Dark Dome’s point-and-click adventure games need no introduction. From the Unwanted Experiment to The Girl in the Window, every game is filled with unconventional puzzles, obscure clues, and secrets. Players will need some patience and a keen eye to hunt for hints and solutions hidden behind closed doors, walls, closets, books, and secret rooms. The Ghost Case is another exceptional adventure game from the same developer. This is a long game with new characters and an in-game map that allows players to move between various locations to solve puzzles.
Hidden Town has a lot of mysteries and spooky tales associated with it. A 20-year-old unsolved case is one of them. Nobody could solve it until detective Ren Larsen decides to open the case again. This is when he received strange signals from the ghosts of Mia and Dan Alba. The souls of the victims need help and only you can assist detective Larsen to get to the bottom of the case. Our complete Ghost Case walkthrough will provide the much-needed help to solve puzzles, search for clues, ask questions and unravel the mystery.
Video Walkthrough
You will find solutions to all puzzles in the video playthrough below, but you can skip it and head straight to the text walkthrough if you need help with specific puzzles.
Note: Some of the solutions/hints for solving puzzles, such as the clock puzzle, are randomly generated in this game. The hints in our puzzles may be different than yours, but the method to solve a puzzle remains the same.
The Map
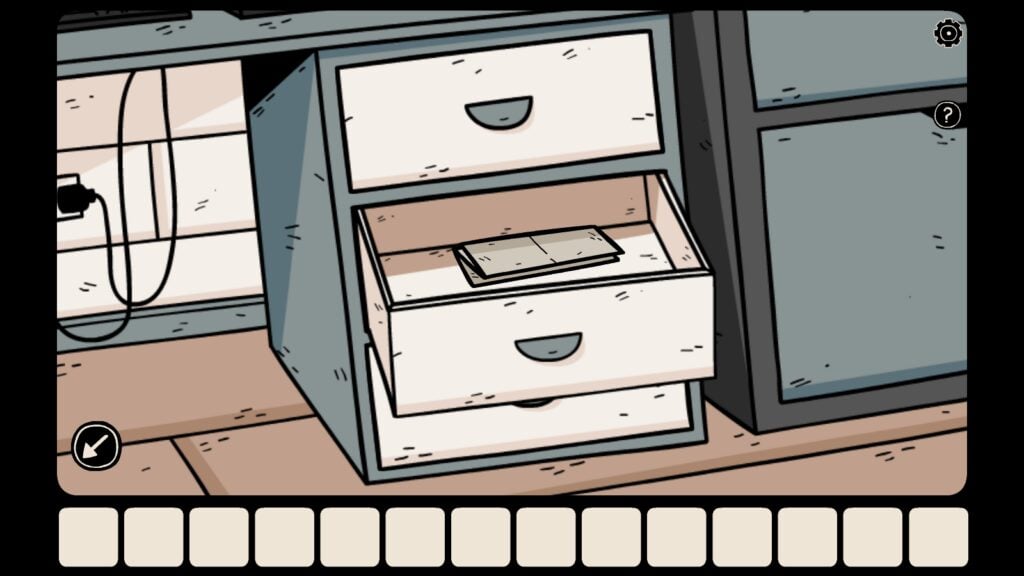
In the police station, tap the three white drawers and open the middle drawer. The drawers are just below the computer monitor. Take the map from the middle drawer.
Tap the red tea cup near the table lamp and pick the sugar sachet.
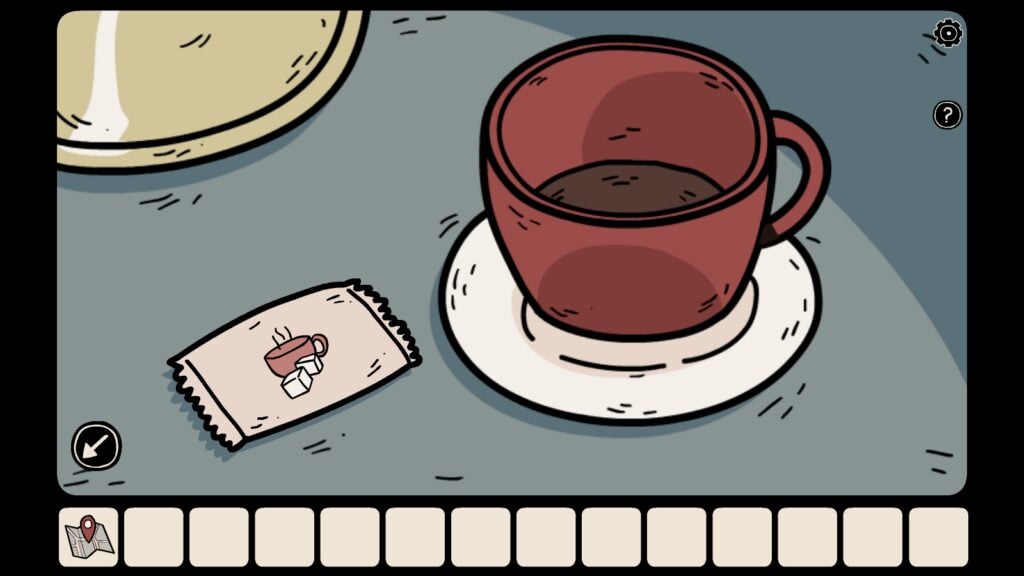
There will be two objects in the inventory list at the bottom of the screen – a map and a sugar sachet.
Tap the map. Now tap the picture of the haunted house on the right side of the police station pic to enter the house.
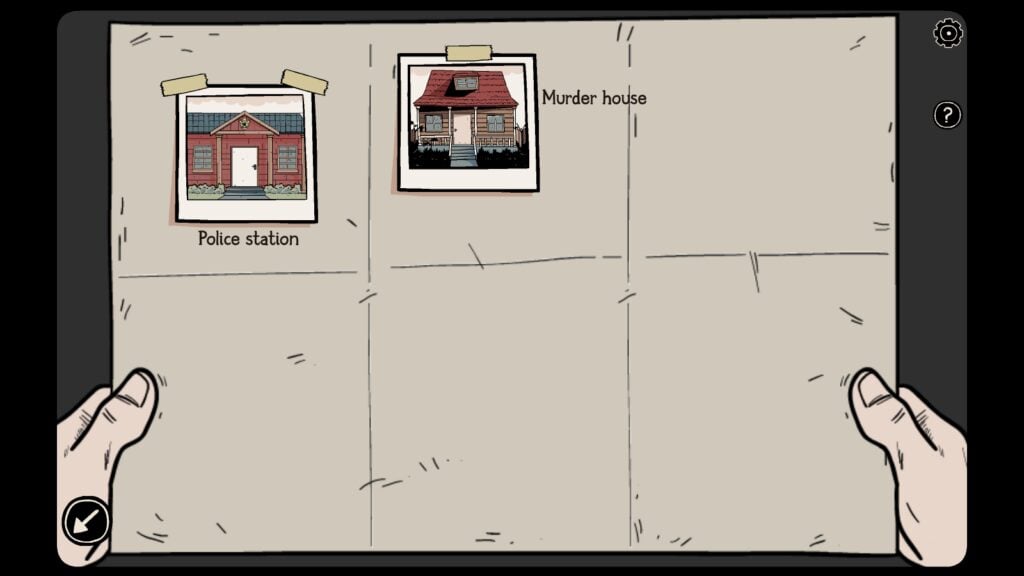
Inside the haunted house, you can move between several rooms by tapping the small white arrows on the right and the left sides.
Go to the room that has a one-seater couch on the left, a small coffee table in the middle, and a damaged chest of drawers on the right. The damaged drawer is infested with termites.
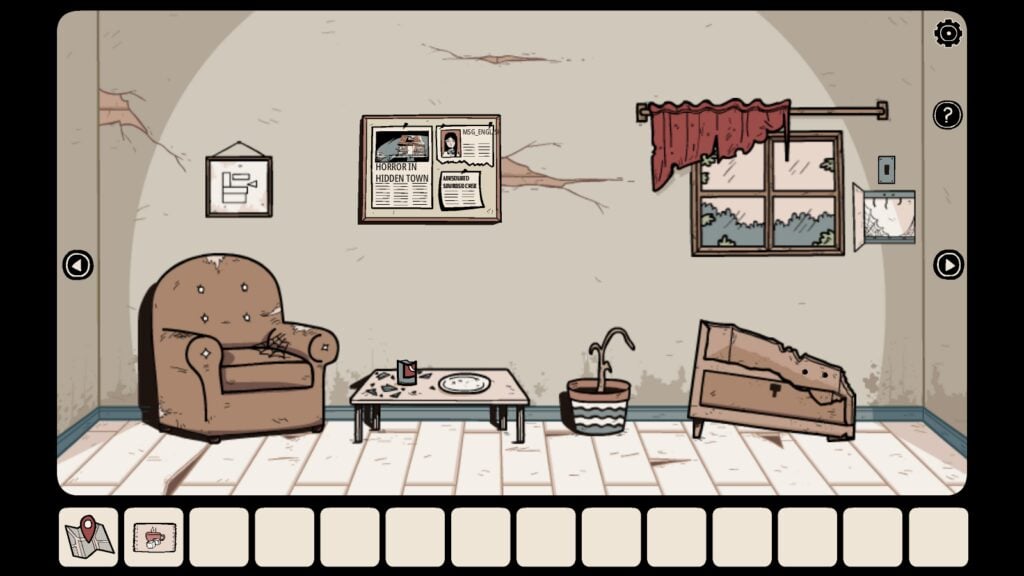
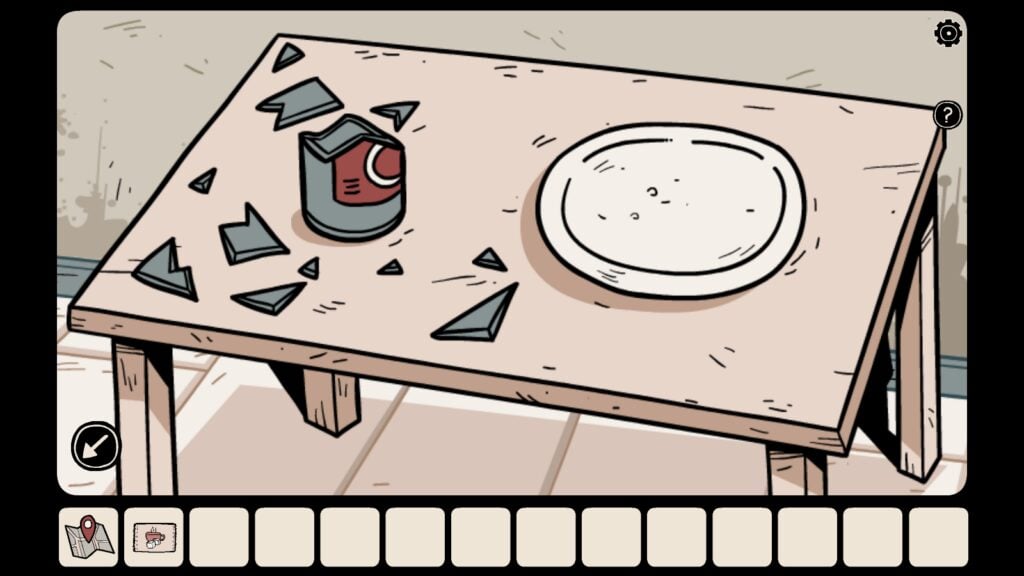
Tap the small light pink coffee table in the middle. There’s a broken bottle on it. Pick it up. Now tap the damaged drawer to zoom in. Place the broken bottle in the drawer (tap the bottle and then tap the drawer to place the bottle on top of it).
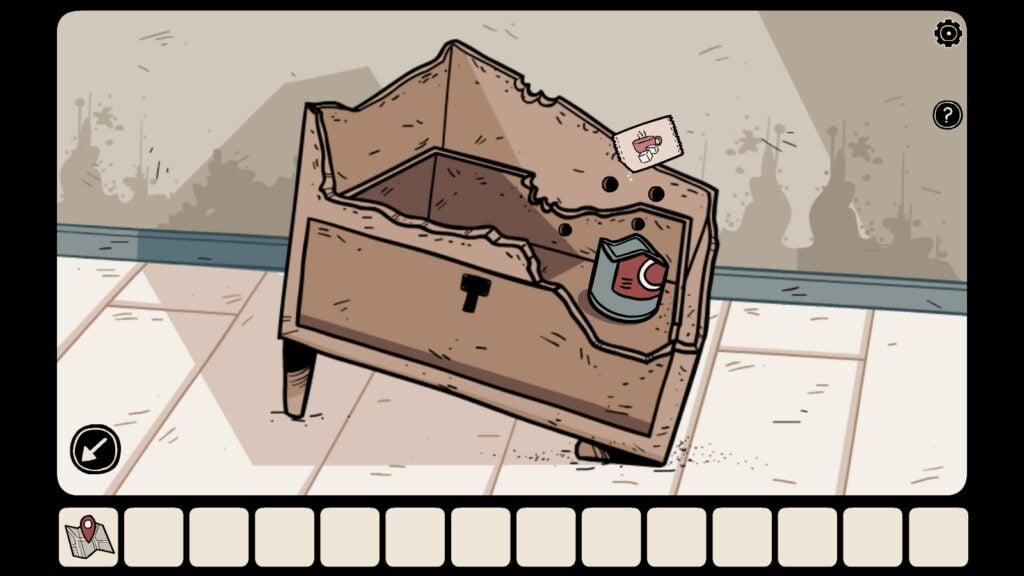
Next, pour the sugar sachet into the empty broken bottle. Termites will be attracted to the sugar and gather in the empty bottle. Take the termite-filled broken bottle.
Now go to the sealed door room. This room has a wall-mounted bookshelf on the left side. Wooden planks were used to seal the white door. Place the termite-filled broken bottle in front of the bolted white door. Termites will chew through all the wooden planks.
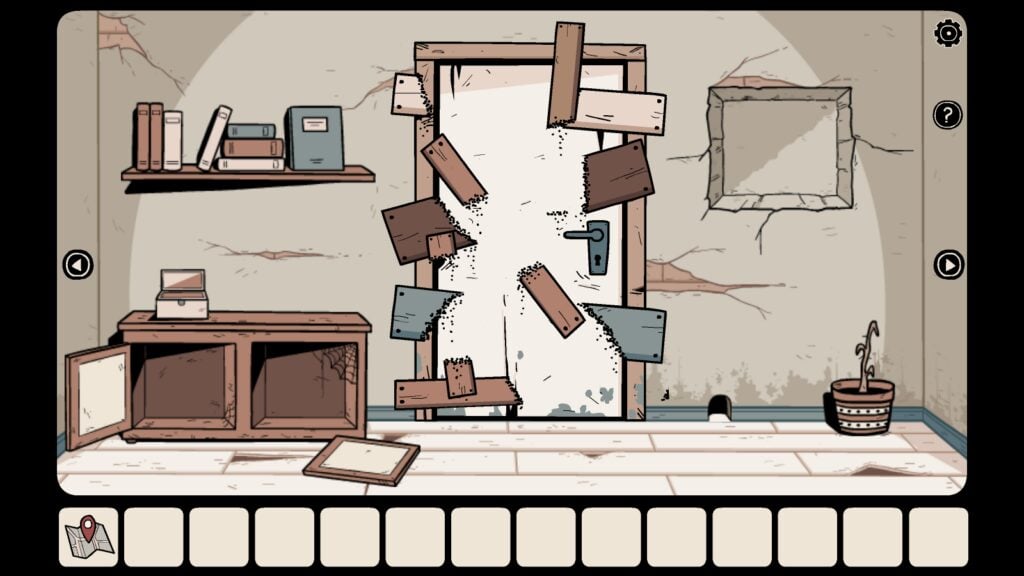
You can now open the white door to enter and see what’s inside. The first room has a mirror on the left and a floor lamp on the right side.
The Chest Puzzle: Solving the Padlock Combination
In the first room, you will see a mirror on the left. Tap the mirror and the detective will look into the mirror to see a shadowy figure move behind him. He looks back but finds no one.
Tap the right arrow to move to the telephone area. An old red telephone is placed on a small table in the middle and a weird-looking painting is hung on the wall right above the telephone. There are two doors on the right and left sides of the telephone.
Open the left door to see a ghostly figure welcoming you. Enter the room to see another similar-looking portrait/framed painting above the rusty metal bed. Here’s a list of rooms where you can find these four paintings.
1. Telephone room: Large painting hung on the wall above the old telephone.
2. Fish Tank room on the left side of the telephone: Above the metal bed on the left side.
3. Room on the right side of the telephone: A small photo frame is placed on the table. Tap the photo frame to get a closer look.
4. In the Broken flower vase room. Tap the right arrow to move to the room. The broken vase is kept on a decorative wooden stool. The painting is hung on the wall.
Tap on each painting to get a closer look.
These paintings provide hints to opening the chest in the “Red Door” room. The red door area is on the right side of the telephone room. There’s a chest placed in the middle of the room. Tap the blue wooden chest to check the combination codes on the red padlock. There are four arrows. Tap on arrows on the padlock and you will see various arrows pointing toward left, right up, and down.
Now pay attention to those four paintings again. A man is shown pointing to the stages of a tree’s growth that goes from seed to ripening. You have to rearrange the paintings in order of growth – seed to the ripening of fruit and then check the man’s finger pointing to the entire process in every painting.
The correct order of the paintings is:
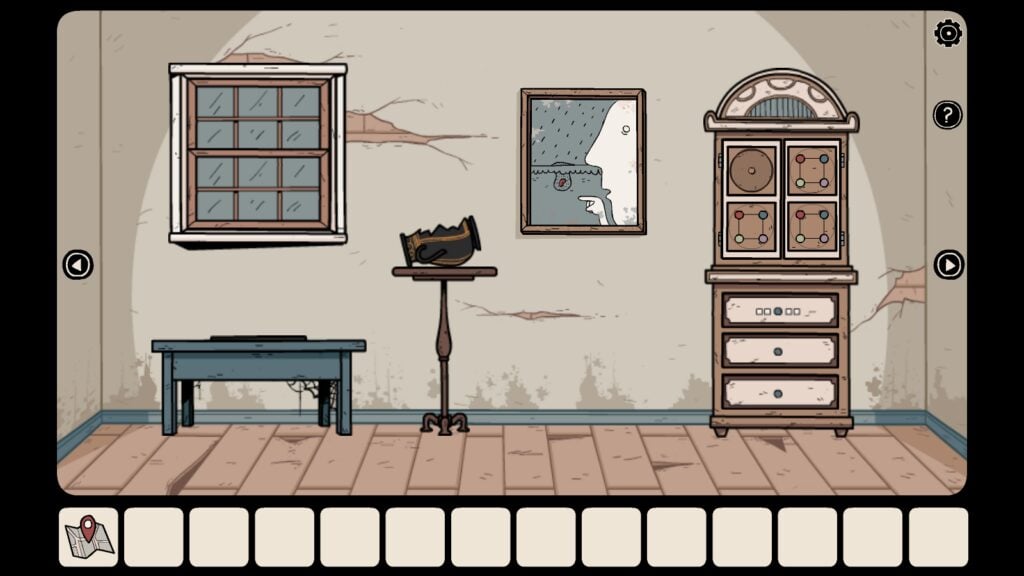
Room 1 (VASE ROOM)
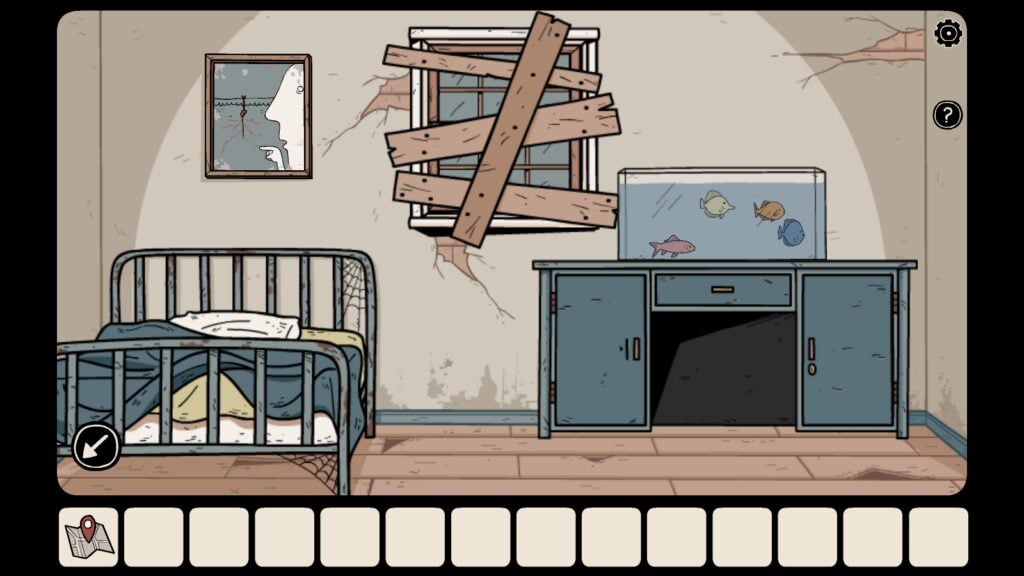
Room 2 (FISH TANK ROOM)
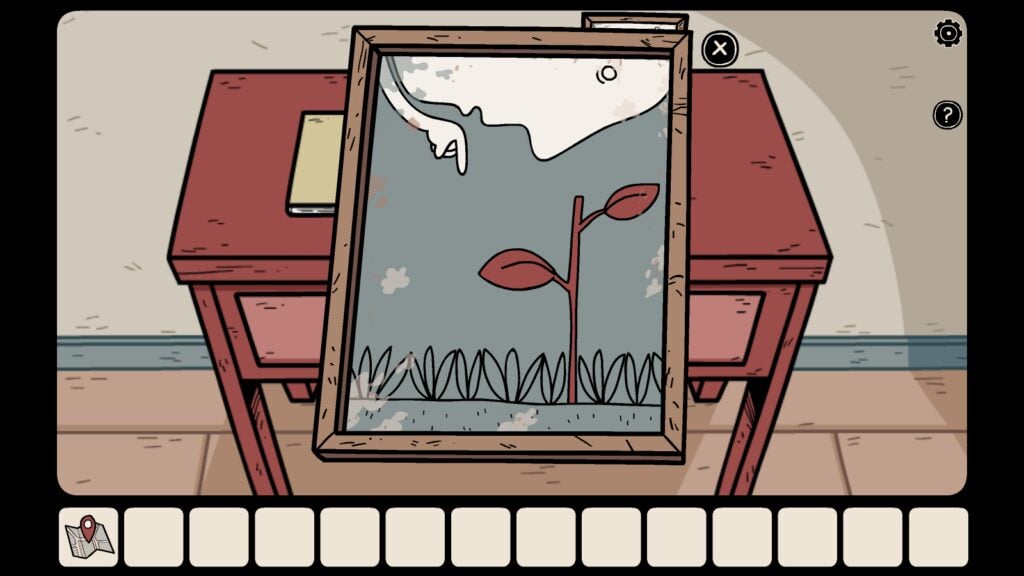
Room 3 (Photo Frame)
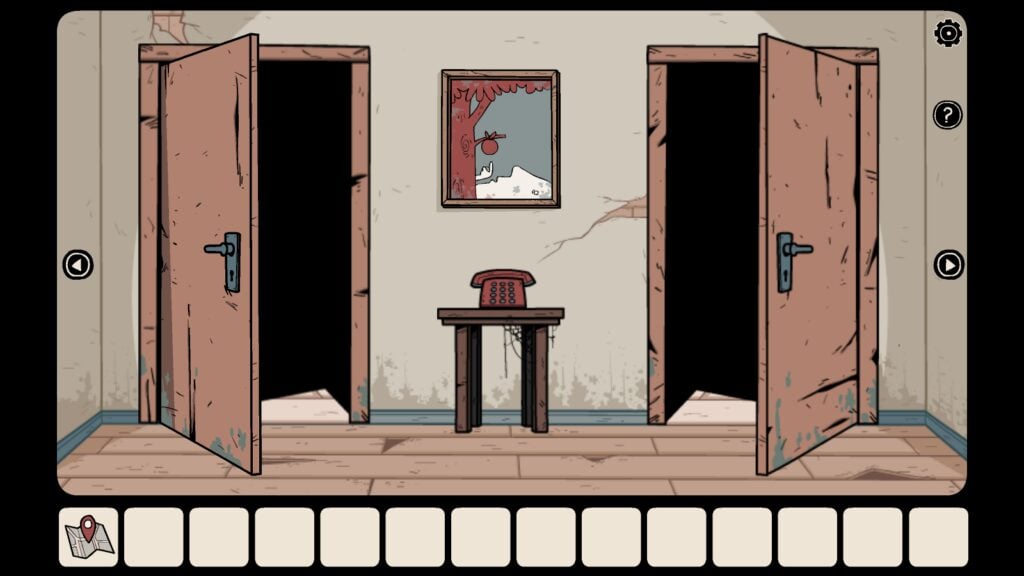
Room 4 (TELEPHONE ROOM)
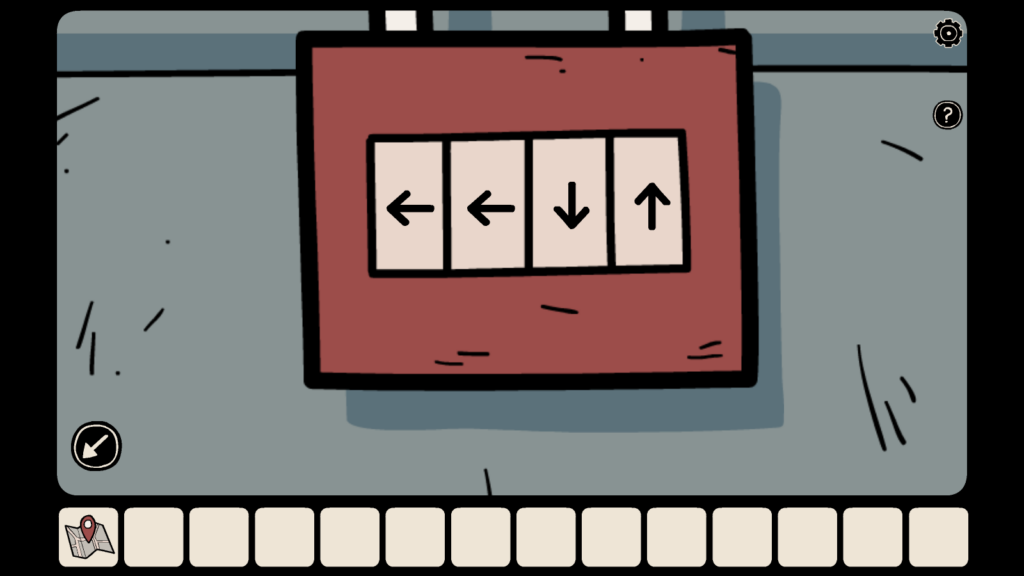
The man’s finger pointing to the stages of a tree’s growth corresponds to the arrows on the chest. The correct arrow combination as per the order of paintings and the man’s finger pointing to the plant’s growth in our game was:
1. Left pointing arrow
2. Left arrow
3. Down arrow
4. Up arrow
The fingers pointing in each painting will be different in your game.
Go to the Red Door/Blue chest room:
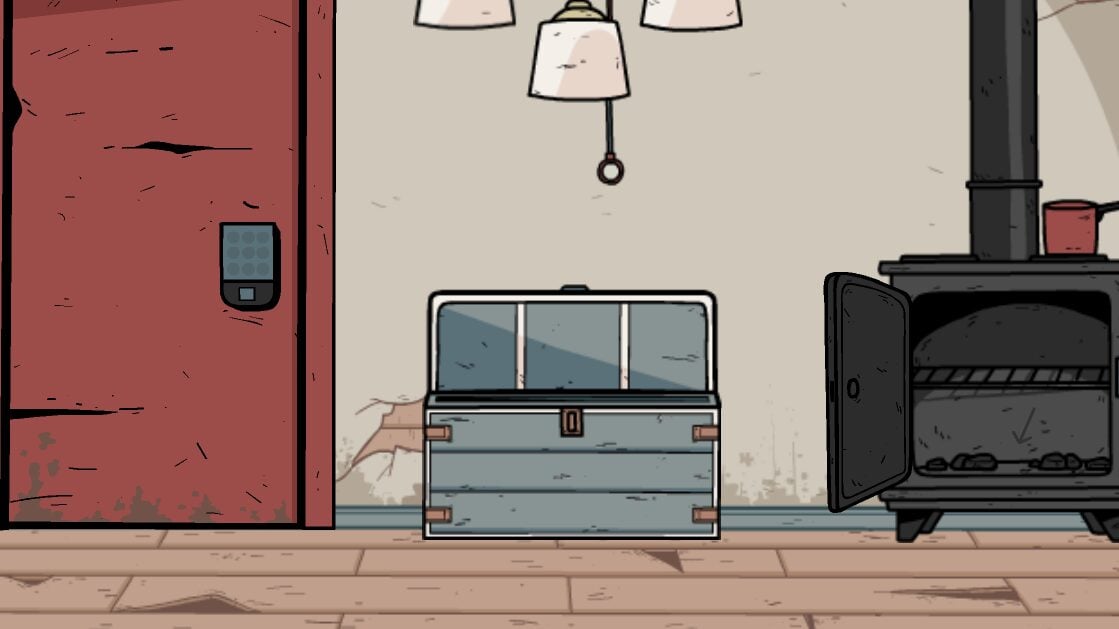
The Red Room – The blue chest
Tap the chest to get a closer look at the red padlock. Enter the above arrow combination. (The arrow sequence/combination could be different in your game as it may be randomly generated).
The chest opens. Tap the chest again to find a lightbulb and three clothing items. Tap to pick the bulb.
Tap on a clothing item to have a closer look and then tap on the neck label to find a strange symbol. Do this for all three clothing items – purple, white, and red. You will find three symbols on each of these neck labels.
Rearrange the symbols in the correct order – pay attention to the design of each piece of clothing. The red T-shirt has a “1”, the white clothing item has three flowers and the purple one has a victory sign.
The symbols on the neck label on each clothing item in the correct order will be as follows:
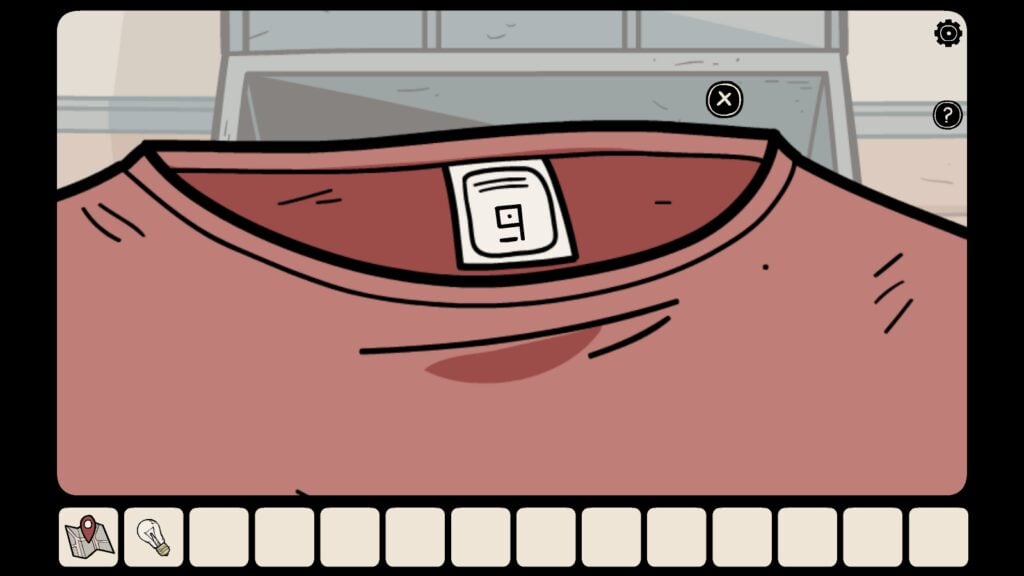
One
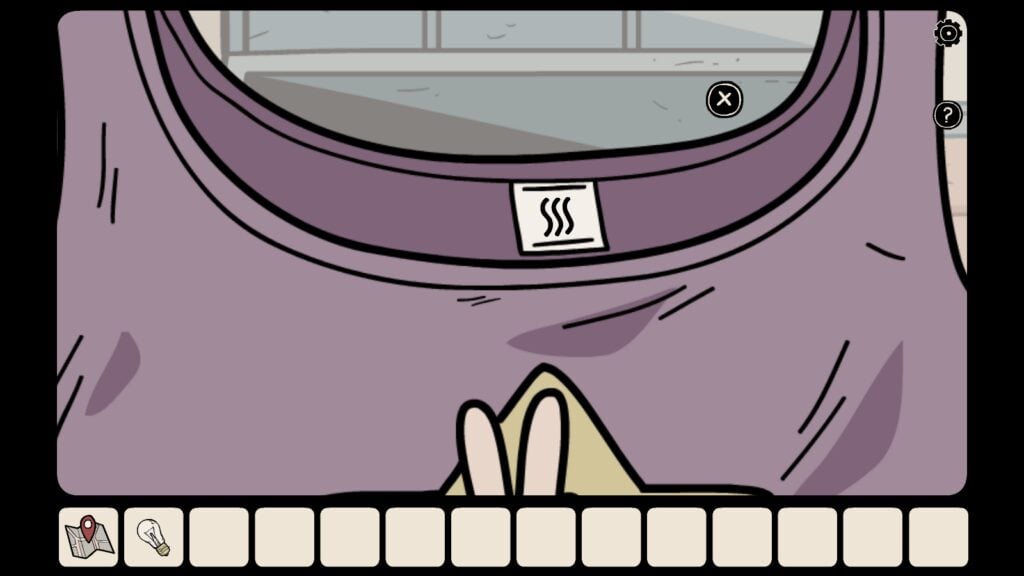
Two
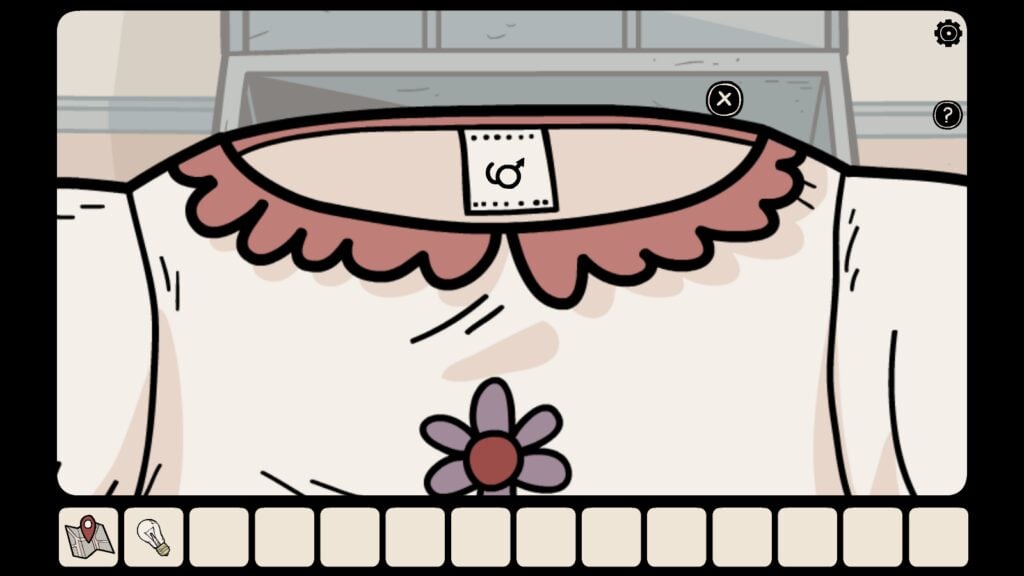
Three
Make the mental note of the above symbols on neck labels in their right order. Now go to the red telephone room and enter the room on the right side of the phone. Inside the room, tap the desk on the left side, underneath the clock. Take the yellow book.
Tap the book on the inventory and then tap on the combination lock on the book. Enter the above symbols from top to bottom as shown in the below screenshot.
The symbols in each neck label should be entered in the correct order to open the locked yellow book, The right order will be – Number 1, the Victory sign, and three flowers on those clothing items. The symbols on the clothes are randomly generated.
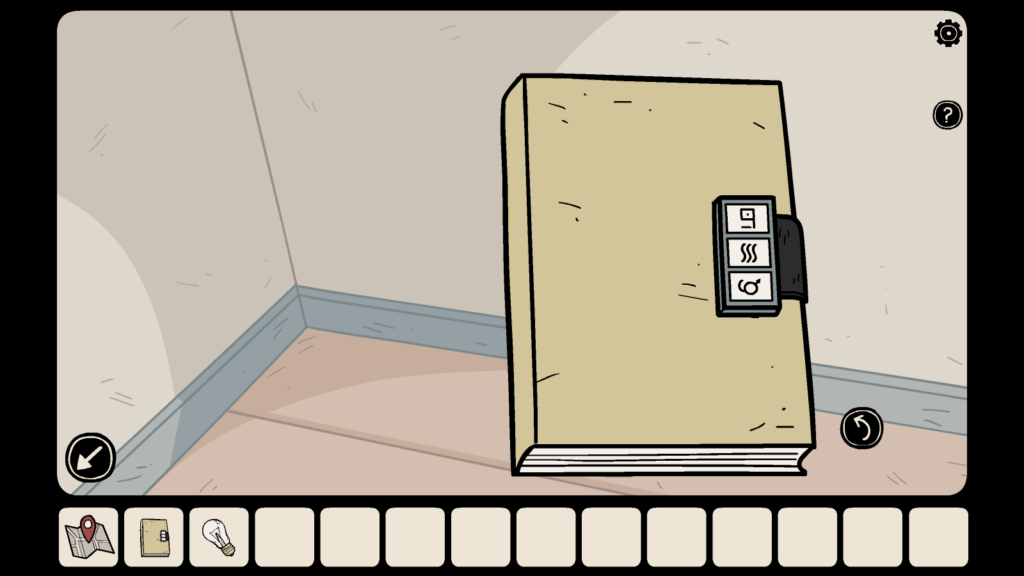
After entering the symbols in the correct order, tap the curved arrow on the lower-right corner of the yellow book to flip through the pages for hidden codes and secrets that will help you explore more and solve puzzles.
When you open the yellow book for the first time, you will see these pages:
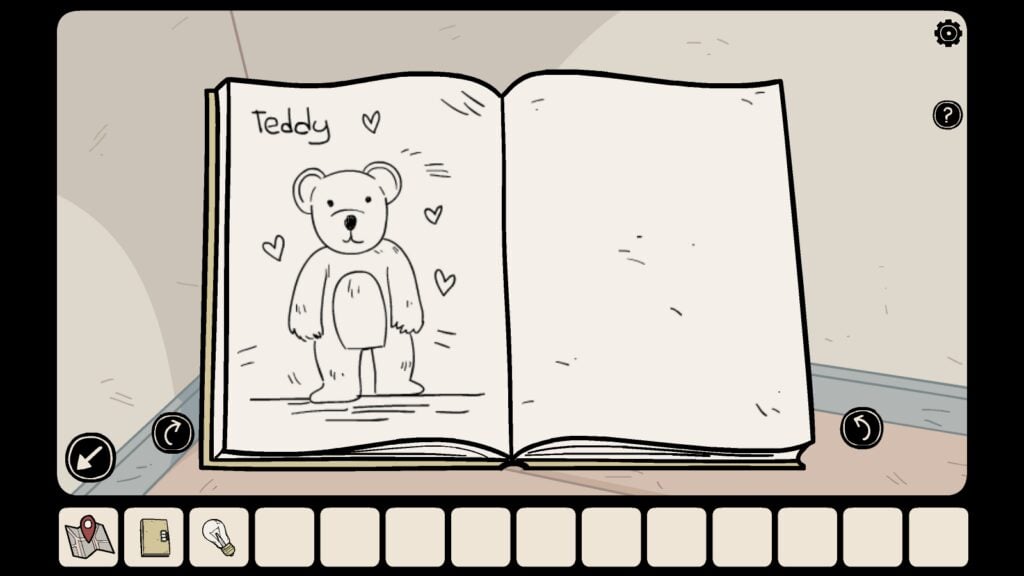
TEDDY BEAR
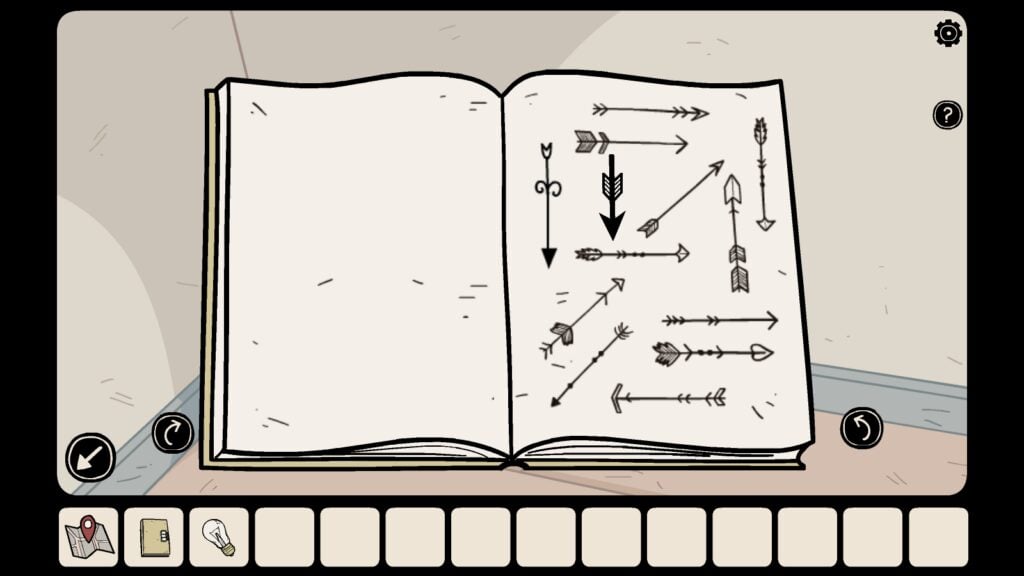
DIFFERENT TYPES OF ARROWS
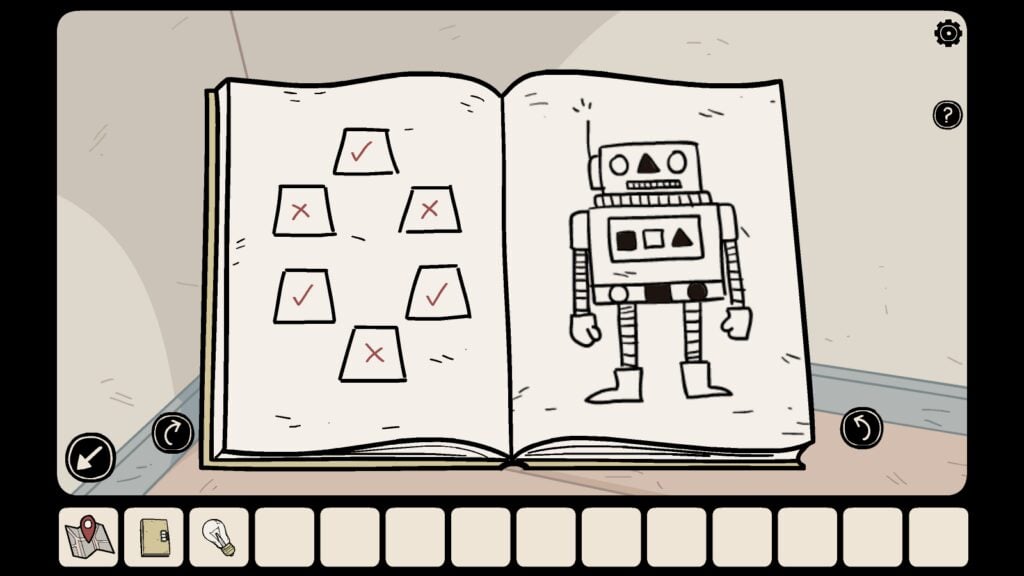
LAMP SHADES AND A ROBOT
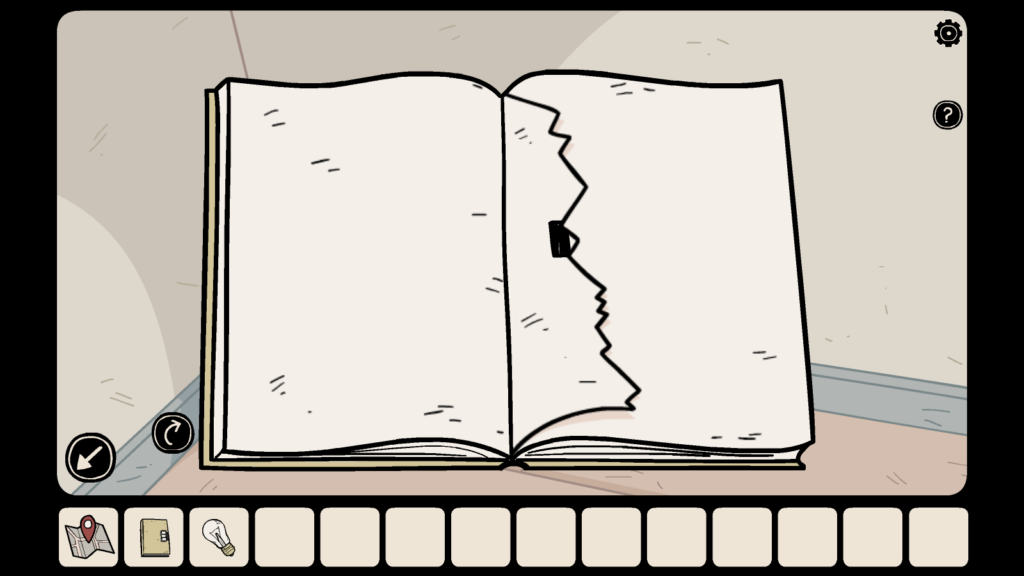
A TORN PAGE
The above pages provide hints for certain puzzles that will help you solve the mystery of the haunted house.
The Toy Robot Puzzle
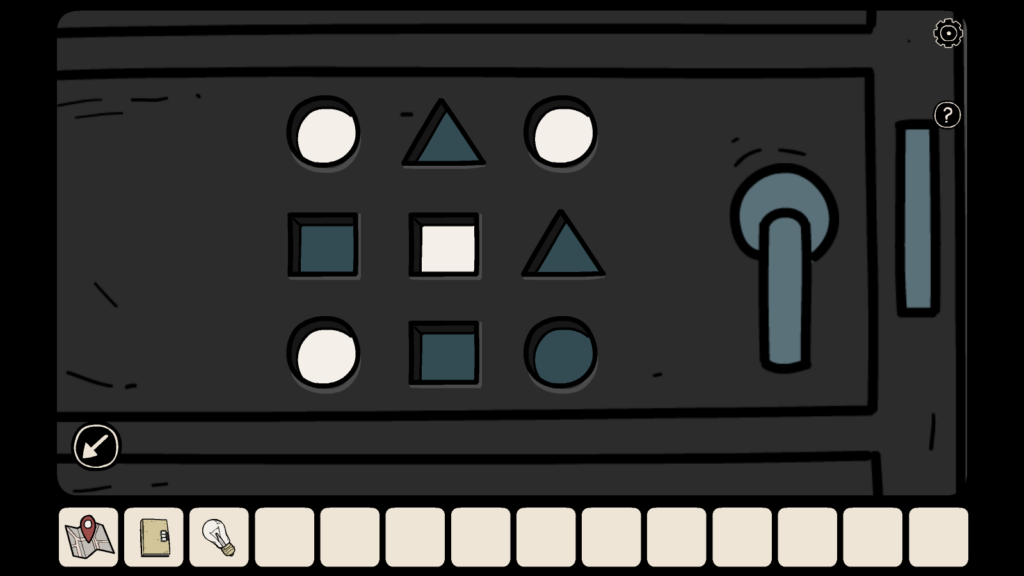
Flip the pages until you find the toy robot artwork. Noticed those strange black and white shapes, such as triangles, squares, and circles on it? It’s actually the solution to solve the safe in the red door room.
Using the arrow keys navigate to the room that has the red door and the blue chest. On the right side is a black safe with the same set of shapes (square, triangle, and circle). You will have to find the right button combination by pressing the correct shapes on the safe.
Tap the safe twice to get a closer view of the shapes. When you tap a shape in the combination lock, it glows. Now go back and view the toy robot artwork (open the yellow book in your game to view it).

A drawing of a toy robot with white and black shapes. Pay attention to the white-colored shapes
The shapes that are white in color are the ones that should be pressed on the safe to get the correct combination. In our game, the white shapes on the cartoon robot artwork are (see the above screenshot):
Two circles on the top row
The middle square in the middle row
The circle on the left, on the bottom row.
Note: The arrangement of the white shapes on the cartoon robot artwork could be different in your game as it may be randomly generated.
Just follow the pattern, i.e. press the ones that are white in color as shown on the cartoon robot drawing on the safe:
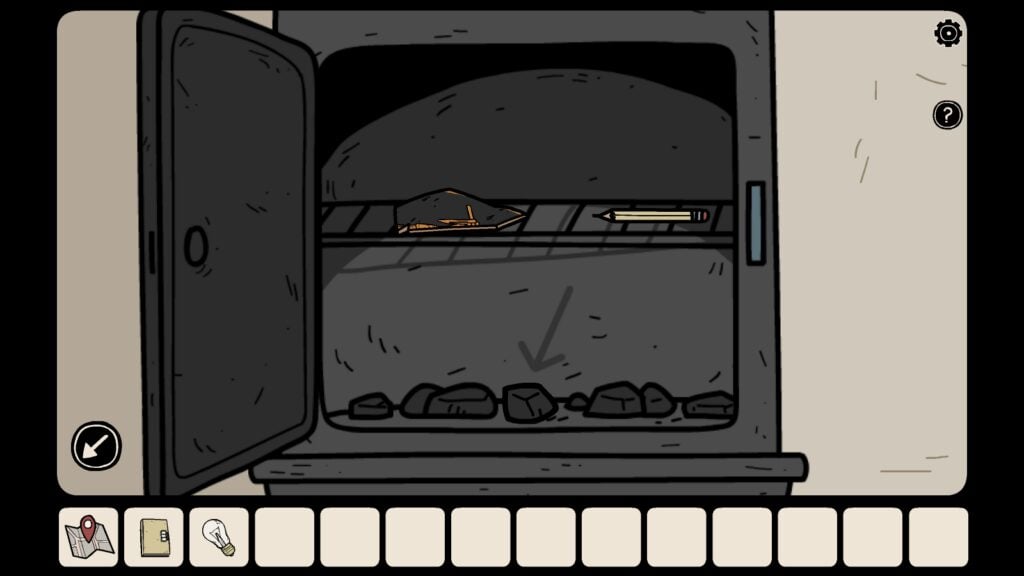
Take the CHARCOAL (the arrow inside the safe wall points to the coal), pencil, and a piece of porcelain (which will be used later to fix the broken vase):
How to Get the First Two Tokens (Top Drawer Puzzle)
Open the yellow book again and flip to the last, torn page.
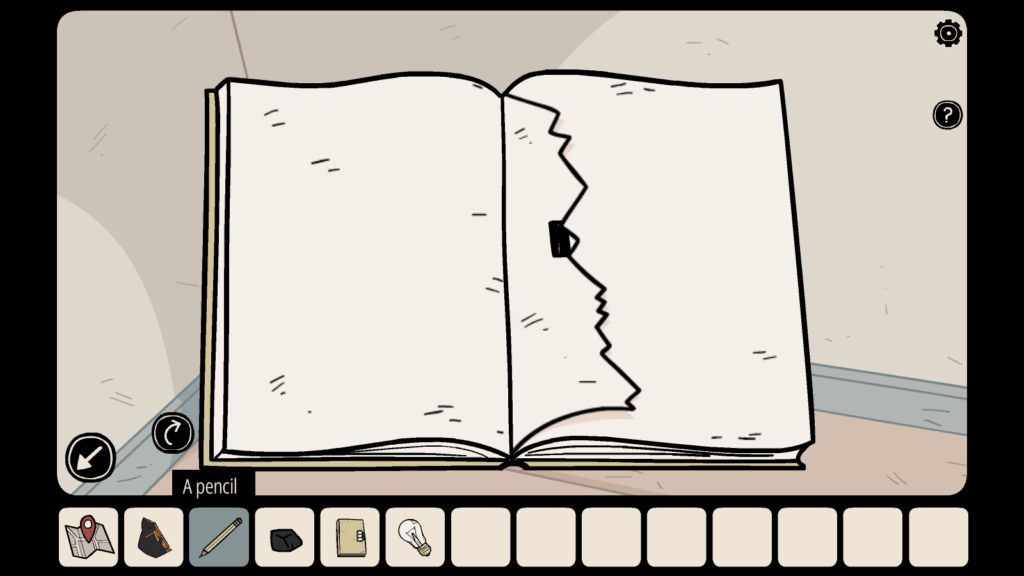
Scribble over the torn page to find four symbols
Tap the pencil on the inventory at the bottom of the screen and then tap the torn page to scribble over the hidden symbol/code.
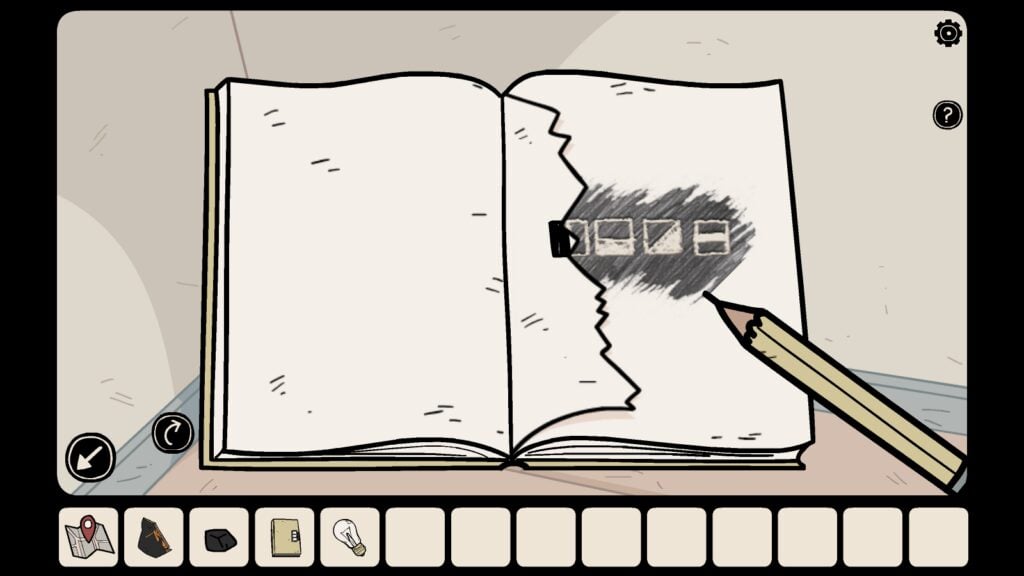
You will see a set of four symbols. It’s the solution to the top drawer puzzle in the vase room.
Go to the room that has the broken vase placed on a stool.
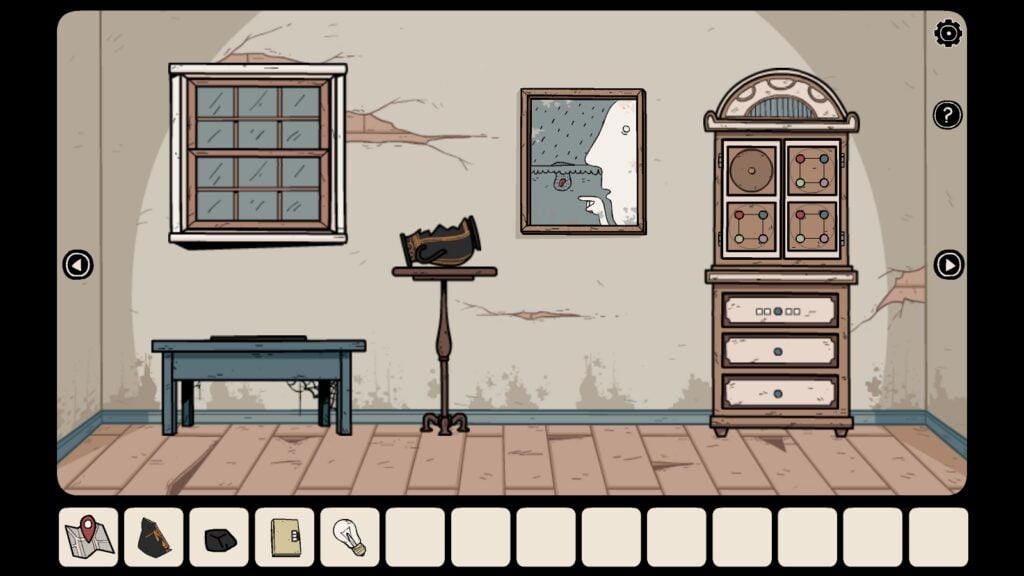
The vase room
Tap the chest of drawers on the right side to get a closer look at the top drawer.
Tap the top drawer again to zoom in to the puzzle.
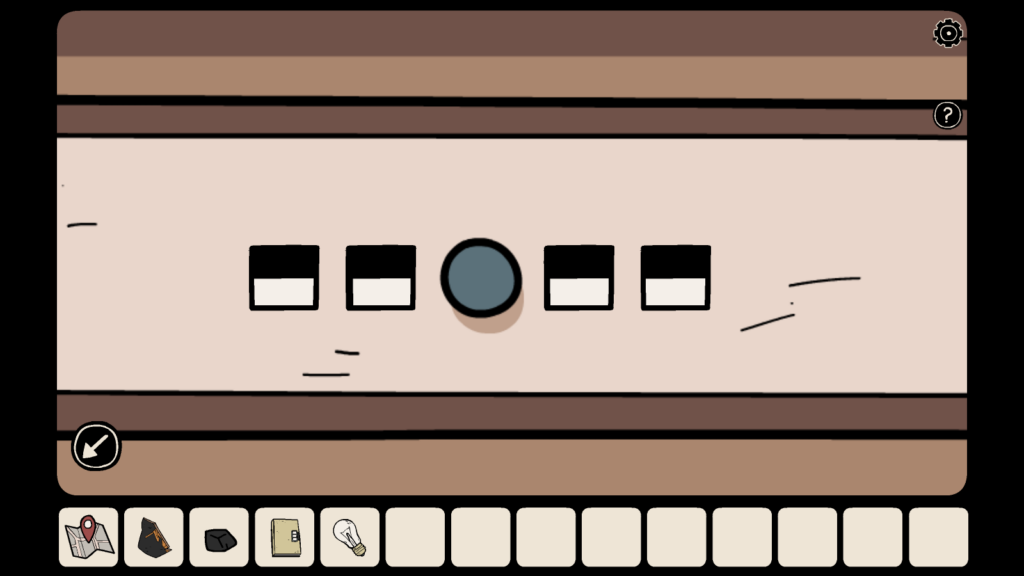
Tap on each symbol on the locked drawer to bring the same set of four symbols as shown on the torn/scribbled page. The symbols displayed on the scribbled page could be different in your game.

Scribbled page
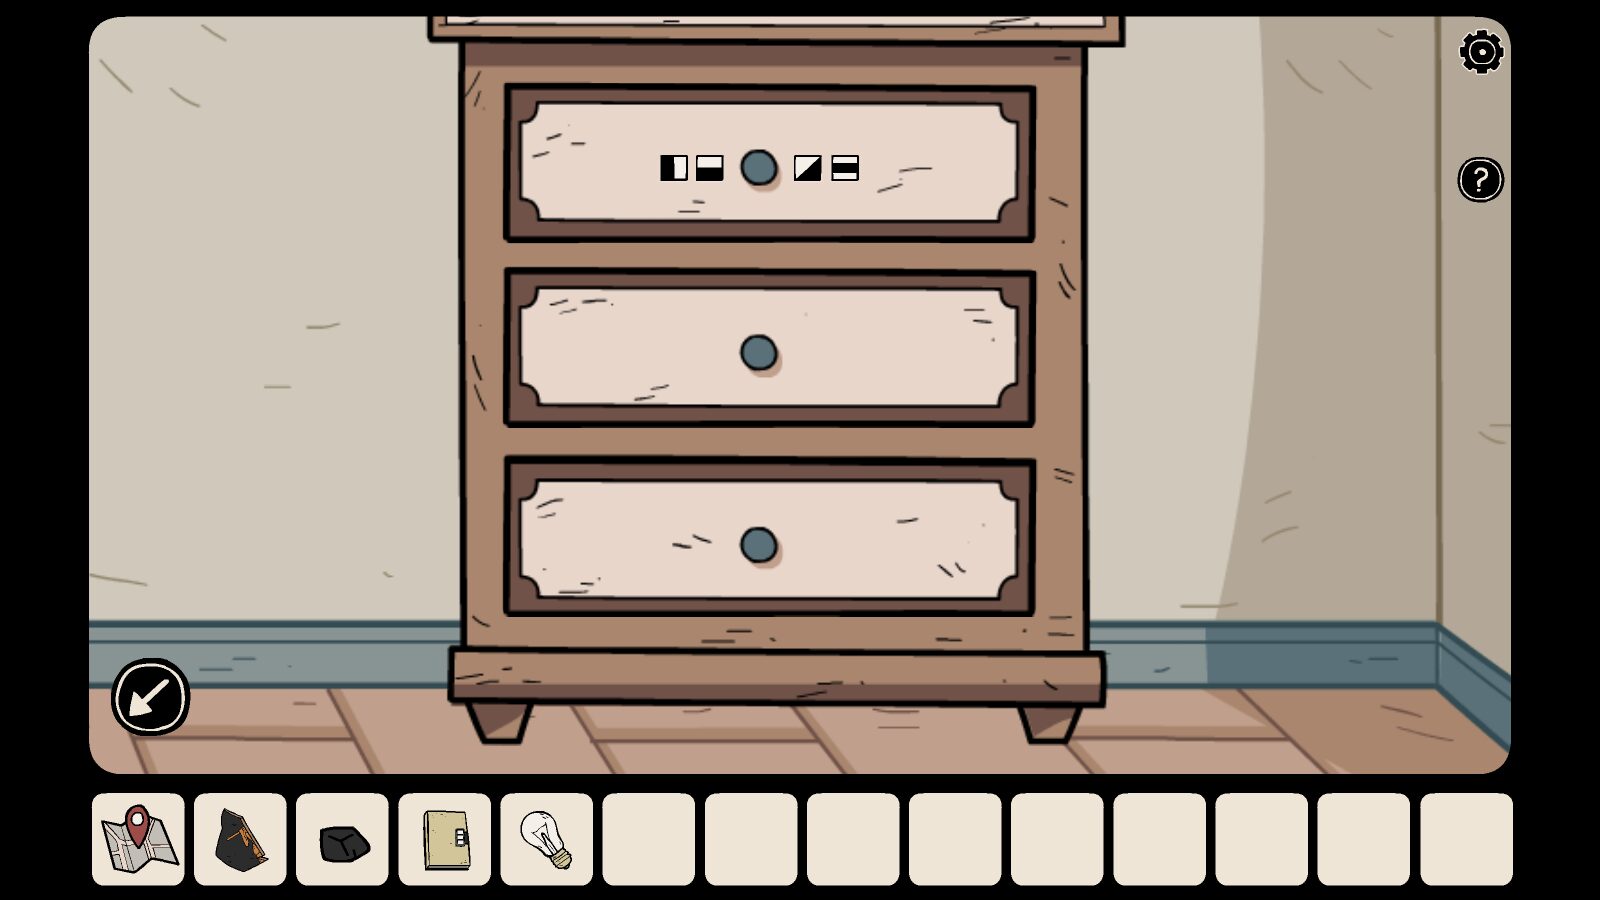
Drawer puzzle
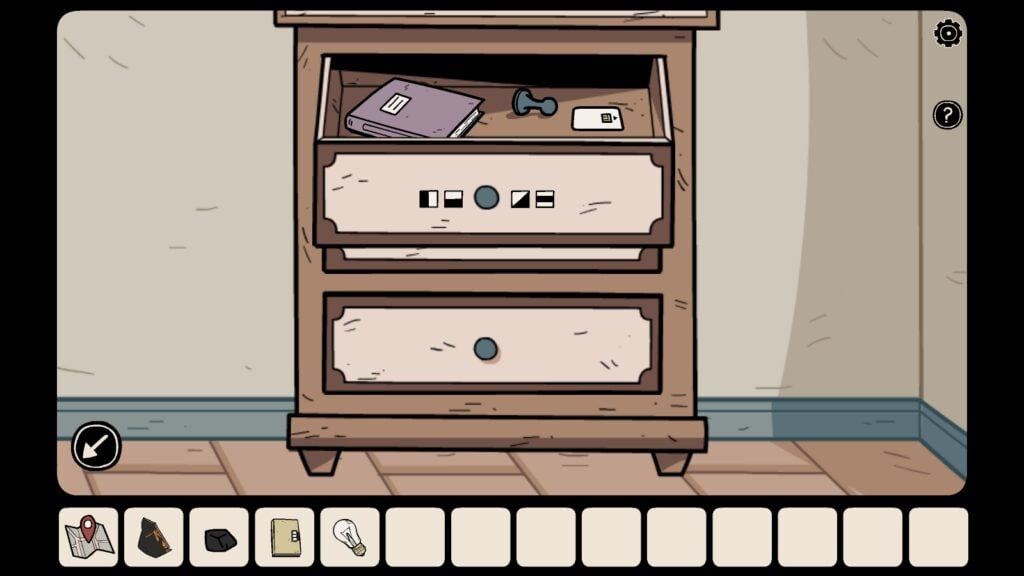
You will hear a click sound. Open the drawer and take the purple book, a chess piece (blue token), and a card with a microchip:
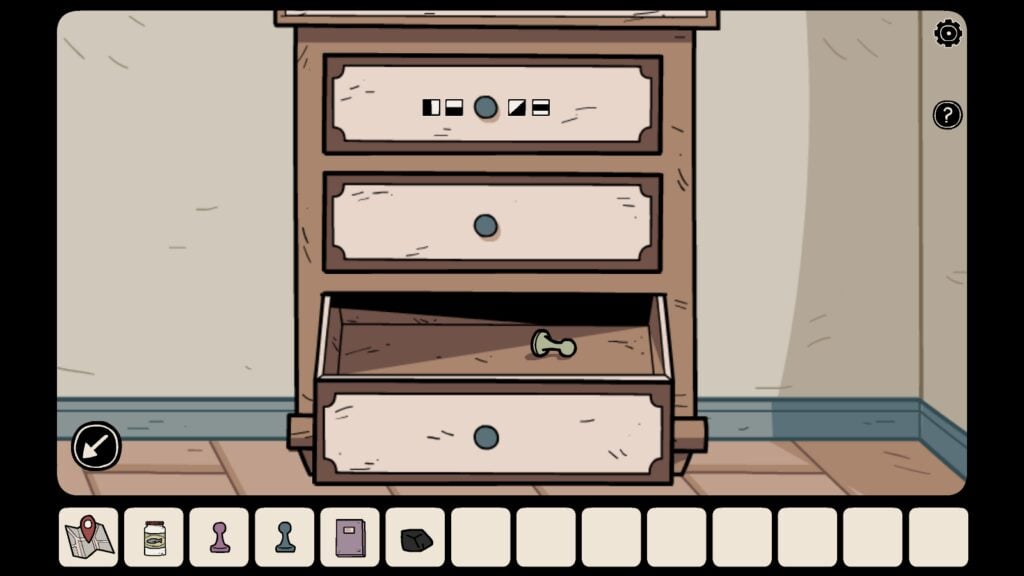
In the same chest of drawers, open the bottom drawer and take the green token.
The Piano Walkthrough
In Ghost Case, the piano puzzle can be solved once you complete these puzzles:
- Lamp Puzzle
- Handing over something precious to Mia’s apparition
The Lamp Puzzle
Go to the room that has a mirror on the left and a floor lamp on the right. From this room, enter another room as the door has been already opened by you. (This is the same door that was blocked by planks from the outside and you used a broken bottle with termites to unlock the door).
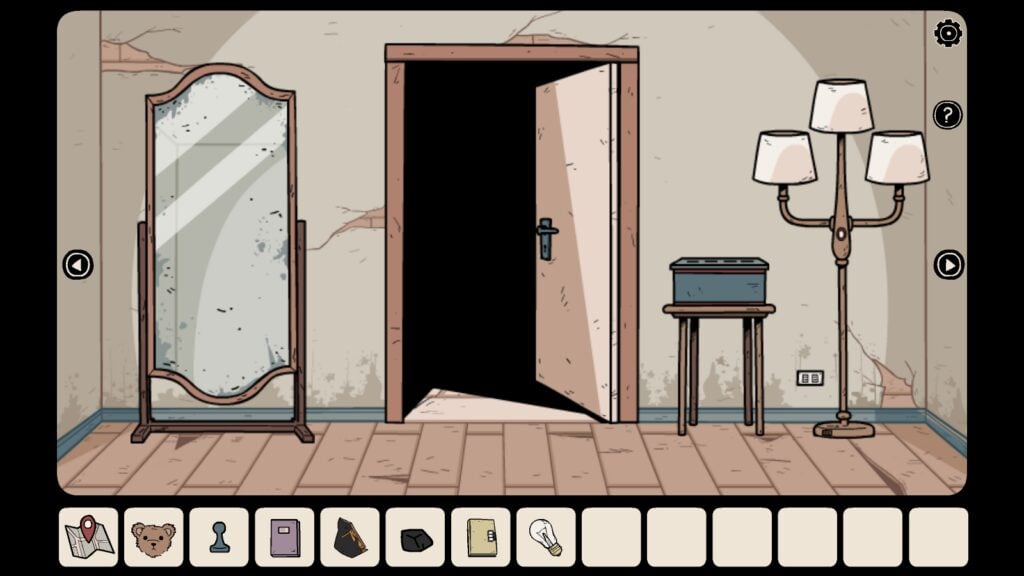
Mirror Room
We have now entered the room that has a wall-mounted bookshelf on the top-left side (this is the same room with the white door blocked by wooden planks):
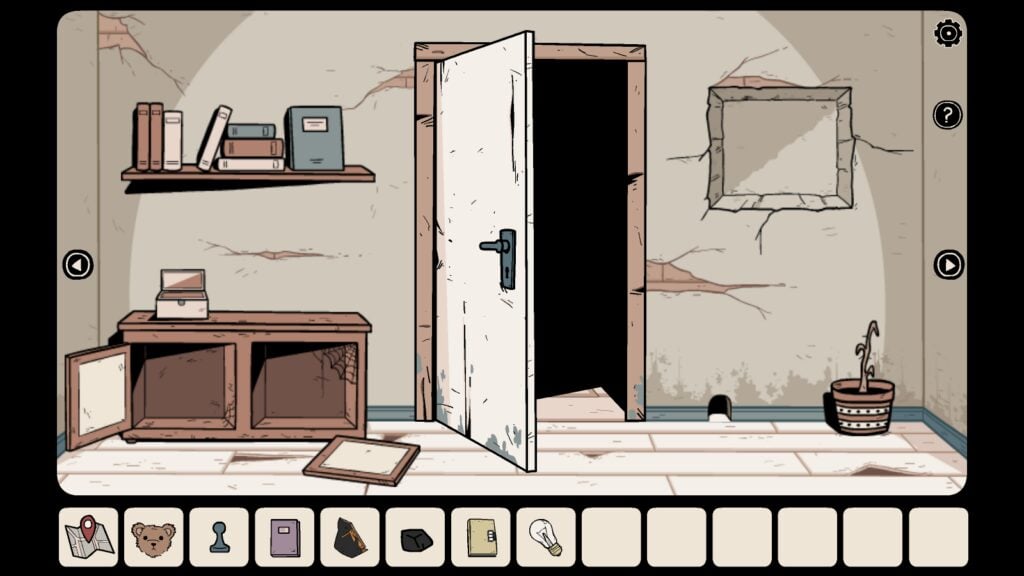
Bookshelf room
From this room, move to the room that has a TV unit. Use the right arrow key to navigate to the TV room.
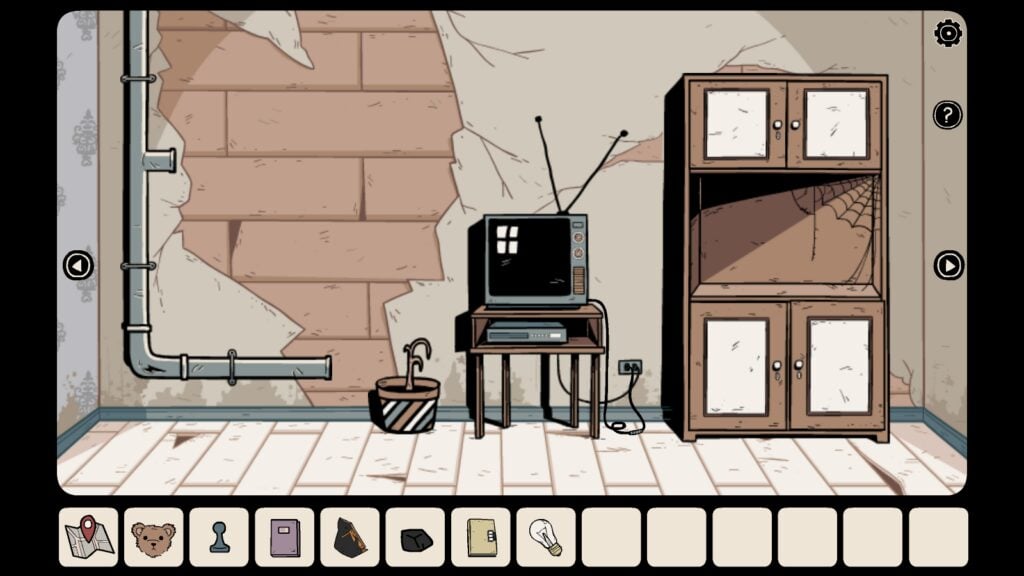
The TV Room
Tap the electrical socket and take the power cord/plug.
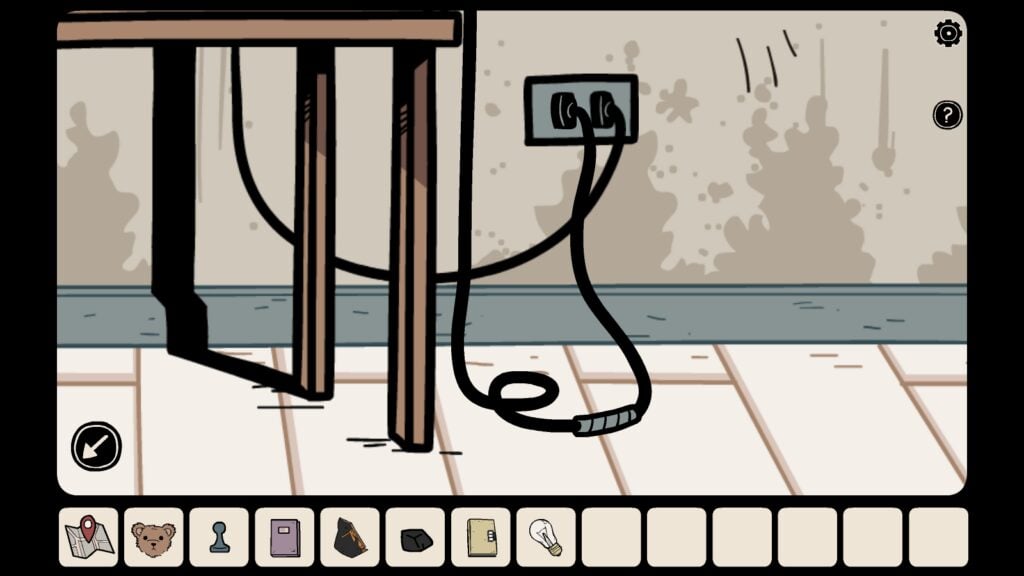
Tap the power cord to pull it out.
Navigate to the bookshelf room using the left arrow and enter the Mirror room from the white door. Tap the electrical outlet near the floor lamp in the mirror room and then connect the plug with the floor lamp.
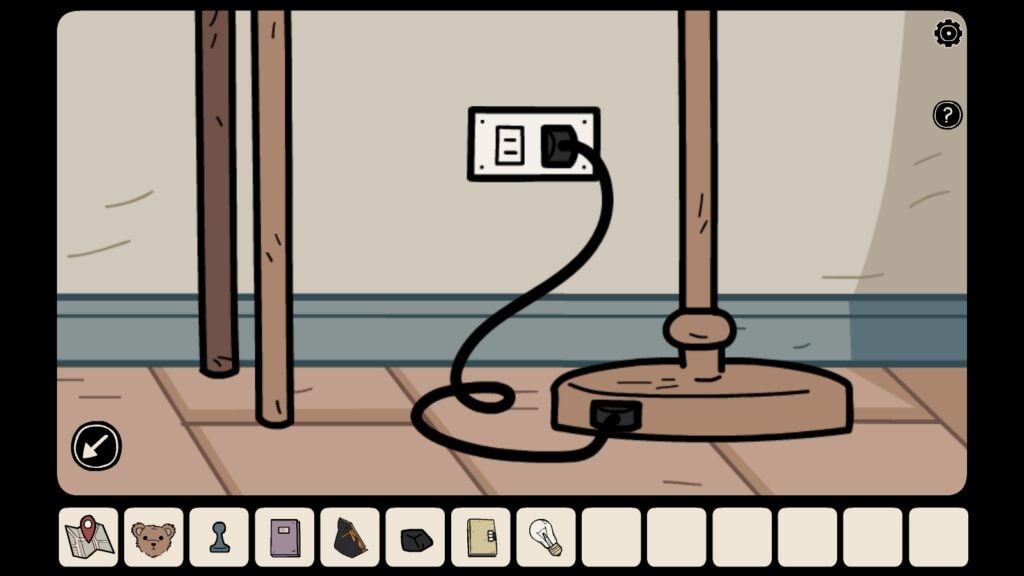
Open the yellow book again and go to the robot artwork page. You will notice pictures of lamp shades with “X” and check marks on them. The lampshade diagram is on the left page as seen in the screenshot below:

Pictures of Lampshades on the left page.
The upper part of the lampshade diagram is of the floor lamp in the mirror room. The checkmark on the lampshade suggests that a bulb will have to be installed there and the “X” marks suggest no bulbs. The position of the Xs and checkmarks are randomly generated.
In the same diagram, the lower part is that of the chandelier. You will find the chandelier in the red door room. Tap the chandelier and tap the bulbs to collect them. You will now have three bulbs. You found the first bulb from the blue chest in the red door room.
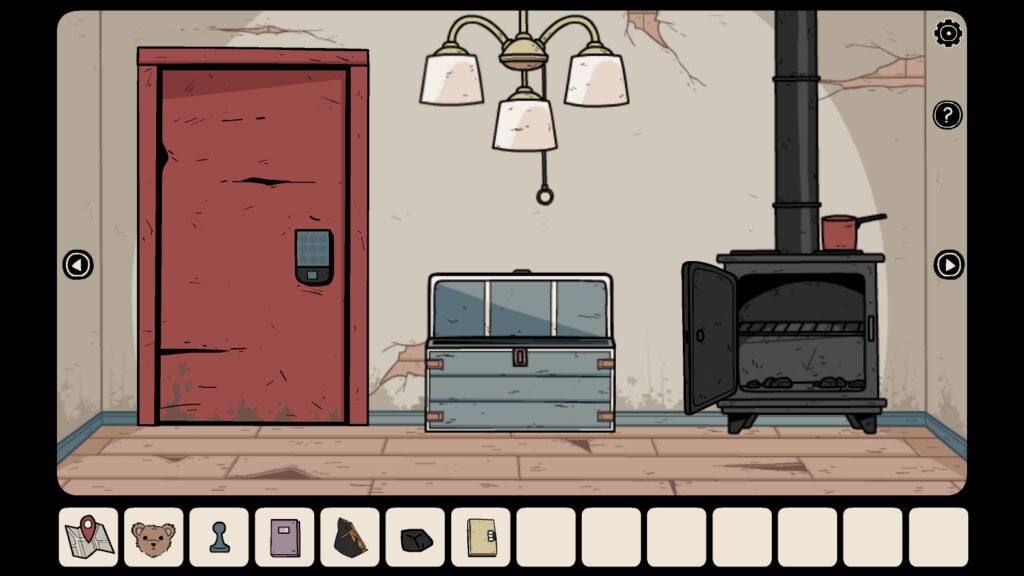
Tap the chandelier again and follow the hint in the lampshade diagram on the yellow book to install the bulb at the appropriate place (Checkmark = install, X = Remove/No Bulb). The chandelier lampshade diagram is displayed on the bottom of the yellow book.
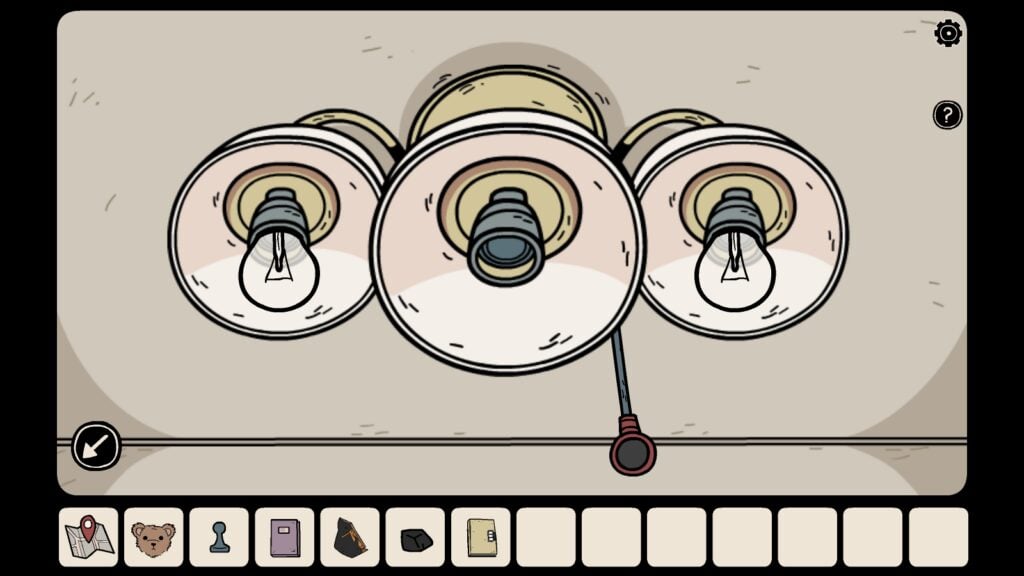
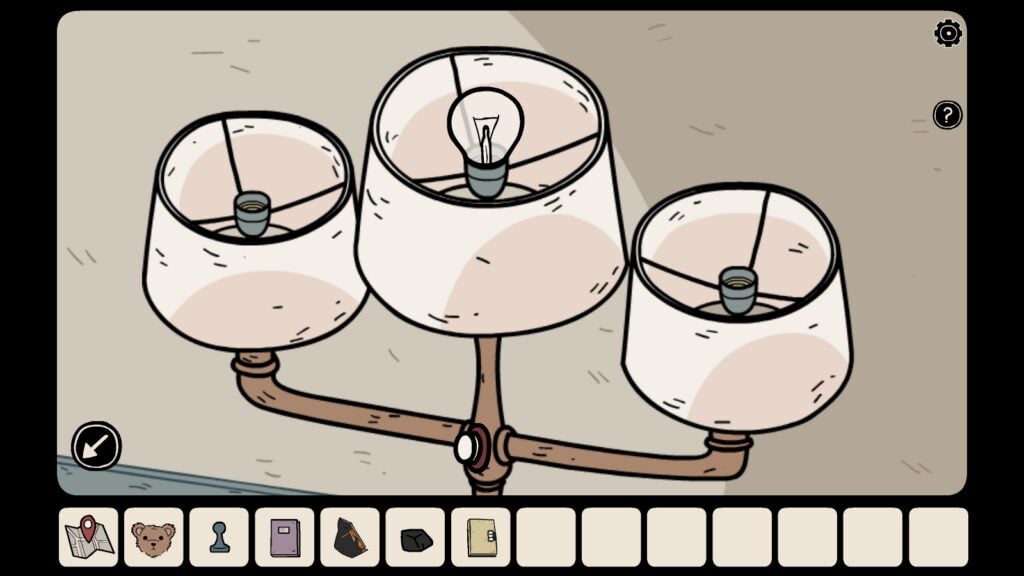
Navigate back to the mirror room and tap the floor lamp. Follow the same procedure (“X” no bulb and checkmark – install the bulb).
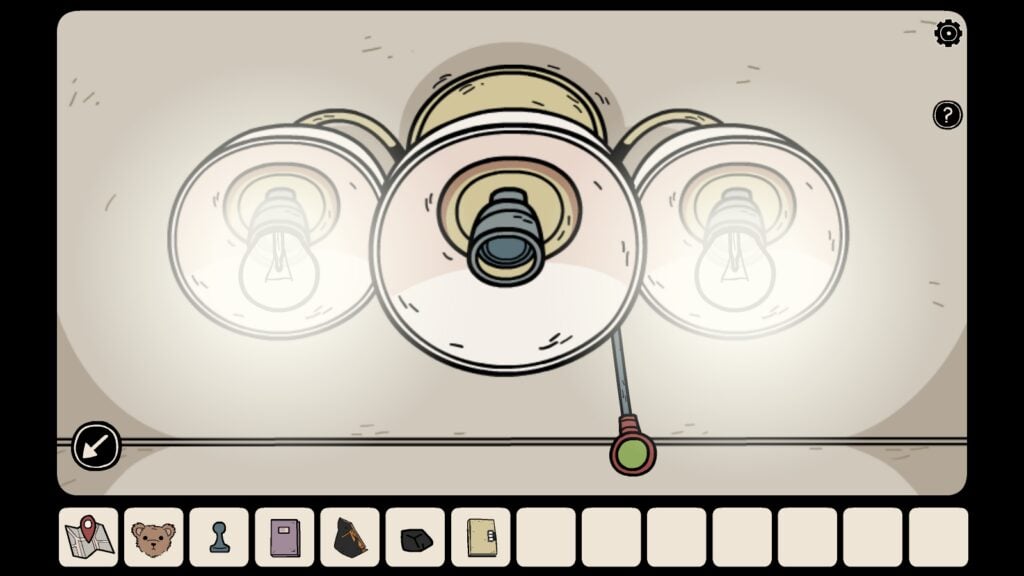
Go back to the red room. Tap the pull chain switch to switch on the chandelier.
No go back to the mirror room and tap the floor lamp. Press the white button at the bottom of the lamp to switch it on:

The lights will flicker and the mirror will display the reflection of Mia’s spirit.
Does she want something? What could it be?
Finding Mia’s Precious Toy
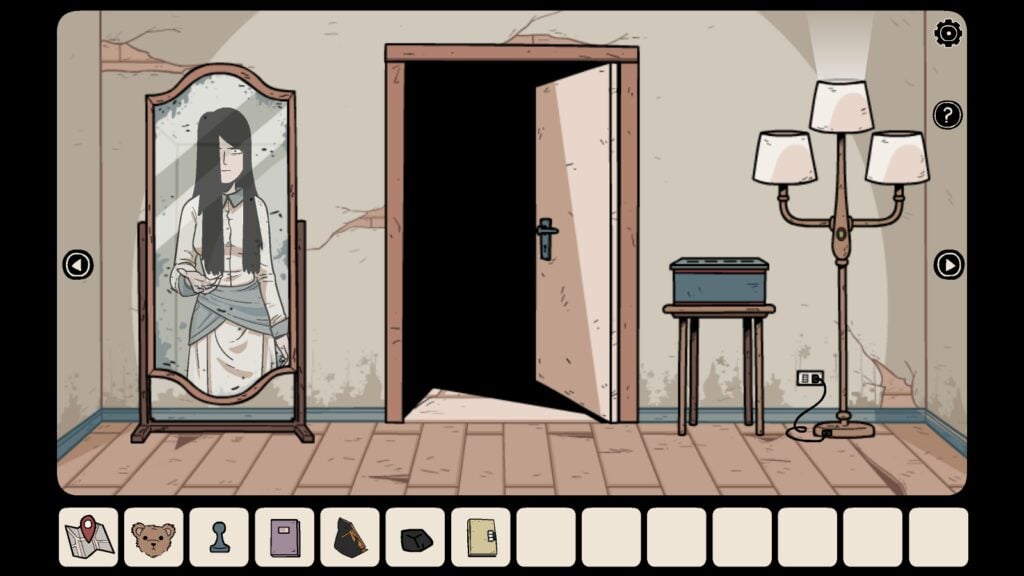
Look at her hand. She wants something.
Well, it seems she misses her teddy bear. The image of the teddy bear was on the first page of the yellow book.
Here’s how to find the teddy bear:
Go to the red telephone room and open the door on the left side to enter the fish tank room.
Tap on the left cabinet below the fish tank.
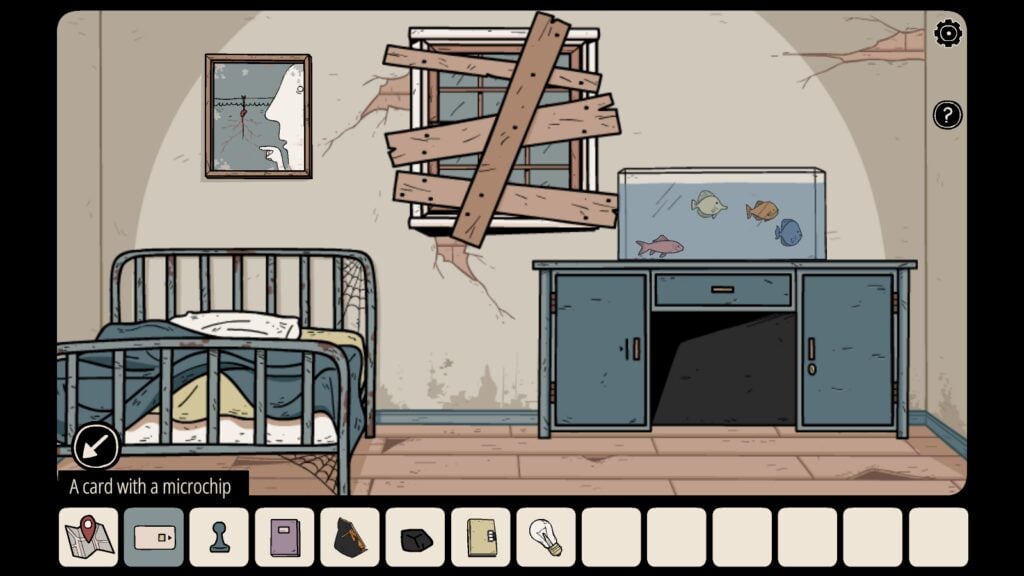
Fish Tank Room
Use the microchip card from the inventory to open the cabinet. The microchip card was found in the top drawer in the vase room. Read our vase room puzzle to know how to get it.
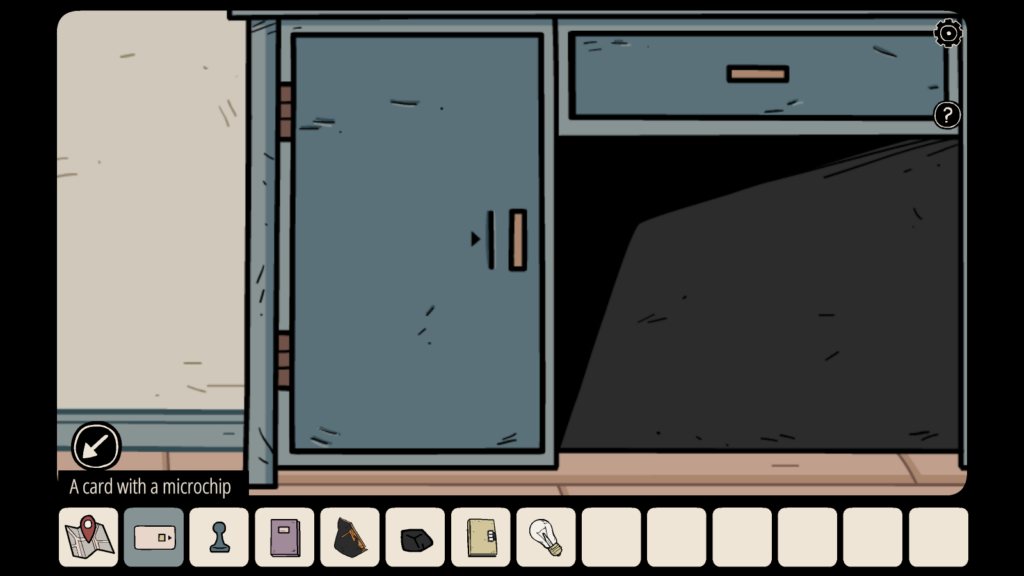
Inside the cabinet, you will find a cute teddy bear. Take it!
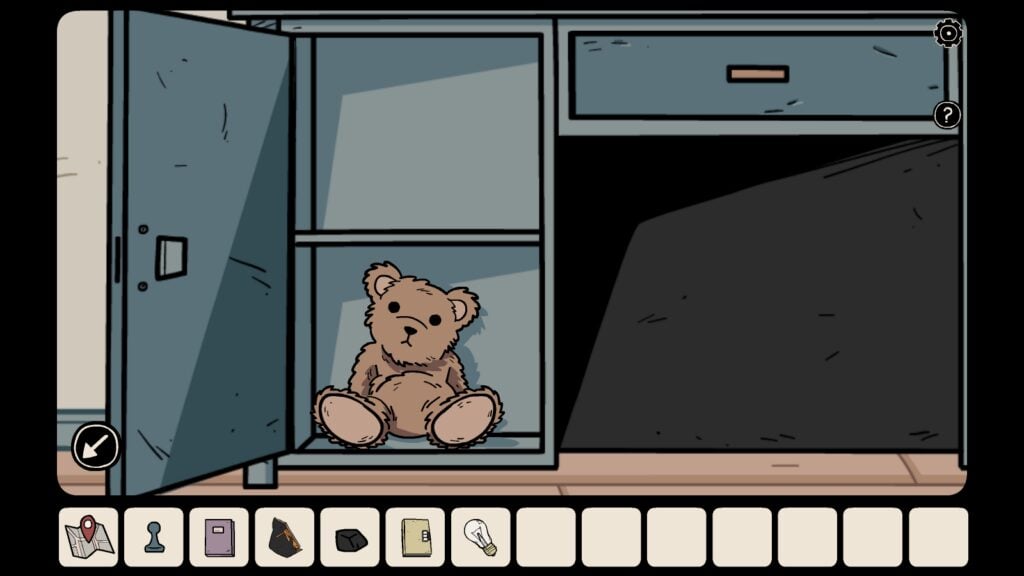
Next, navigate to the mirror room, tap the teddy bear from the inventory and tap the mirror.
The ghost girl will happily take the cute teddy bear from you and disappear. You will notice random numbers scribbled on the mirror surface. Make a mental note of it or write them down on a piece of paper.
The numbers shown below may not be the same in your game.

The Piano Puzzle
Now that you have discovered a set of random numbers on the mirror, you can proceed to the red telephone room to solve the piano puzzle. Unlike other puzzles in Ghost Case, the piano puzzle is a musical memory game. Here’s how to solve it:
Navigate to the telephone room. Tap the red telephone twice, and dial the same numbers that were scribbled on the mirror. After dialing, you will hear haunting music playing in the background. You can listen to it again and again. Tap the arrow on the lower-left corner of the telephone to exit and then tap the telephone twice to listen to the music again.
You will have to reproduce the sound by pressing the piano keys in the correct sequence. The mini piano is in the clock room. You can record this tune and then play it in a loop. It will help you solve the puzzle a bit quicker.
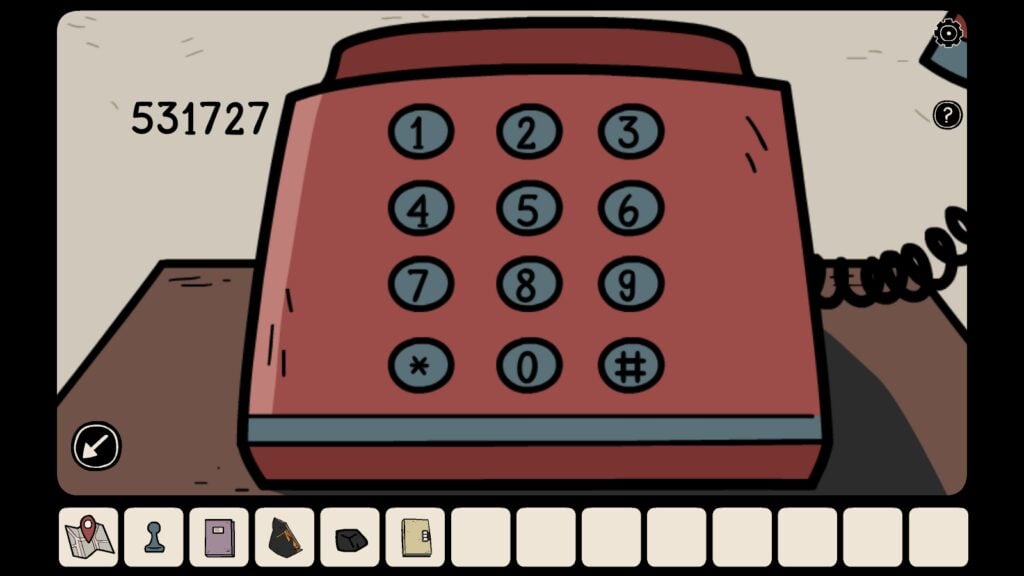
Note: The sound generated after dialing the numbers is random.
In the same telephone room, access the clock room on the right. Tap the right side of the telephone to enter this room.
There’s a desk below the wall-mounted clock. Tap the desk. An electronic mini piano is installed on top of the desk. Tap the wooden cover (see the screenshot) to open the keyboard:
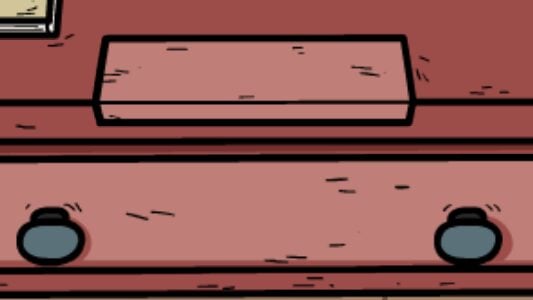
Piano Cover
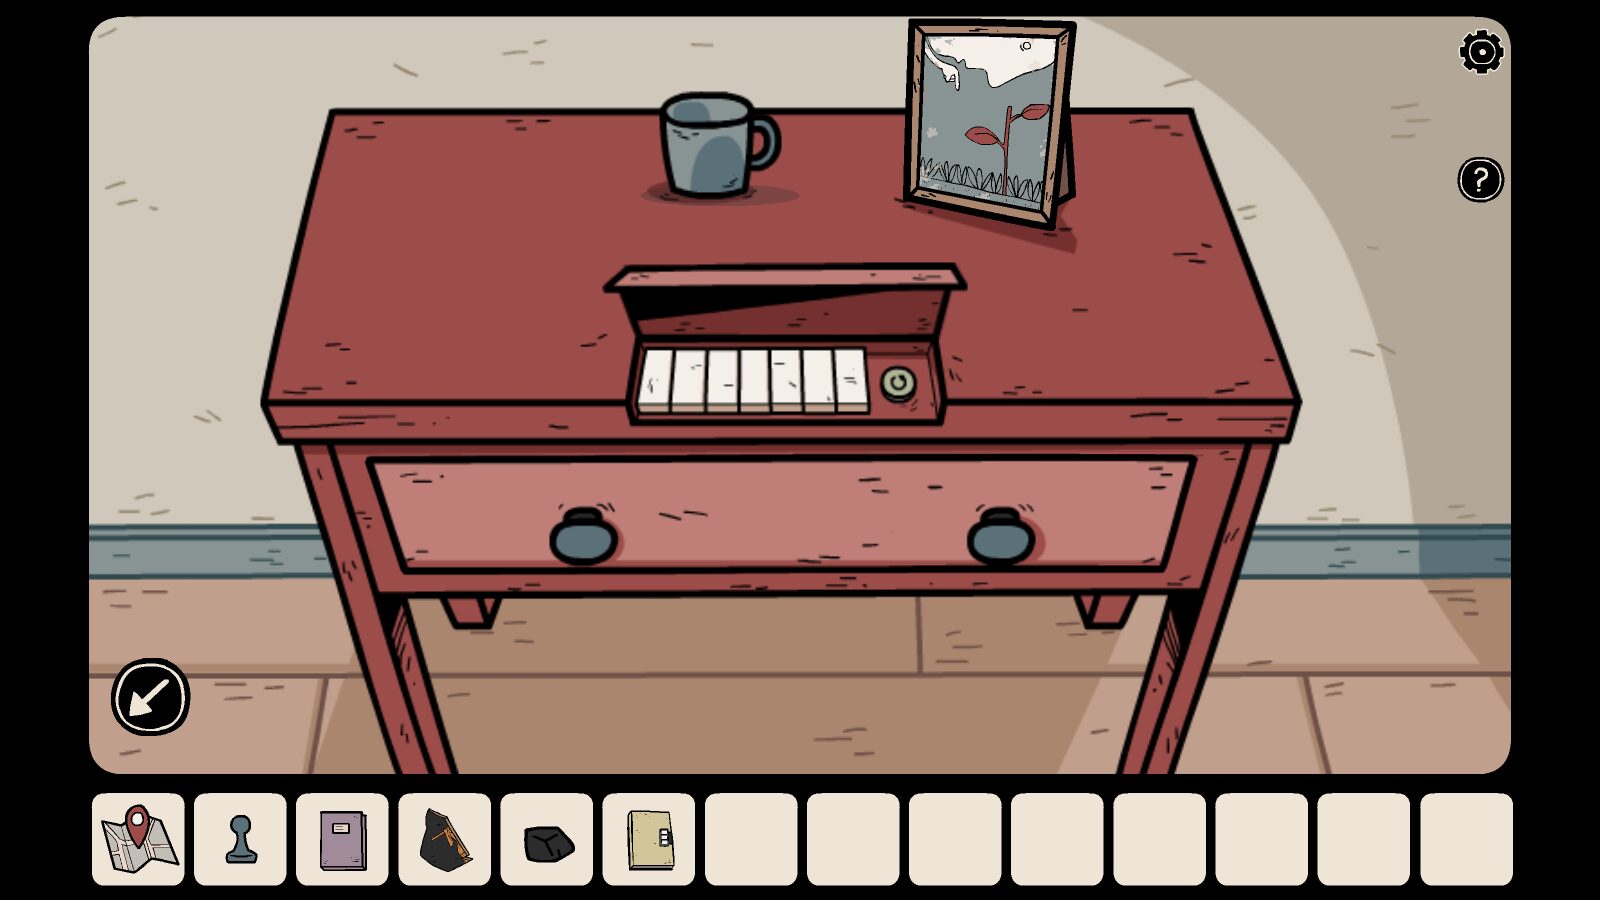
Mini Piano
Tap the keyboard to get a closer view. Press the correct keys to replicate the sound you heard after dialing the numbers.
You can record the music in the telephone room and then listen to it in a loop in case you don’t want to press the wrong keys. Tap the green reset button near the keyboard if you have pressed the wrong sequence of keys.
Upon reproducing the music correctly, the drawer will slide open. Inside, you will find another piece of the broken porcelain vase and an arrow-shaped metal clock hand. Take them:
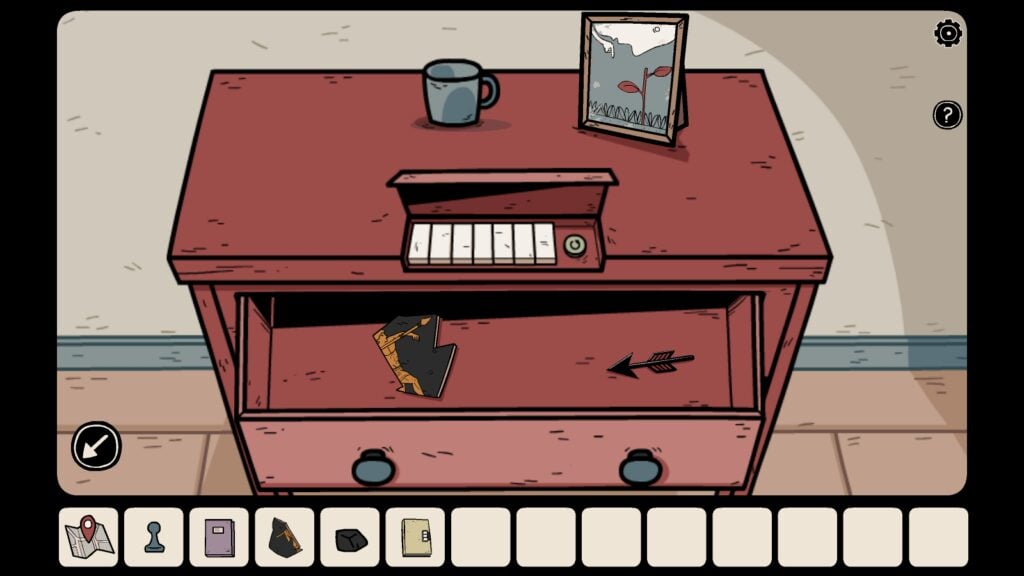
The metal clock hand will help you complete the Clock Puzzle and the porcelain piece will help you complete the vase puzzle.
Vase Puzzle
Go to the vase room. Tap the broken vase placed in the middle of the room to get a closer room. It’s a jigsaw puzzle game – you will have to piece together all parts to complete the puzzle. But you would need glue to hold the pieces together.
To find the glue go back to the telephone room and from there enter the fish tank room (left door). Tap the middle drawer underneath the fish tank to open it. Take the glue.
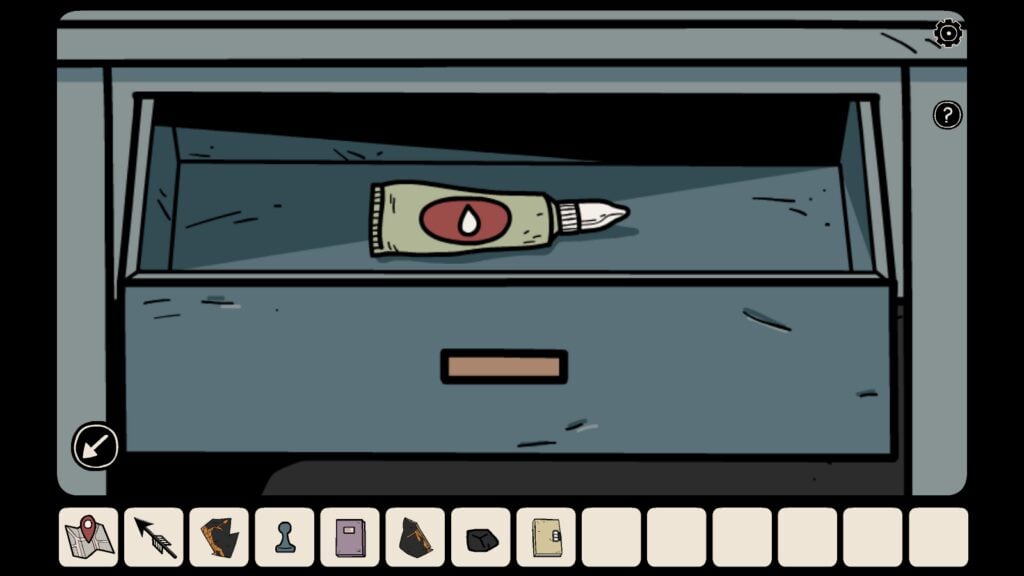
The glue can be found in the top drawer in the fish tank room
Navigate to the vase room. Tap the vase. We have already collected two missing pieces – the first one was found in the safe (red door room, extreme right. We opened the safe with the help of the toy robot puzzle hint) and the second piece was found in the mini piano room. Put these two pieces on the stool surface – Tap a piece on the inventory and then tap on the stool to place it.
Tap the glue and then tap on each piece to put a layer of adhesive on them. You can now begin putting all pieces together to solve the vase jigsaw puzzle. There are ten pieces. Make sure all ten pieces are on the stool before attempting to solve this puzzle.
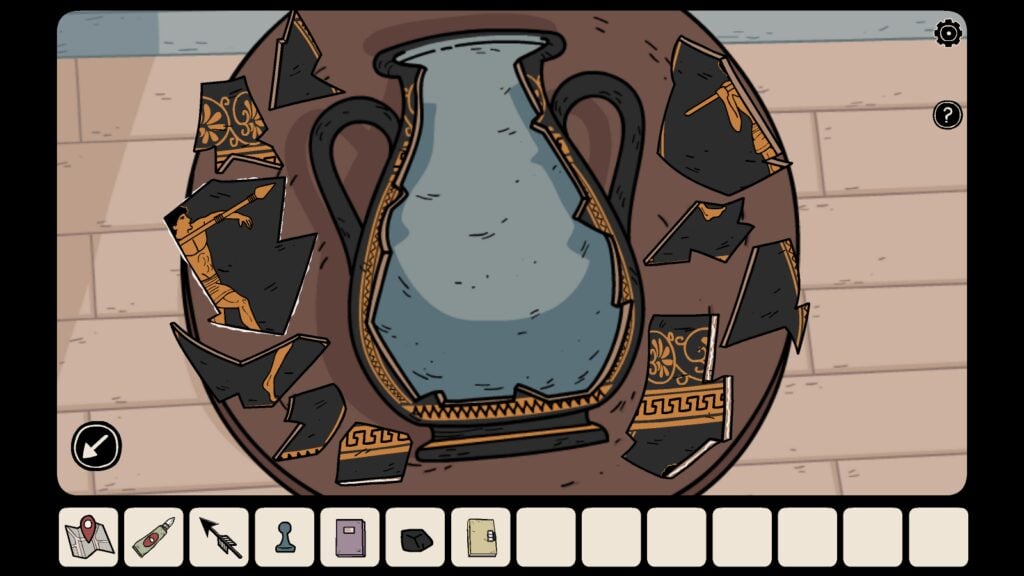
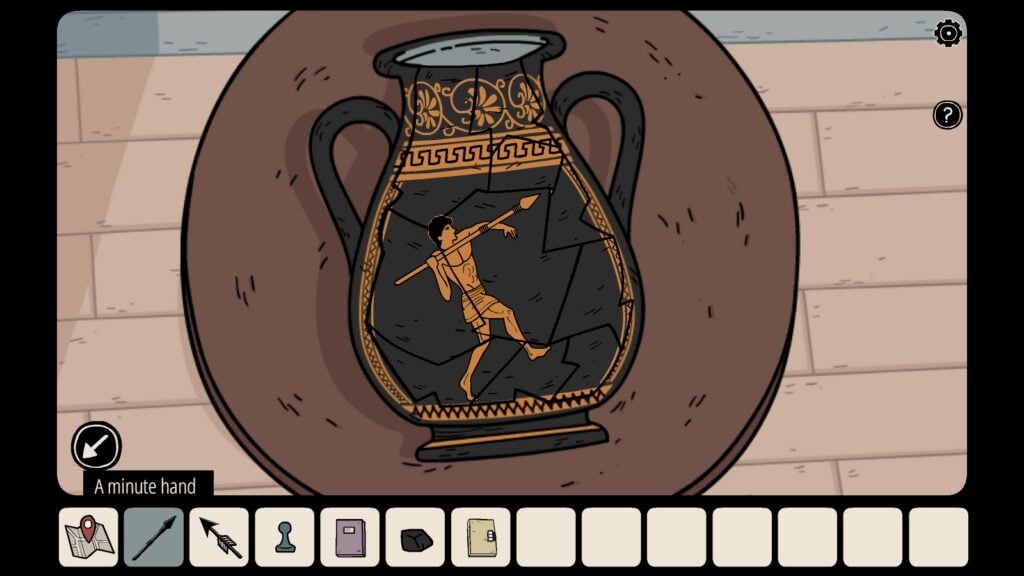
Make sure you put the biggest piece (the one that has a warrior holding the spear with his face shown) at the end after piecing together all 9 parts.
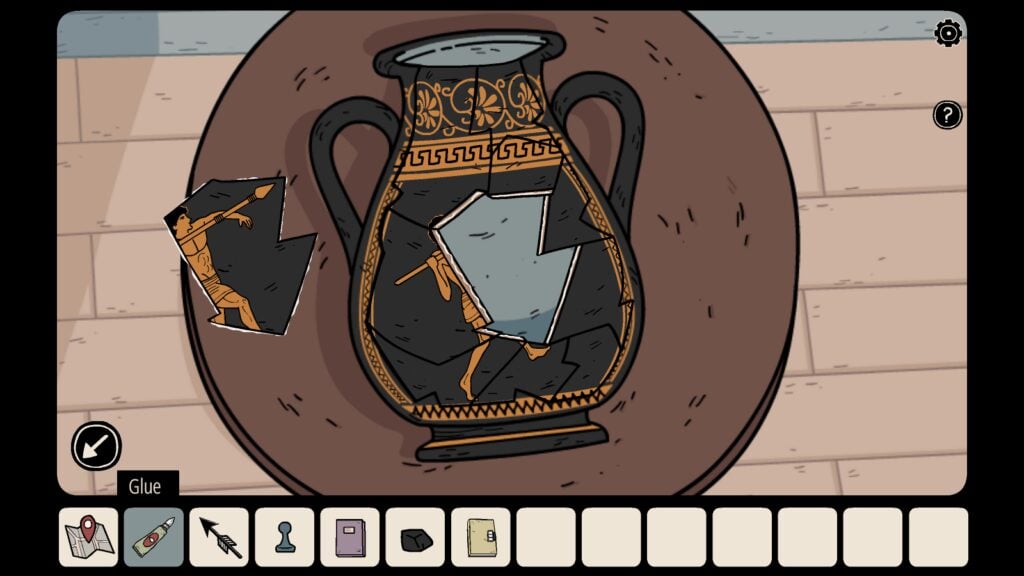
When you affix the final piece in the middle, the spear will glow. Tap the spear to take it.
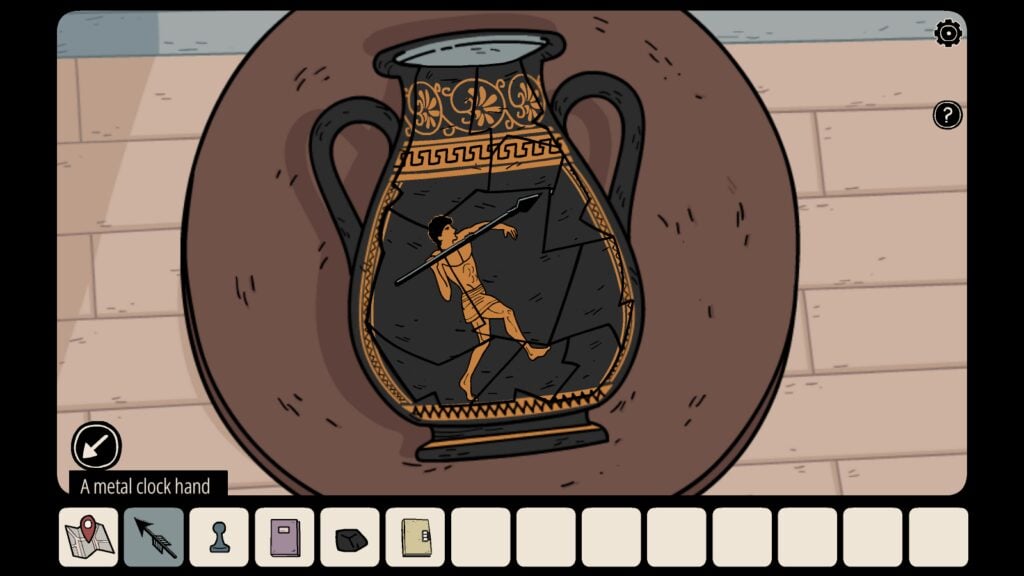
It’s actually a “Minute hand”, which will be used along with the “Metal Clock Hand” to solve the clock puzzle in the Electronic Mini Piano Room.
The Clock Puzzle
To solve the clock puzzle in The Ghost Case, collect the minute hand after solving the Vase Puzzle. You will get the metal clock hand from the piano puzzle. You will also need the yellow and the blue book to know the position of the hours, minutes, and seconds hand on the wall clock. Here’s the solution to the clock puzzle:
Navigate to the telephone room. From this room, enter the mini piano room (right door). Tap the wall clock above the piano/desk.
Install the metal hand and the minute hand on the clock to repair it. Just tap them and tap the clock to put them in their place. You will now have the minute hand ( spear), hour hand (arrow), and second hand.
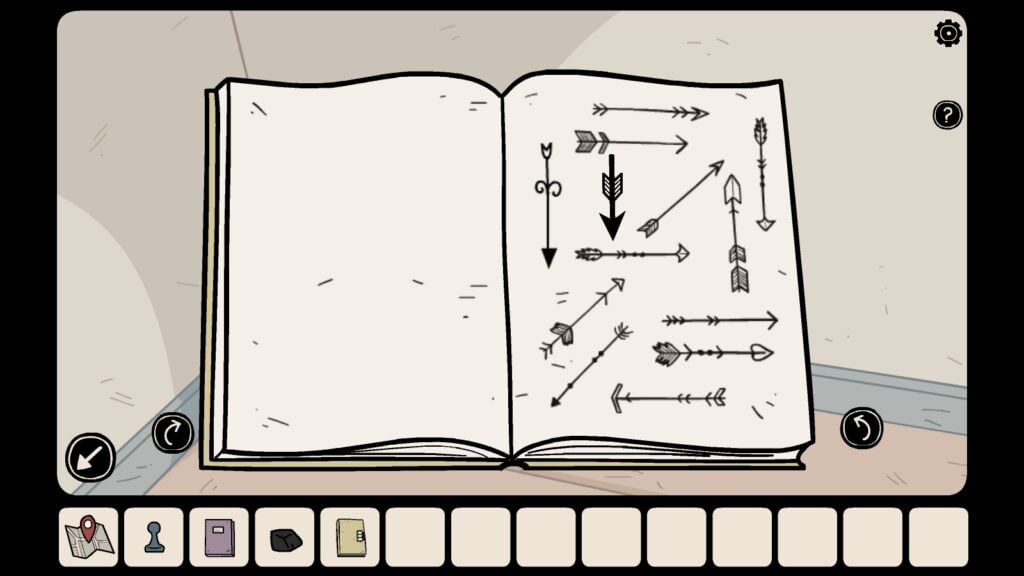
Both the yellow and purple books will provide hints for the correct clock setup. Open the yellow book first. Go to the page having different types of arrows.
Pay attention to the two arrows and the direction they are pointing. These arrows will look similar to the ones you have in the inventory on the bottom of the screen – the spear, and the dark shorter arrow with fletching.
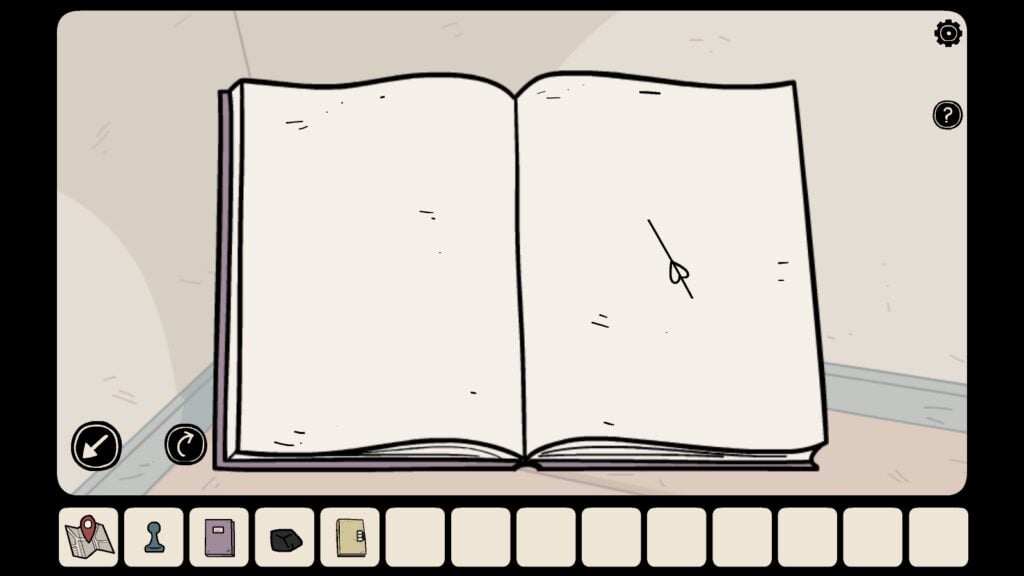
Now open the purple book. We found this book inside the top drawer (chest of drawers on the right) in the vase room. Flip through the pages to know the direction of the second hand’s direction.
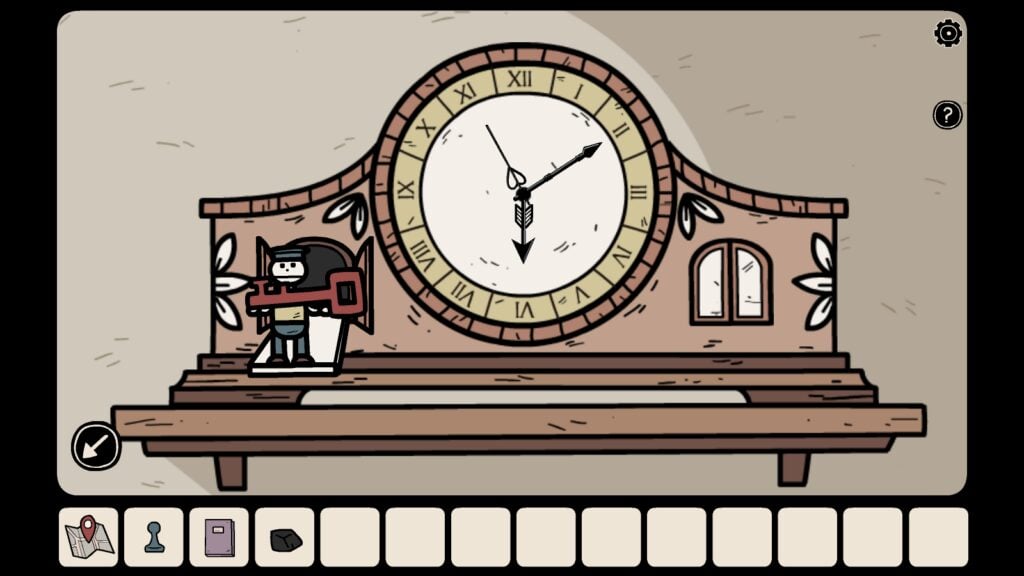
You can now solve the clock puzzle. Make sure the hour, minute and the second hand is pointing in the right direction as shown in the yellow and purple book.
This is what the completed clock puzzle will look like (screenshot below). Note that the direction of the hour, minute, and second hand shown on the yellow and purple books will be randomly generated.
Take the red key.
Now go to the telephone room > fish tank room and then use the red key to open the locked cabinet below the fish tank. This locked cabinet is on the right side.
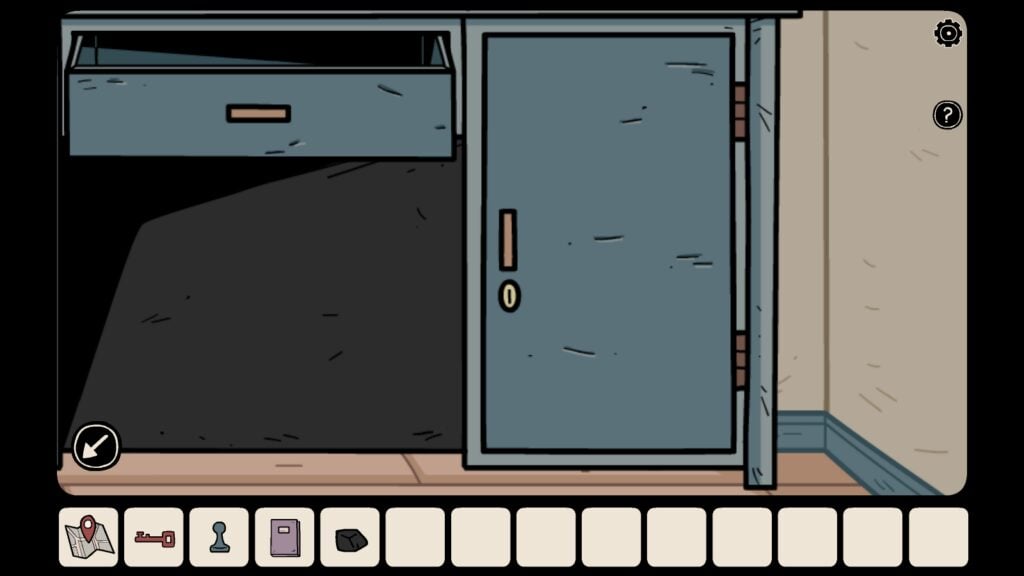
Use the red key to open this cabinet
Open the cabinet and take the purple token and fish food.
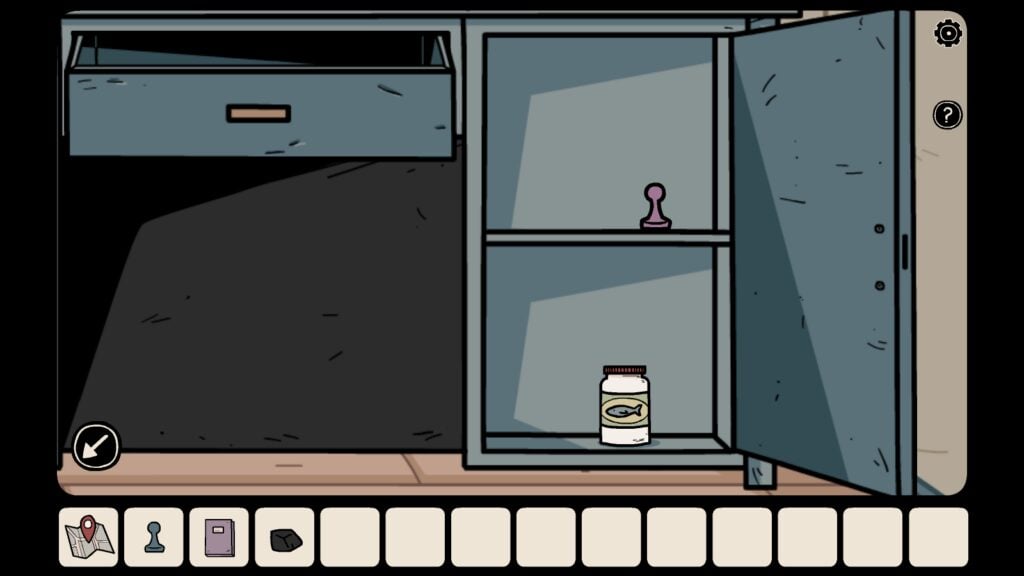
The Fish Tank Puzzle
By now you have collected three colored tokens – blue, green, and purple. The blue and green tokens were found in the chest of drawers on the right side of the vase in the vase room. Refer to the “Top Drawer Puzzle” of this guide to know how to get the blue and green tokens.
To get the fourth token, solve the fish tank puzzle:
1. Go to the fish tank room (left door) from the telephone room and tap the tank to get a closer view.
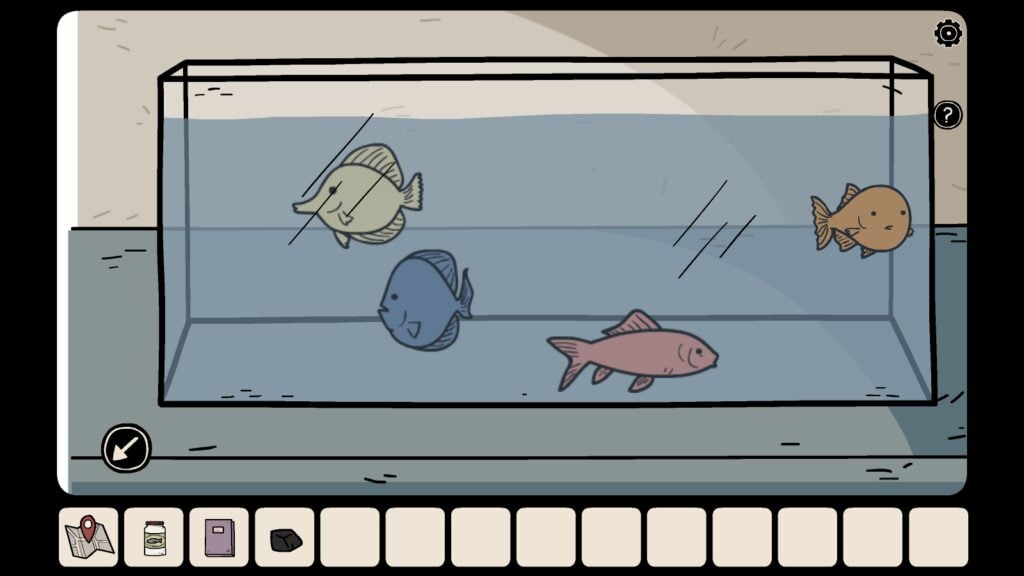
2. Tap the fish food and then the fish tank to sprinkle the food into the water.
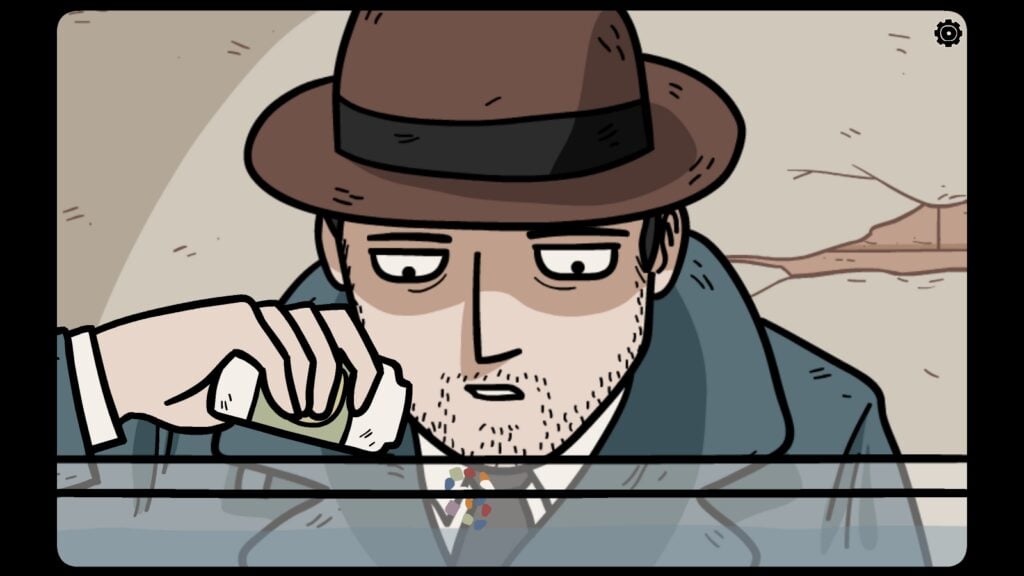
3. The fish will look different than before. Check their scales. You will see a unique pattern emerge on their scales.

Fish look different now. Pay attention to their patterns.
You will find similar-looking patterns on a blue box in the mirror/floor lamp room. Move to that room.
This blue box is kept on a small table near the floor lamp.
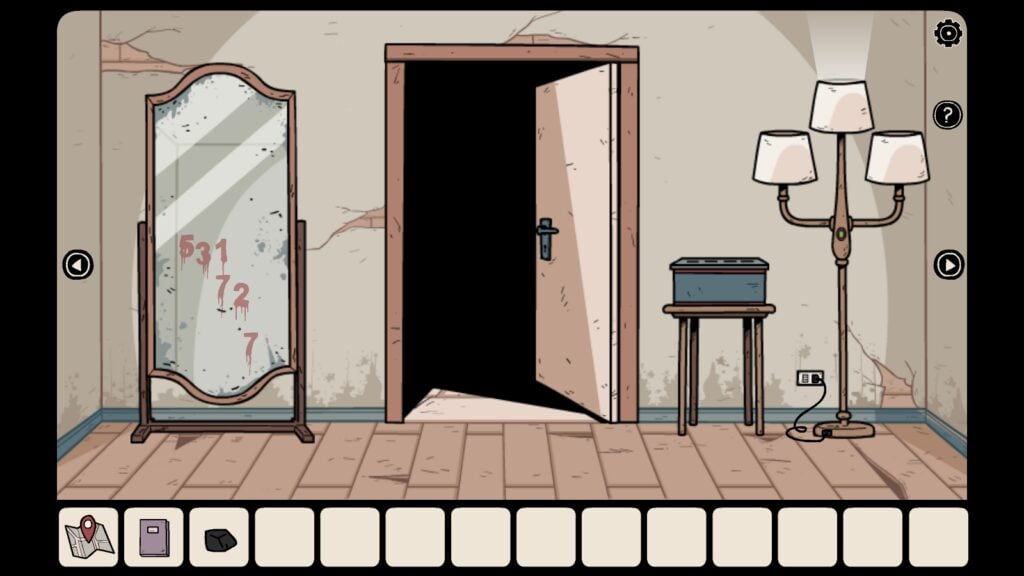
Tap the blue box to get a closer look:
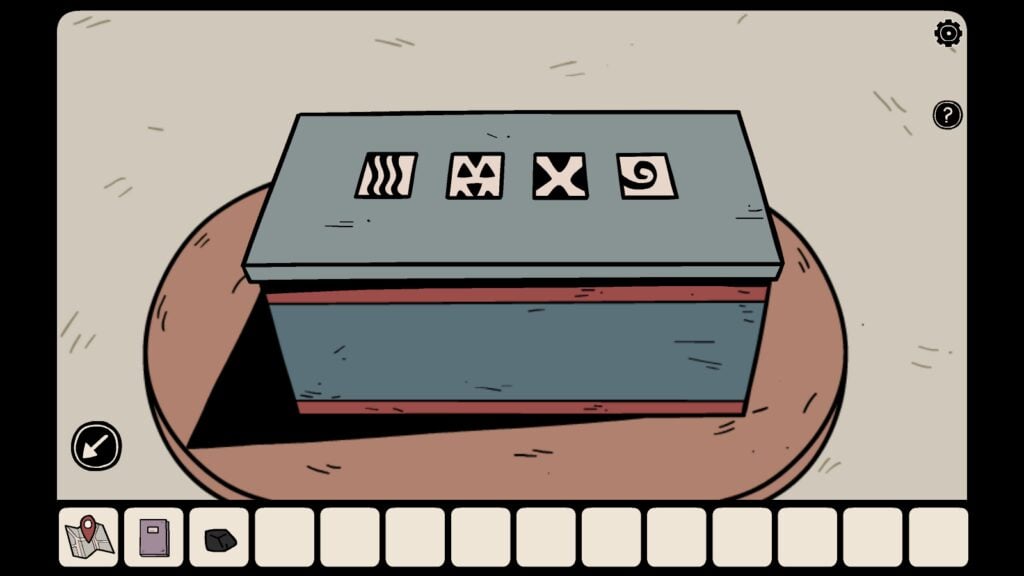
You will need to set up the right combination of patterns on the blue box to open it.
The patterns on the fish and the hint provided in the purple book will help you find the correct combination:
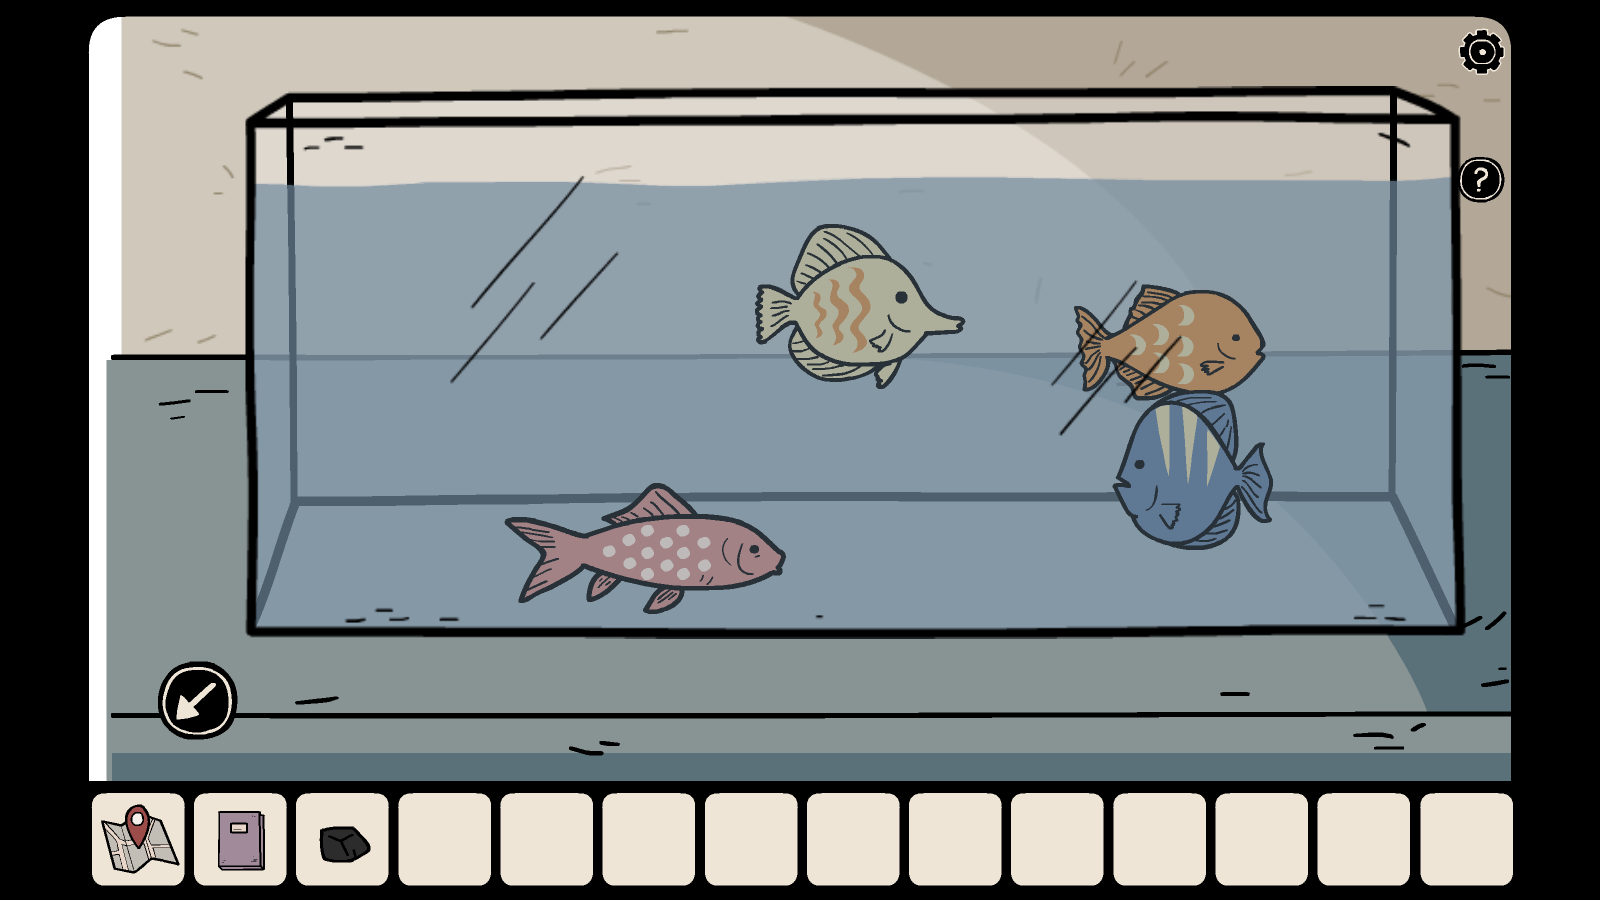
Check the fish scales for patterns
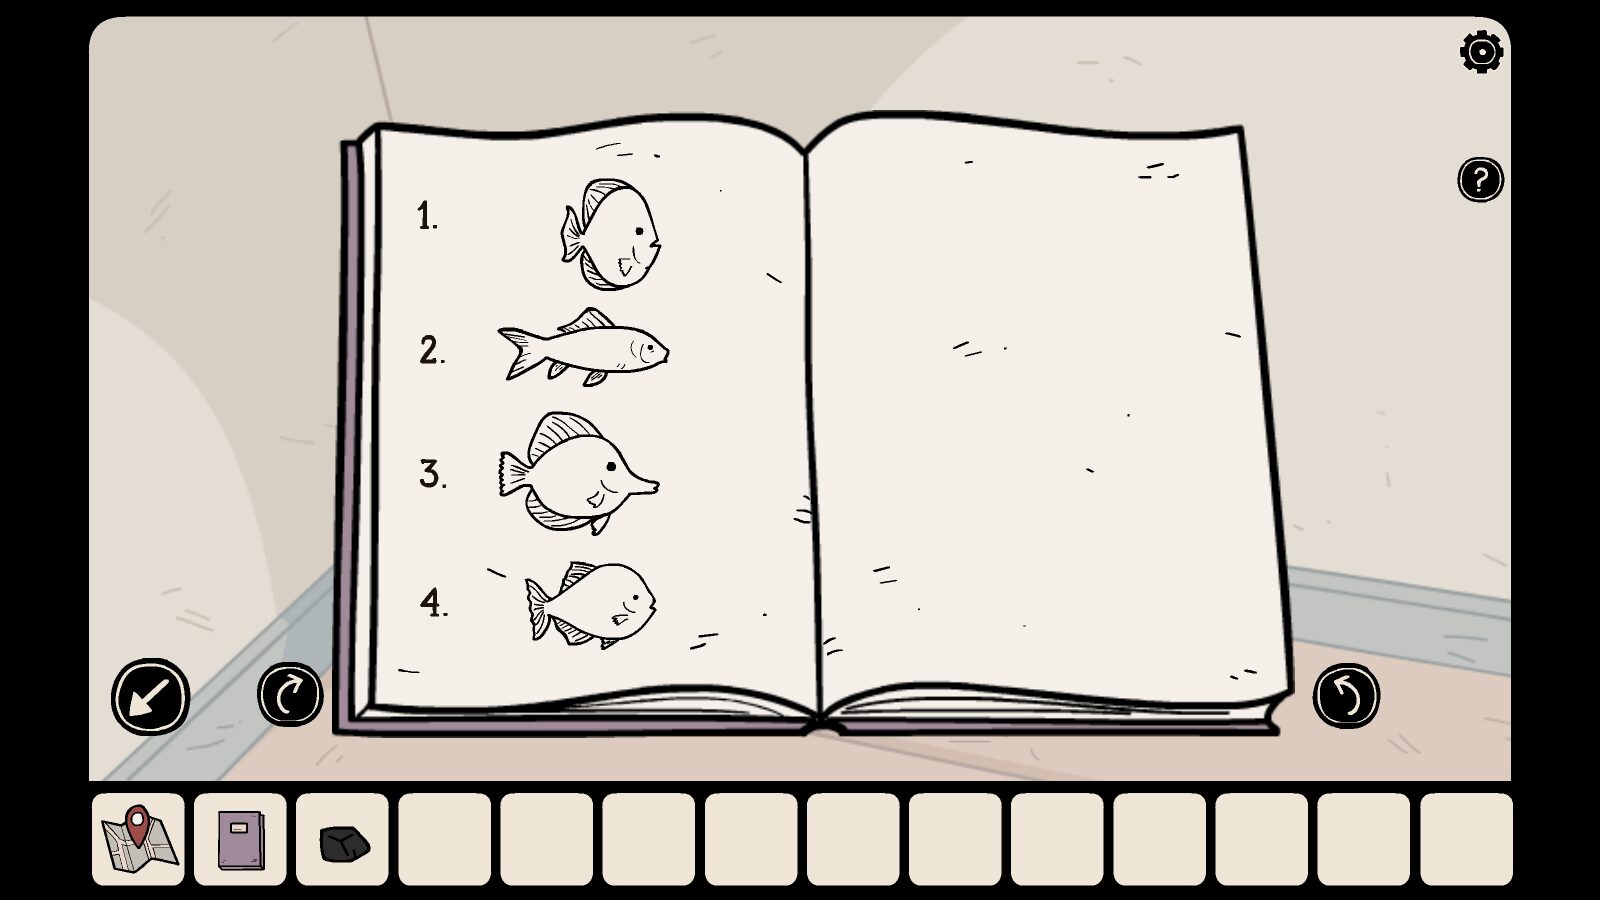
Correct order to enter pattern combination on the blue box
Make a note of the shapes of all four fish and then put their patterns in the correct order as per the order of fish numbered 1-4 as shown in the purple book. Fish numbered 1 to 4 in the purple book will help you find the patterns on them in the correct order. Go back to the blue box in the mirror room and enter the patterns in that order to get the correct combination:

The pattern on fish could be randomly generated, so your combination might be different than ours.
Upon entering the correct combination, the box will open. Take the fourth “red” token from the box:
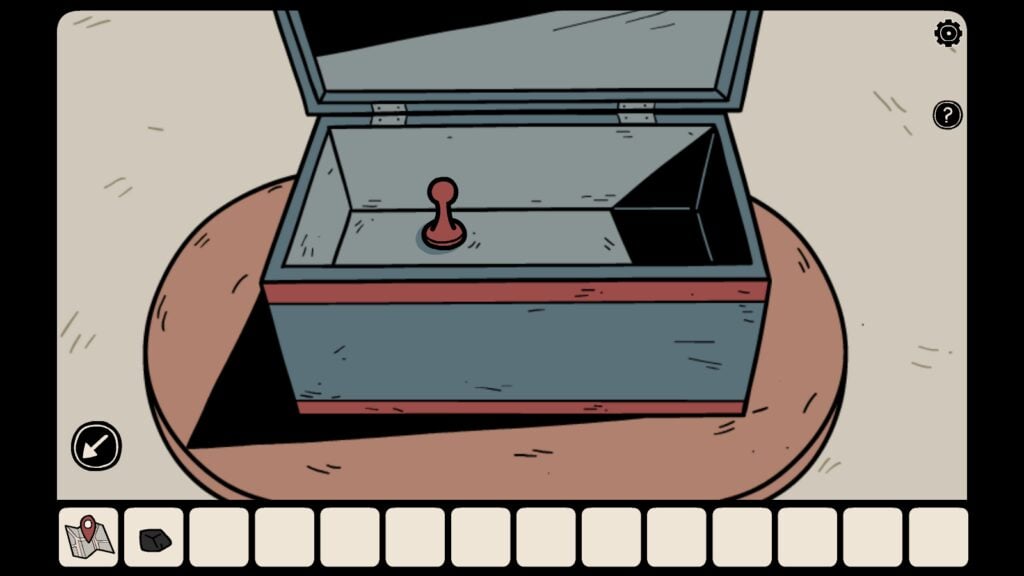
The Chessboard Puzzle
For the chess board puzzle in Ghost Case, you will need four tokens – red, blue, green, and purple.
- Go to the “How to get Tokens” section of this walkthrough to find the blue and green tokens.
- Read the “Clock Puzzle” to know how to obtain the purple token.
- The “Fish Tank” puzzle in this guide will help you find the red token.
Once you collect all four tokens, navigate to the vase room and tap the blue coffee table on the left side of the vase. Place all four colored tokens on the table near the chess board.
Dan’s ghost will start moving all the tokens onto the chess board.
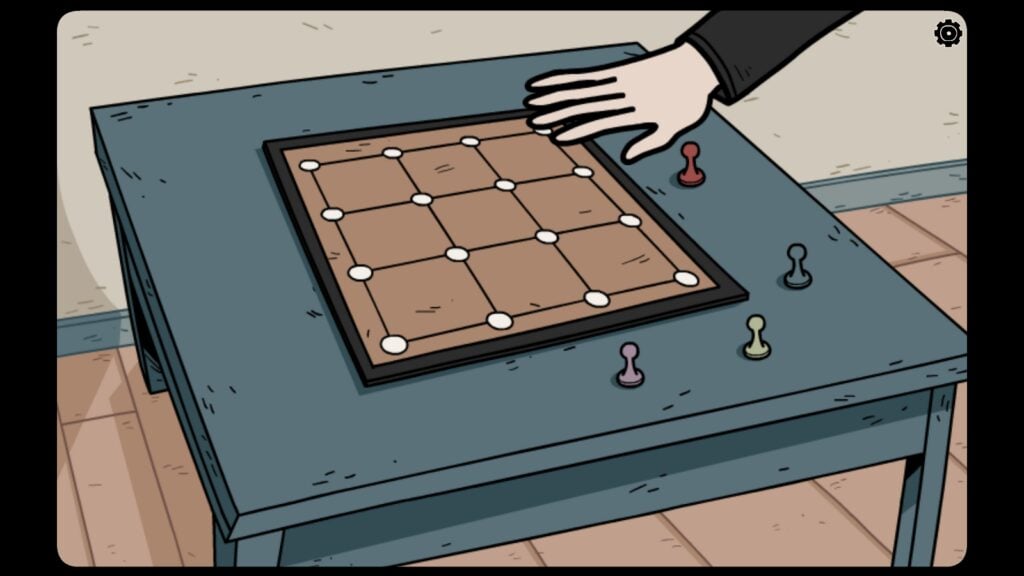
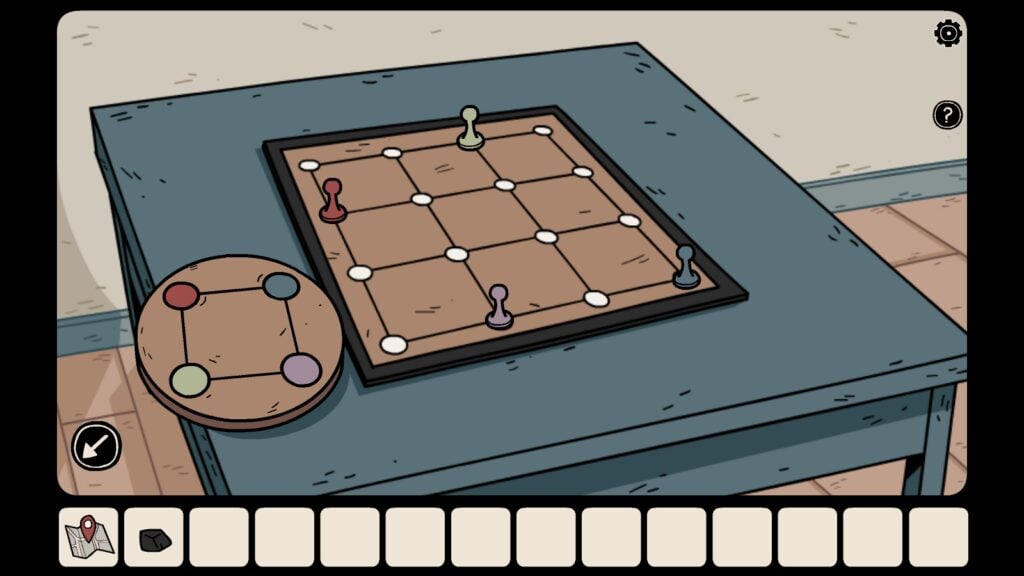
The tokens will be placed at certain points on the game board. You will also see a round tile with four small circles (red, blue, purple, and green) inscribed on it. The colors are the same as the color of the tokens. Take the wooden tile.
In the same vase room, pay attention to the cupboard with a chest of drawers on the right.
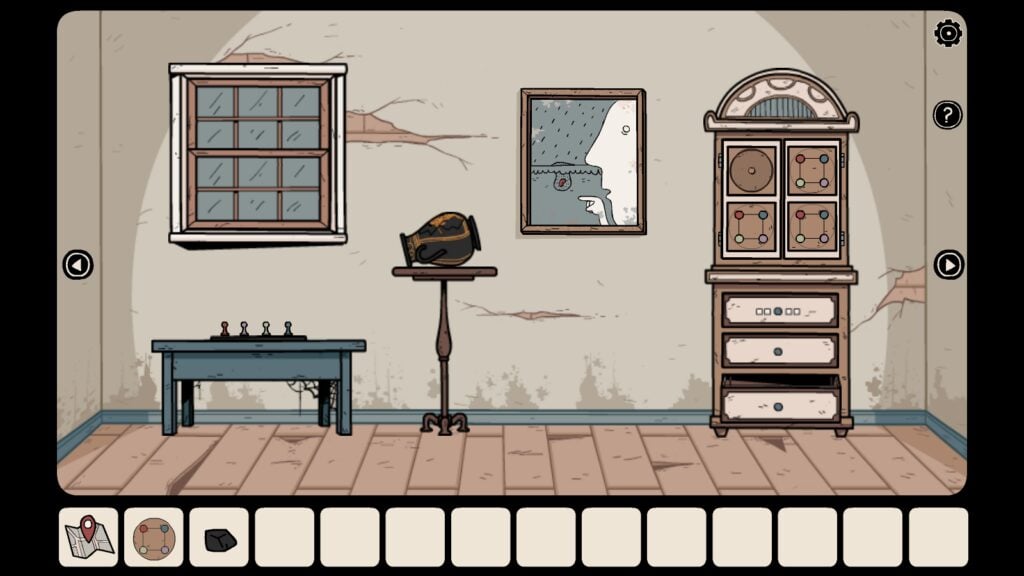
Tap the upper part of the cupboard, where three similar-looking tiles can be seen. Attach the round tile to the empty slot.
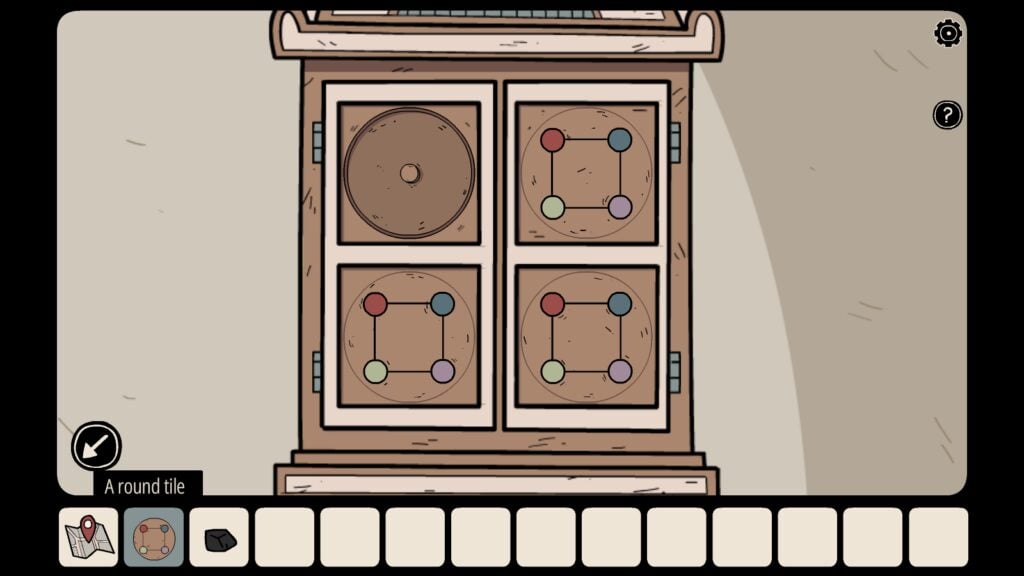
The First Slot is Empty. Attach the round tile from the inventory to the empty slot
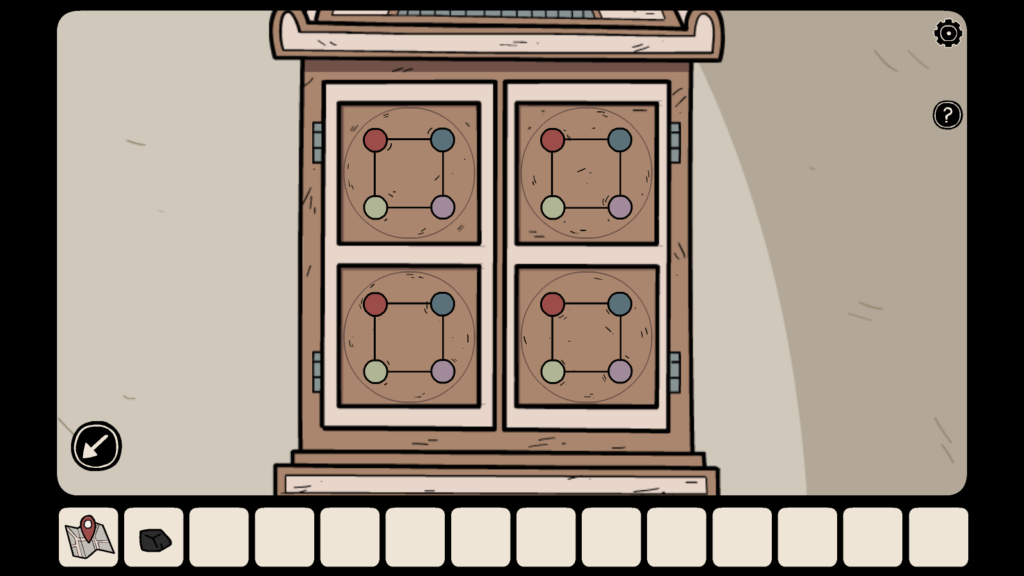
You now have four tiles on the puzzle.
Go back to the game board and pay attention to the position of the tokens on the game board.
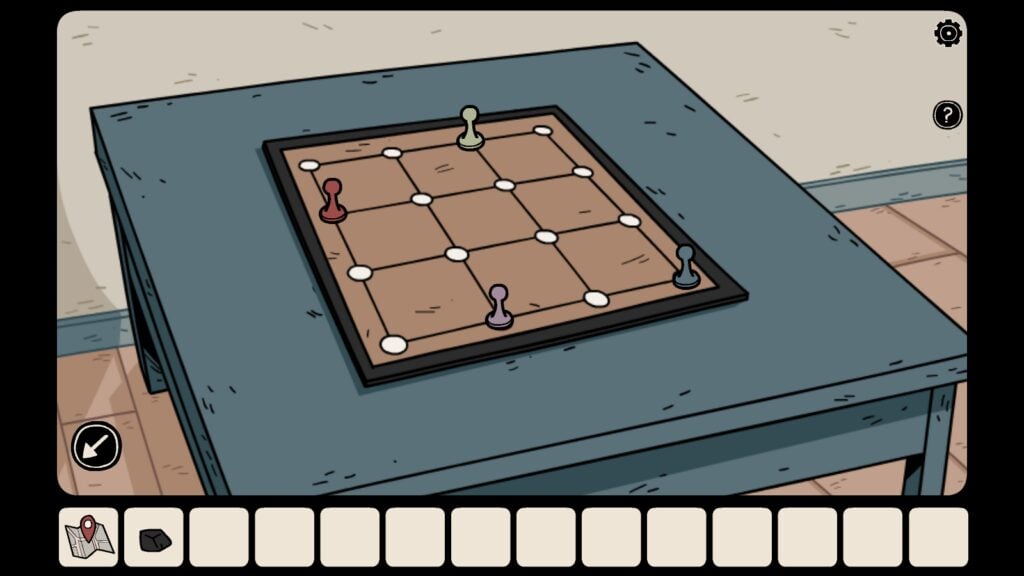
In the tile puzzle, you will have to rotate all four tiles in such a way that one of their colored circles is positioned in the same way as the position of the tokens on the chess board. So the red circle on the first round tile should be in the same position as the red token on the game board, the second round tile on the top should have the green circle in the same position as the green token on the game board, and so on. Check the screenshot of the completed puzzle:
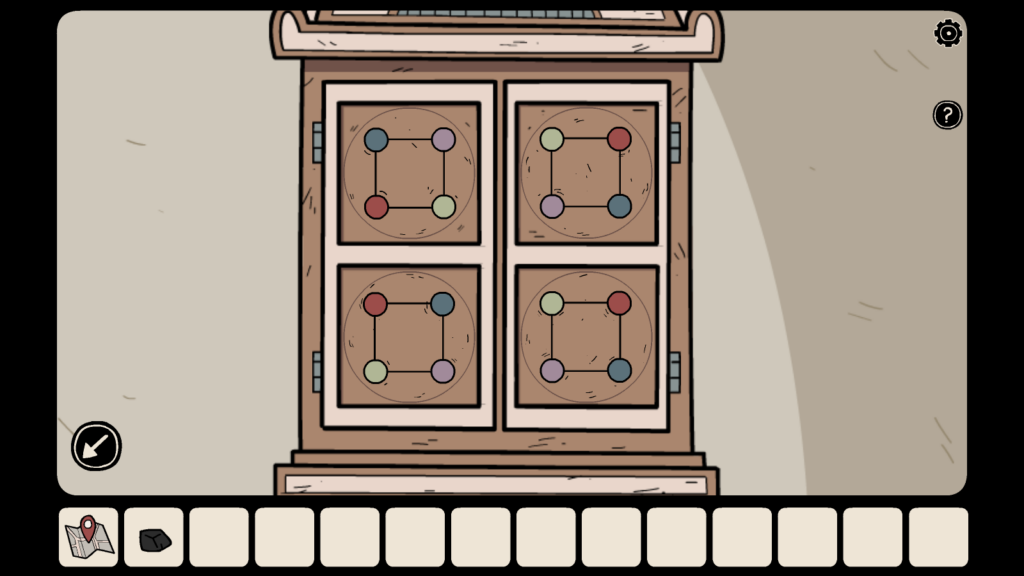
Completed Tile Puzzle
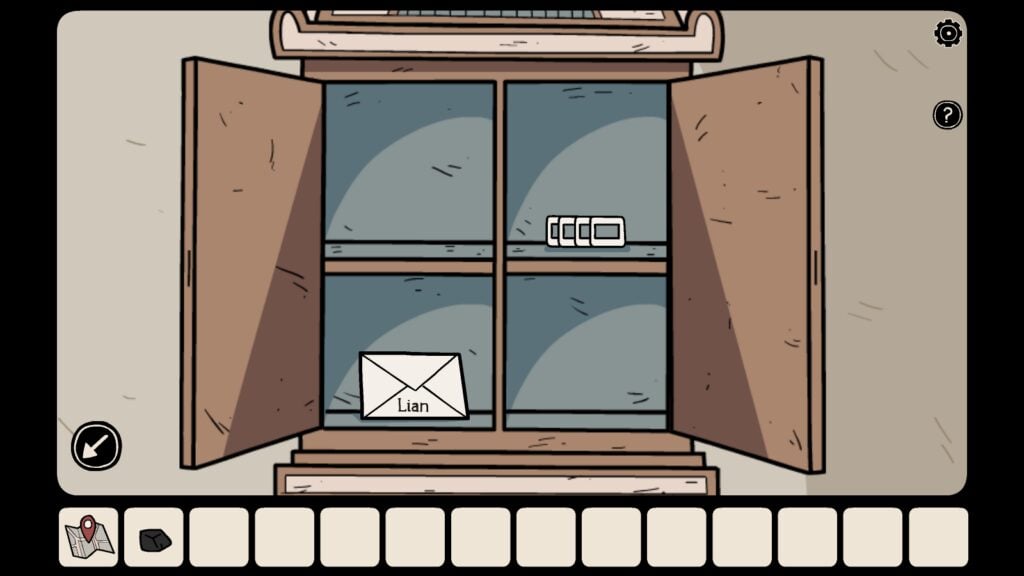
When you solve the puzzle, the cupboard opens. Take the envelope with the name “Lian” and a set of “projector slides” from the cupboard.
Note: In Ghost Case’s chess board puzzle, the position of the tokens on the game board may be different in your game as some of the puzzles are randomly generated.
On the inventory at the bottom of the screen, tap the map and go to the “Police Station”.
In the police station, tap the projector and insert the slides. Press the white button on the projector to turn it on.
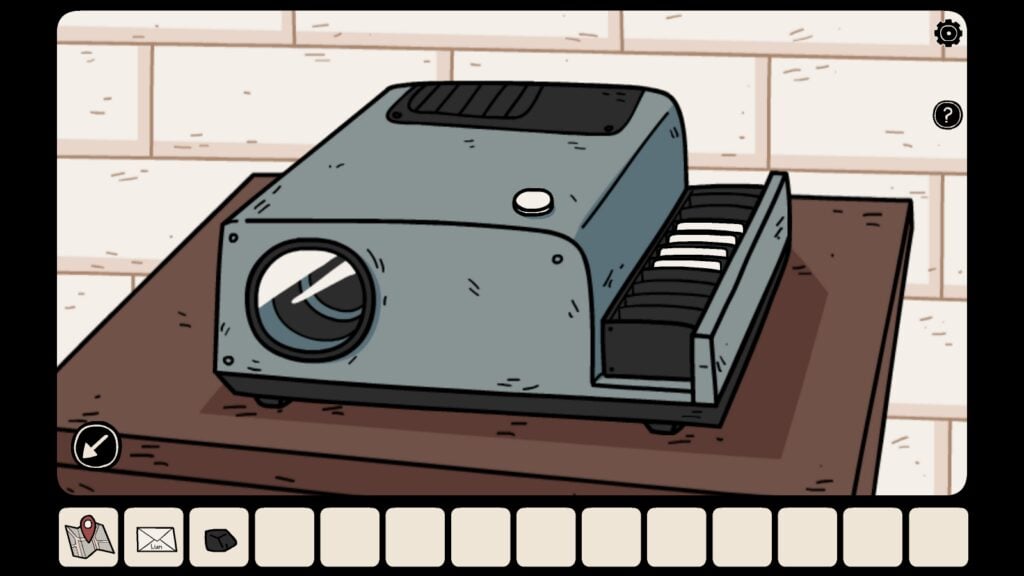
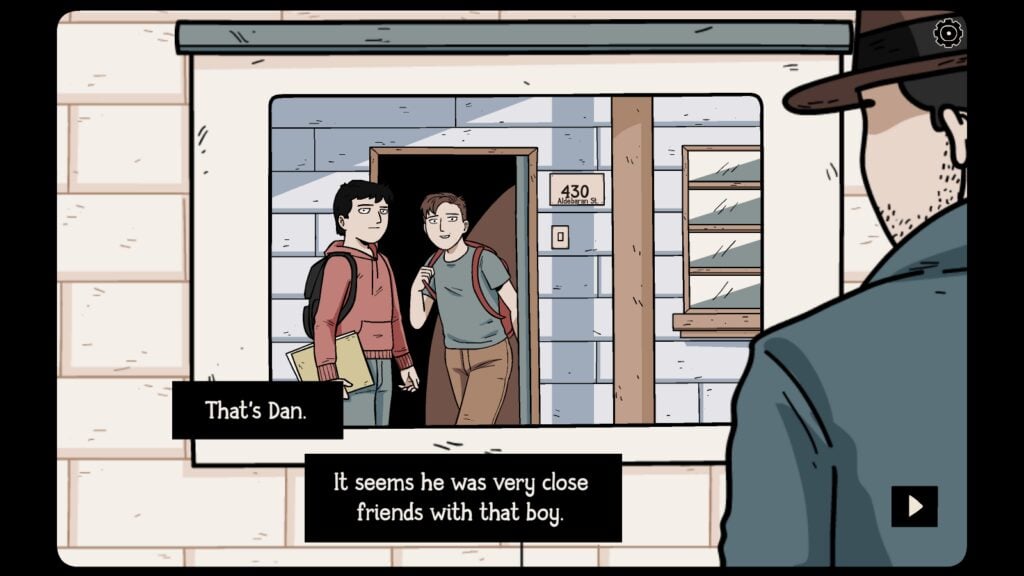
The projector will display a series of images on the white screen. Tap the curved arrow on the lower-right corner of the white screen to view a new image.
When he sees the second image, the detective notes down the address of Dan’s friend “Lian” on the map.
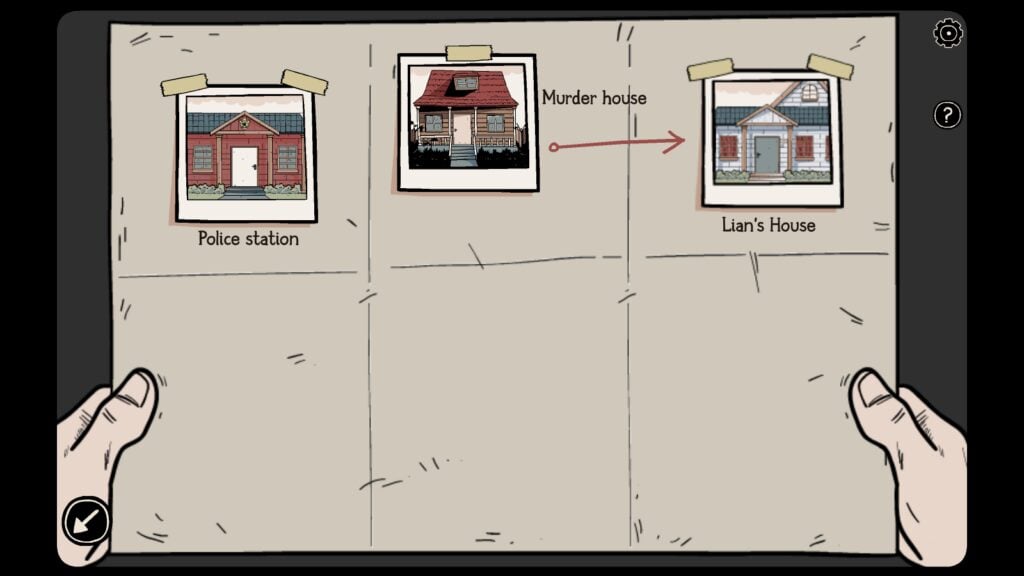
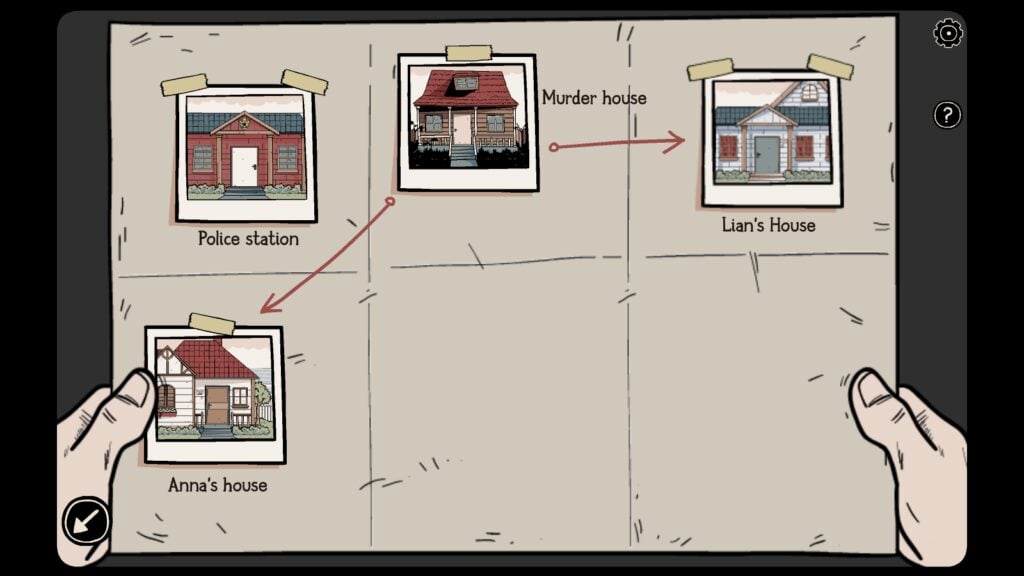
A new location will be added to the map – Lian’s House. Tap on that location to go to Lian’s place.
Interrogating Lian
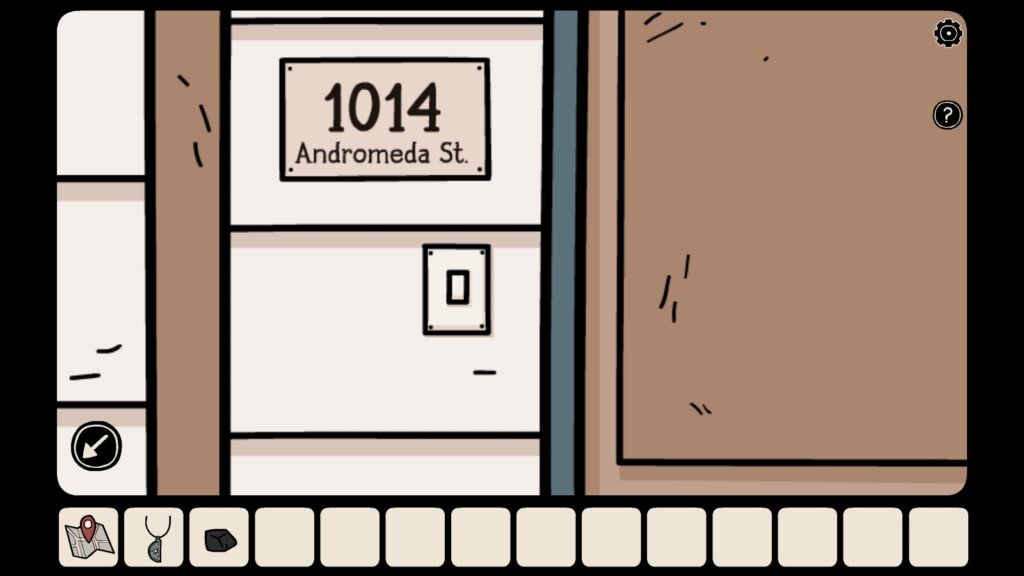
Once your reach Lian’s house, ring the doorbell (tap the house number to get a closer look and then ring the doorbell). He won’t be interested in any kind of interrogation. You must do something to talk to him.
Tap the letter and then tap on the door. The detective will slide the letter under the door. Lian will open the door and is ready to talk.
Ask all questions to him by tapping on the text boxes. He will provide interesting info about the case, such as sneaking to a cemetery with Dan and his sister, and a card with holes that will help you solve the red door puzzle. Ask “When was the last time you saw them” to get the card.
Note: In Ghost Case, there’s one or more than one answer that provides a key hint or a new location to help you proceed. Make sure you ask all questions to all characters, such as Lian, Anna, and Laia to get those answers.
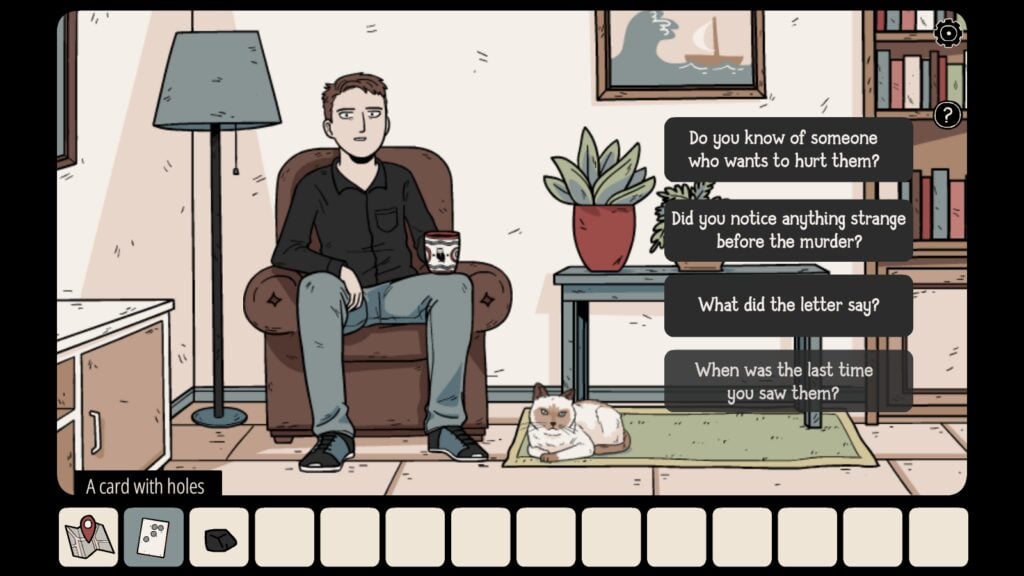
Ask questions to Lian
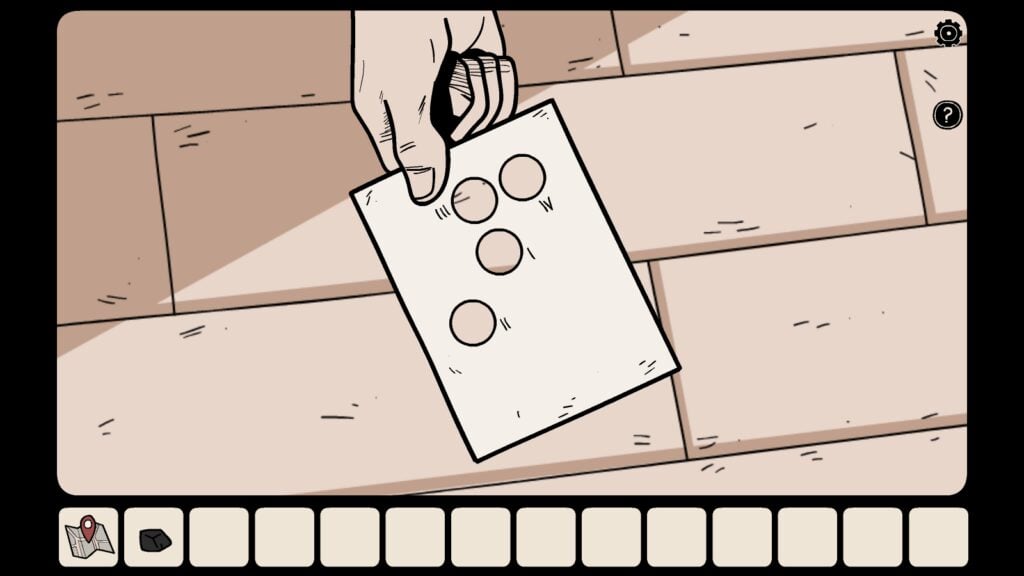
Lian will give you a card with holes.
Go back to the haunted house > red door room. Tap the red door. Use the card with holes on the electronic door lock.
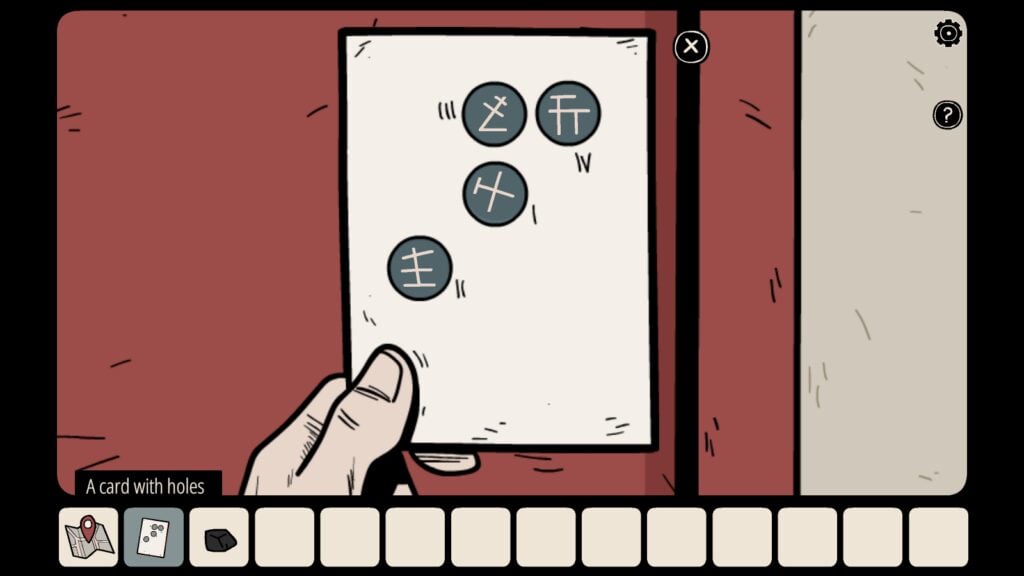
Make a mental note (or take a screenshot) of the symbols that appear on the holes and the roman numerals (I, II, III, IV) near the holes. The roman numerals show the correct order of the symbols that you need to press to open the red door.
Tap the “X” button on the top-right corner of the card to remove it. Now press those symbols on the electronic lock in the correct order and then press the OK button. The door will open.
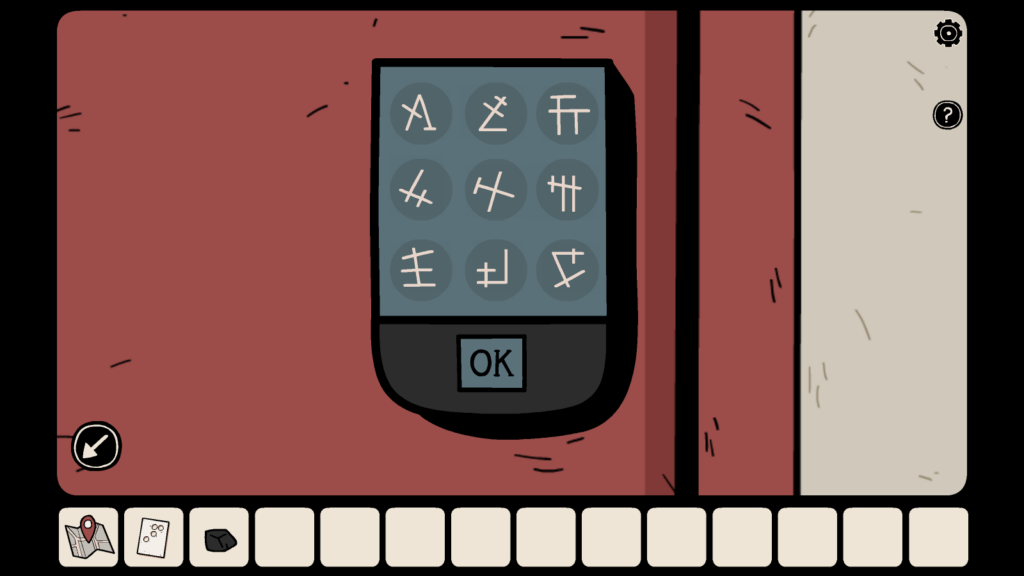
The red door gives access to the closet. In this room, you will have to solve a few more puzzles to proceed.
The Bottle Puzzle
The bottle puzzle is one of the most challenging puzzles in The Ghost Case. Here, you not only have to arrange the top-shelf bottles in the correct order but also make use of their shape and size to find the correct 3-dial combinations for opening the briefcase.
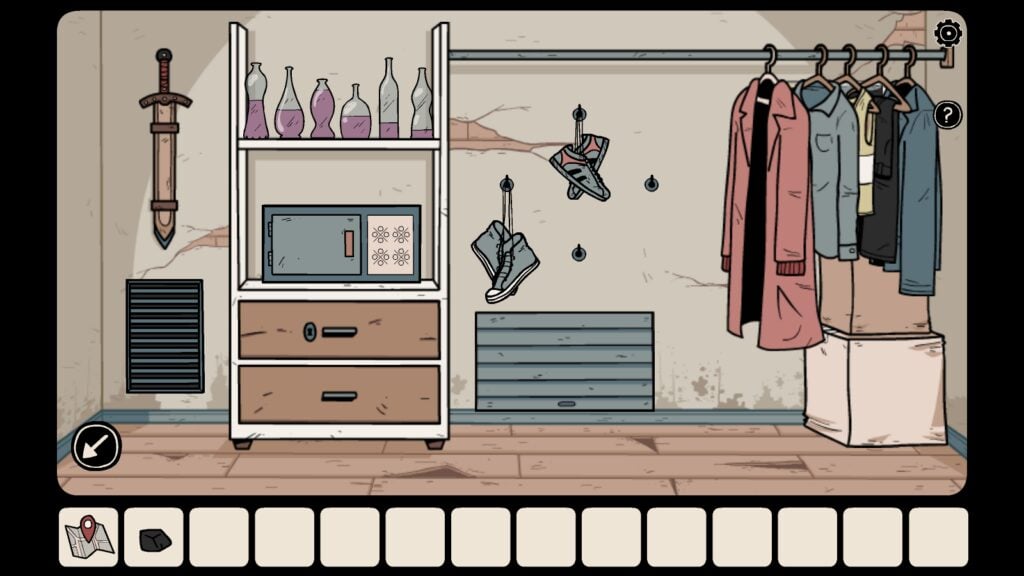
The Closet
The clothes hung on the rod are blocking access to the top cardboard box kept in the extreme right corner of the room. Tap the clothes to move them. Now tap the cardboard box on the top.
Open the cardboard box and take the piece of paper. The diagram on the piece of paper is of glass jars of different shapes, and a “-” and “+” sign is drawn on top of the paper.
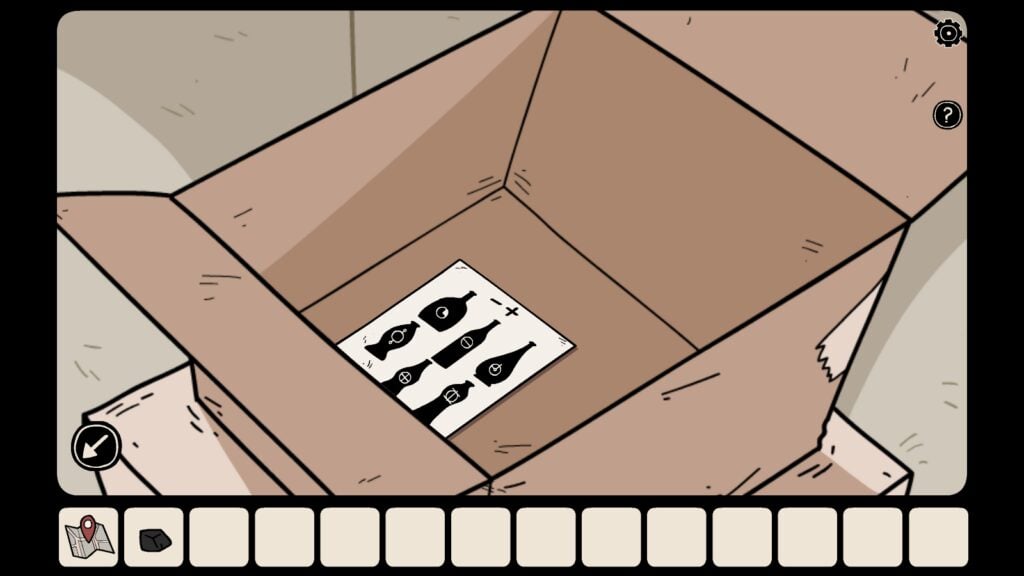
Tap the piece of paper to get a clear view.

You will see similar-looking glass bottles of different shapes and sizes on the top shelf in the closet. Each bottle is filled with a purple solution. Arrange the glass jars keeping in mind the signs “-” and “+” on the paper. In the diagram (screenshot above), the “-” and “+” provides hints for the proper arrangement of glass jars on the shelf – Least to Most.
Arrange them in ascending order, from the least to most full, to solve this puzzle:
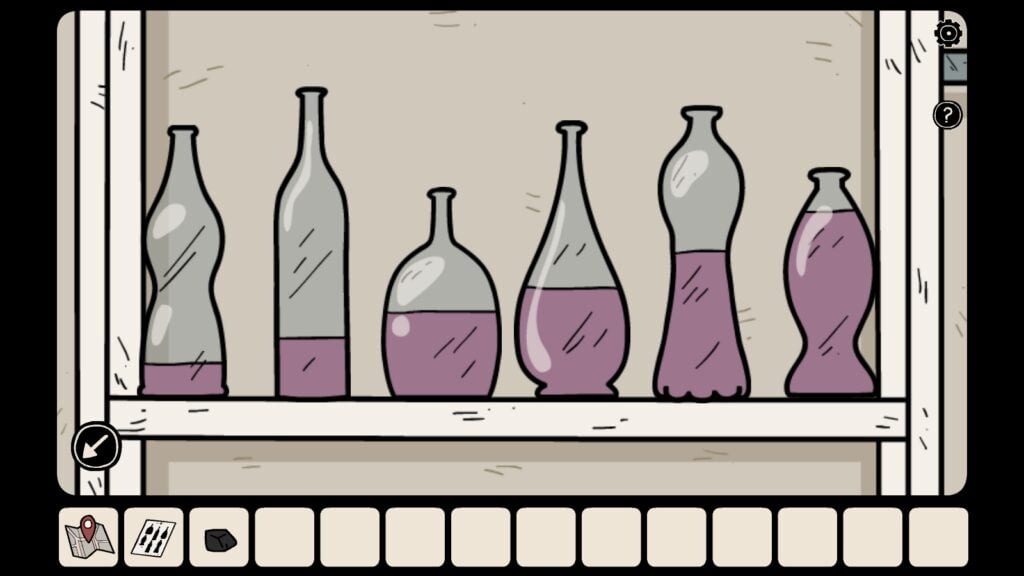
After solving the puzzle, the vent below the clothes rod slides open and a red briefcase falls on the floor.
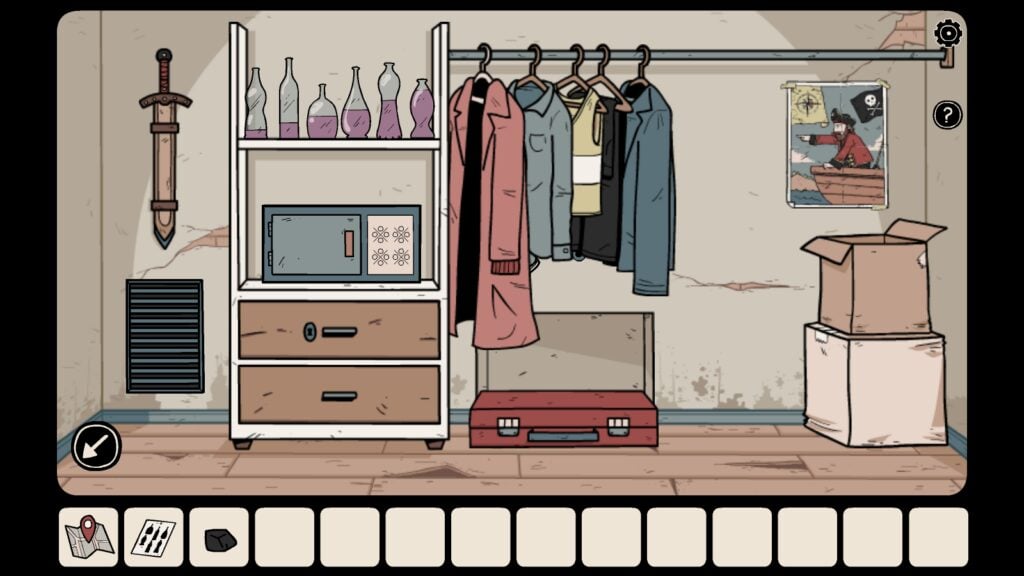
Tap the red leather briefcase to get a closer look. It has 3-dial combination locks on the left and right sides. You will have to get the correct combination of symbols on both sides to open the briefcase. Tap a combination lock to get a closer look at the astrological symbols on them. The same symbols on the 3-dial combination locks can also be seen on glass jars on that piece of paper.
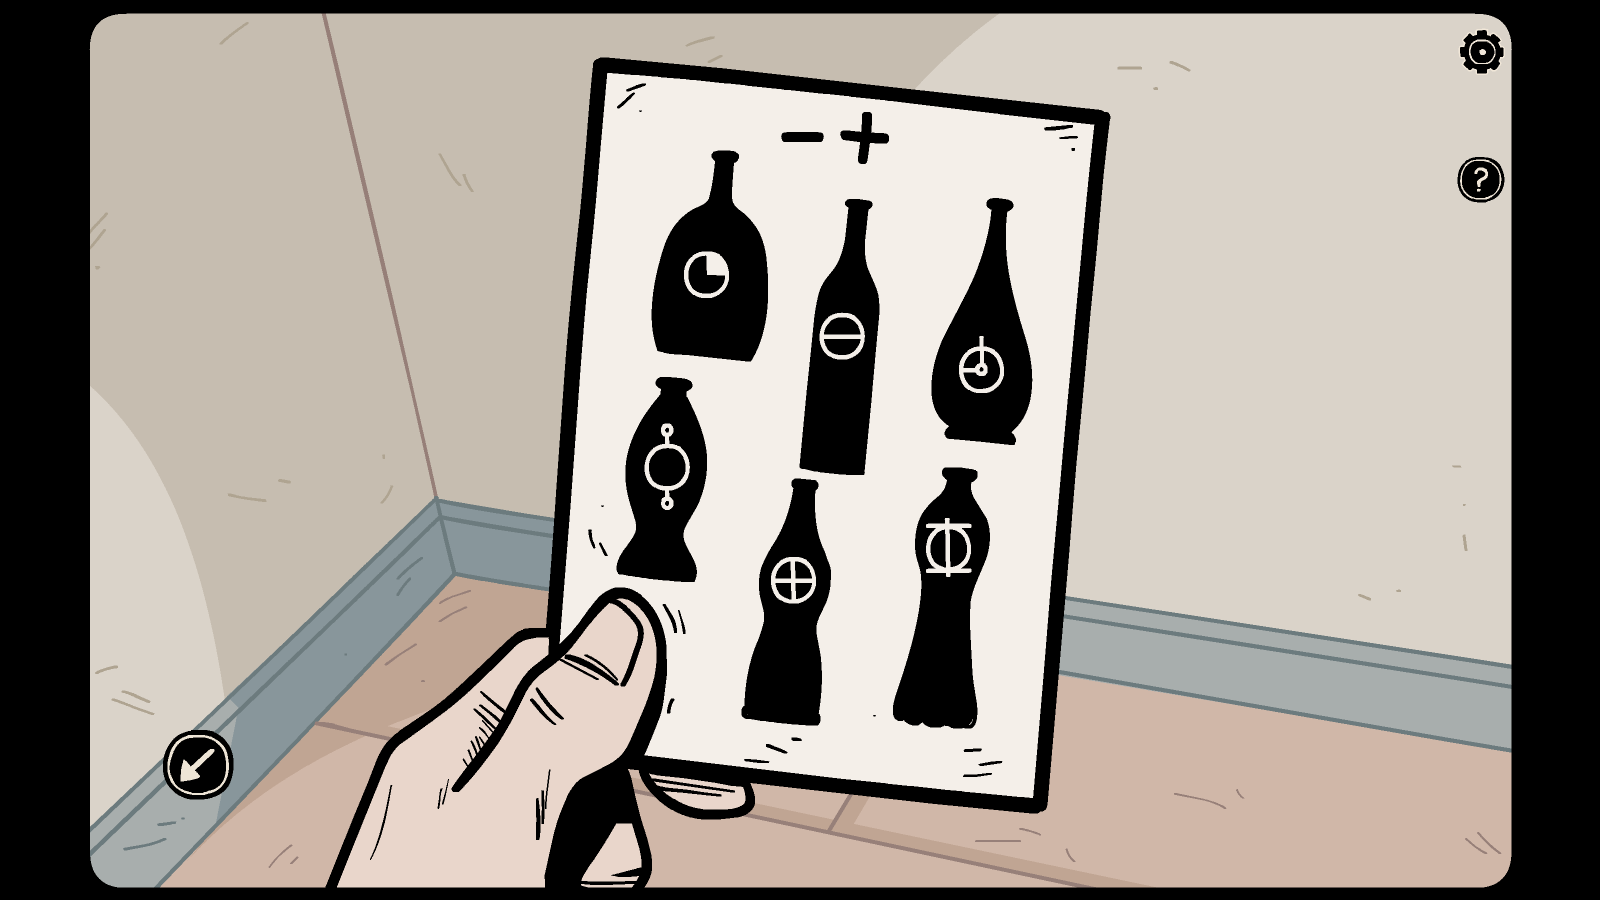
Symbols on glass jars on the piece of paper
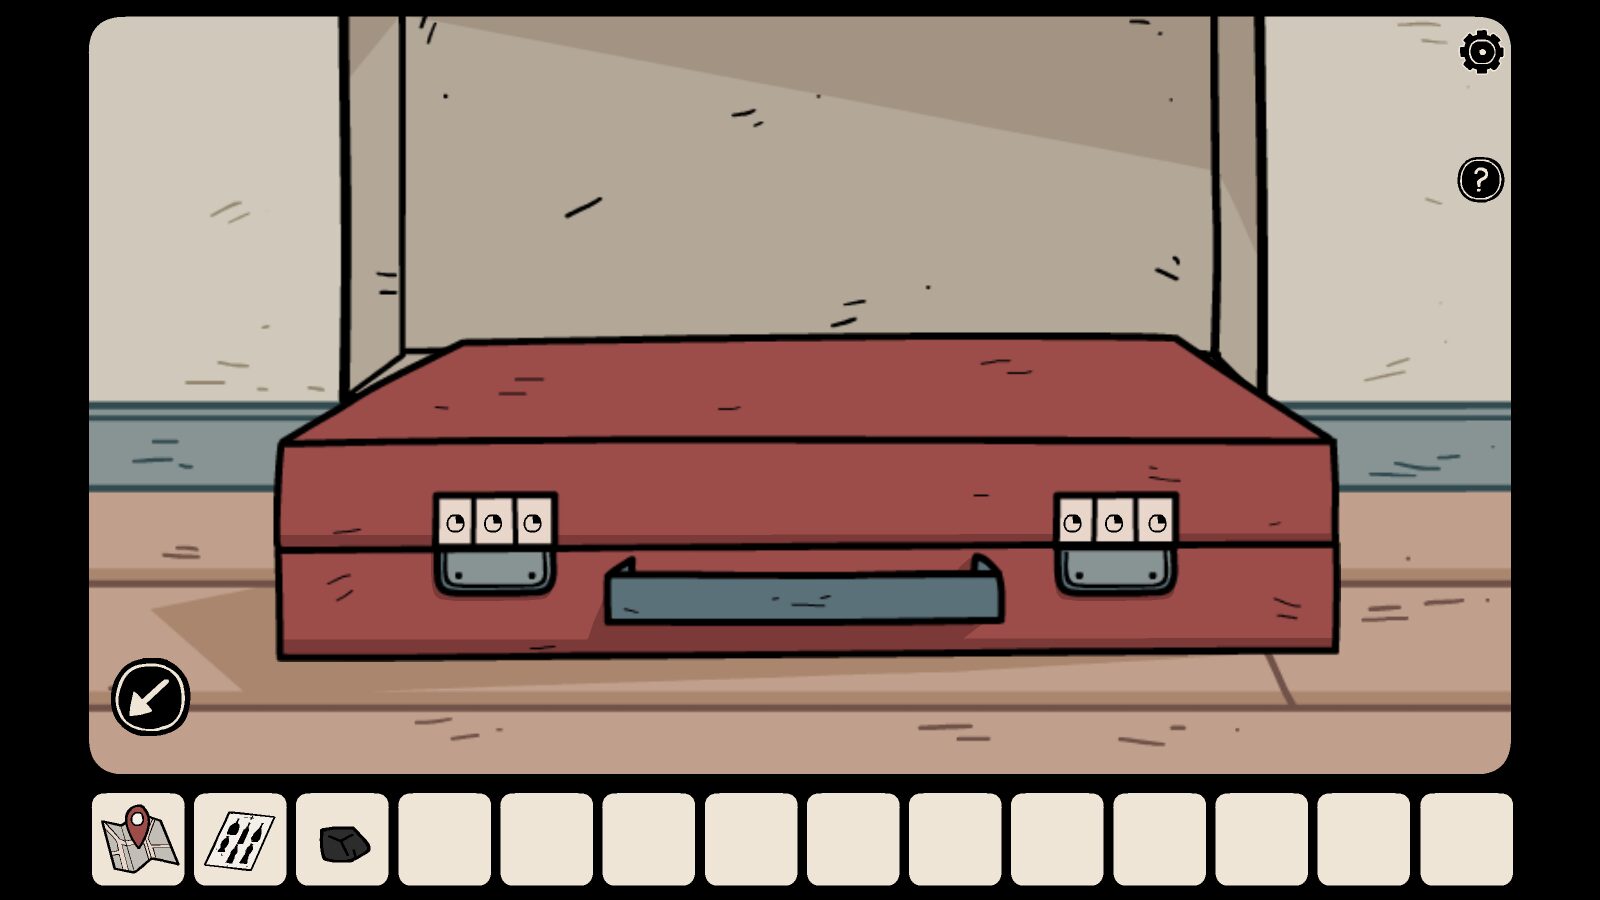
Symbols on Red briefcase combination lock
Refer to the white-colored symbols on the glass bottle drawn on the piece of paper and enter them on the briefcase combination locks as per the arrangement of bottles on the shelf. We have already arranged the bottles from least to most full (ascending order) taking the help of the hint (“-” to “+”) drawn on the piece of paper. We will now need to match the shape/size of the bottles on the shelf – starting from the least to most full, i.e. from left to the right – with the pictures on the piece of paper to get the correct symbol combination for opening the briefcase.
What we have to do is – Note the shape of the first glass bottle (least full) on the shelf, and find its picture on the piece of paper. When we find the bottle’s picture on the paper, note down the symbol on that bottle’s picture and enter the symbol on the left 3-dial combination. We will do the same for the second, third, fourth, fifth, and sixth bottles placed from left to the right on the shelf – find their matching pictures on the piece of paper, note down the symbol on those pics, and enter the same on the briefcase – until we enter the correct combination for the briefcase. See screenshots as an example below:
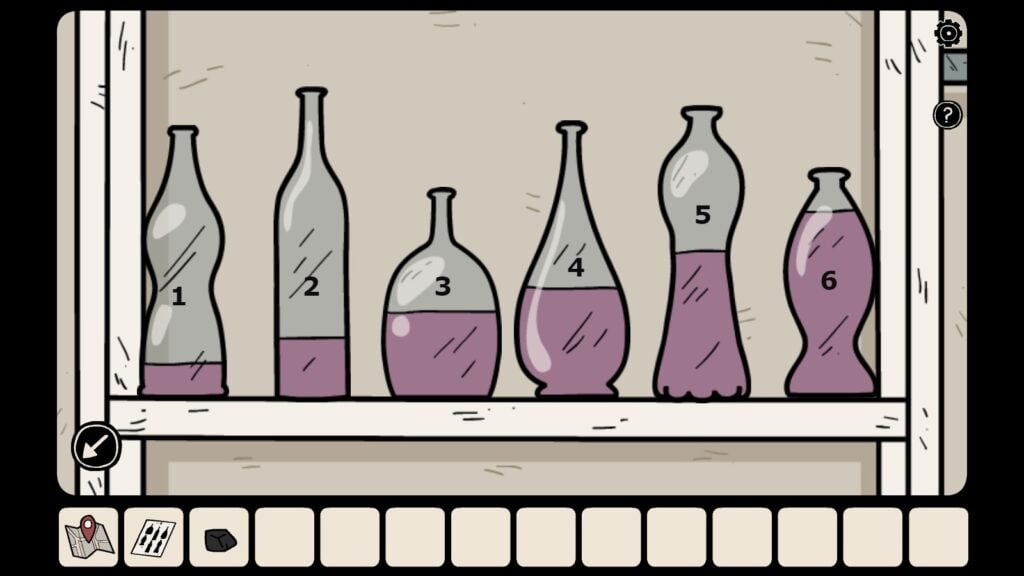
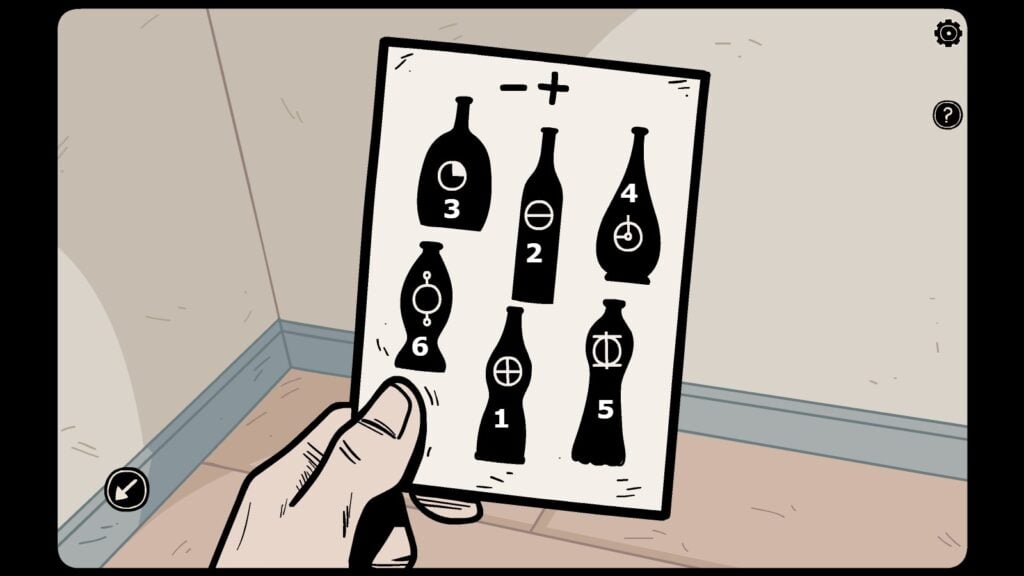
In the first screenshot, bottles on the shelf are numbered from left to right as 1-6 and their pictures on the paper are also numbered 1-6 to make it easy to find the correct order of symbols. All you have to do is find the picture of the shelf’s first bottle, the least full one, on the piece of paper and note down the symbol on that picture. Do the same for the second, third, fourth, fifth, and sixth bottles from the least to the most full – find their picture on the piece of paper and note down the symbols on those pictures, until you find the correct order of symbols. Enter those symbols, starting from the left 3-dial combination for the first three bottles to the right 3-dial combination for the last three bottles to unlock the briefcase.
Note: The astrological symbols drawn on the pictures of bottles on the piece of paper could be random and not the same as the above. Follow the above steps to complete the puzzle.
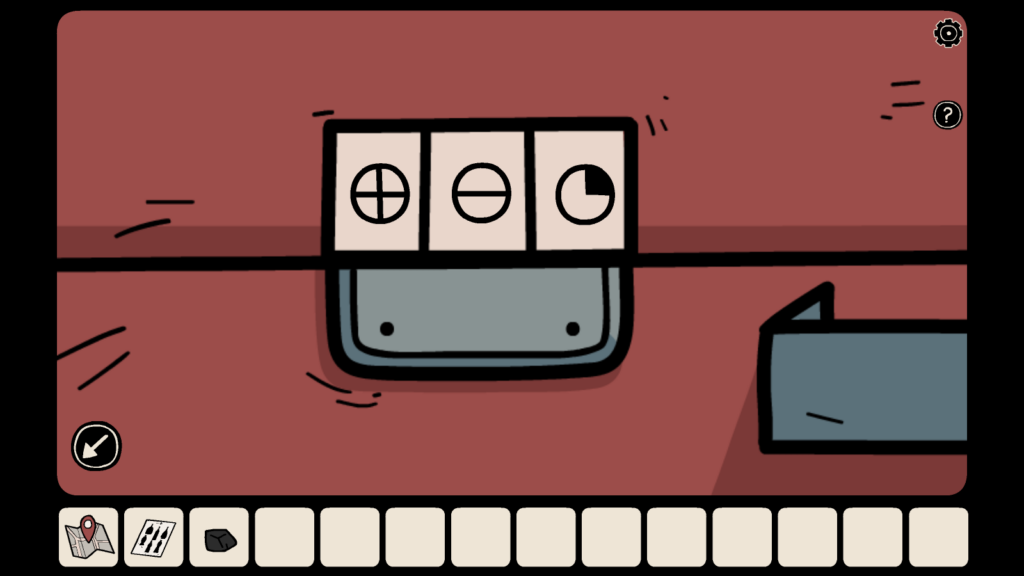
Left
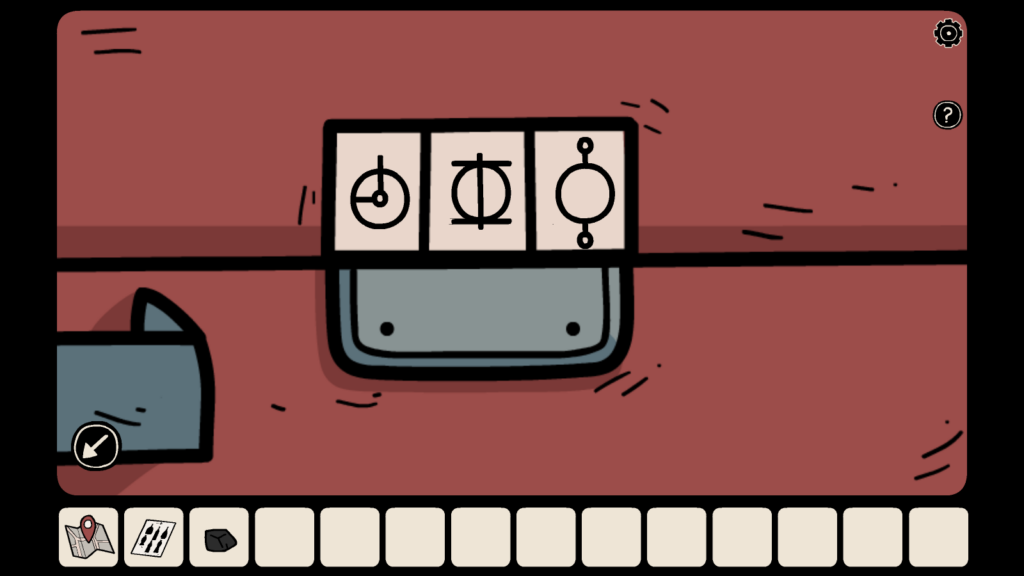
Right
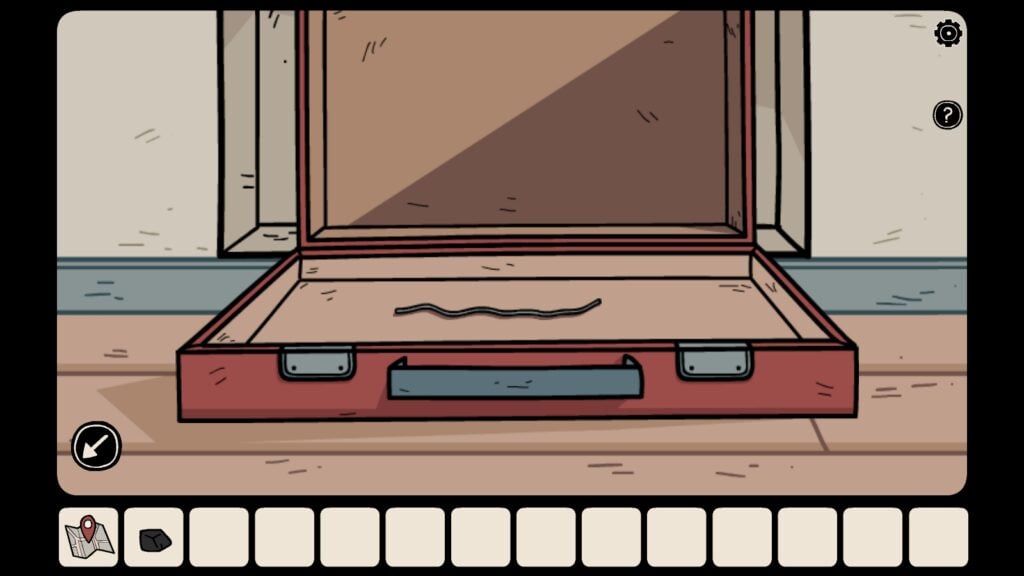
Opened Briefcase
After entering the correct combination of symbols, the briefcase will open with a click. Take the wire from the briefcase.
Tap the drawer on the bottom of the shelf, the second drawer below the blue safe, and take the pair of pliers:
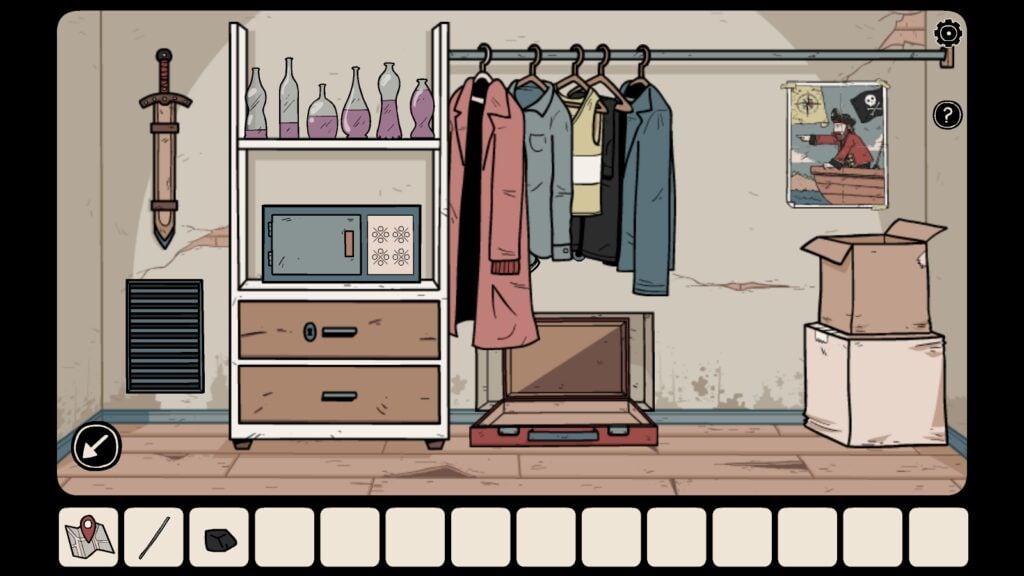
The second drawer, below the blue safe, contains a pair of pliers
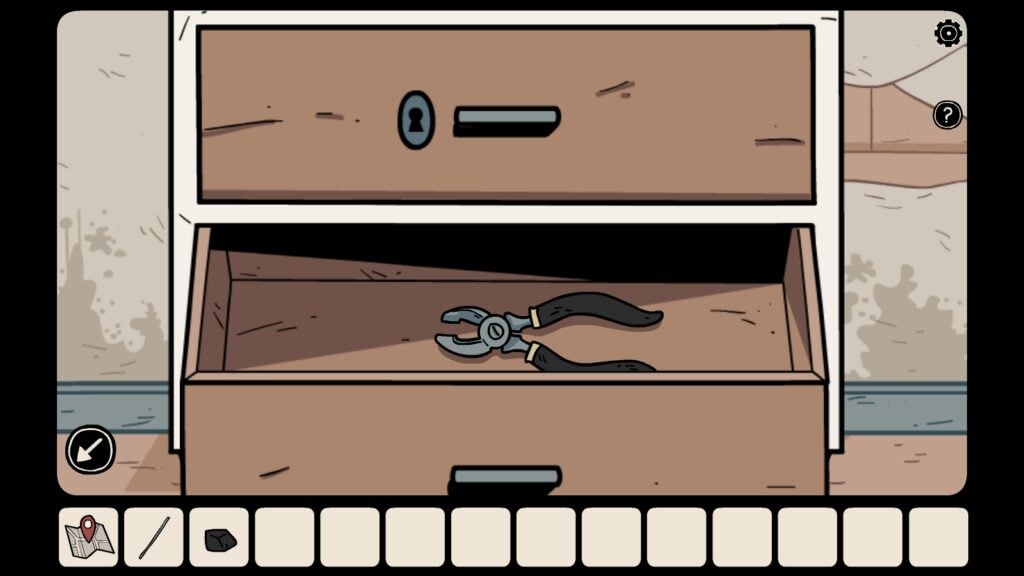
A pair of pliers
On the inventory at the bottom of the screen, tap the pair of pliers and then tap the wire to bend the wire with the plier.
Tap the vent on the extreme left, just below the sword. Next, tap the bent wire and then tap the white key to pick it up.
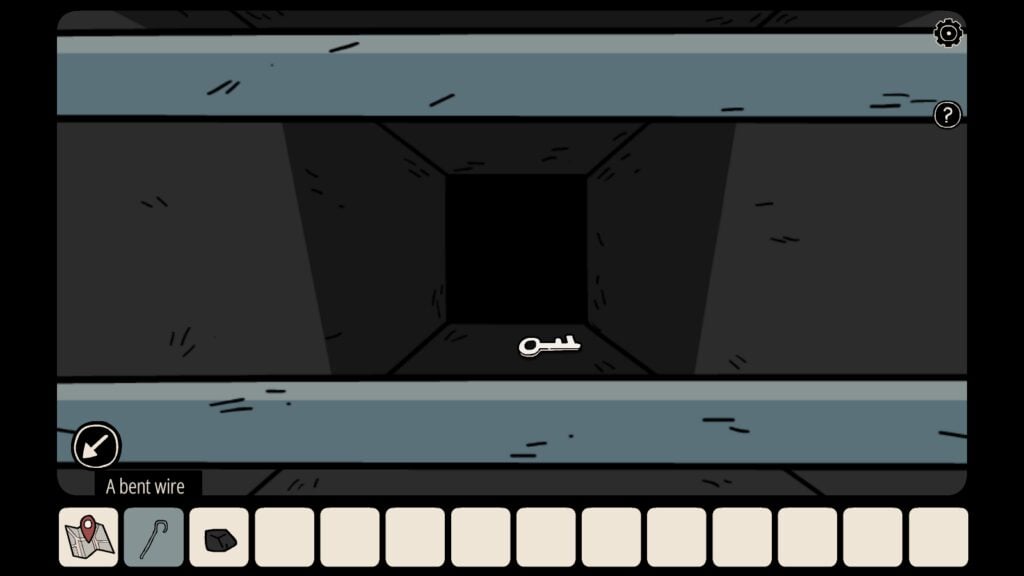
Pick up the white key using the bent wire.
Use the white key to unlock the first drawer at the bottom of the shelf. Take the green book and the flashlight.
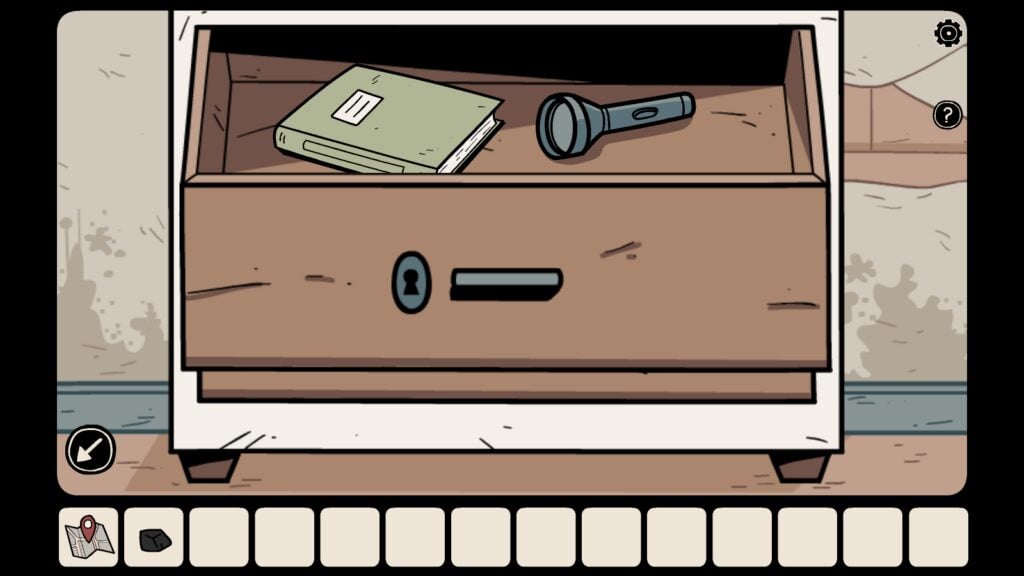
Flip the pages of the green book until you find a set of pictures on the last page:
1. Skull & bones
2. Vent
3. Sword
4. Shoe.
You will find them in the same closet room.
The arrangement of pictures on the green book may be different in your game.
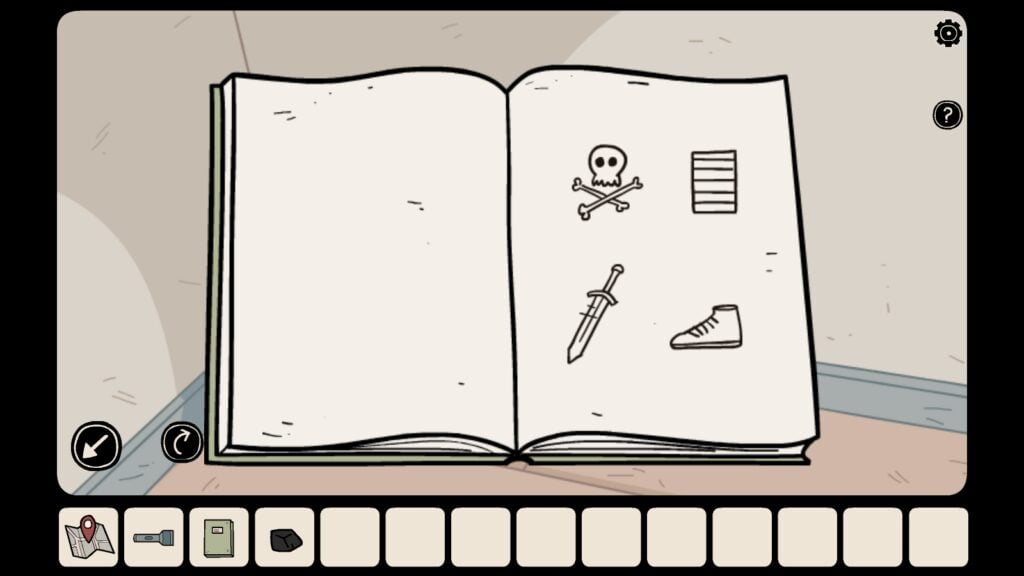
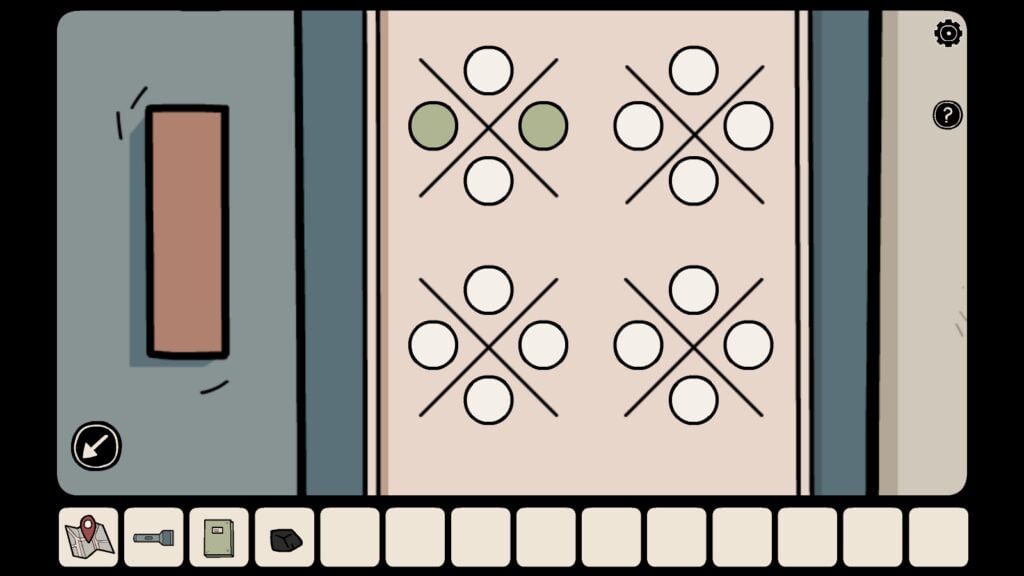
Hints are drawn in the correct order on the green book. Find the location of the hints and then locate the colored circles on each hint. According to the right order as shown in the book, color the naughts on the safe as per the colors of the dots displayed by each hint in the book.
1. The first picture in the green book is of a skull and bones. You will find the same skull on the pirate poster taped on the wall, behind the clothes. Move the clothes and then tap on the poster to get a closer view.
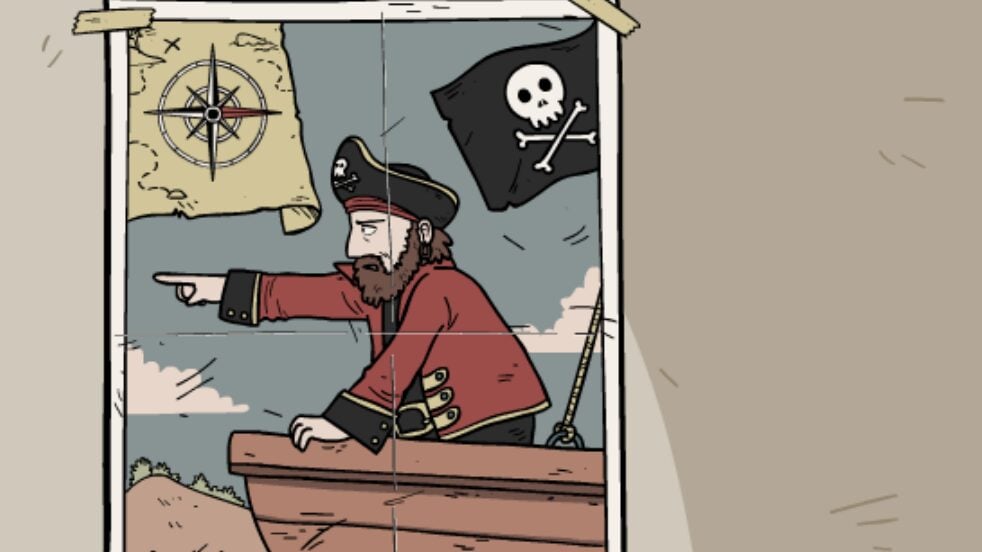
Poster with a skull on the black flag
Color the upper dots as per the position of sockets on the skull, taking a cue from the red cardinal point.
Pay attention to these pictures on the poster:
a. The pirate’s finger, pointing in a certain direction.
b. The red-painted cardinal point on the compass.
These two hints will help you plot the dots on the blue safe (check the right screenshot above). Tap the blue safe on the shelf. The blue safe is below the glass bottles. Tap the naught and crosses pattern on the blue shelf to get a closer view. From the pirate and the cardinal point position, tap the dots to get the first correct pattern combination. (The pirate’s finger and the cardinal point will be randomly generated in each game.)
2. The second picture in the green book is of a vent. It’s the same vent where you found the white key. The vent is below the sheathed sword. Tap the vent and use the flashlight to light it up. Note the black colored dots on the vent pattern and copy the same pattern on the blue safe by tapping the corresponding dots on the second naughts and cross pattern.
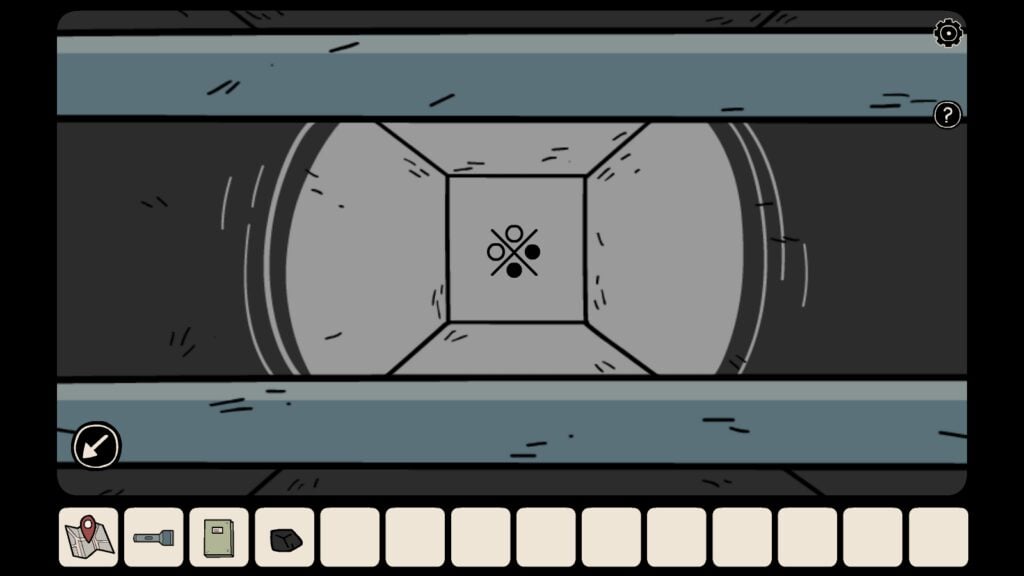
Pattern on the Vent
3. The third picture on the green book is of the sword. Tap the sword to partially unsheathe it. Pay attention to the black dots and replicate the third pattern on the safe.
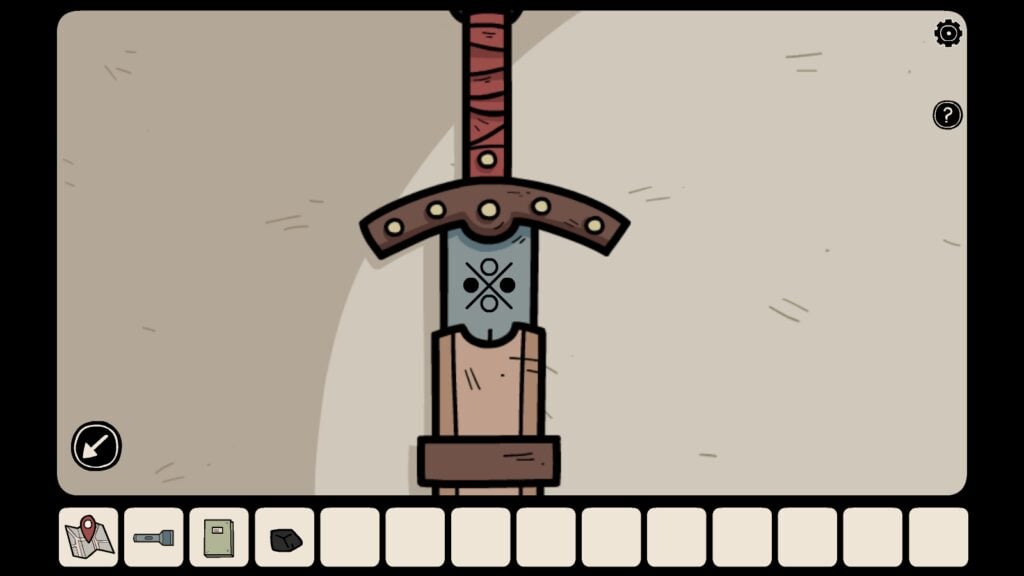
Check the black dots
4. The fourth picture (hint) on the green book is of the shoe. You will find two pairs of shoes hanging from two hooks, just behind the clothes. There are four hooks on the wall and their pattern is similar to that of the naught and cross pattern on the safe. Tap the clothes to move them away from the shoes and only then you can get a clear view of the shoes and hooks. Pay attention to the hooks on which the shoes are hung on and tap the corresponding dots on the fourth naught and cross pattern of the safe.
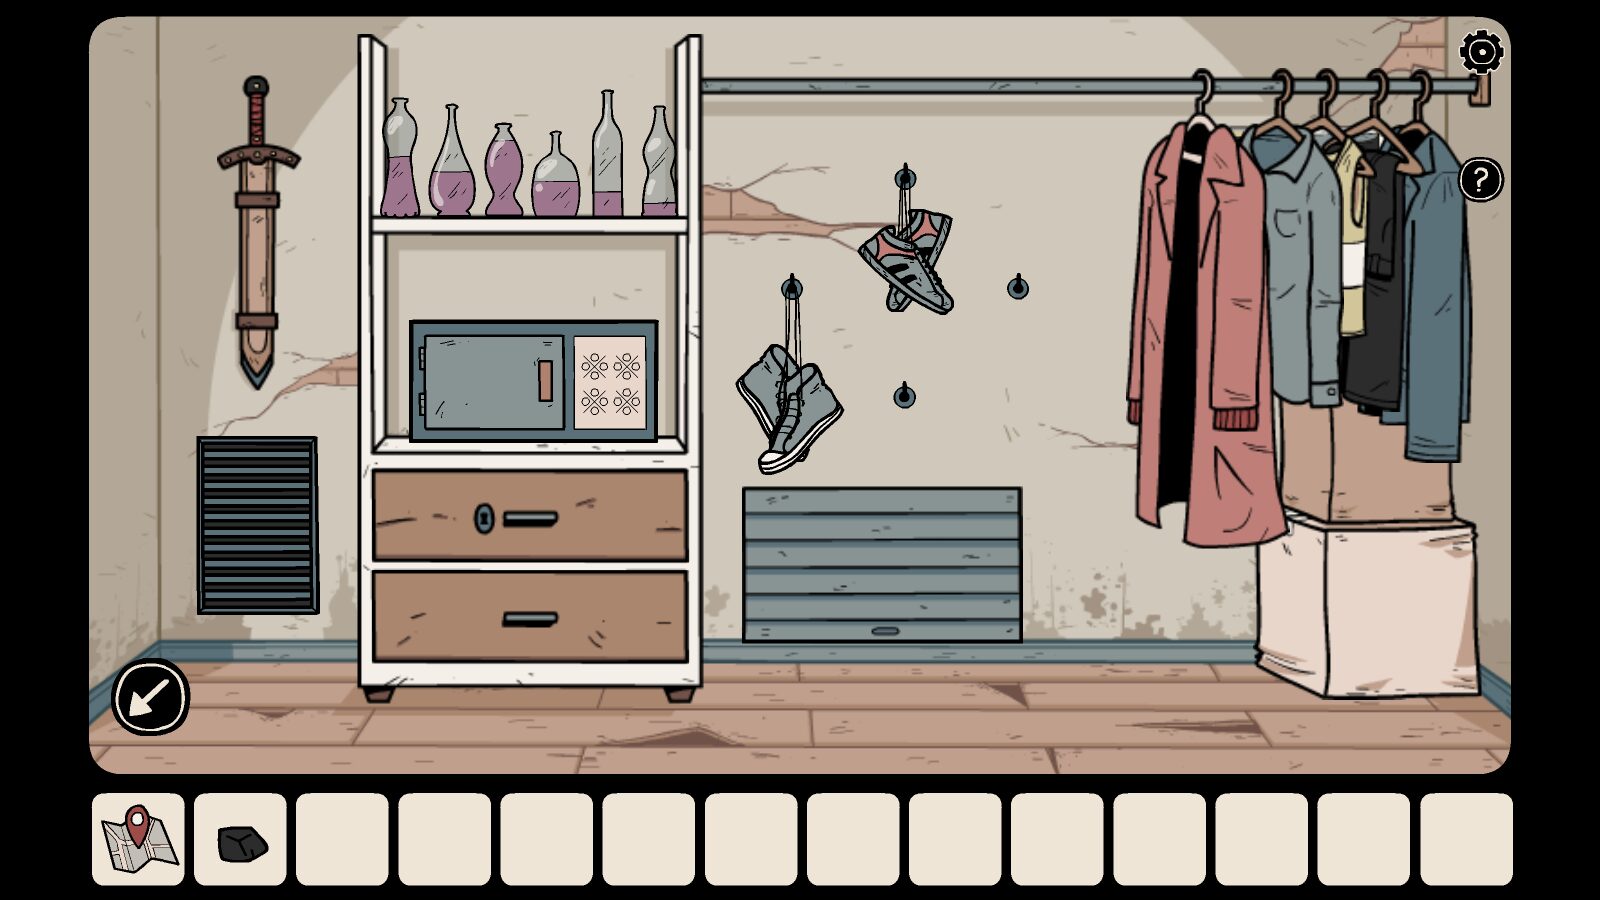
Pay attention to the hooks where the pairs of shoes are hung on
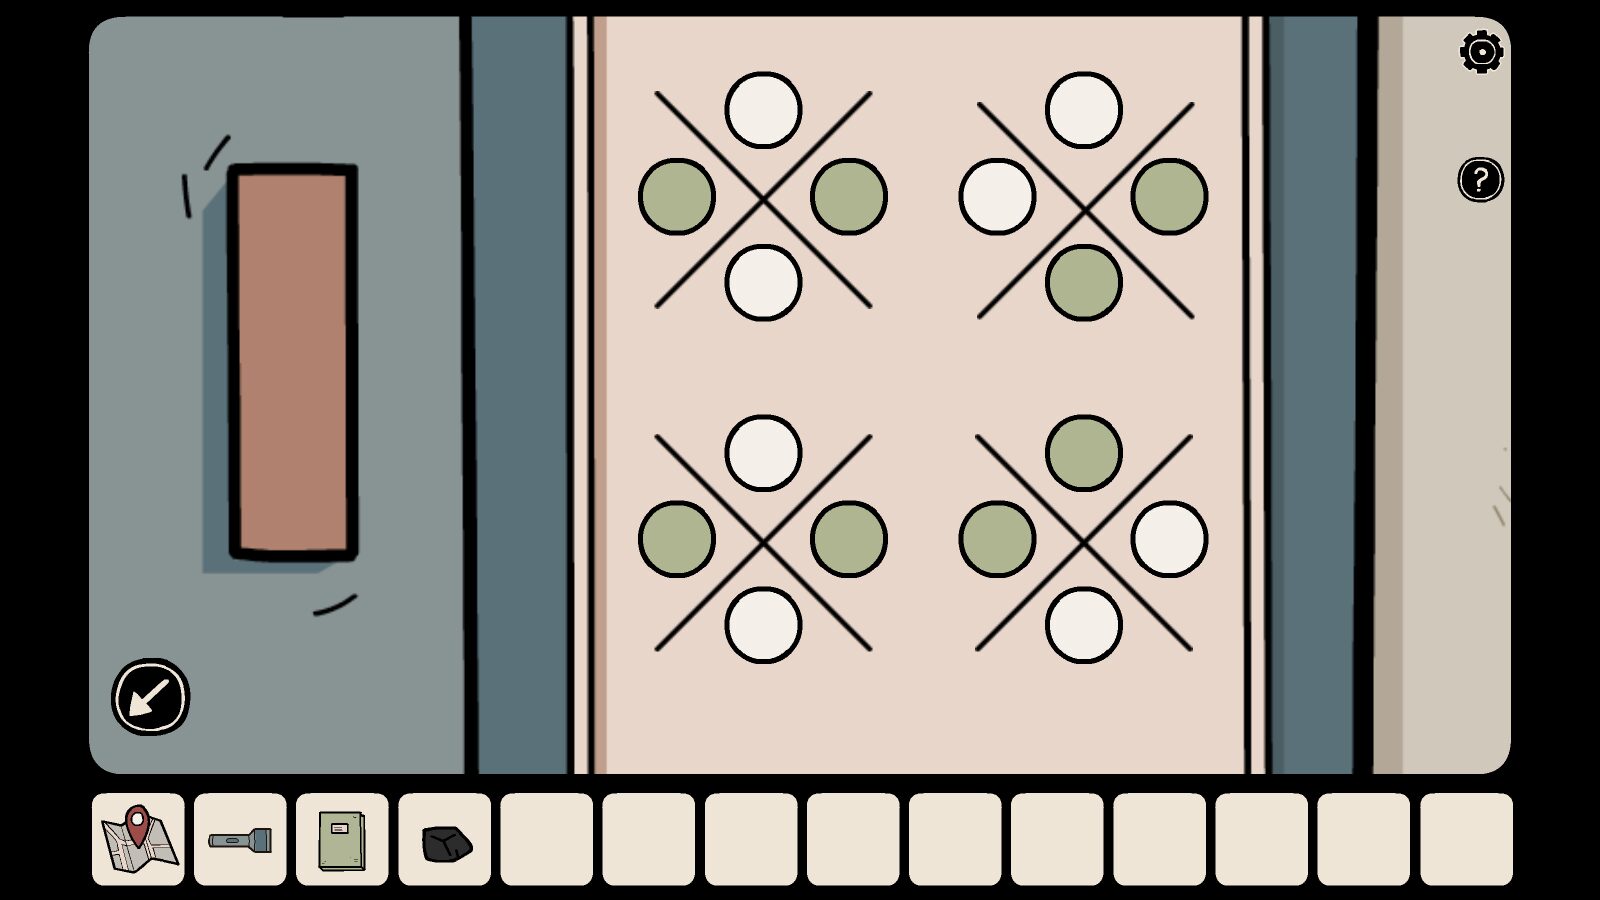
Replicate the same on the fourth pattern
The safe will open. Inside, you will find a floppy disc and a half-broken medallion. Take them.
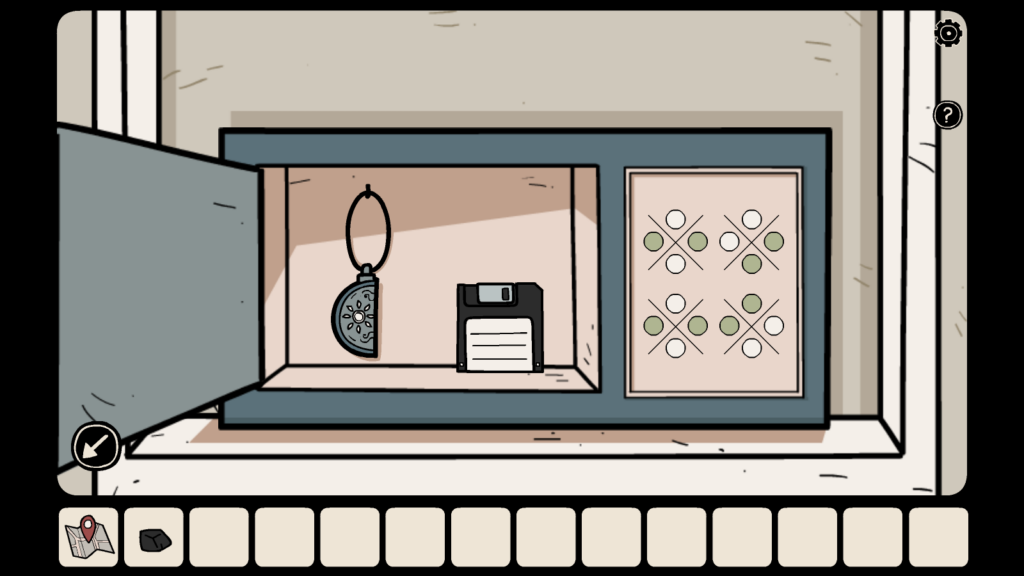
From the map, go back to the police station. Tap the computer. Insert the floppy disc into the disc drive of the computer.
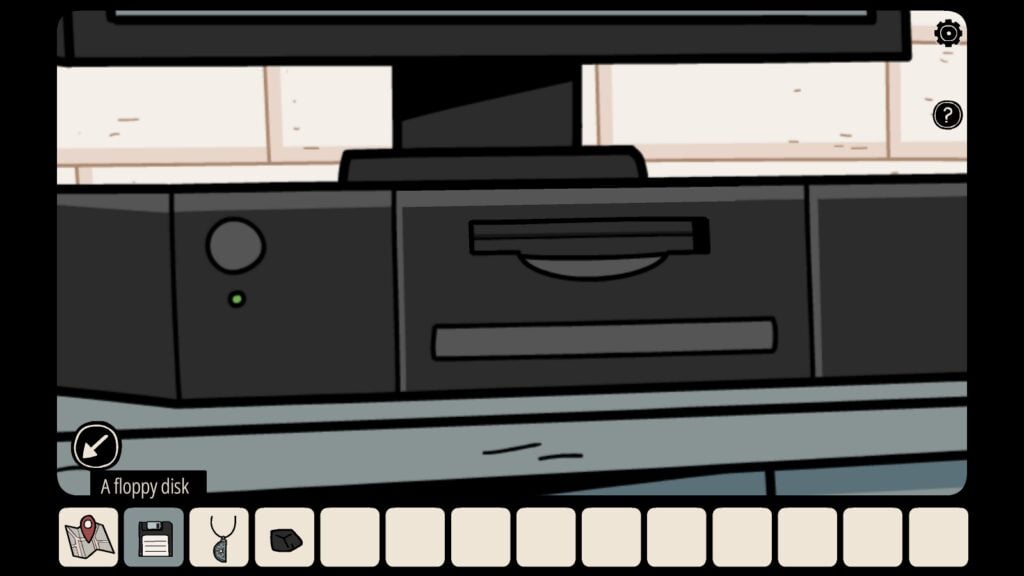
On the monitor, you will see two images and two text documents. Tap on each image and .txt file to examine them. A new character Anna will be revealed in this scene. The detective will note down her address on the map. Tap the map to go to Anna’s House.
Interrogating Anna
When you are close to Anna’s house, tap the door and ring the bell. She will open the door. The private eye will try to talk to her but she will refuse. You will need to do something to ask questions to Anna.
Tap the arrow on the bottom-left corner of the screen to exit the front door:
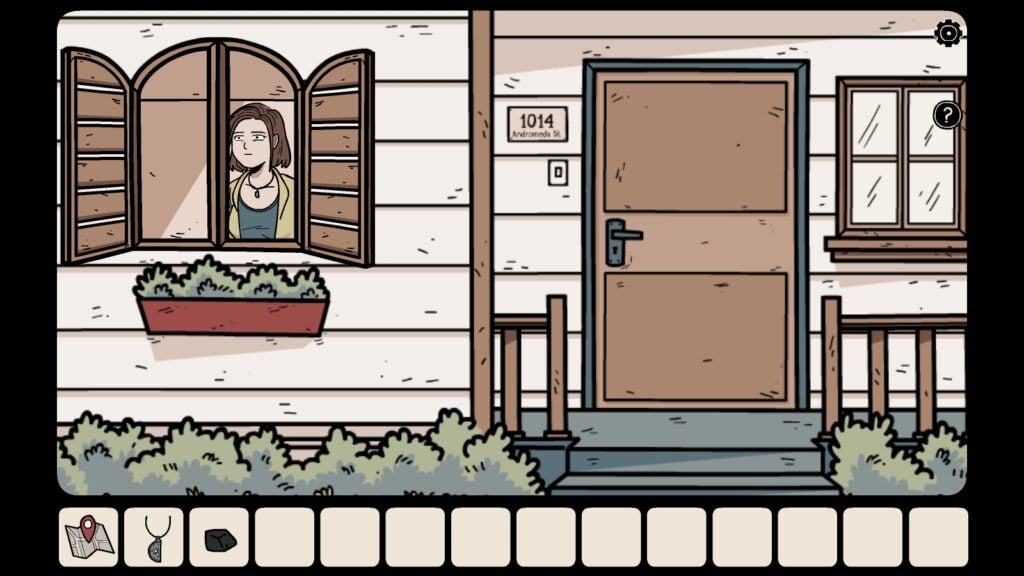
As you move away from her house, you will see Anna opening the window:
Tap on the window and then tap on the half-broken medallion. Tap on Anna to give it to her.
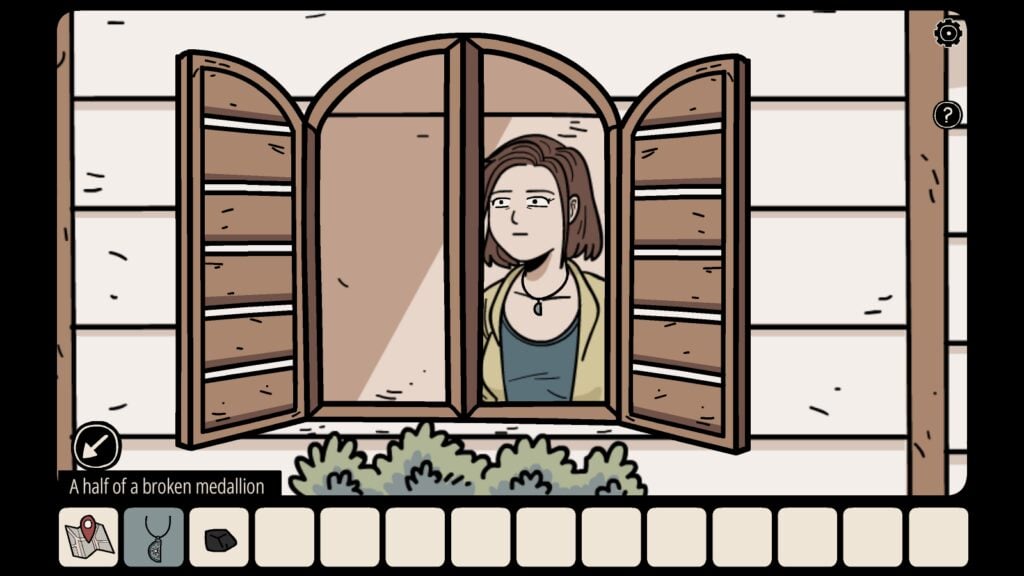
She will let you enter her house and is ready to answer all your questions.
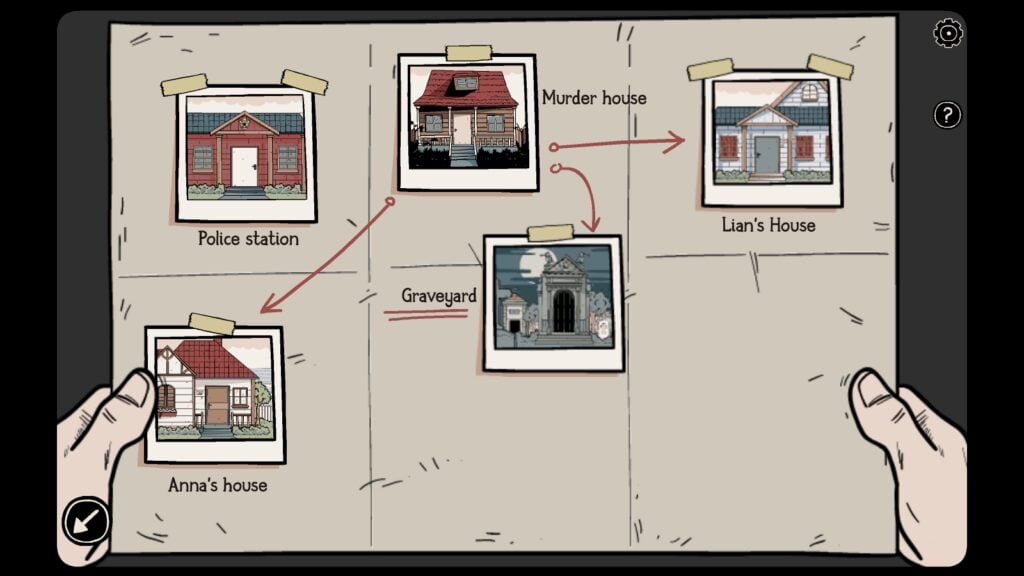
Ask all questions, but when you ask “Who could be chasing them?”, she will hand over a picture to you. It’s a picture of a mausoleum drawn by Mia. The mausoleum is in the same graveyard/cemetery where Mia, Dan, Lian, and Anna went to hang out. The detective will note down the location of the graveyard on the map.
The Graveyard Walkthrough
Once you get the location of the cemetery on your in-game map, tap its picture to reach this location. You are very close to finding the culprit in The Ghost Case and the graveyard holds a very crucial clue to solving this 20-year-old case.
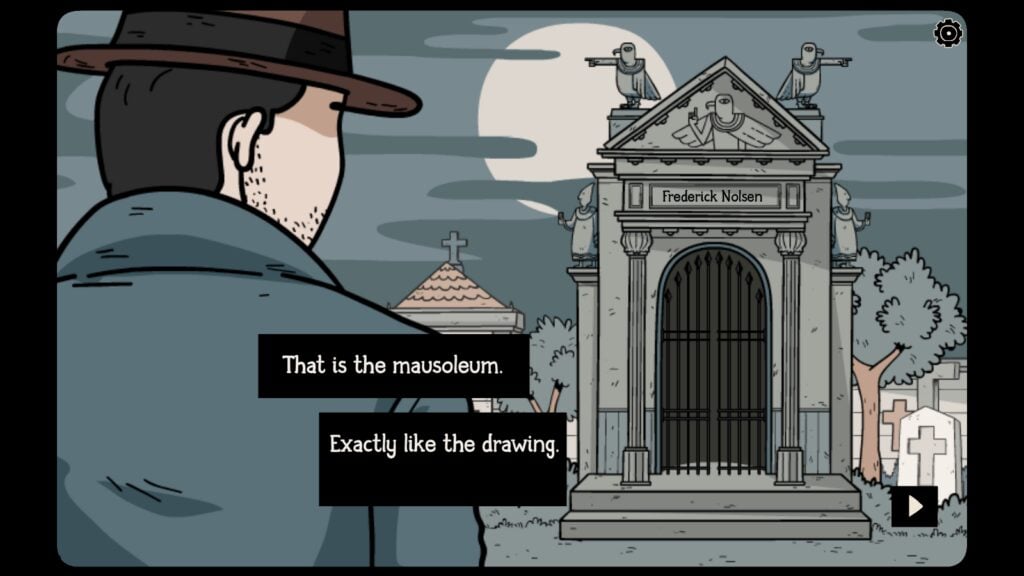
You will find the mausoleum in the graveyard. It’s ditto like the one drawn by Mia. There’s also a name inscribed on the top of the entrance: “Frederick Nolsen”. Who could he be?
Step inside the mausoleum to solve more puzzles.
The Tomb Puzzle
In Ghost Case, you will have to solve the tomb puzzle to enter a range of secret chambers, including the one where Frederick Nolsen is performing an evil ritual. Here’s a step-by-step guide to solve it.
Take the matchbox kept on the right wall and the lantern on the left wall (as shown in the screenshot below). On the inventory at the bottom of the screen, tap the matchbox and then tap the lantern to light it up.
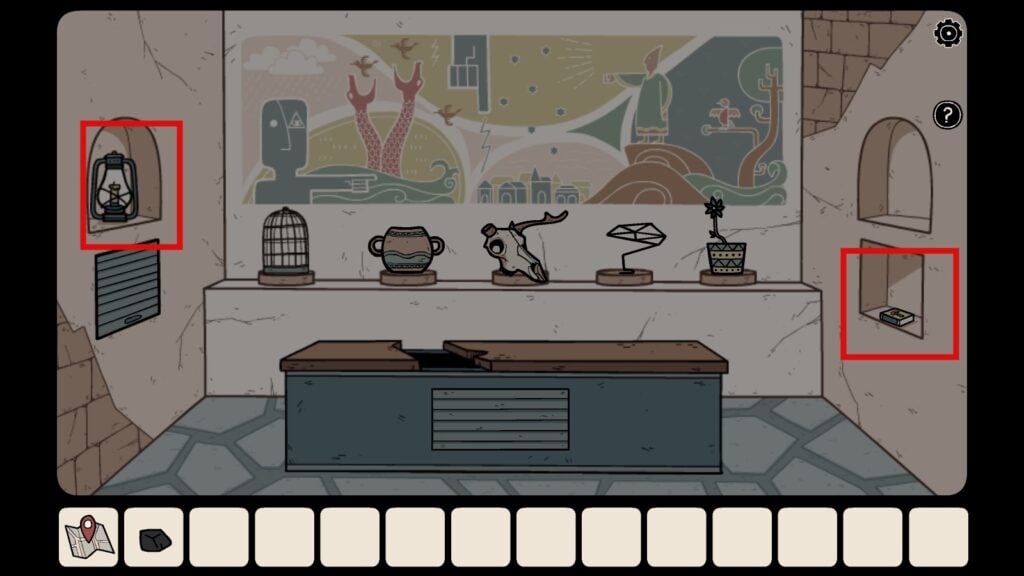
Now tap the lantern and place it on the tomb/platform kept in the middle of the room. You will see seven objects kept in the background casting shadows on the wall. Tap on each object and arrange them in such a way that their shadows blend with the five paintings on the wall.
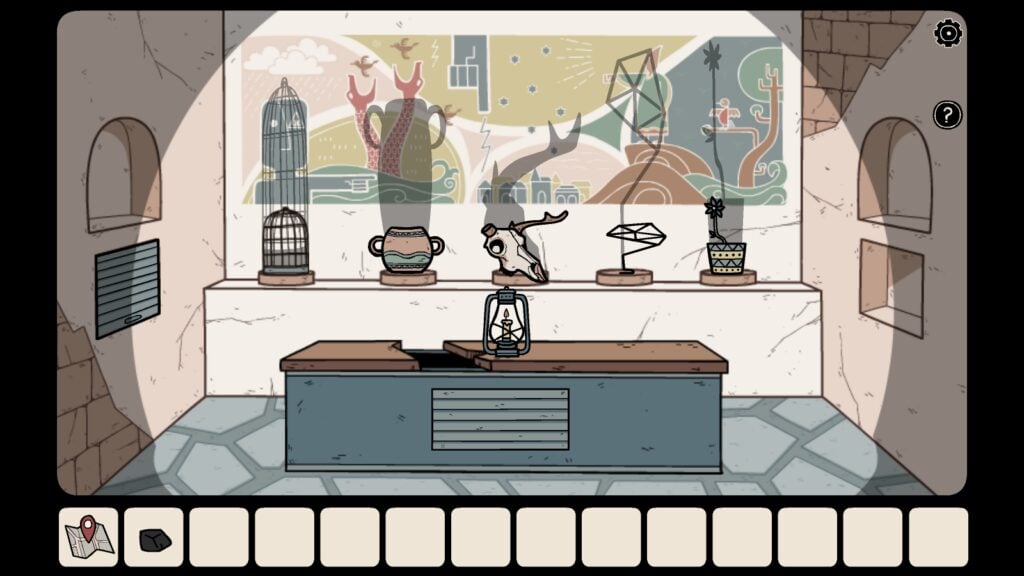
This is what the completed puzzle looks like (see the below screenshot). After arranging the objects, their shadows blend with the painting on the walls, adding more meaning to the painting. After completing this puzzle, a new puzzle will be revealed in the tomb, just below the lantern. You will also find a ring on the left wall. We have marked them with red squares in the below screenshot:
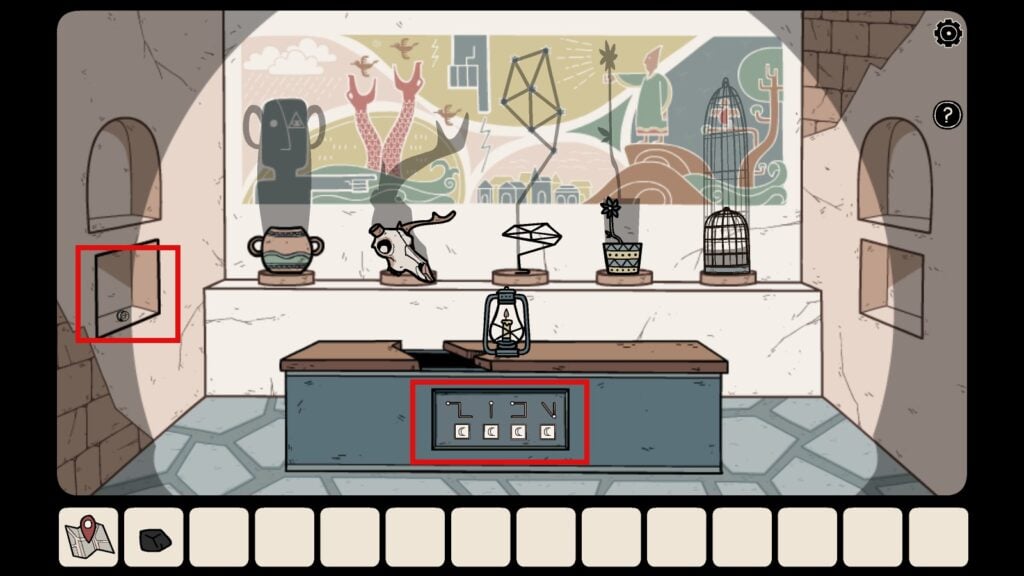
Tap to take the ring from the left wall. The detective will pick it up and observe it carefully. The ring has a strange insignia. He will have to do more research on this ring.
Go back to the police station. The detective finds more information about Fredrick Nolsen on his computer. He then remembers the ring and the strange symbol on it. He knows where to find information about the ring and quickly scribbles something on the map. A picture of the store appears on the map. Tap the store on the map to get more information about the ring.
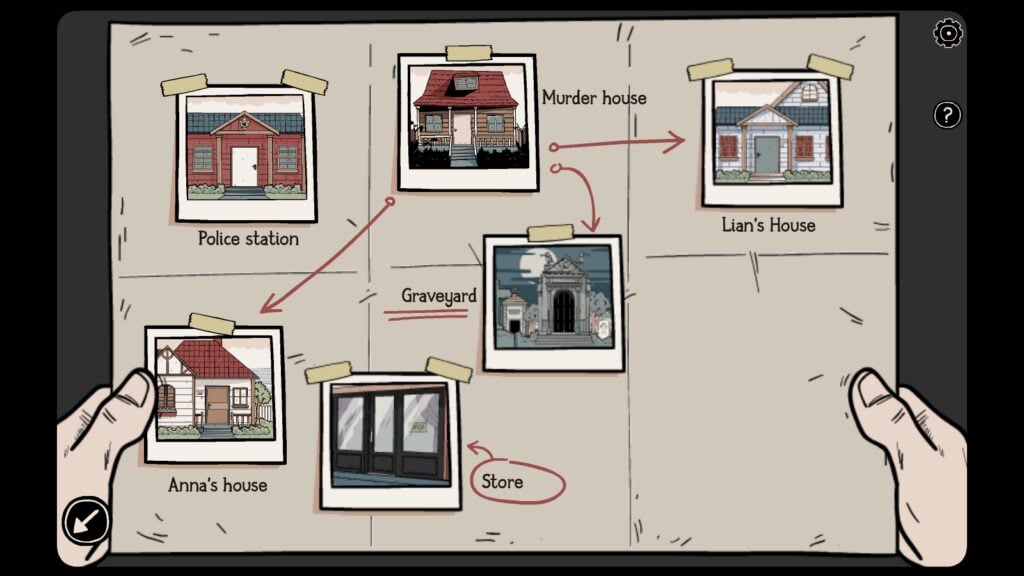
Detective Ren Larsen talks to the store owner named “Laia” and asks her about the ring and its symbol. He also asks additional questions pertaining to the Shamalu magic and its rituals and whether it can be undone. Tap on each question to get to the details of this ritual and the ring.
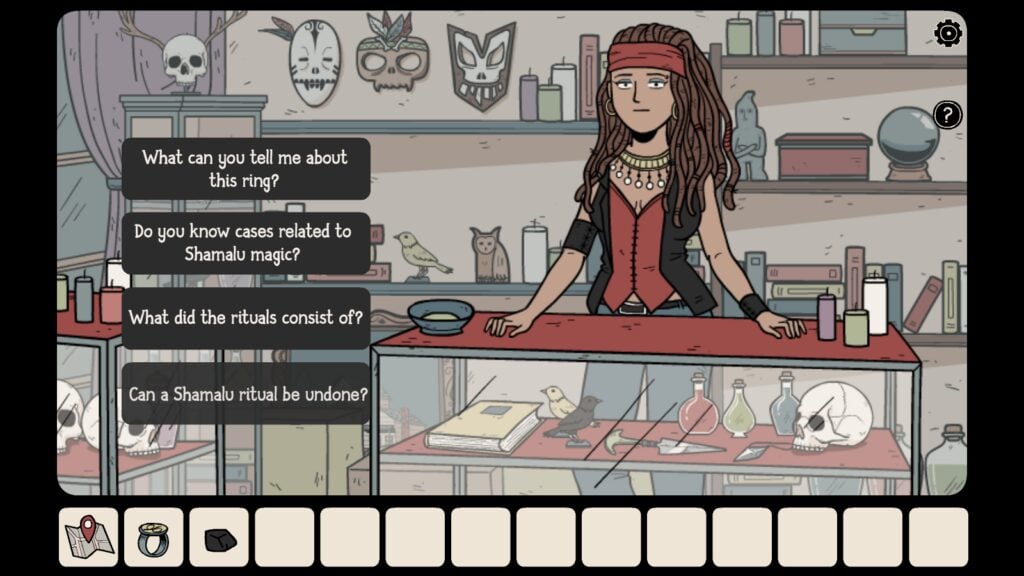
Asking the question “Can a Shamalu Ritual be Undone” will allow Laia to hand over a ritual doll. She will also instruct how to draw the ring symbol with charcoal. It should be drawn inverted. Make sure you pick up the doll to undo the Shamalu Ritual at the end of the game.
Ask this question – “Do you know cases related to Shamalu magic” – to know more about Lenny Auris, a security guard at the cemetery who is admitted to a madhouse due to shock as he witnessed a traumatic event the night before his duty at the graveyard. The detective will note down the location of the asylum on the map.
A new location, “Mental Hospital” will be drawn on the map. Tap to go to the mental asylum to meet Lenny Auris.
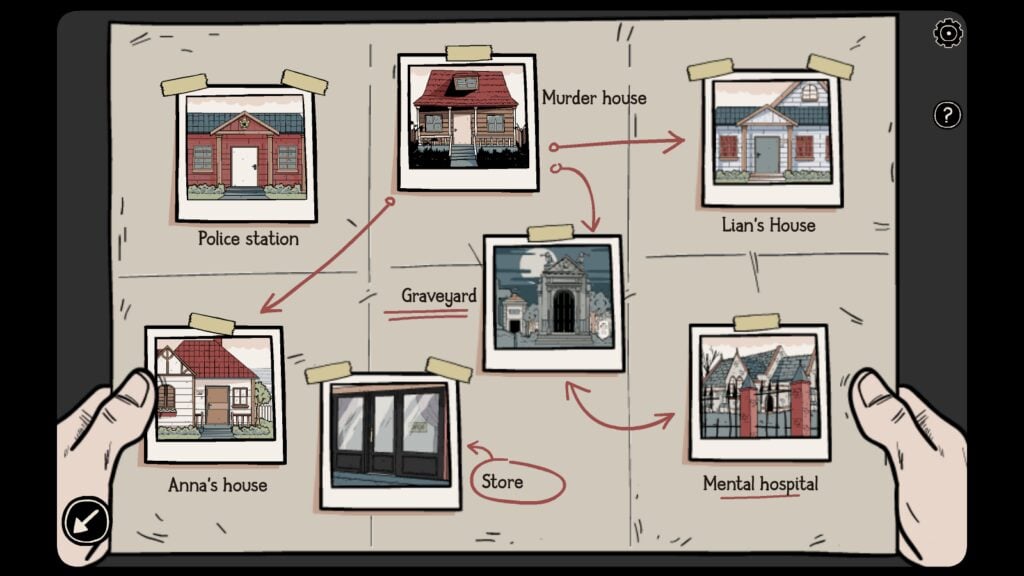
The Mental Hospital Walkthrough
Lenny Auris’s ward in the mental hospital will provide crucial hints to solve the tomb puzzle in the Ghost Case.
In the mental asylum, ask questions about Lenny Auris to get additional information about him. When you ask “Can I see him and talk to him”, the hospital staff member will escort you to his cell.
Inside Lenny’s ward, you will see scary posters on the wall and the same strange insignia scribbled multiple times on the wall. Tap the wall to get a closer look. Pay attention to these posters on the wall (marked by purple circles):

Pay attention to the posters (marked by purple circles) on the wall. They are hints for the graveyard tomb puzzle
Tap Lenny Auris and he will present a riddle. The riddle will be randomly generated in each new game.
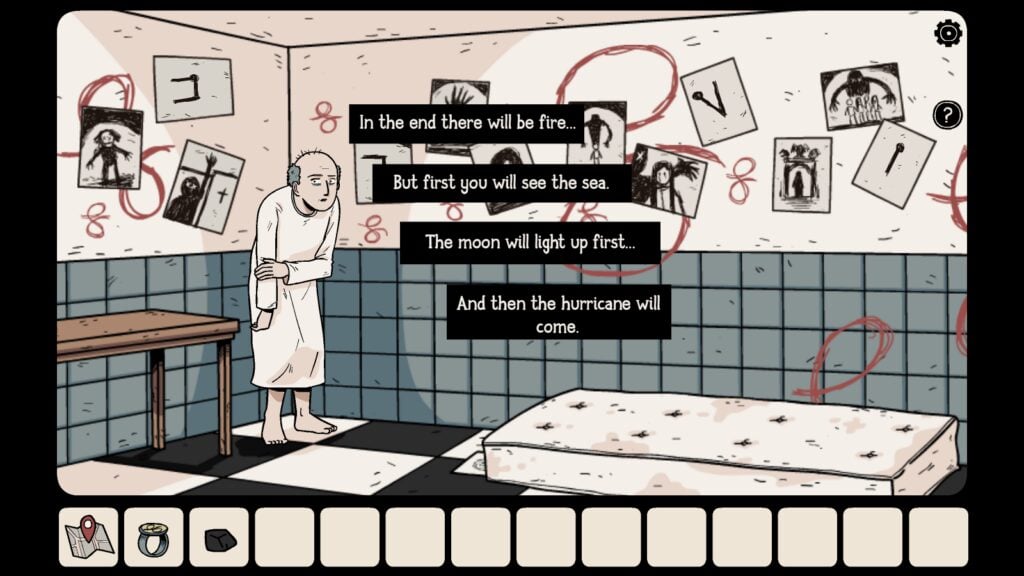
Lenny’s riddle and the posters on the wall (those that are marked by purple circles in the screenshot) hint at solving the tomb puzzle in the graveyard.
Go back to the graveyard > mausoleum. You will get a call from the police station. Lian and Anna have disappeared and Frederick could be behind these kidnappings. You will have to stop him before he succeeds in his dangerous ritual.
Inside the mausoleum, tap the puzzle engraved in the tomb to get a closer look at it. There are two puzzles – In the top one, you will have to slide the dots. In the bottom puzzle, you will have to select the correct pictures to open the tomb.
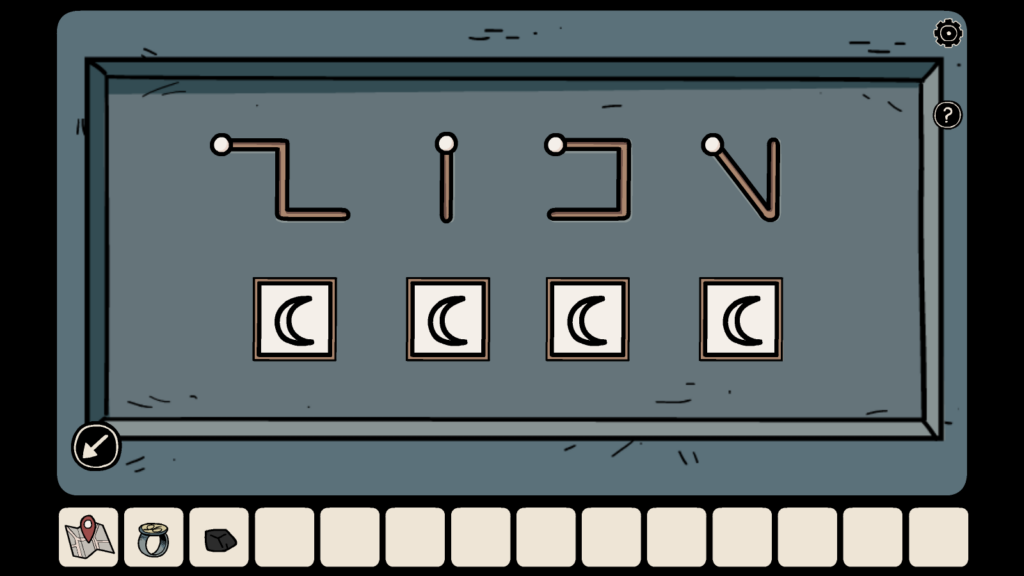
- Top Puzzle: Slide the dots on the four different engravings to replicate the ones marked by purple circles on the asylum wall. Make sure you find the right order of patterns on the wall posters before solving the puzzle. The position of the dots on the posters on the wall may be different in your game.
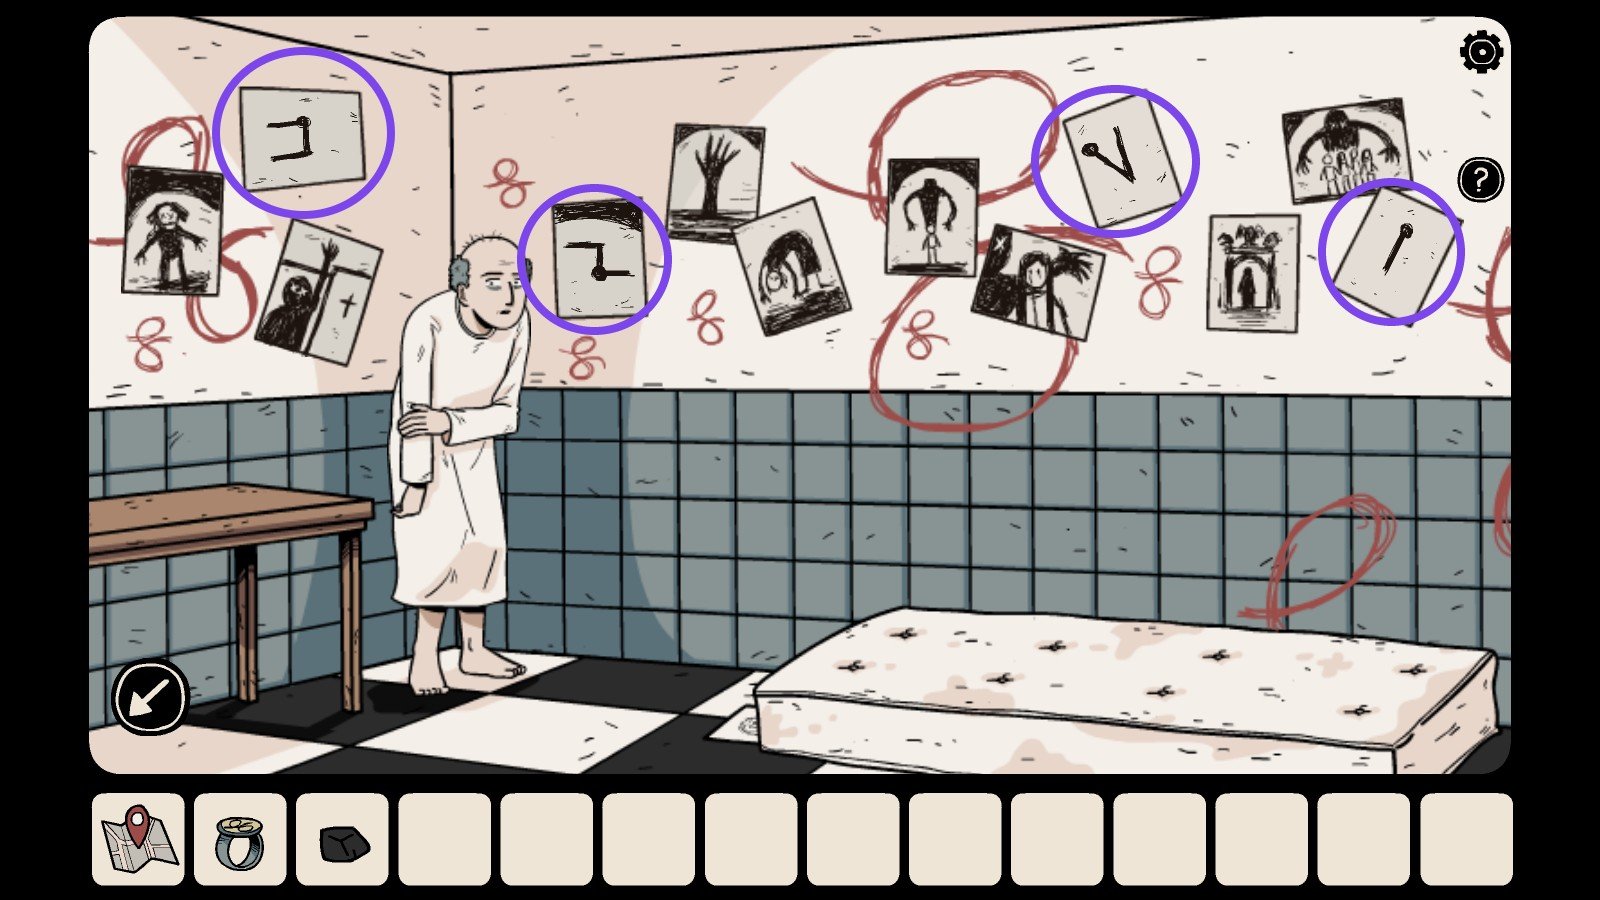
Solution for the top puzzle marked by purple circles
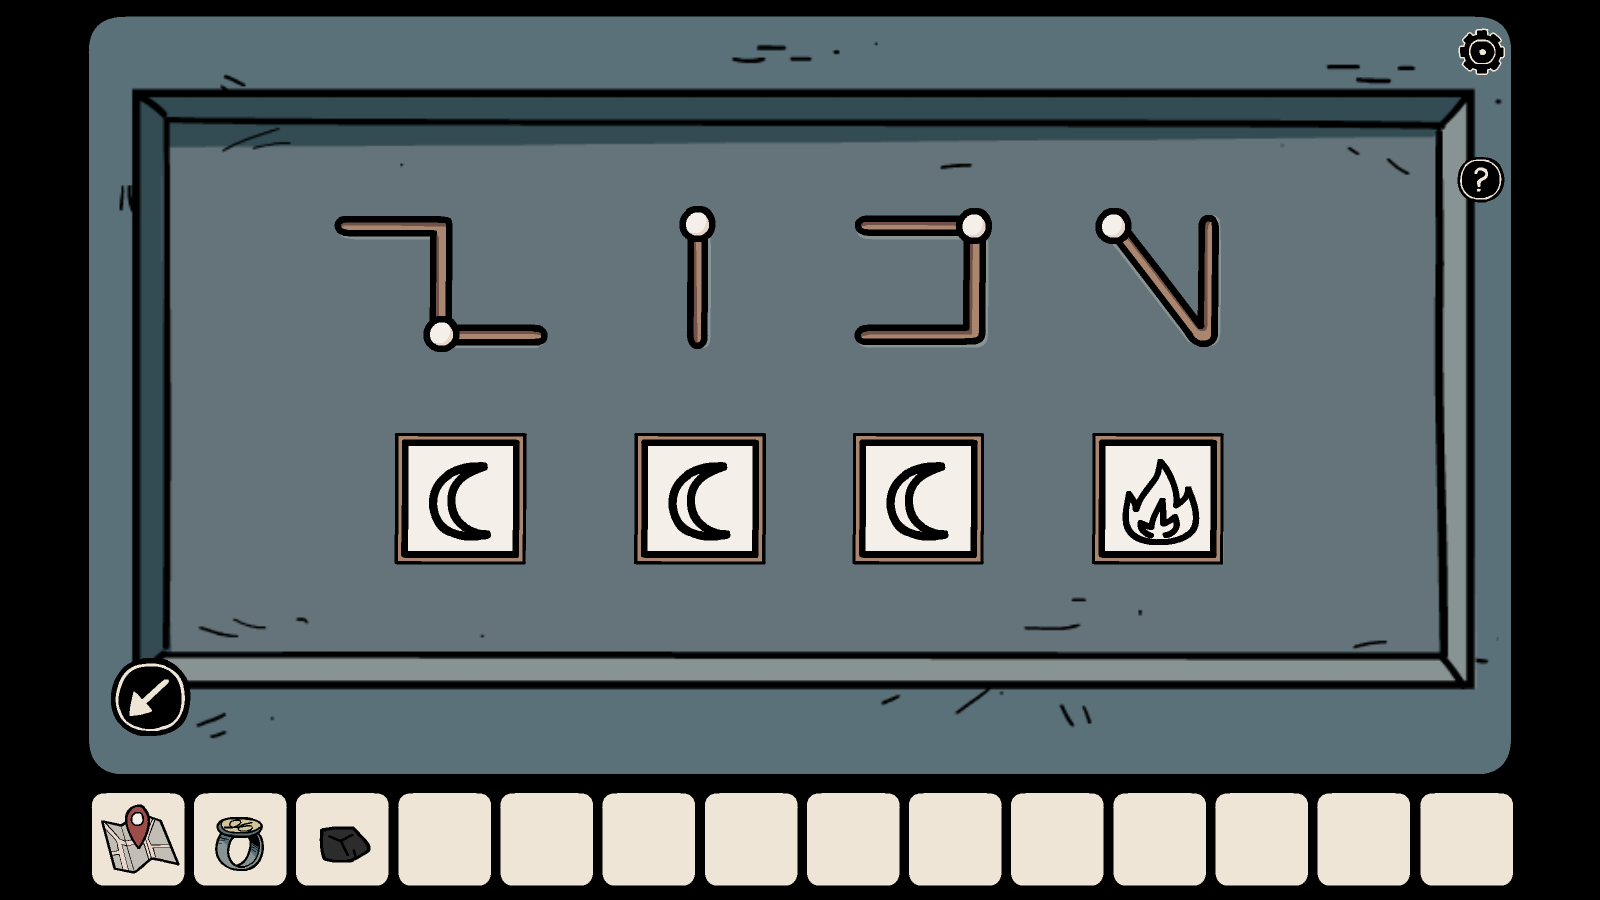
Top Puzzle
2. Lenny’s riddle will be used to solve the bottom puzzle (four symbols). Pay attention to words such as the moon, fire, hurricane, sea, etc, and note down their order (“end”, “first” etc.) as mentioned in the riddle. The riddle will be randomly generated in each new game, so your riddle will be different from ours.
For the riddle in our game, this was the solution:
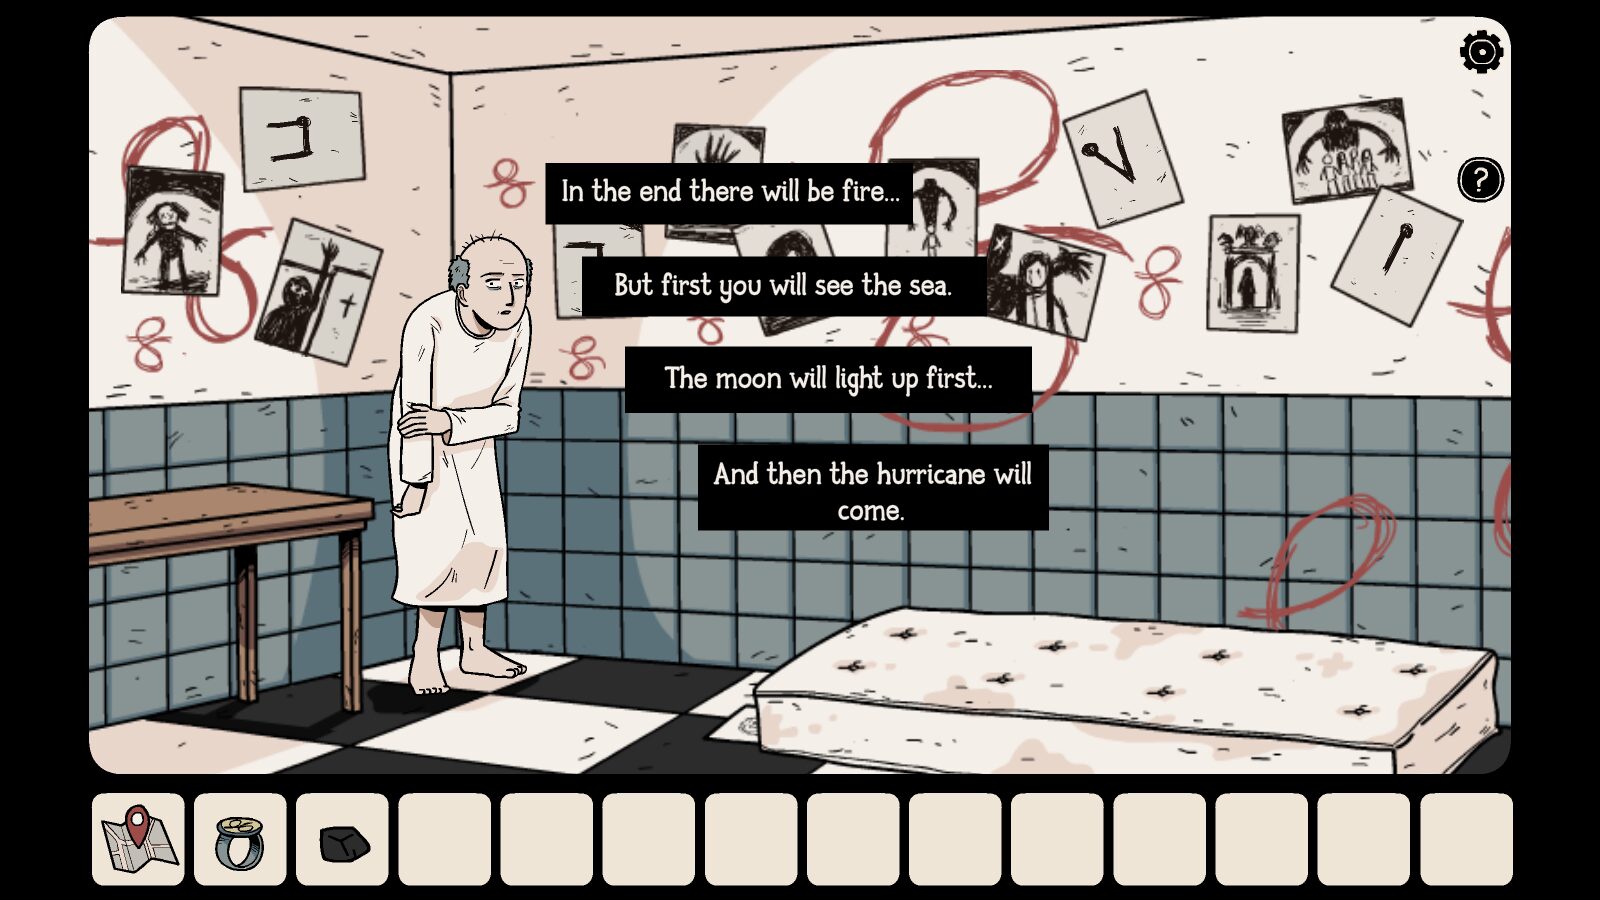
Lenny’s Riddle
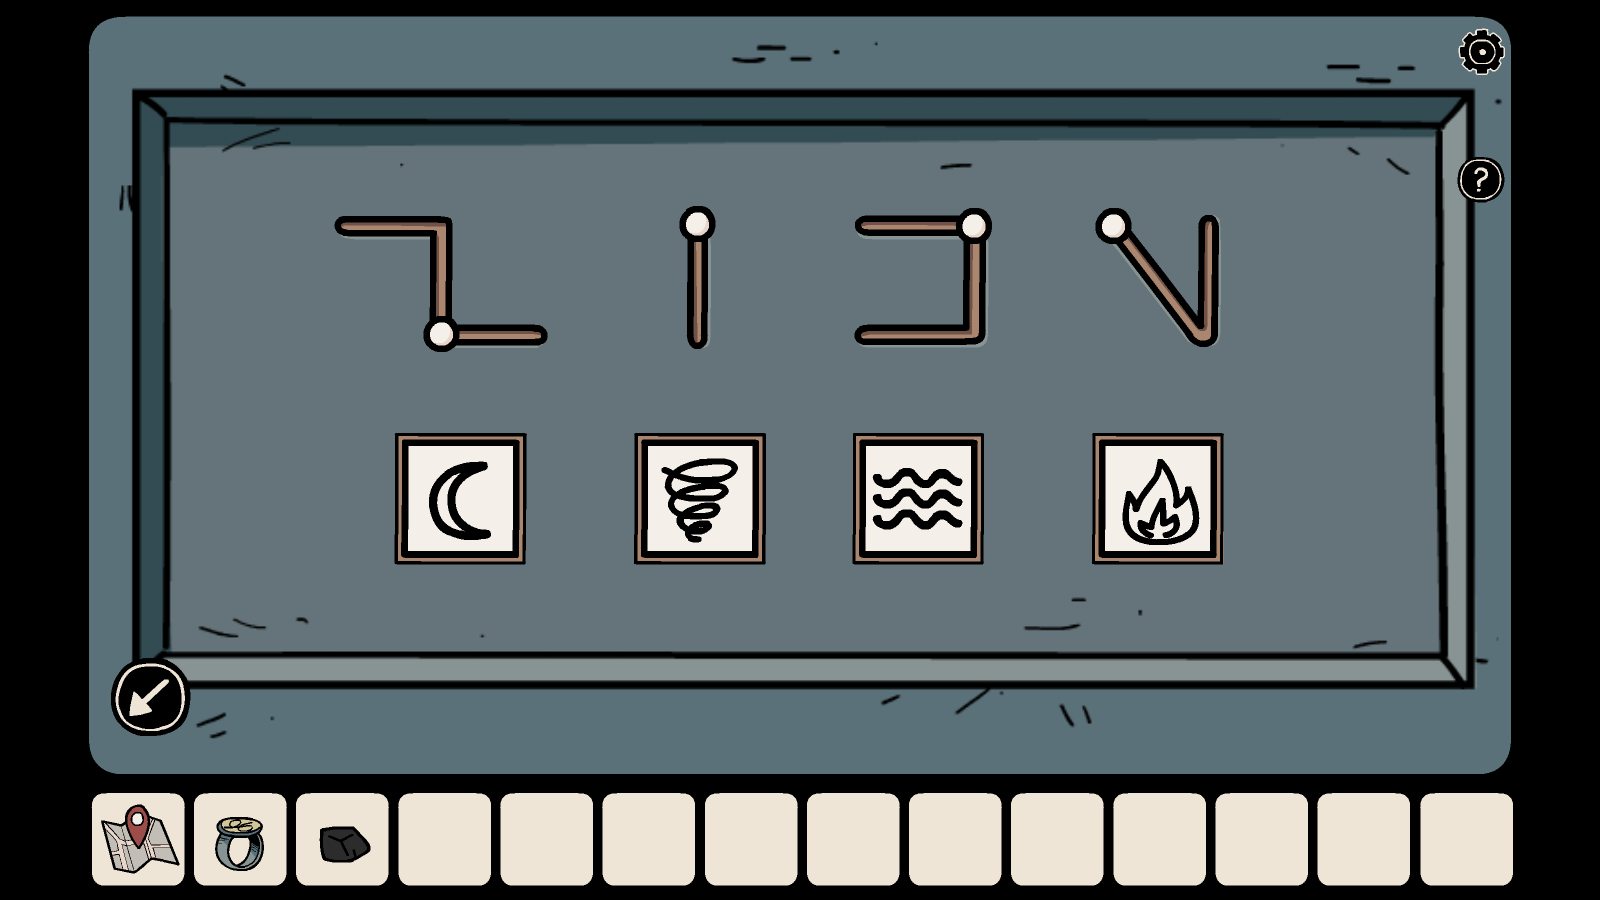
Bottom Puzzle
The tomb slides open, revealing a secret chamber beneath it. There’s a staircase that leads to the chamber(s). Tap the staircase to enter the secret chamber(s).
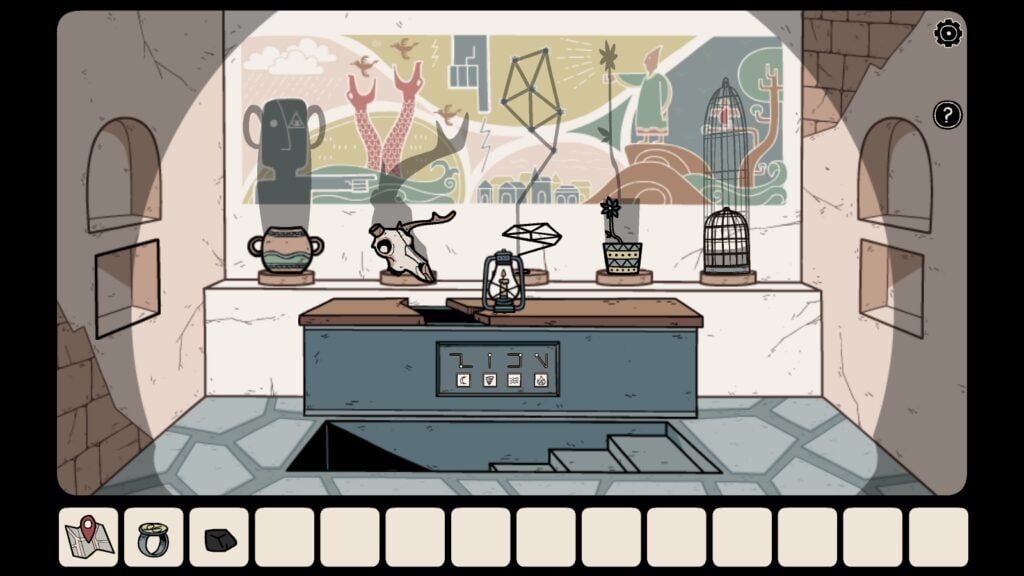
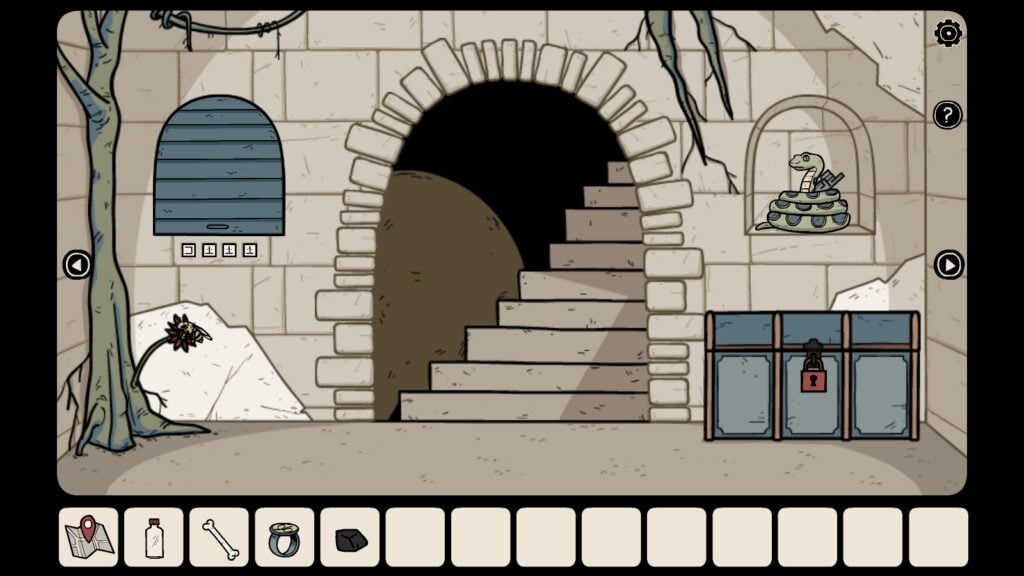
The first room has a blue locked chest, a large venomous snake is protecting what looks like a broken hand of a statue. There’s a shuttered arched niche on the left and below the niche are four strange-looking symbols. Tap the blue shuttered niche to get a closer look at the symbols. We will call this room the snake room:
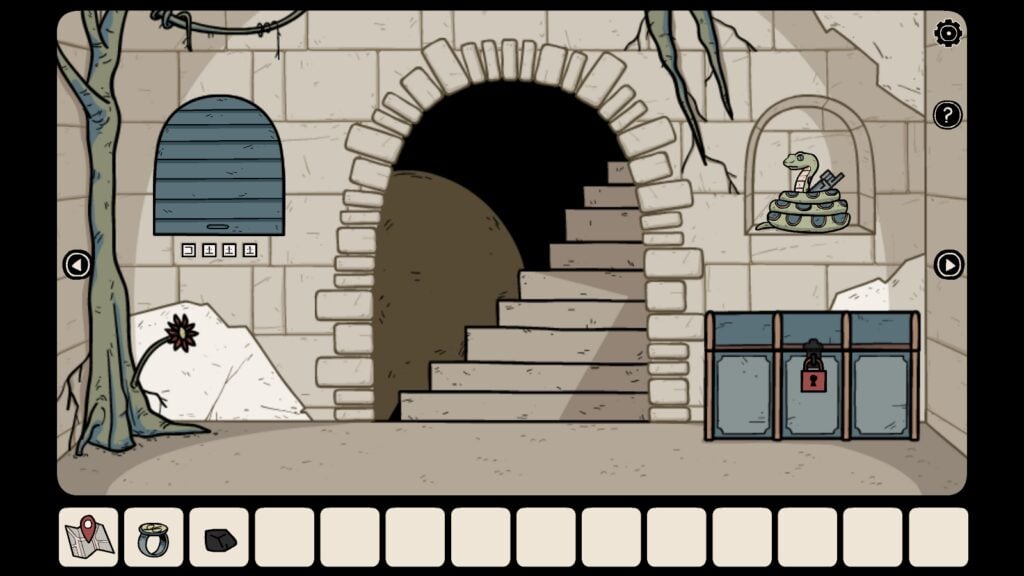
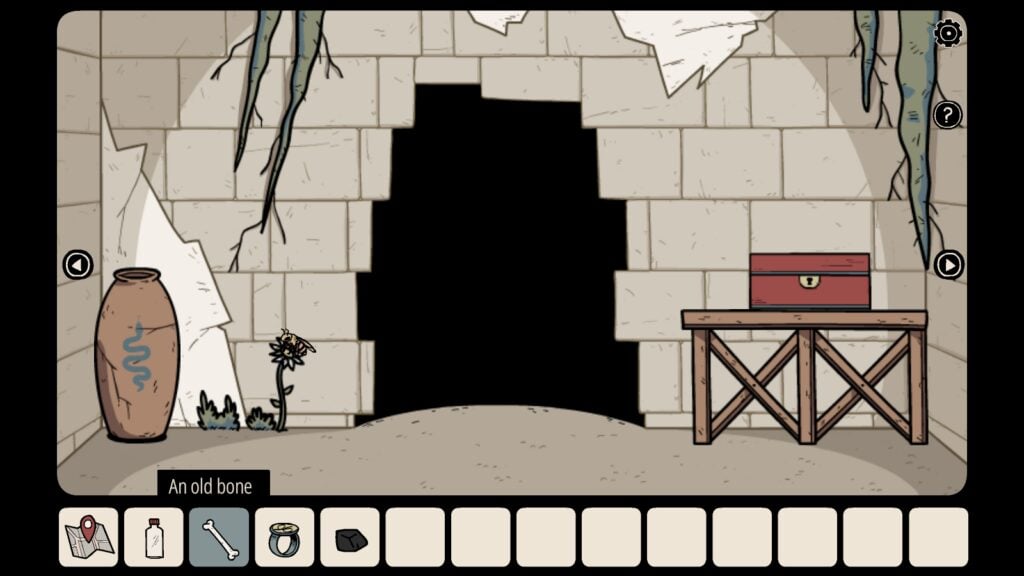
Using the left and right arrow keys, you can enter other rooms. Tap the right arrow key to enter the red treasure chest room. It’s the third room:
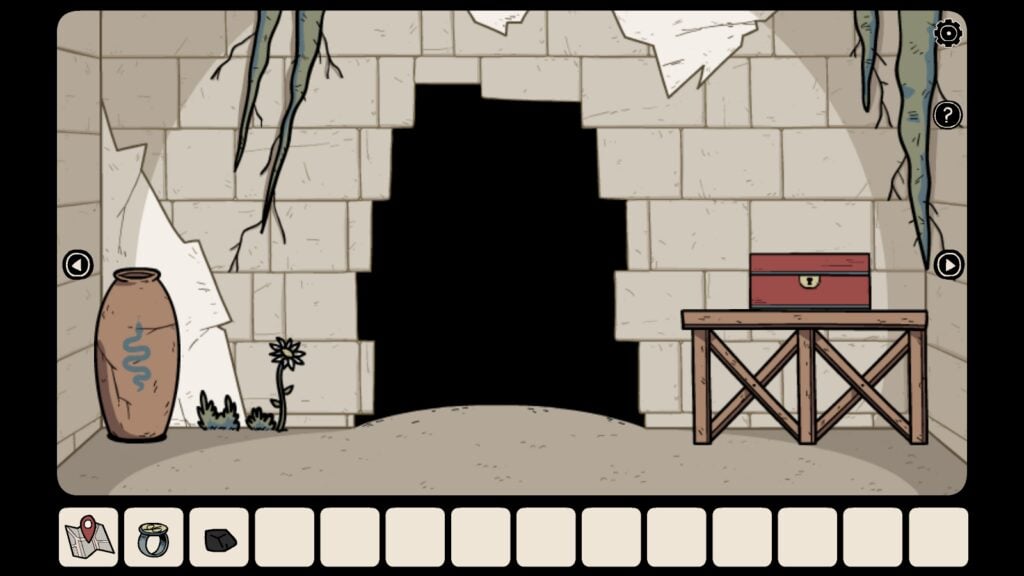
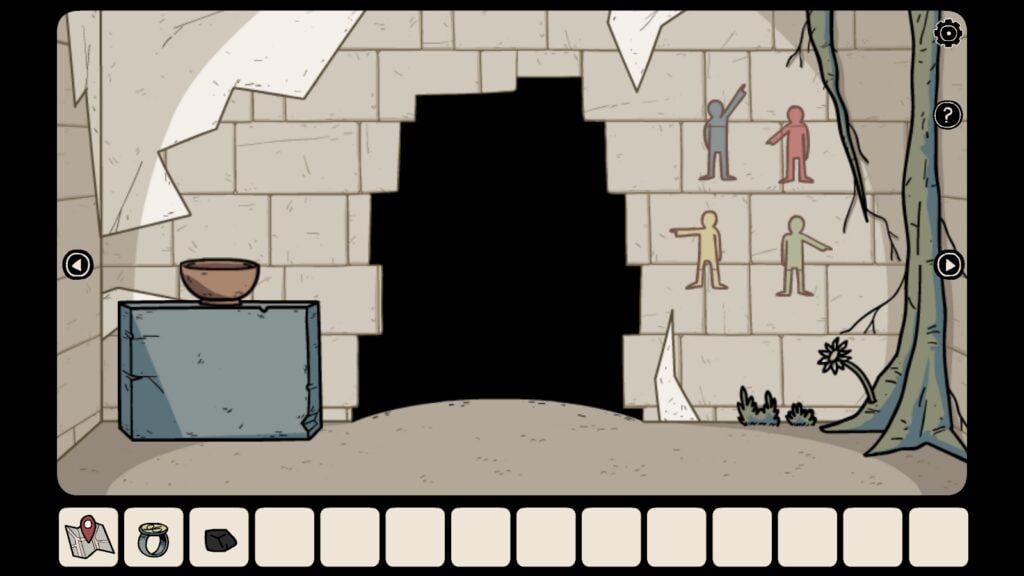
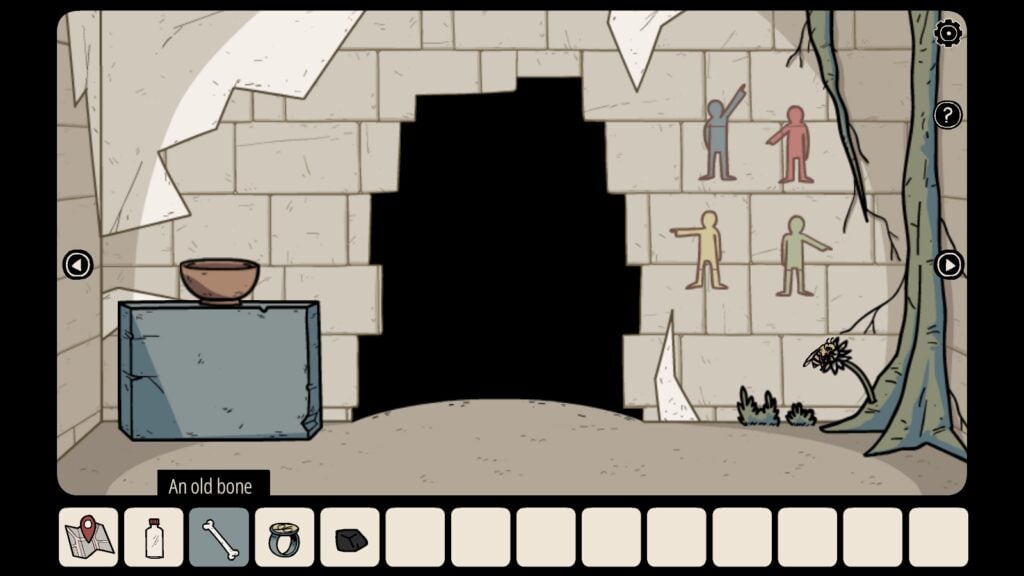
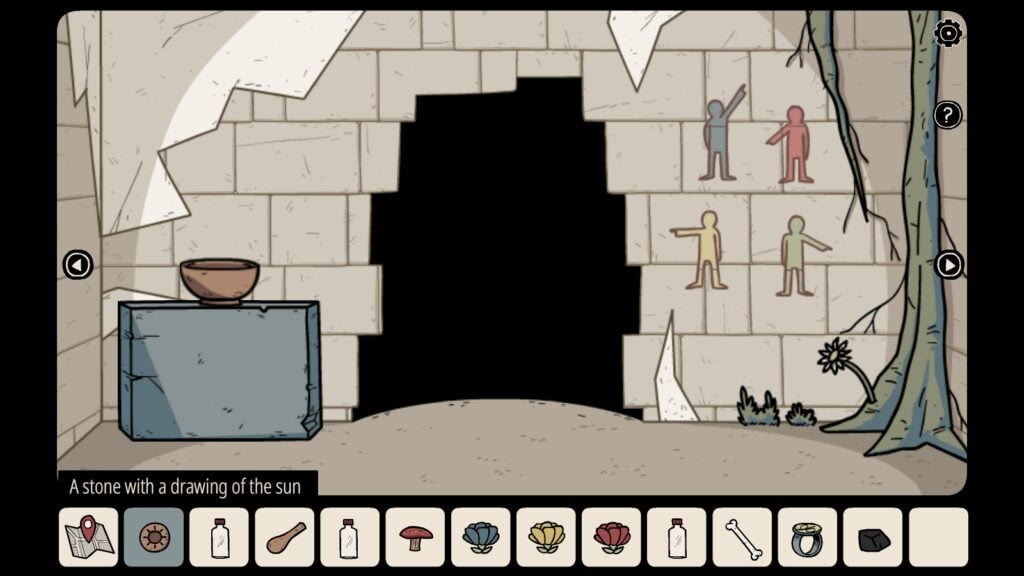
You will see a large hole in the wall. Tap the hole to discover additional secret chambers. The first room in this set has pictures of four people pointing in various directions on the right wall and a clay bowl on the left side of the large hole:
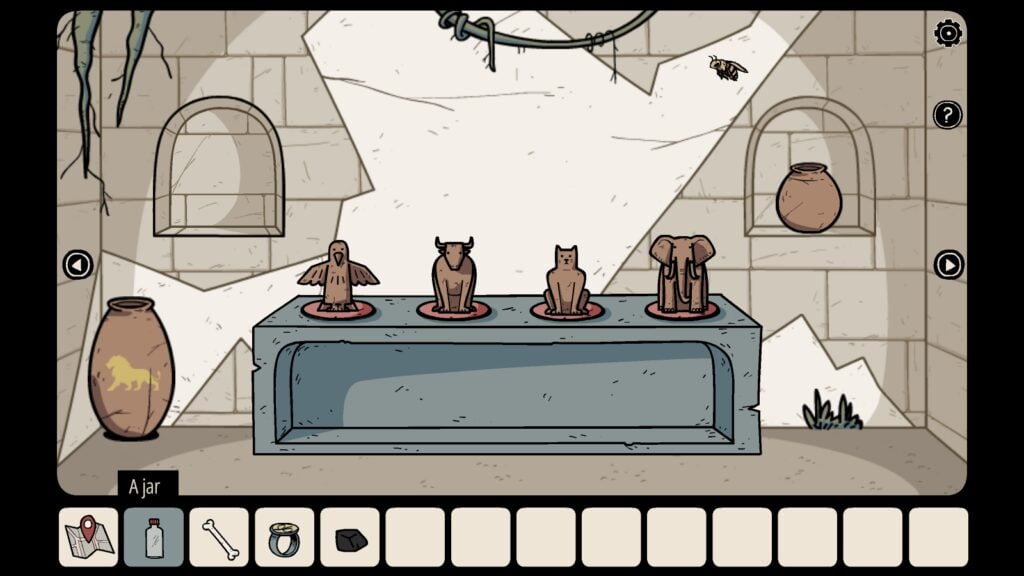
Tap the right arrow to navigate to the second room. In this room, you will find red cylinders of various shapes installed on a platform. There are statues of animals kept below the cylinders.
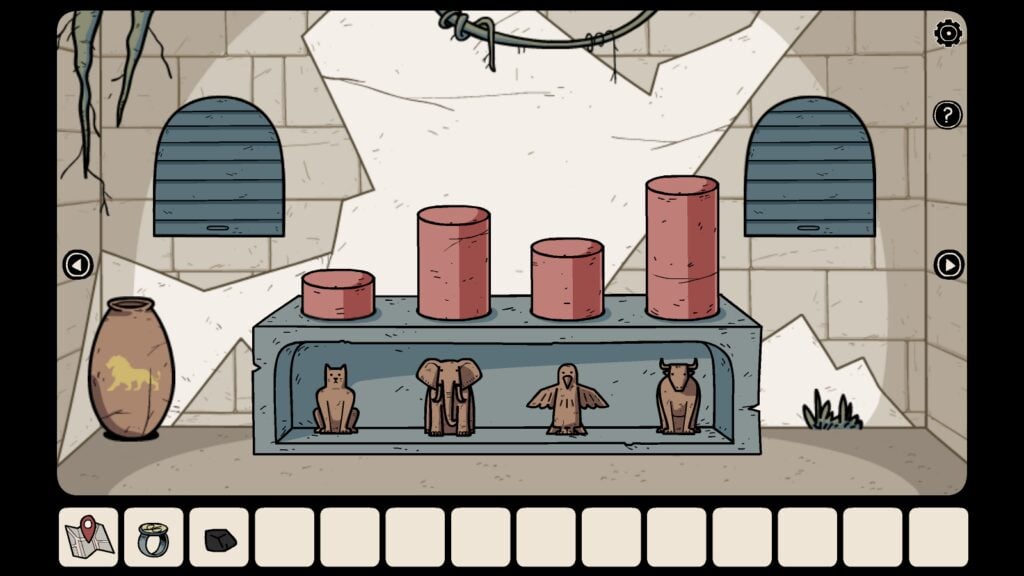
The objective of this puzzle is to push down all four cylinders and level them by placing statues of the animals, beginning with the heaviest animal to the lightest, on top of them. Start with the heaviest animal, the elephant. Tap the elephant and then tap on the tallest cylinder to place its statue on top of it. You will see the cylinder completely leveled on the platform. Next will be the bull. Place the bull on the second tallest cylinder to see it leveled. Then use the cat on the third and finally the bird, the lightest of the four, on the smallest cylinder.
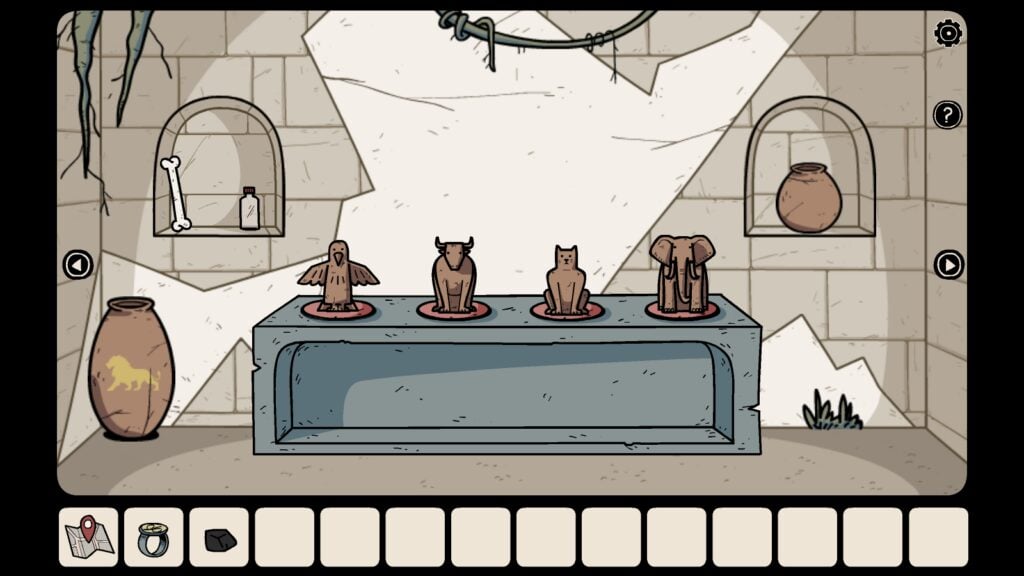
The two closed arched niches on the right side and left side, behind the platform reveal objects. The right side has a clay pot and the left side contains an OLD BONE and a jar. Take the old bone and a jar from the left niche.
Tap the clay pot kept on the right arched niche. It will wobble a bit and a large honeybee will fly out of the clay pot. Follow the bee’s flight. It will move to the left, so tap the left arrow to follow her to the next room.
The bee will land on the flower on the lower right side of the screen. Tap the bee again. It will move to the outer chambers. Tap the large hole on the wall to follow her to the red chest room.
In the red chest room, you will find the bee sitting on the flower in the lower-left corner of the screen. Tap and follow her to the next room on the left. You will see her sitting on a flower near the small platform. Tap her again and she will move to the next room. Finally, it sits on the red flower in the snake/blue chest room. The below screenshots show the bee’s flight from one room to the other:
FOURTH FLOWER
THIRD FLOWER
SECOND FLOWER
FIRST FLOWER
FOLLOW THE BEE’S PATH
Tap the bee sitting on the red flower and it will move to a room that has an old withered tree. She will gently drop pollen all around the tree. The tree blossoms with colorful flowers.
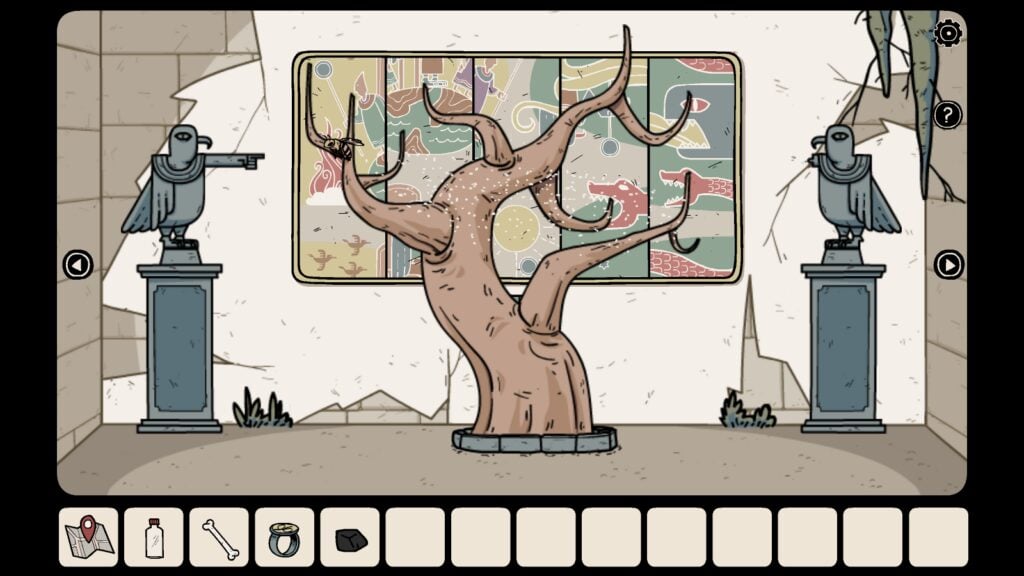
Bee Sprinkling Pollen
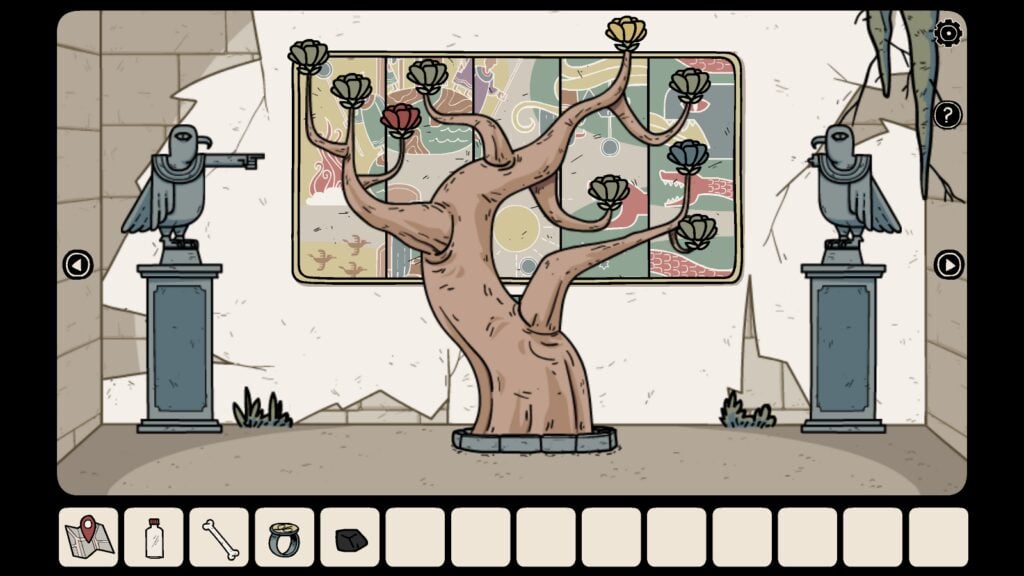
Flowering Tree
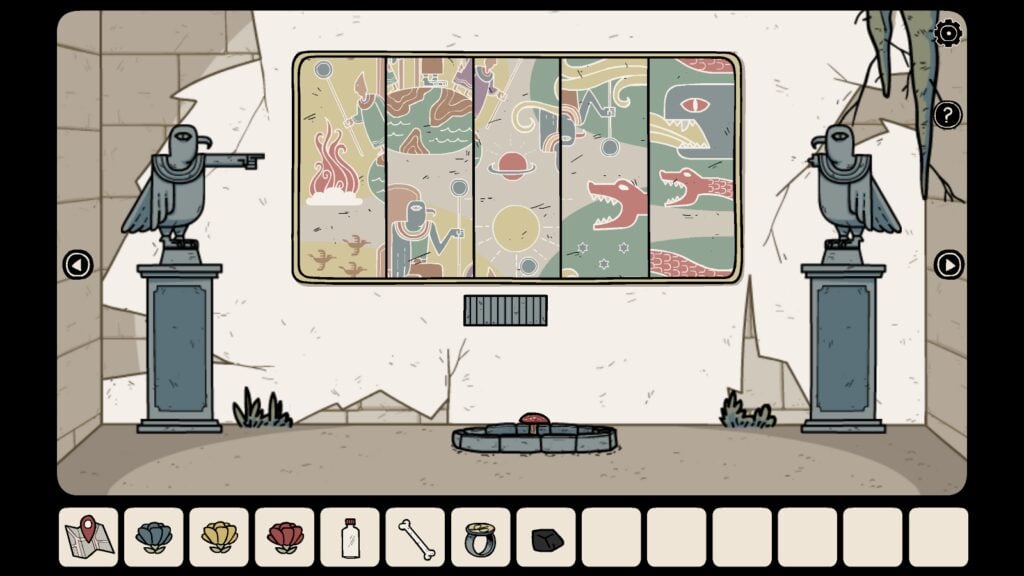
Red Mushroom
Pluck the red, blue, and yellow flowers. The tree vanishes, and a small RED MUSHROOM appears in its place. Take the red mushroom.
In the same room, you will see a large painting on the wall. Tap the painting to zoom into it. The painting is divided into five parts. Tap on one of the parts and it will slide upwards.
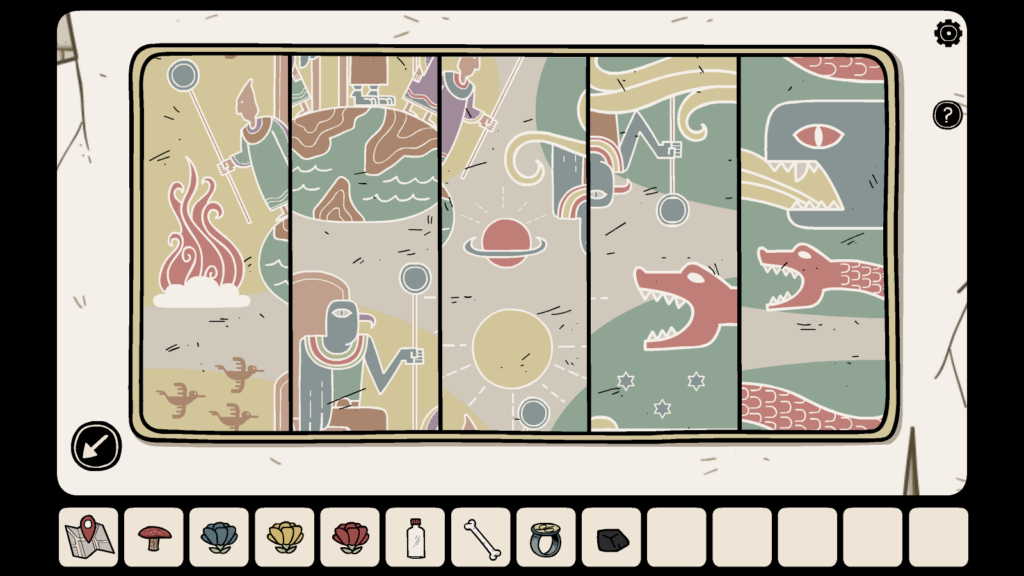
A large artwork in the tree room.
It’s a sliding jigsaw puzzle. Slide the parts upwards to bring out the complete picture. Some parts move up together, so make sure you carefully and patiently move all parts together to bring up the complete picture, like the screenshot below:
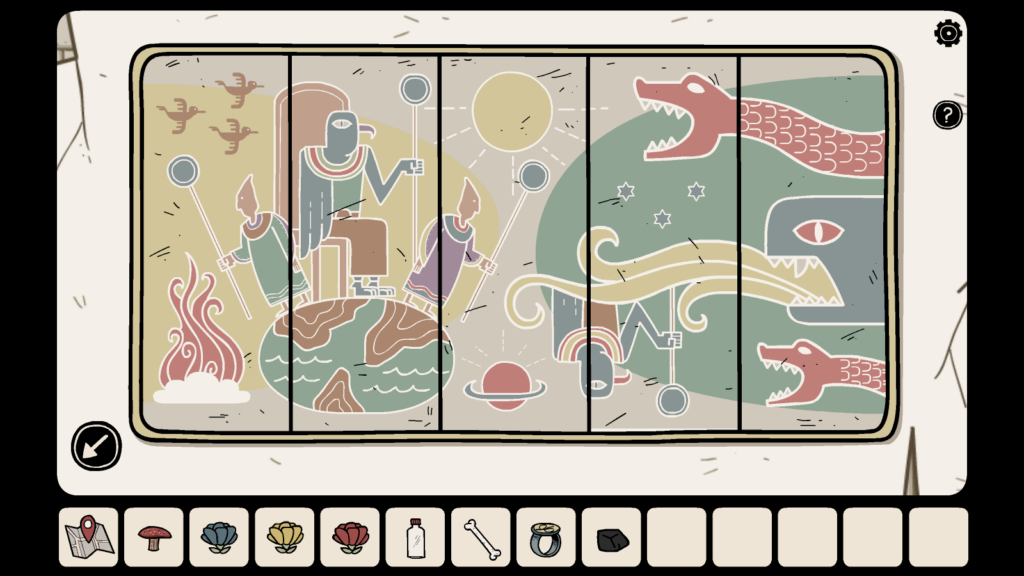
When you finish this puzzle, the small locked vent just below the painting unlocks, revealing a key. Take the black key.
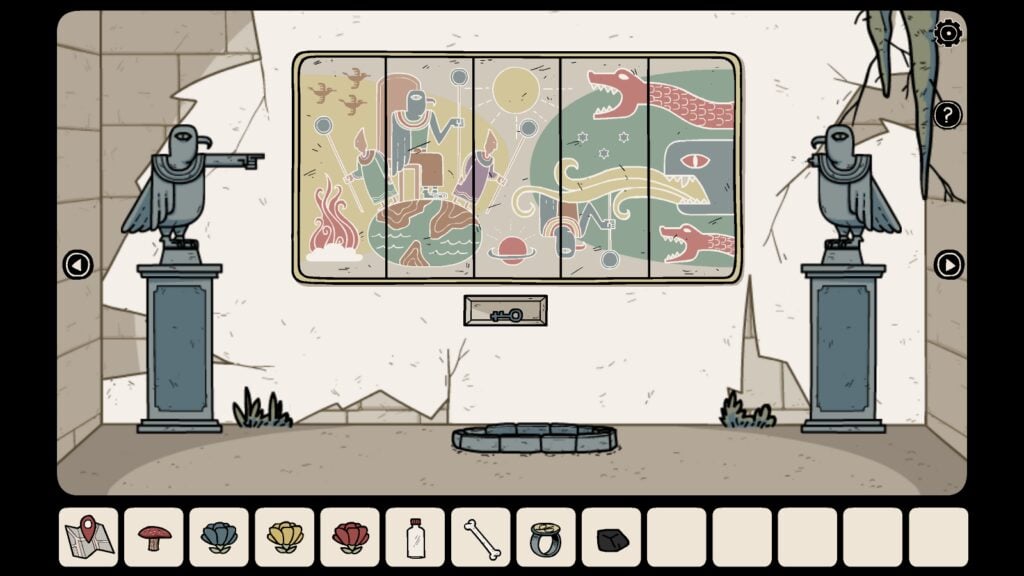
Use the right arrow keys to navigate to the red chest room. This is the same room that has a large hole in the middle, which gives access to additional secret chambers. Use the black key to open the red-colored chest.
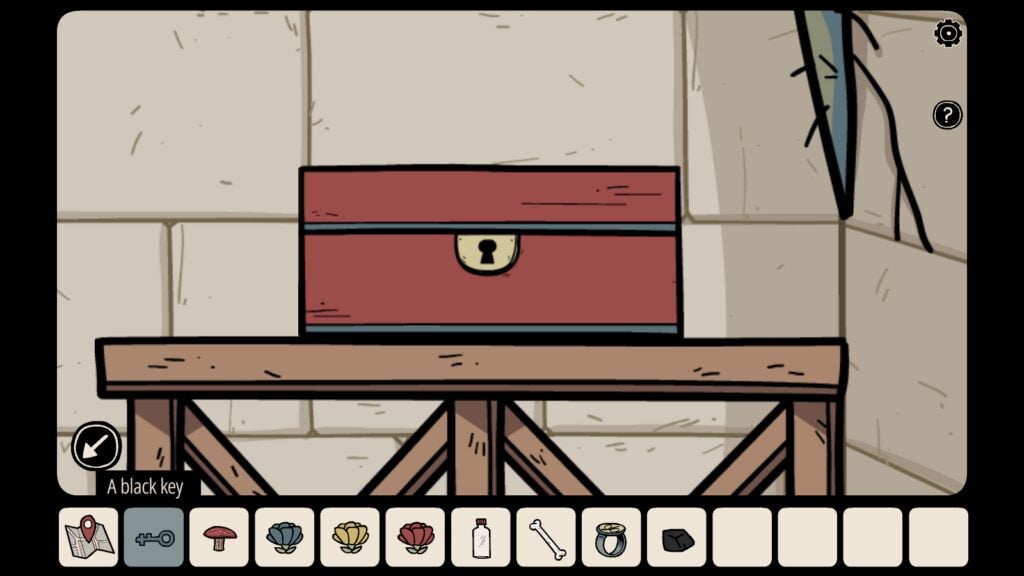
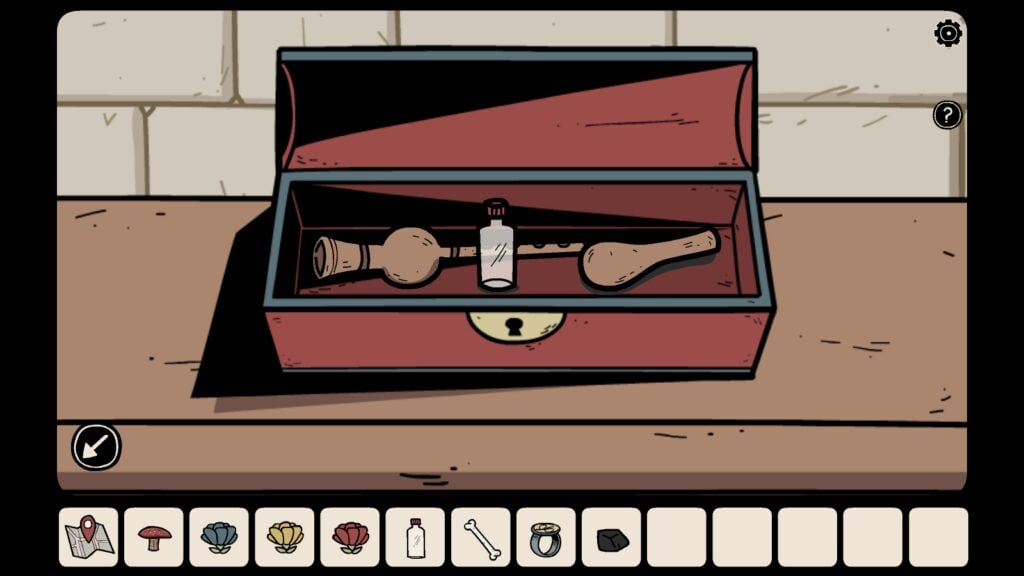
Open the chest and tale the jar, a pestle, and a wooden flute.
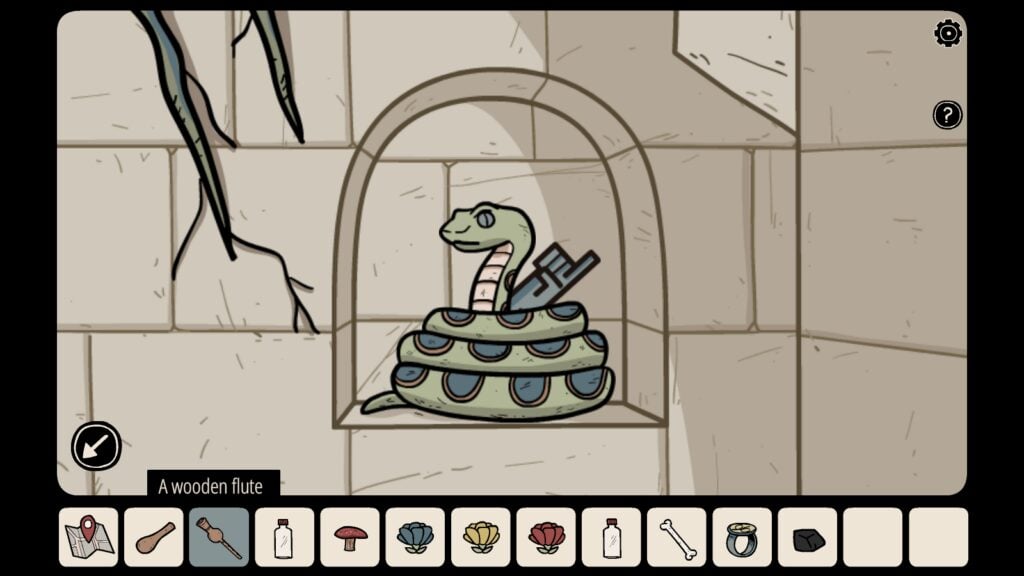
Go back to the room that has a snake protecting a broken hand of a statue. Use the wooden flute on the snake to make her fall asleep. Tap the hand.
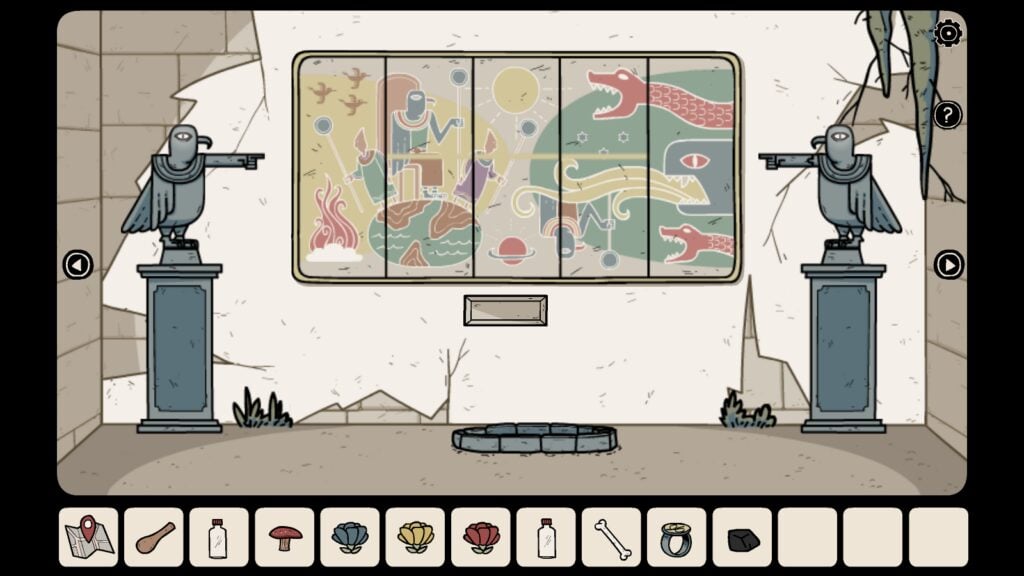
Tap the left arrow in the snake room to navigate to the large painting room. Tap the hand and then tap the broken statue on the right to fix it. You will see the laser beams emanating from the fingers of the left and right statue, making the painting light up magically.
Tap the painting again to get a closer look. You will see strange symbols appear on all four staffs in the painting (marked by red squares in the screenshot below):
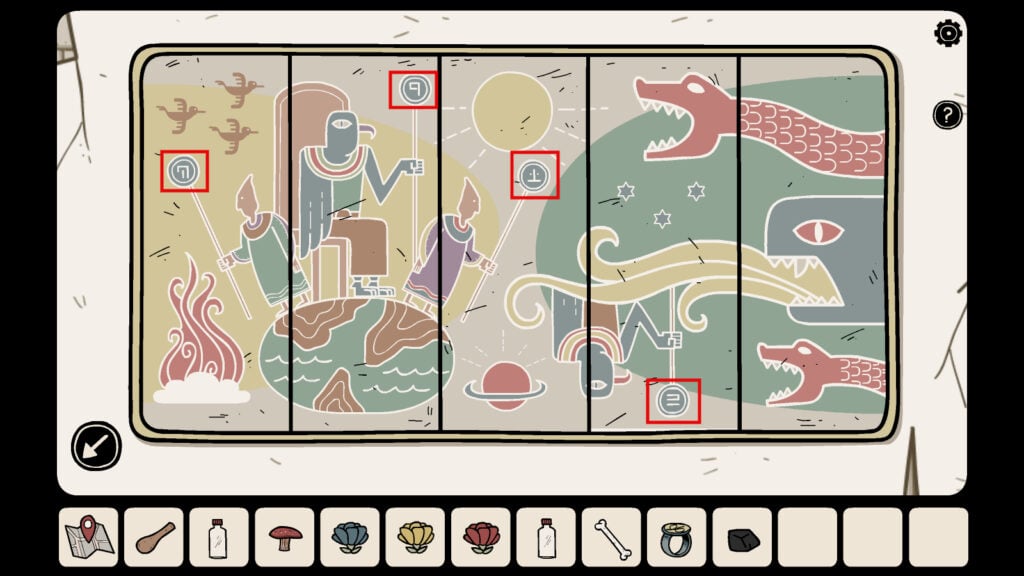
Note down the symbols and their correct order, from left to right, from the painting, and enter them in the same order below the arched niche in the snake room. The symbols on the painting will be random.
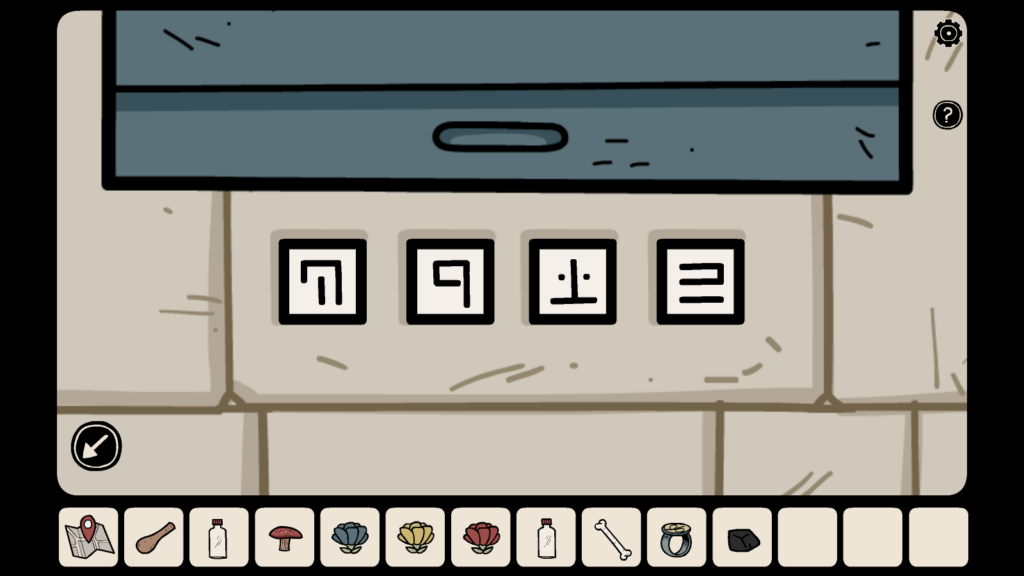
Enter the symbols in the correct order as seen in the painting.
Upon entering the correct order of symbols, the arched niche on the left wall unlocks, revealing a piece of paper and another glass jar. Take these objects.
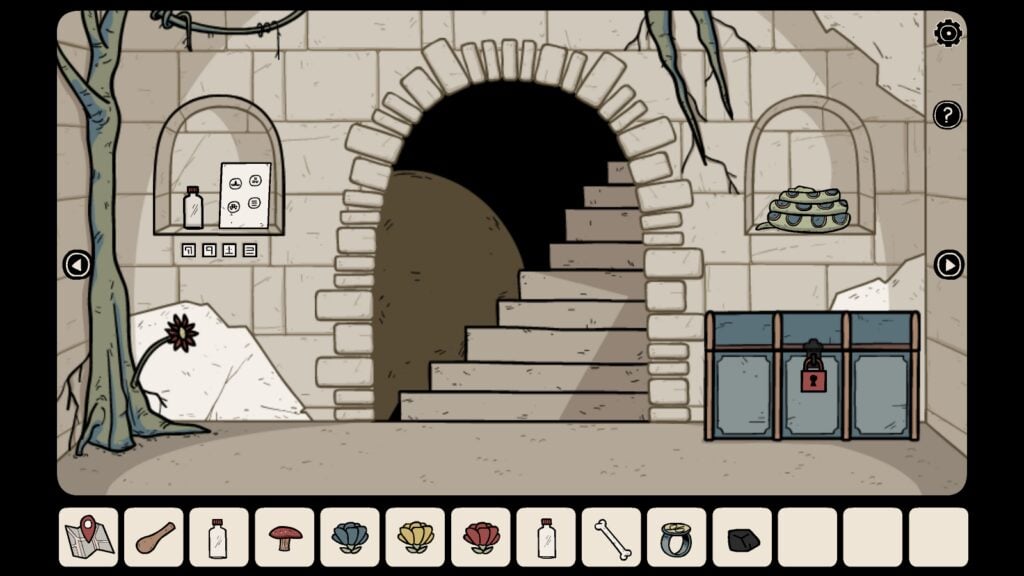
Tap the piece of paper from the inventory. There are four different symbols and each symbol has a unique background color. The first one has a green background, the second symbol has a blue background, the third symbol has a red background and the fourth has a yellow background.

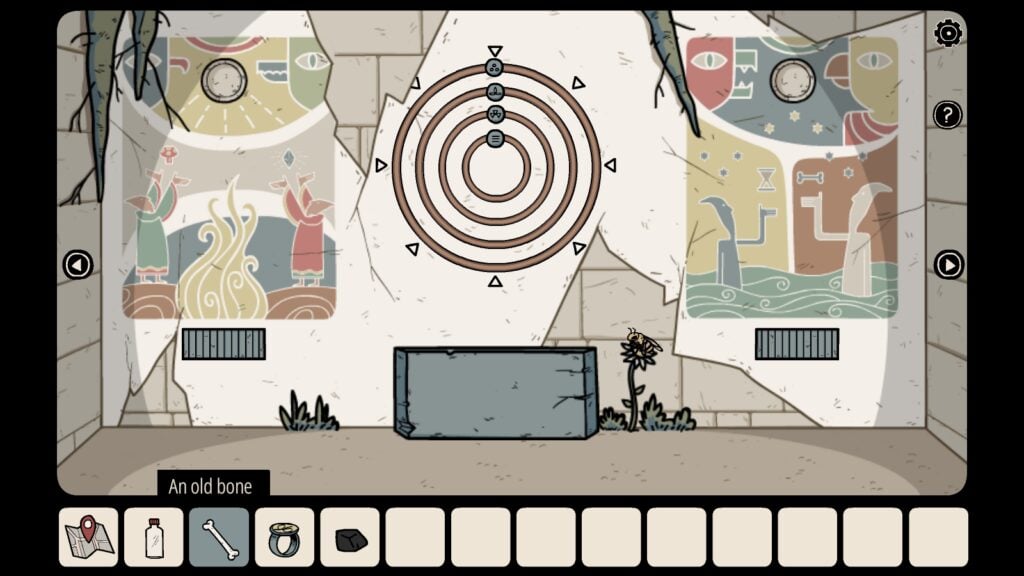
Pay attention to the symbols as shown in the above screenshot. You will find the same symbols in the next room. Navigate to this room by tapping the right arrow in the snake room. You will see concentric circles on the wall. Tap the circles to zoom in.
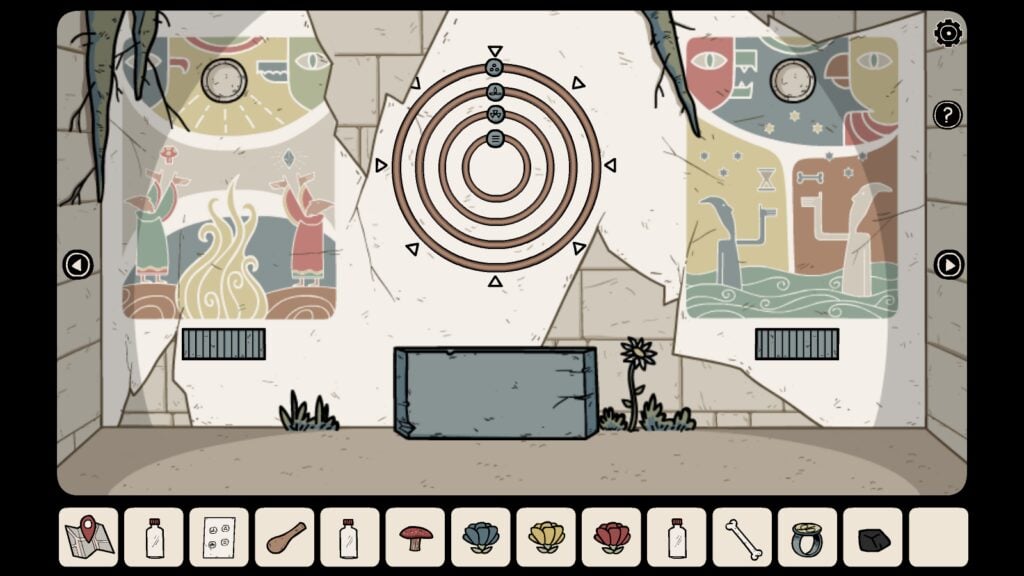
The symbols can be seen in each circle. Tapping the symbols makes them move from one point to another. Points of the circles are marked by tiny triangles.
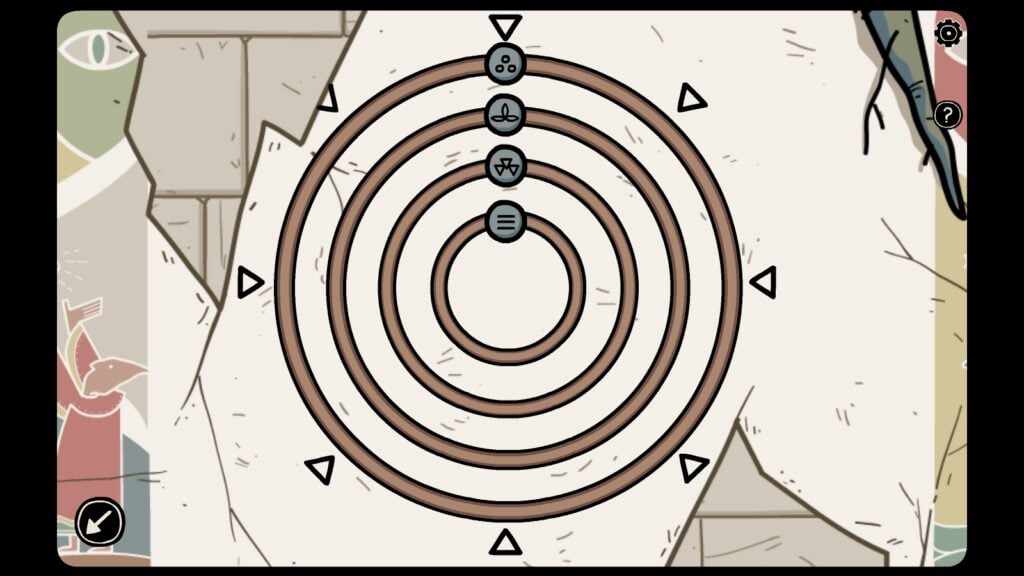
Now go to the next room, the “red chest” room, and tap the large hole on the wall to enter this room:
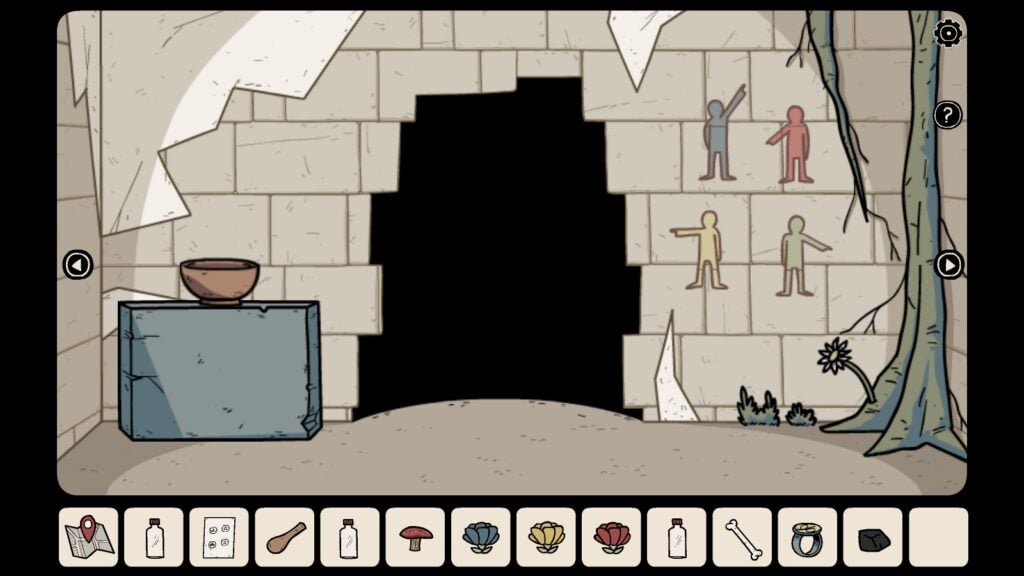
Sketches of four people pointing their fingers in four different directions are shown on the right wall. Match their colors (blue, red, yellow, and green) with the background colors of symbols on the piece of paper.
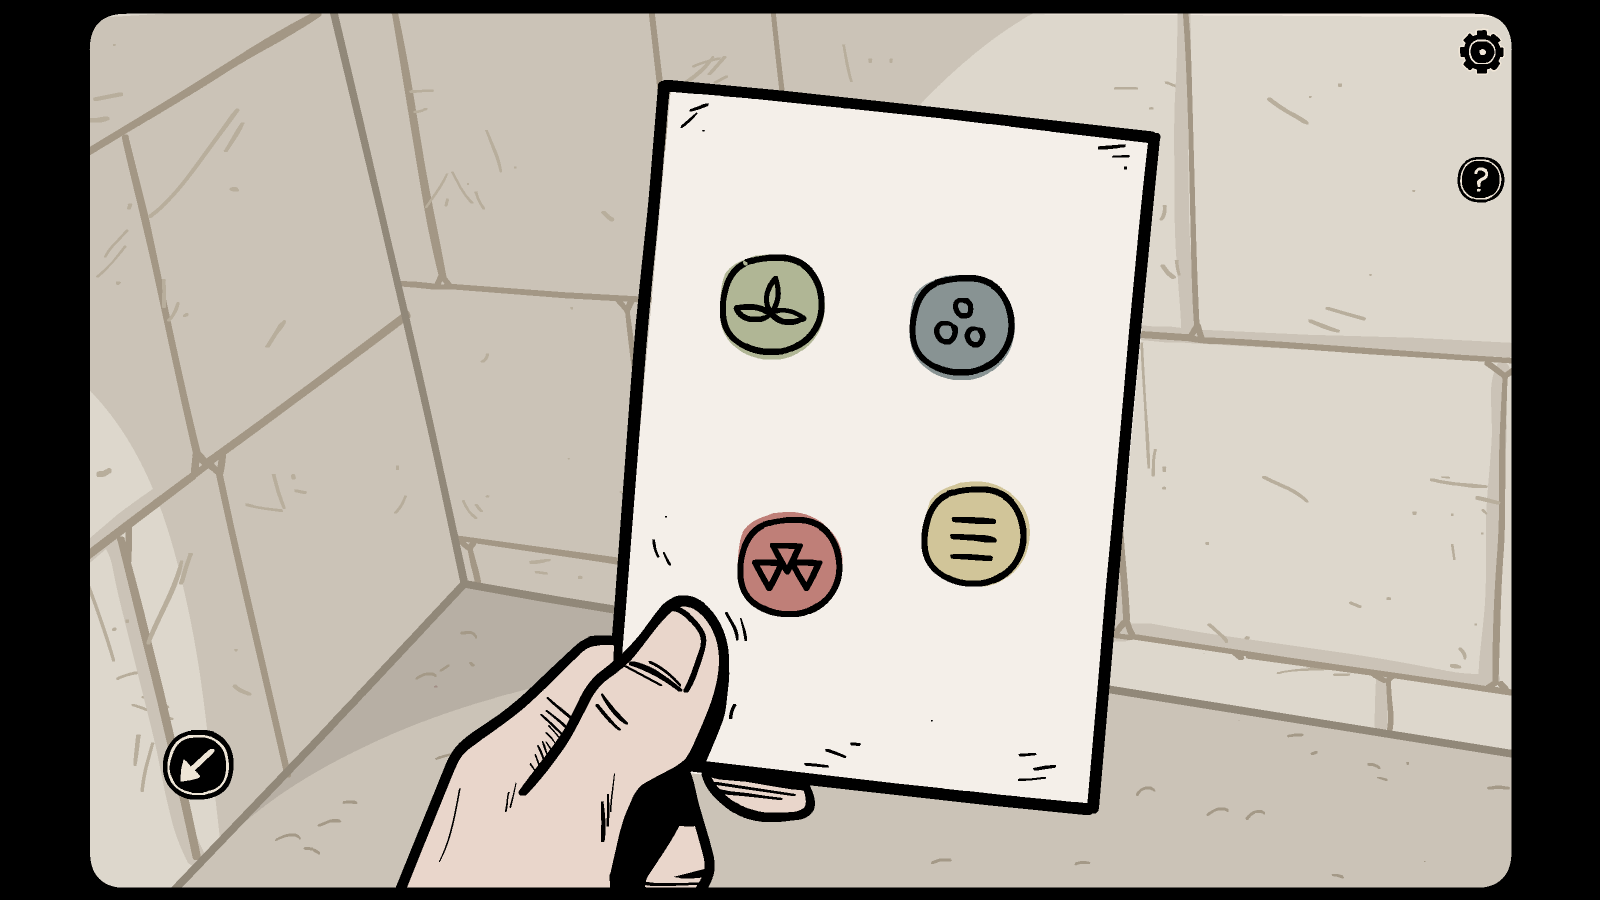
Symbols and their color

Match the color of the people drawn on the wall with the background color of the symbols on the piece of paper
Go back to the room that has concentric circles drawn on the wall. Tap on all four symbols on each circle one by one and move them to four different points as shown by the drawings of people pointing their fingers in four different directions (keep the colors of the persons and the corresponding colors of the symbols in mind while doing this). The colors of the four persons and the fingers pointing in various directions could be different in your game.
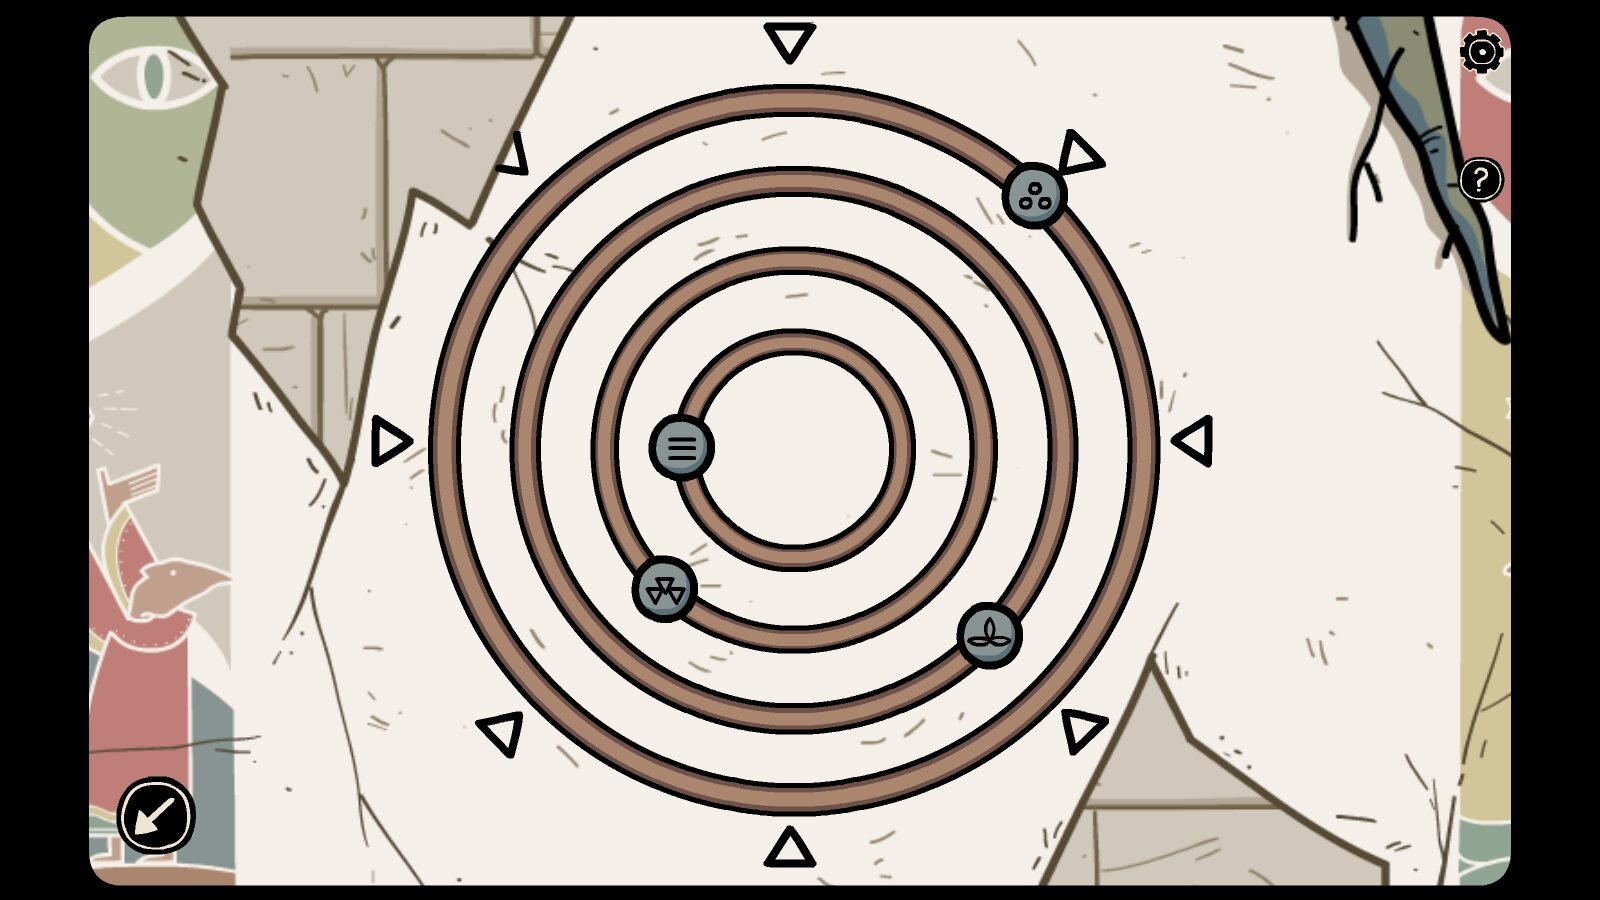
Completed Puzzle

Colored People
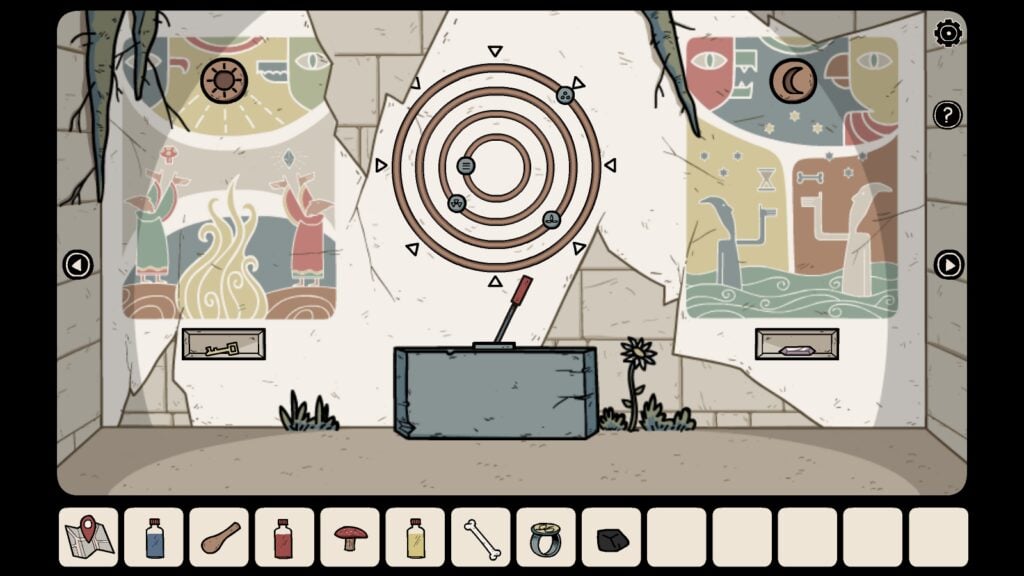
When you complete this puzzle, a stone disc with the drawing of the sun will arise from the stone platform in the middle. When you take the disc, a lever will appear on the platform:
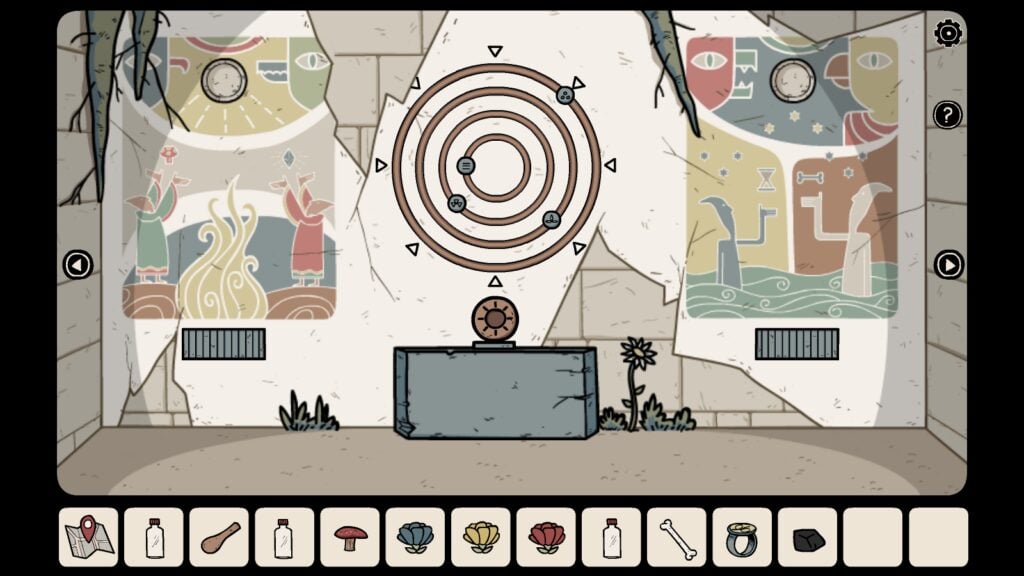
Take the Stone Disc
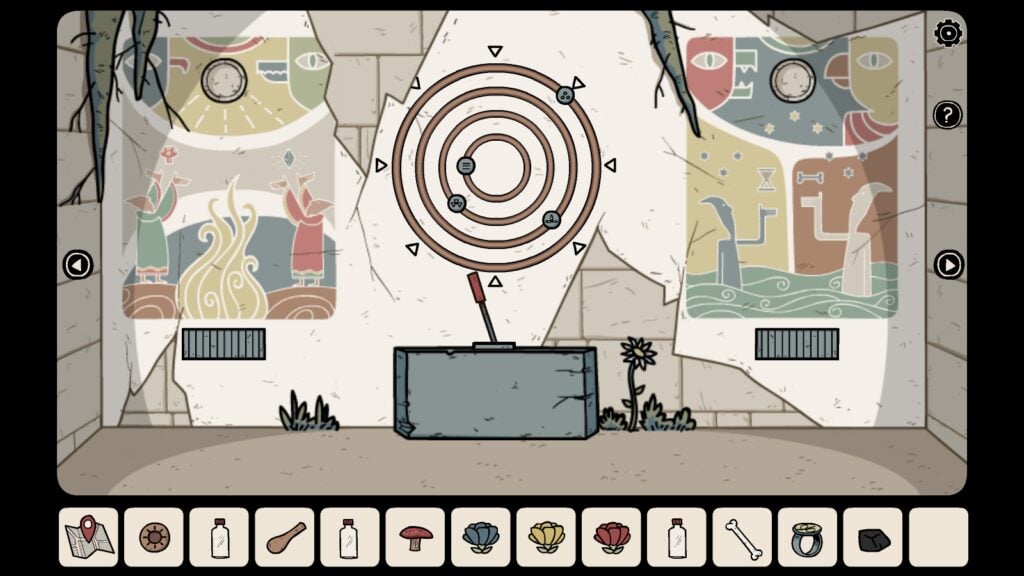
Pull the Lever
Pull the lever. In another room, water will start flowing from the mouths of three creature statues – Snake, Lion, and the Hawk.
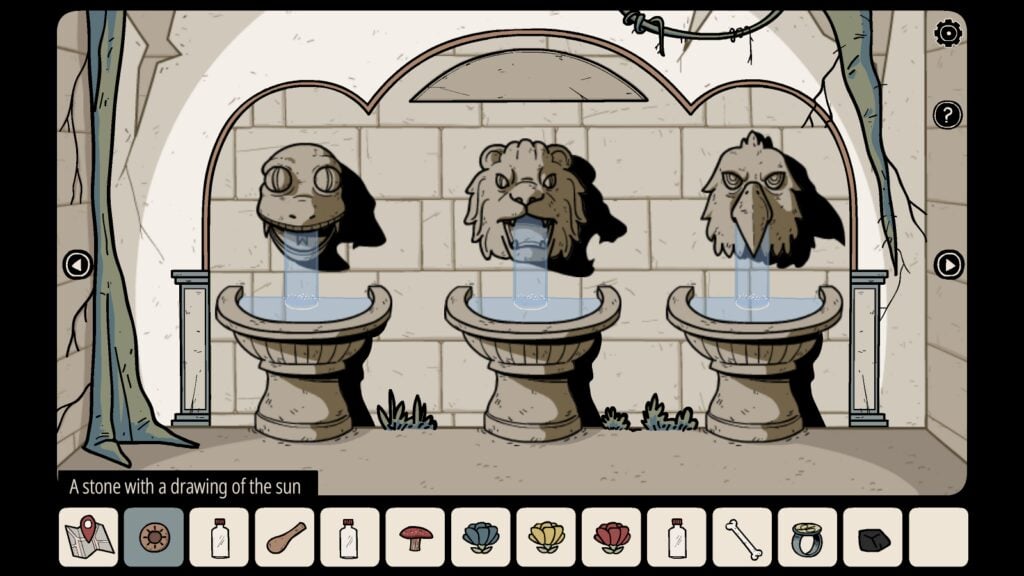
Before you reach this room to solve a puzzle, navigate to these three rooms to find earthen flower vases/pots kept in a corner. The first flower vase is in the red chest room. To access the second and third rooms, tap the large hole on the wall in the red chest room. Note the drawings in all three earthenware in all three rooms as shown in the screenshots below:
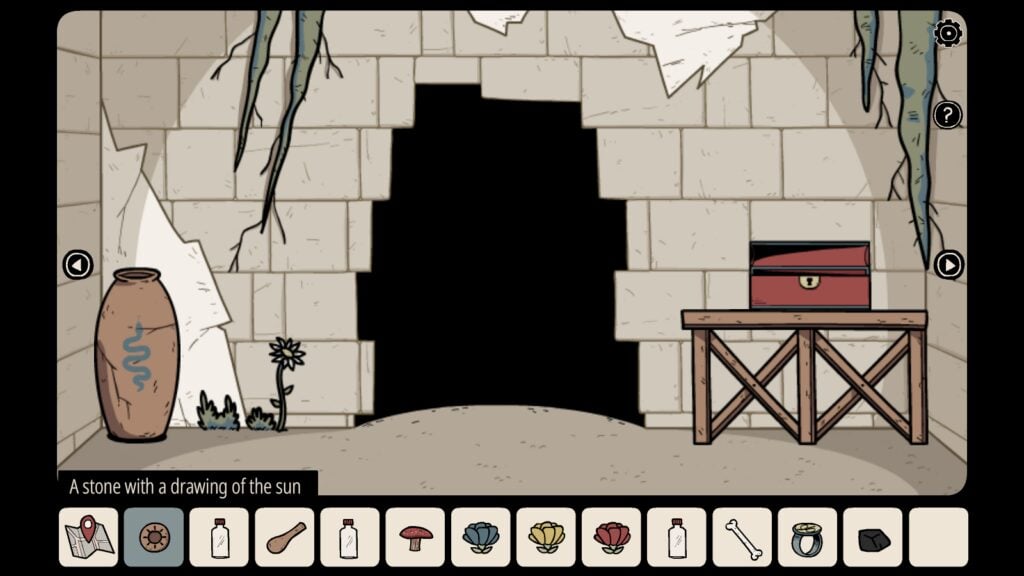
SNAKE Drawn on Earthenware
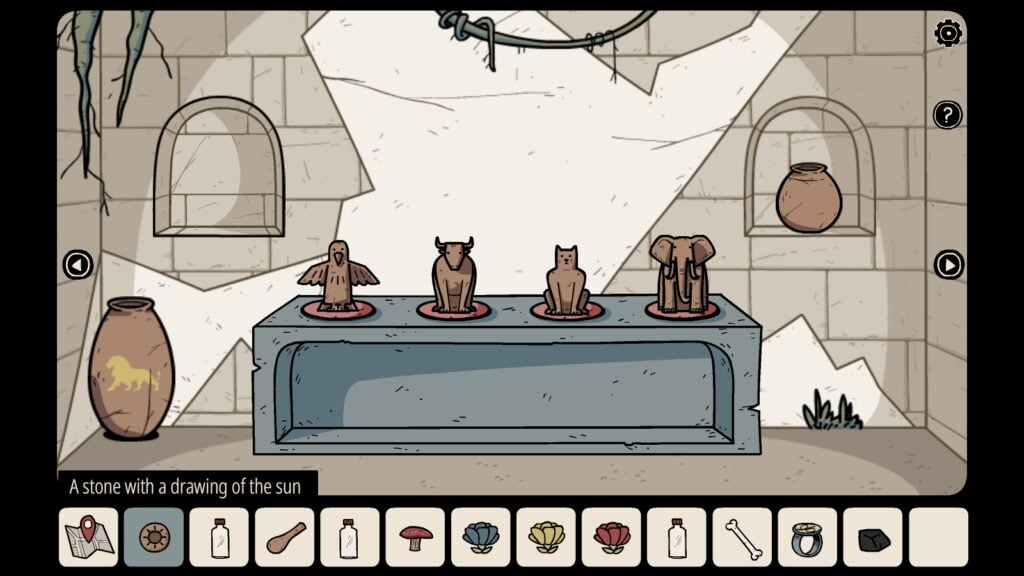
LION
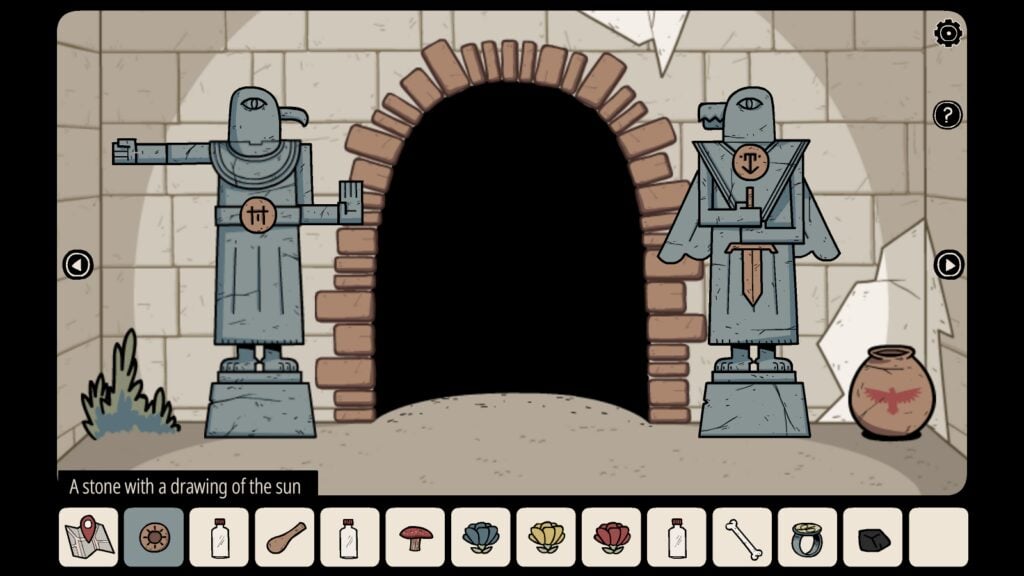
HAWK
Also, pay attention to their colors. The Snake drawn on the big flower pot is blue in color. The Lion drawn on the earthenware is yellow in color and the Hawk’s drawing is red in color. The order of the colors of these three creatures may be different in your game.
Go to this room. There’s a clay bowl placed on a platform on the left side of the room. Tap the clay pot.
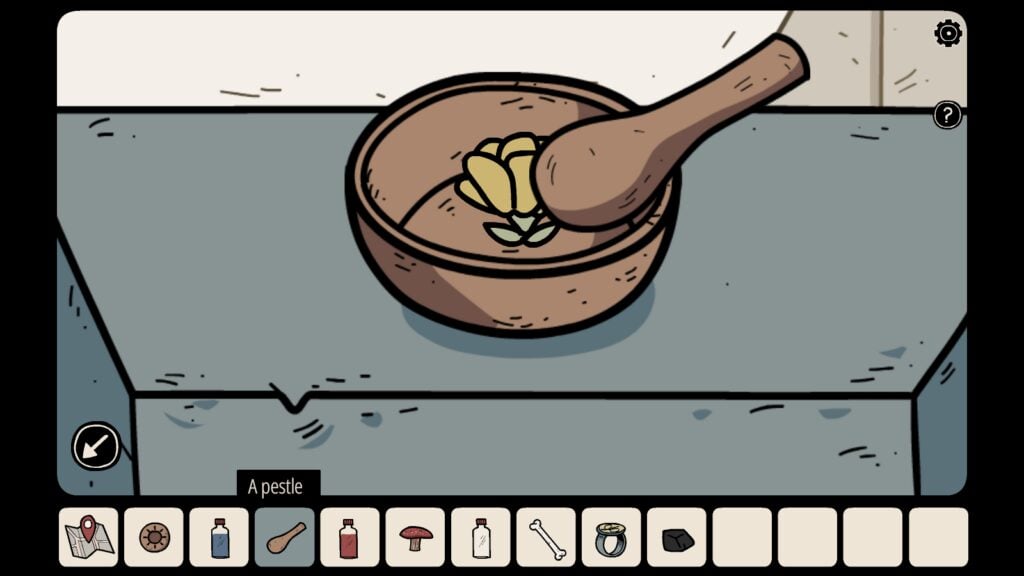
Among the three flowers in the inventory on the bottom of the screen, tap the blue flower and then tap the empty clay bowl to place the flower in it. Using the pestle, crush the blue flower to extract blue dye from it. Collect the blue dye in one of the empty glass jars (By now you will have three glass jars).
Follow the above procedure for the red and yellow flowers. You will now have three glass jars filled with blue, red, and yellow dye.
Yellow Flower
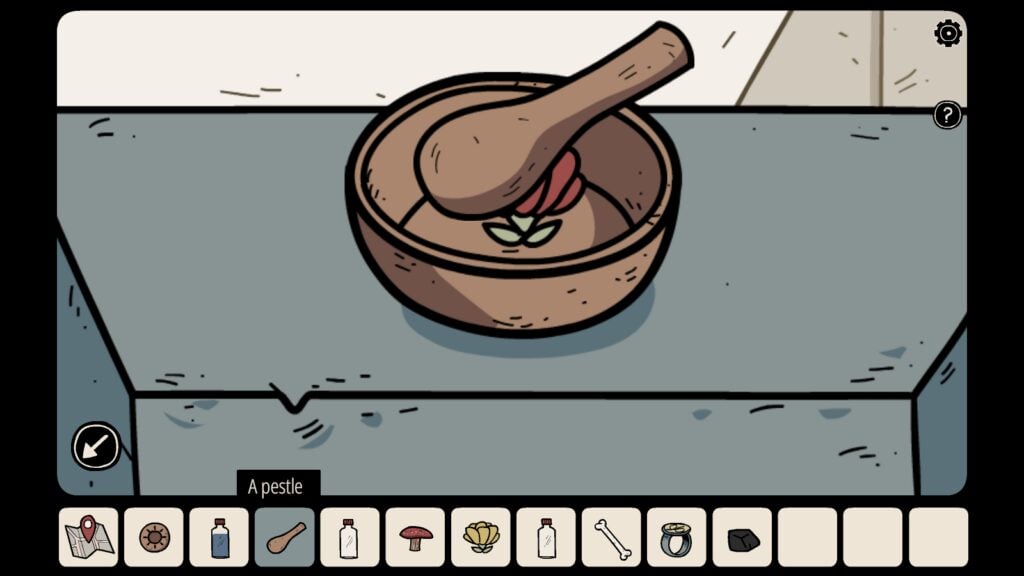
Red Flower
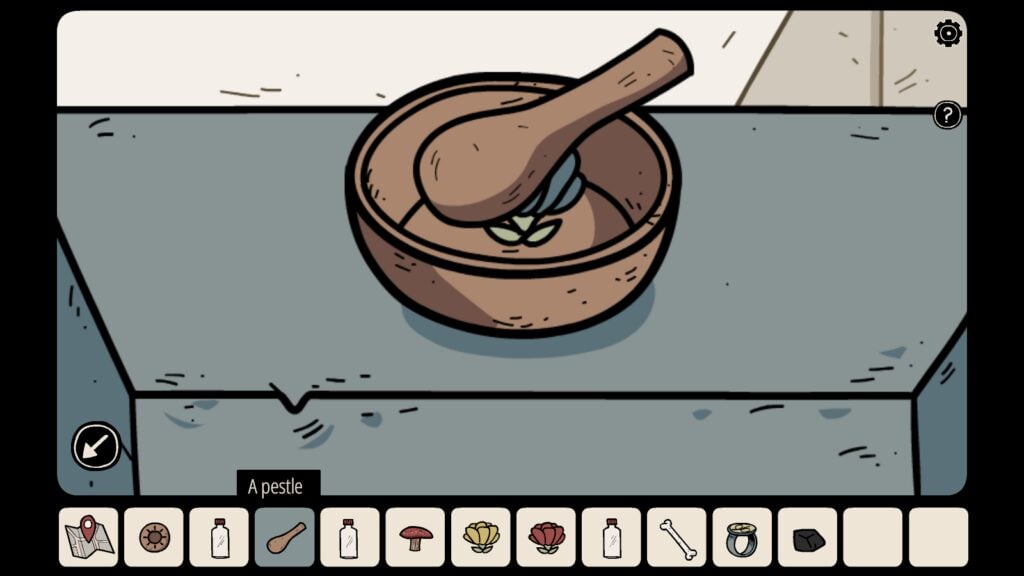
Blue Flower
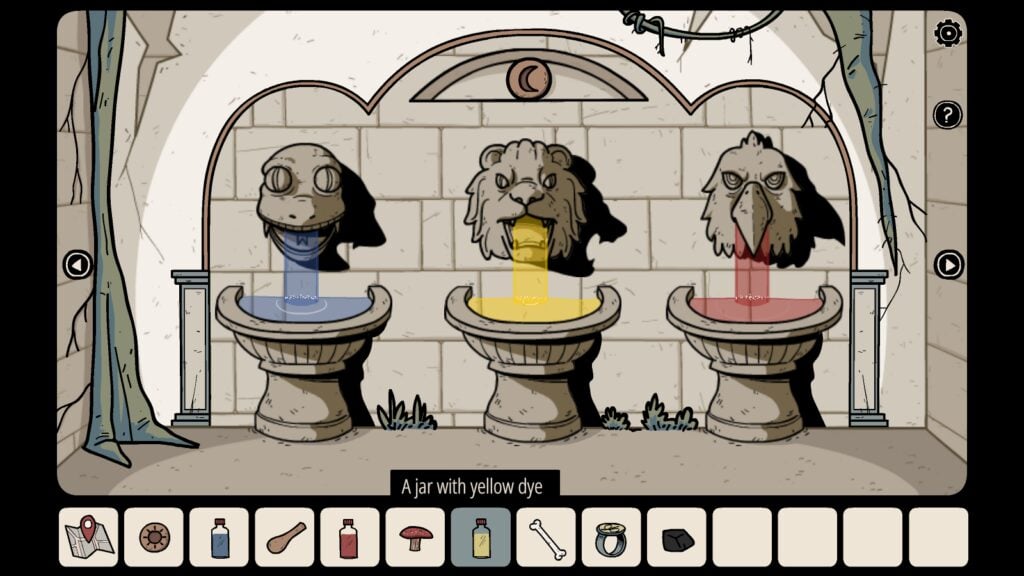
Move to the room containing statues of three creatures. By now you have noted the colors of the creatures drawn on those earthen pots/vases. In our game:
Snake – Blue, Lion – Yellow, Hawk – Red.
Pour the blue dye into the water gushing out of the snake’s mouth.
Pour the red dye into the water gushing out of the hawk’s mouth
Pour the yellow dye into the water gushing out of the lion’s mouth.
A hidden niche above the three animal statues opens, revealing a stone with a drawing of the crescent moon. Take the stone. You will now have two stones – a crescent moon and a sun stone.
Navigate to the room with the lever and concentric circles drawn on the wall. Place the stone with the drawing of the crescent moon on the empty slot. Behind that empty slot is the painting of the night sky and stars. A small sliding cabinet below the painting opens, revealing a CRYSTAL OF QUARTZ. Take the gemstone.
Now put the stone with the drawing of the sun on the second empty slot. Behind the empty slot is the daytime painting. You will also see rays emanating from the empty slot. The sliding cabinet below the daytime painting opens, revealing a golden key. Take the golden key:
Move to the snake room and use the golden key to unlock the blue chest kept on the right side of this room. Open the chest and take the HOURGLASS, aka a sand clock.
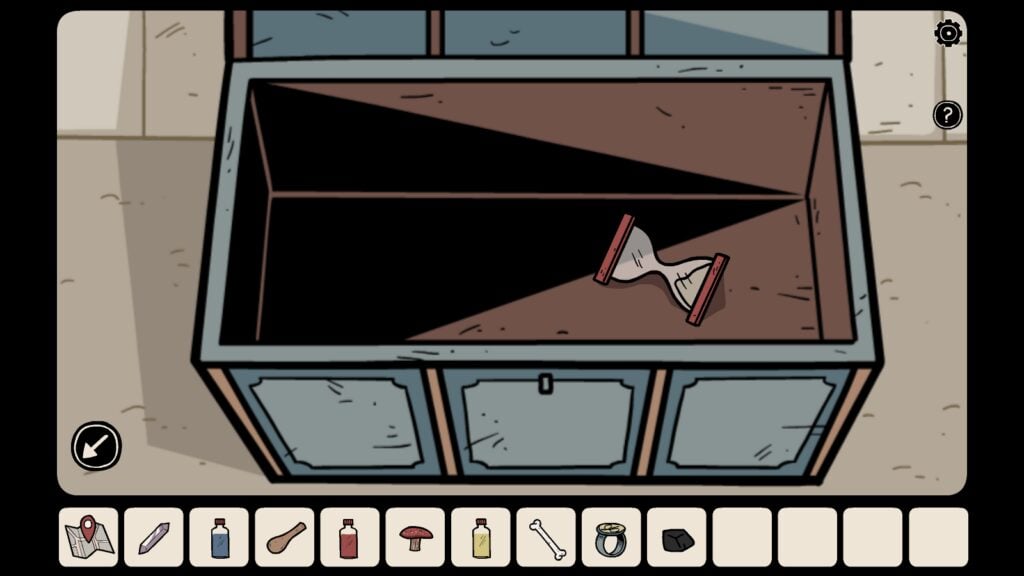
By now, you must have collected five objects, including the final hourglass. They are crucial to solving the final puzzle, which will ultimately foil Frederick Nolsen’s evil ritual. Throughout this walkthrough, the names of these five important objects are in capital letters and bold – this will make it easy for you to search for them in this article in case you haven’t found them and want to find a solution to get them. The names of these items are:
- CHARCOAL
- OLD BONE
- RED MUSHROOM
- CRYSTAL OF QUARTZ
- HOURGLASS
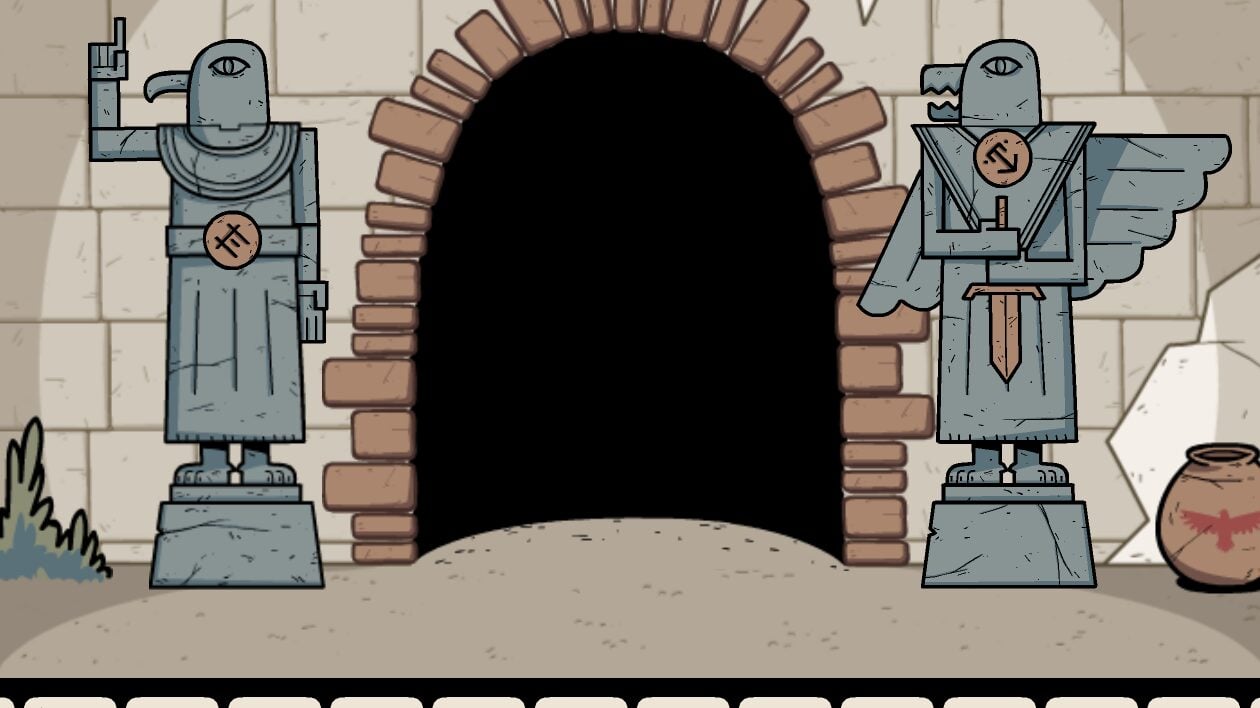
Move to this room. It has an entrance to the ritual room. The entrance in the middle is flanked by two large statues on the left and right. Tap to enter.
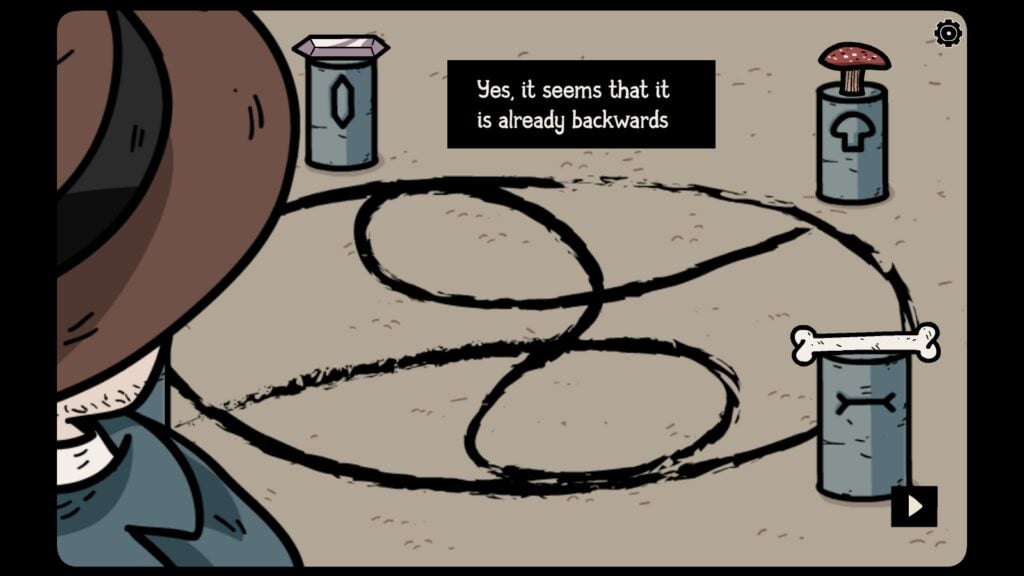
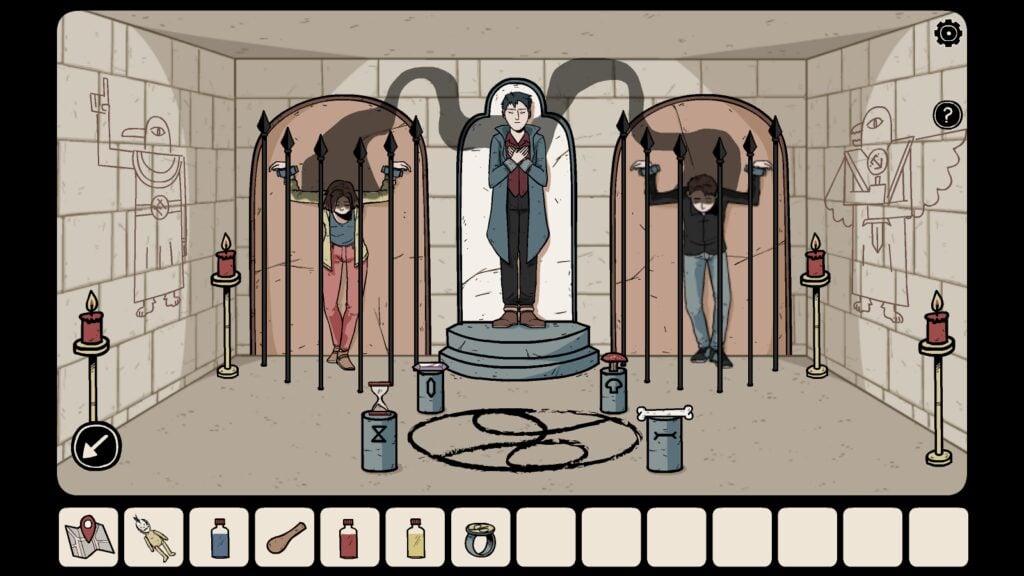
Inside the ritual room, four blue cylinders surround the same strange symbol as seen in the ring. There’s a drawing of a bone, mushroom, crystal, and hourglass. Place the old bone on top of the cylinder that has the drawing of a bone. do the same for the remaining three objects.
Finally, tap the charcoal and then tap the symbol drawn on the floor. The detective will remember Laia’s words when he asked how to undo the Shamalu ritual
“the ring symbol was drawn inverted with charcoal”.
He will follow her instructions.
As he finishes drawing the symbol inverted with charcoal, two pictures of bird-headed guards appear magically on the left and right walls. Take a screenshot or mentally note their pose and the position of the symbols on their collar and belt.
Step out of the ritual room by tapping the arrow on the lower-left corner of the screen and you will see the same bird-headed statues on the left and right sides of the entrance.
Pay attention to the stance of the bird-headed guard pictures on the left and right walls of the ritual room. Also, note the position of the symbols on their collar and belt. Reproduce their stance by moving the parts of the two bird-headed statues near the entrance. Parts of the bird-headed statues, such as the beak, fingers, wings, arms, the symbols on the collar and belt, sword, and face, are movable. Tap to move them to ensure they look the same as the pictures on the ritual room walls.
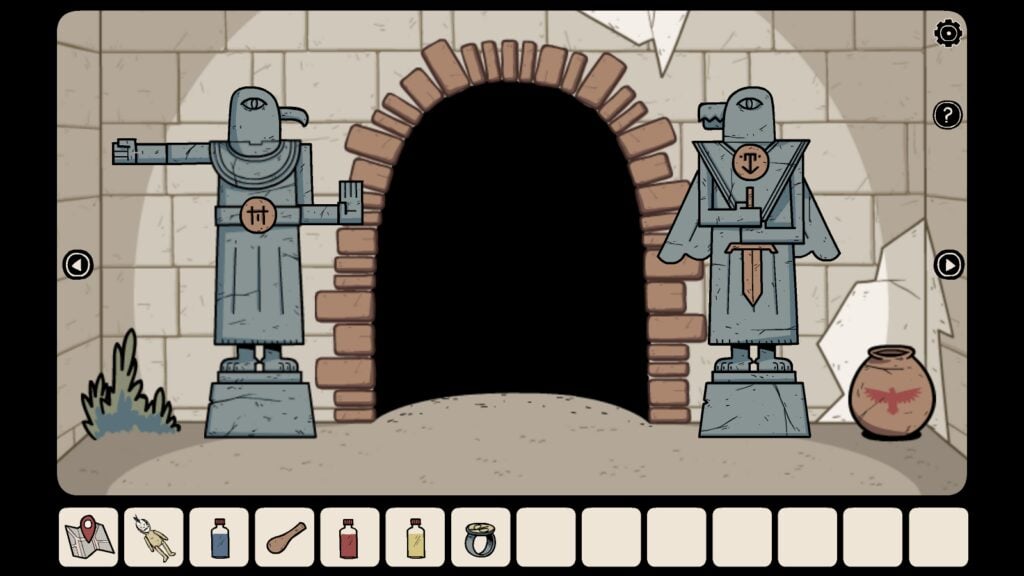
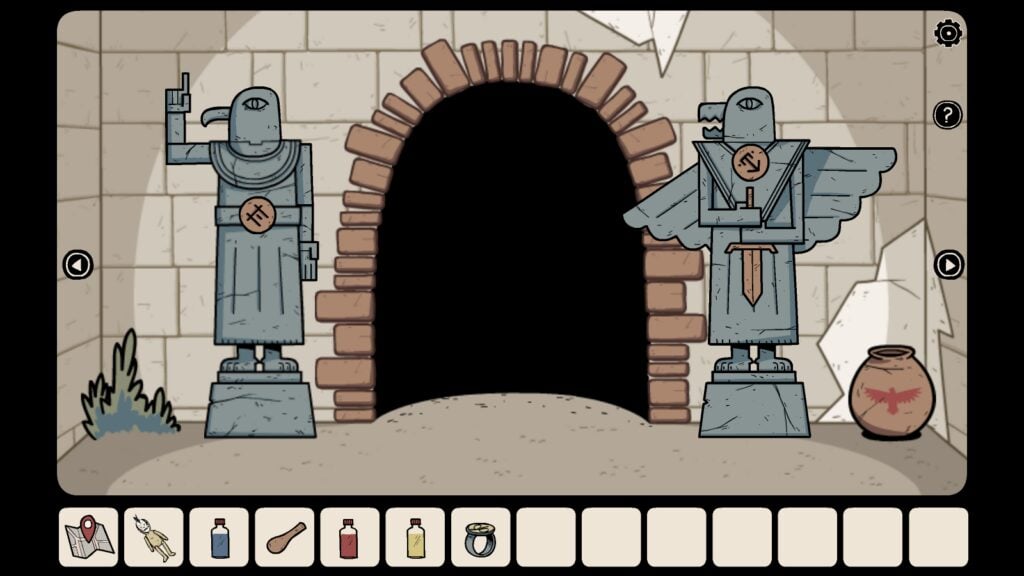
Bird-headed pictures on the wall

Bird-headed Statues
This may be a randomly-generated puzzle. So the stance of the statues in your game could be different than ours.
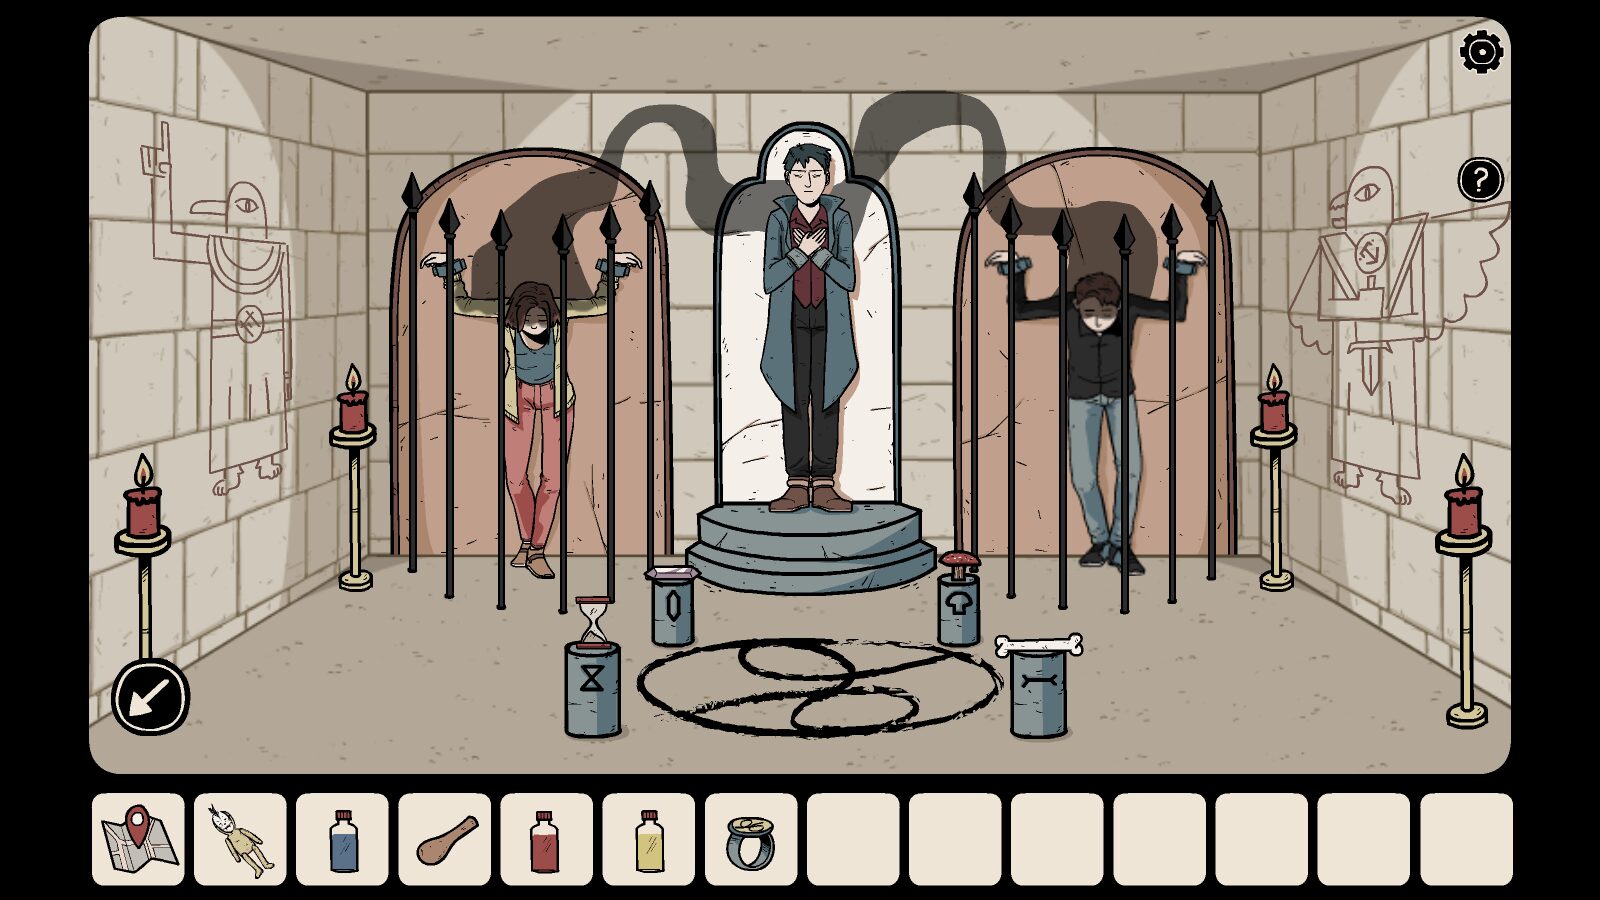
When you solve this puzzle, Anna and Lian’s handcuffs unlock automatically. Detective Ren Larsen, Anna, and Lian try to escape but Frederick wakes up and the detective confronts him. You will have to make that last attempt to foil his ritual and this involves the ring with the Shamalu ritual symbol and the doll received from Laia.
Endings
There are two endings in Ghost Case – Good and Bad. You will trigger the bad ending if you make a wrong move or if there’s a minute delay in foiling his ritual. If you are late and he succeeds, the Shamalu ritual will suck the soul out of Anna, Lian, and the detective’s bodies and Frederick will achieve eternal life.
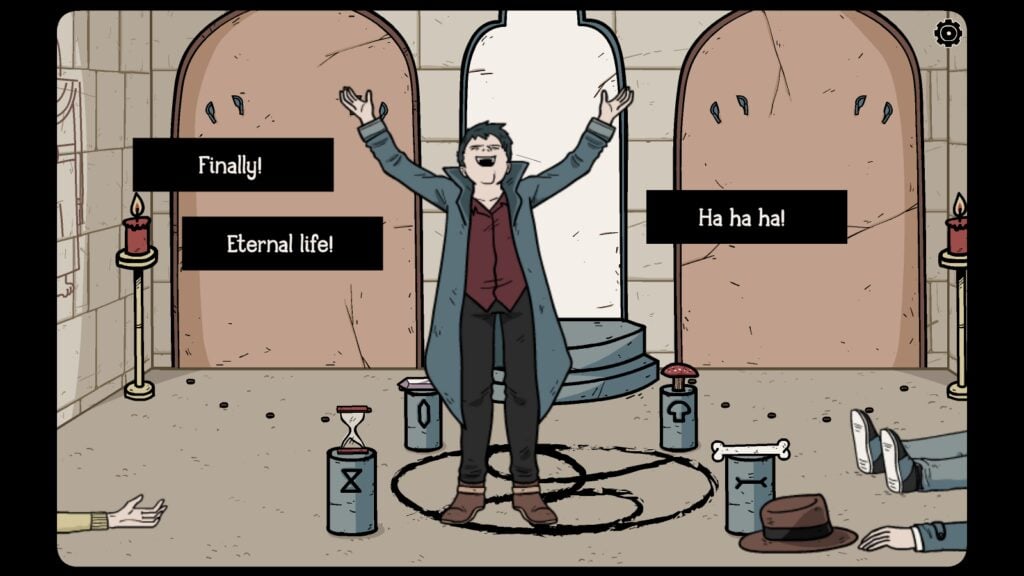
You will have to be quick to undo his evil ritual. Here’s how to do this to get a good ending:
Combine the ring with the doll. On the inventory at the bottom of the screen, tap the ring and then tap the doll.
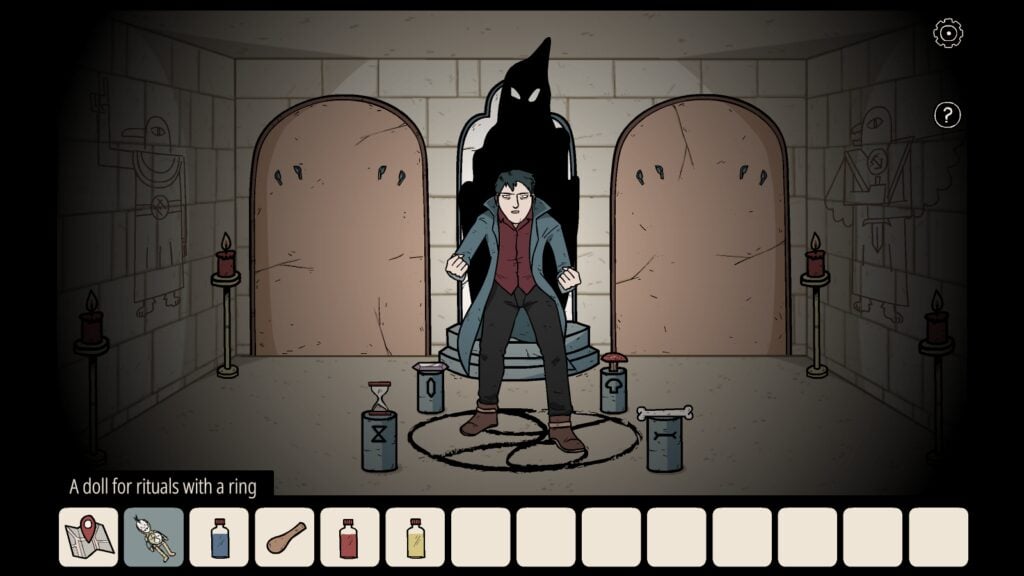
Now tap the combined item and tap on Fredrick. The detective throws the doll at him. The enchanted doll lands on the symbol drawn on the floor.
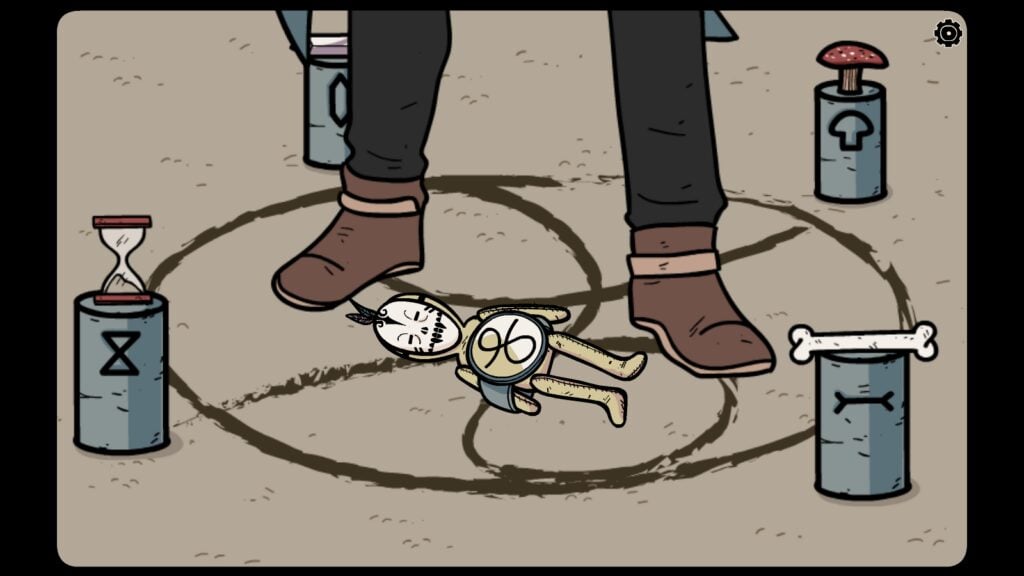
Frederick’s soul will be trapped inside the doll.
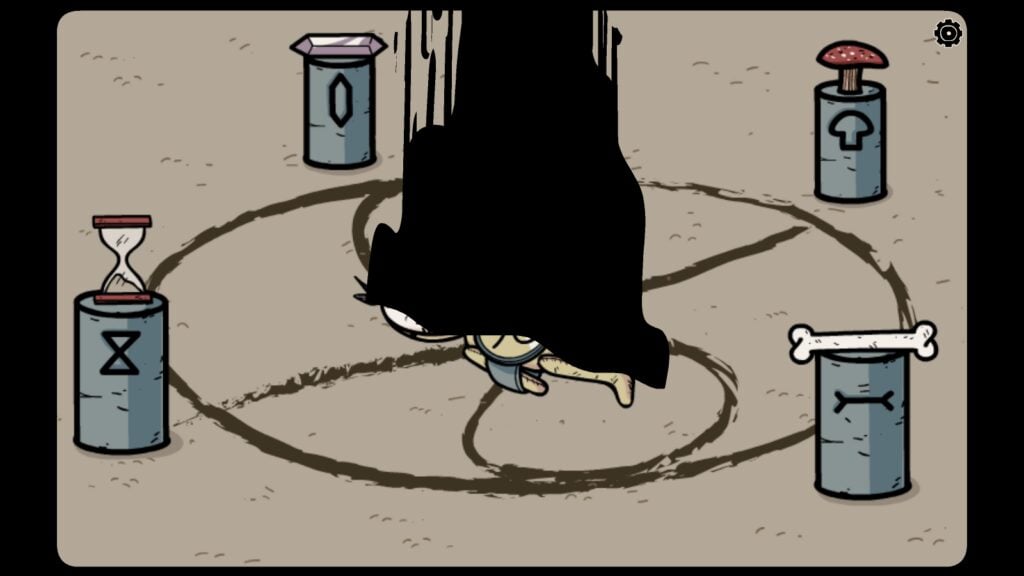
Secret Ending
Ghost Case’s good ending triggers an additional “secret ending”, which also includes a bonus puzzle. After the cutscenes, the detective hands over the doll to Laia, who knows about such dolls and has a special place to keep them.
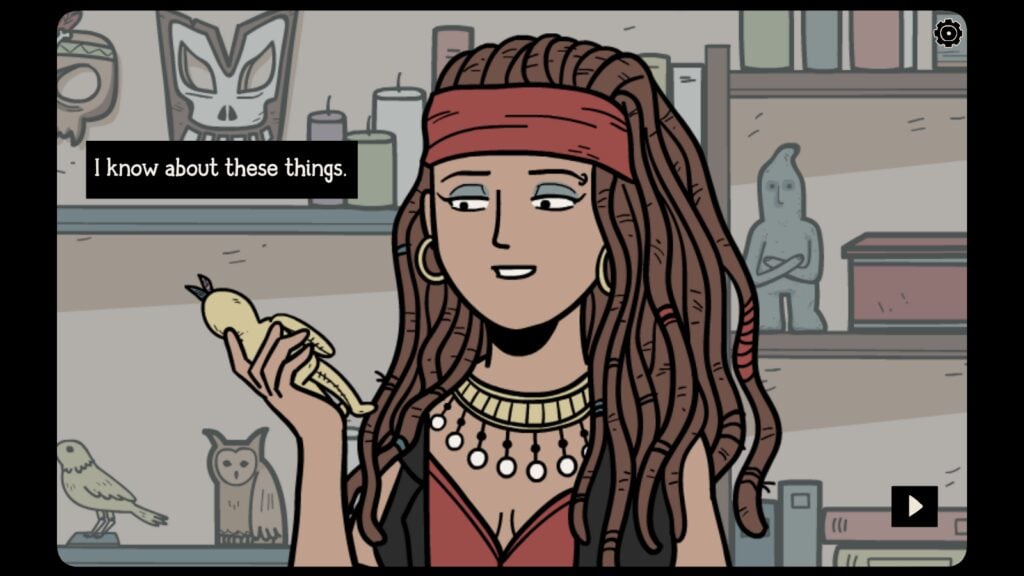
She will move towards a small casket, where a bonus puzzle awaits. It’s a maze-like puzzle. All you have to do is rotate the tiles to find a path that connects the left eye to the right eye to open the casket. The path-finding puzzle may be a bit different in your game.
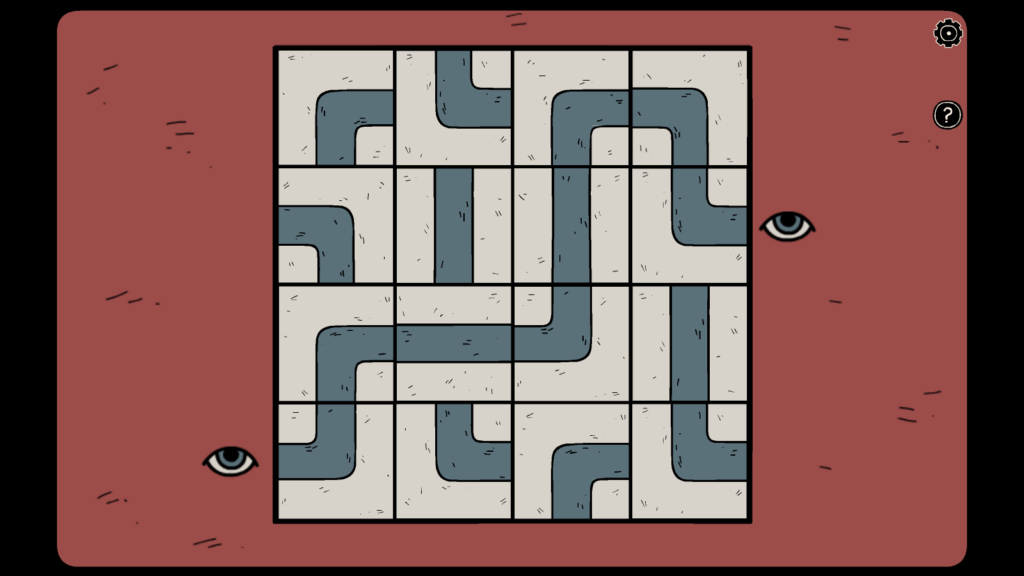
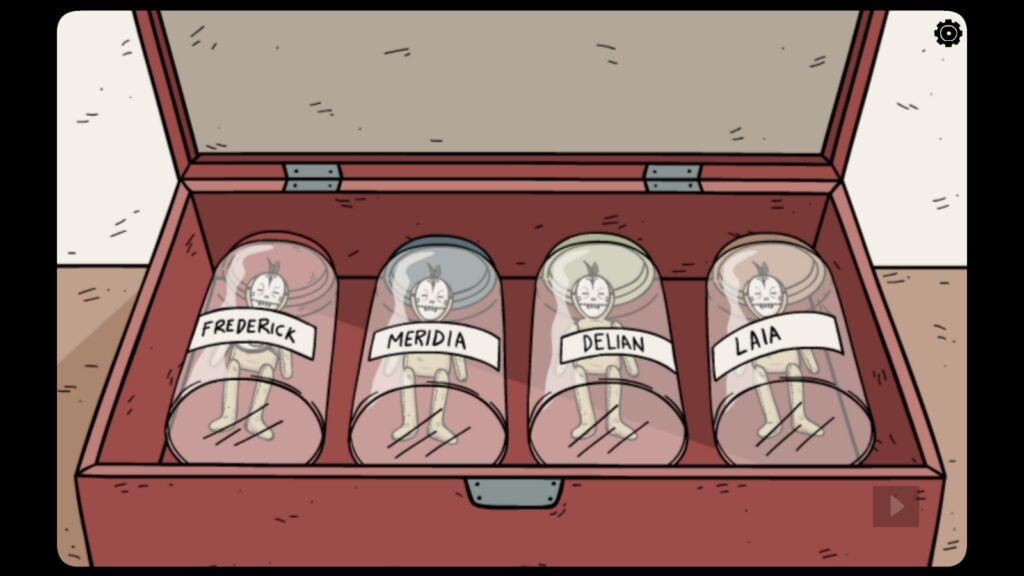
Solving this puzzle opens the casket. Laia puts the doll inside a glass jar labeled “Fredrick”. There are three more dolls in the casket – “Meridia”, “Delian” and “LAIA” *shudders*.
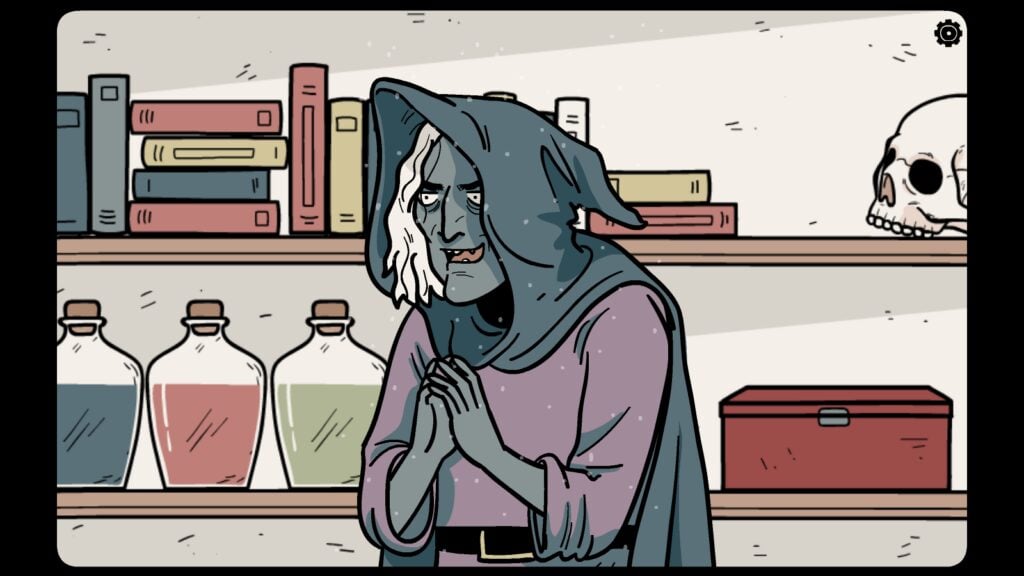
The next scene shows Laia transforming into a witch. Looks like we have seen this evil witch before. Oh yes! Nowhere House! But then who is Laia? You can know more about her in our new walkthrough:
- Haunted Laia: Complete Walkthrough and Guide
List of Hidden Owls
Dark Dome’s fascination with owls seems pretty interesting. Throughout this game and other games, you will find pictures and symbols of the bird of prey in the most unexpected of places. Here’s a list of all owls in Ghost Case:
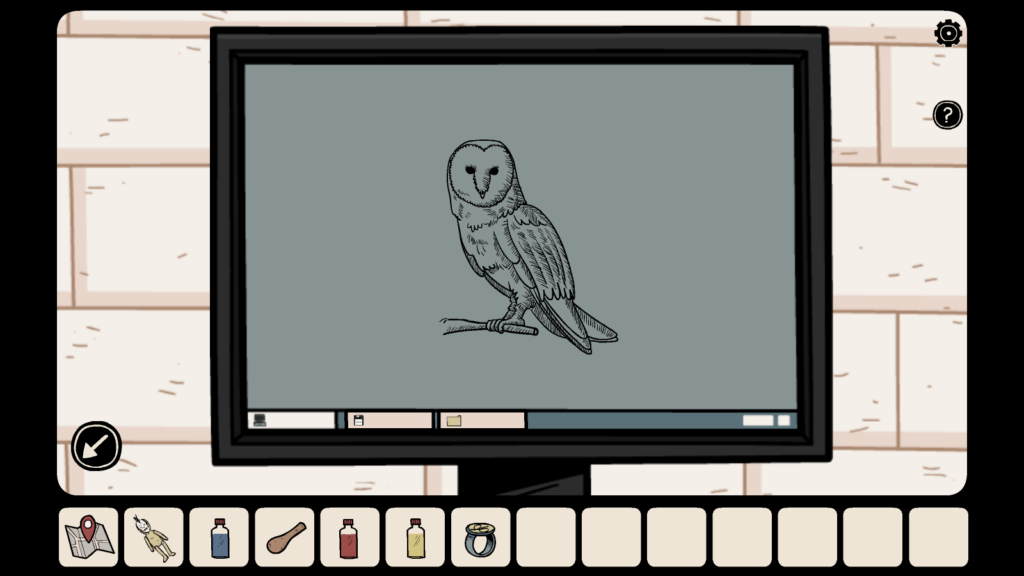
1. In the police station, tap the computer and tap the floppy disk icon on the taskbar. You will see the image of the owl on your monitor. Do this after inserting the floppy disk into the disk drive.
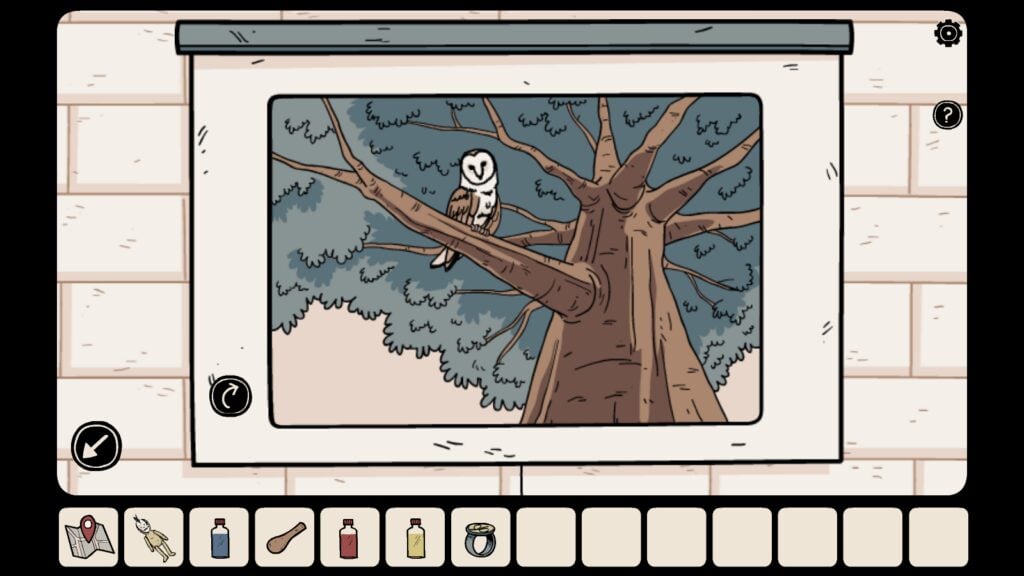
2. The second owl can be found in the police station as well. After inserting the slides into the projector, turn on the projector. Keep viewing every image on the white screen, including the blank slides. The last slide will display an owl perched on a branch of a tree.
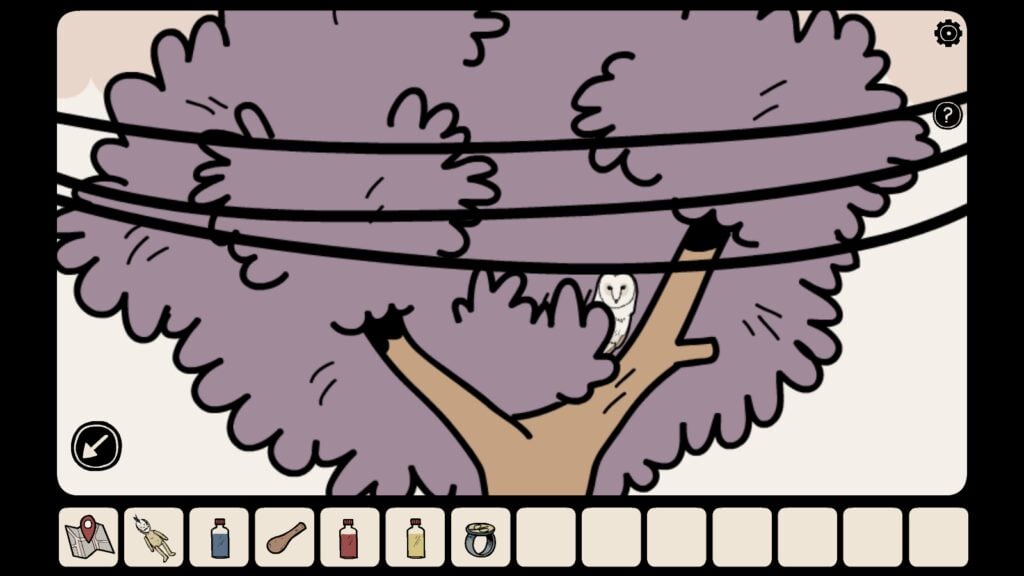
3. In the haunted house (the second location, next to the police station on the map), go to the Vase Room and tap the left window to open it. You will see a ghost peeking from the window opening. When it vanishes, tap the outside view to get a closer look. Tap the purple tree on the extreme left to spot an owl.
4. In the same haunted house, navigate to the Piano Room. You can access this room from the telephone room. Tap the clock above the mini piano desk. Make sure you solve the clock puzzle first and then tap the tiny door on the right to open it. You will see a cute owl peeking from the opened door.
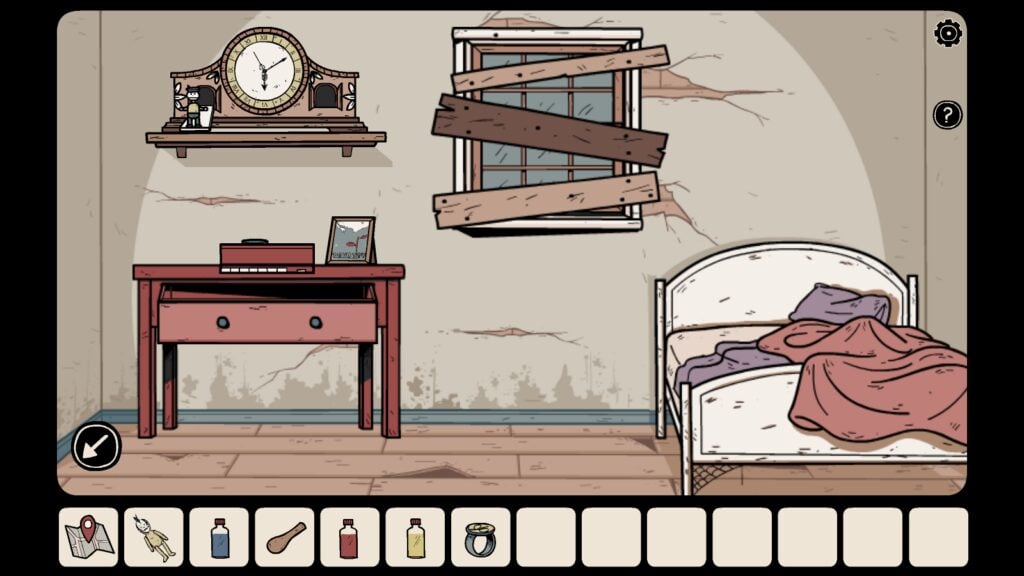
The Piano Room
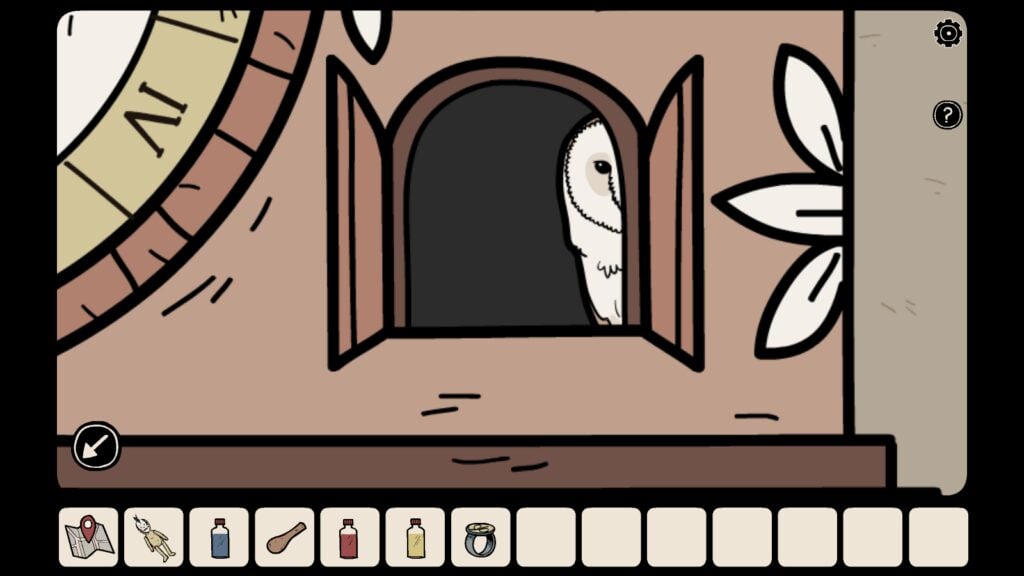
There’s an owl in the clock’s right door.
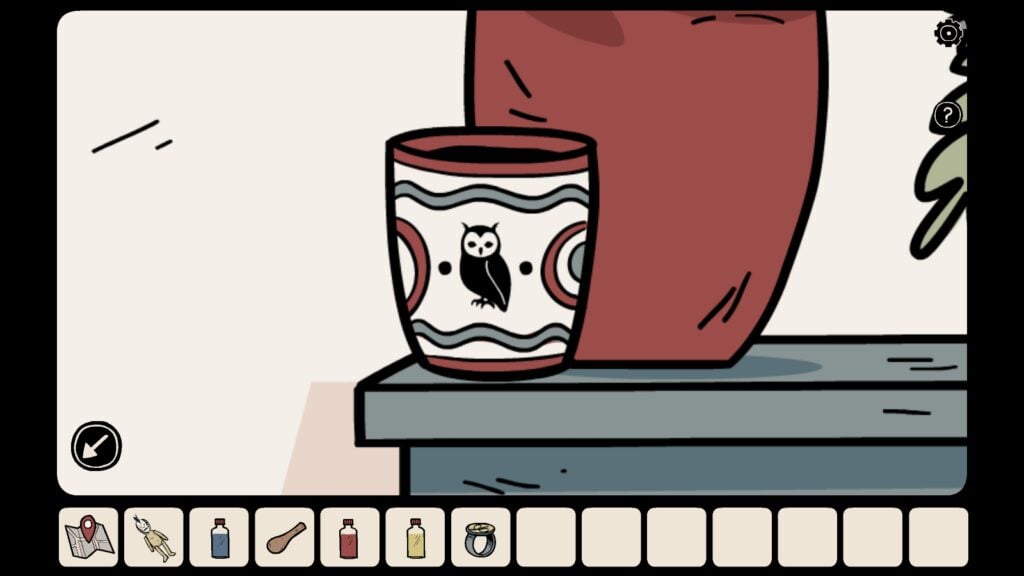
5. In Lian’s House, tap the coffee mug to get a closer look. You will see a picture of an owl drawn on the mug.
6. In Anna’s house, the wine bottle behind her has a picture of an owl. Tap the wine bottle.
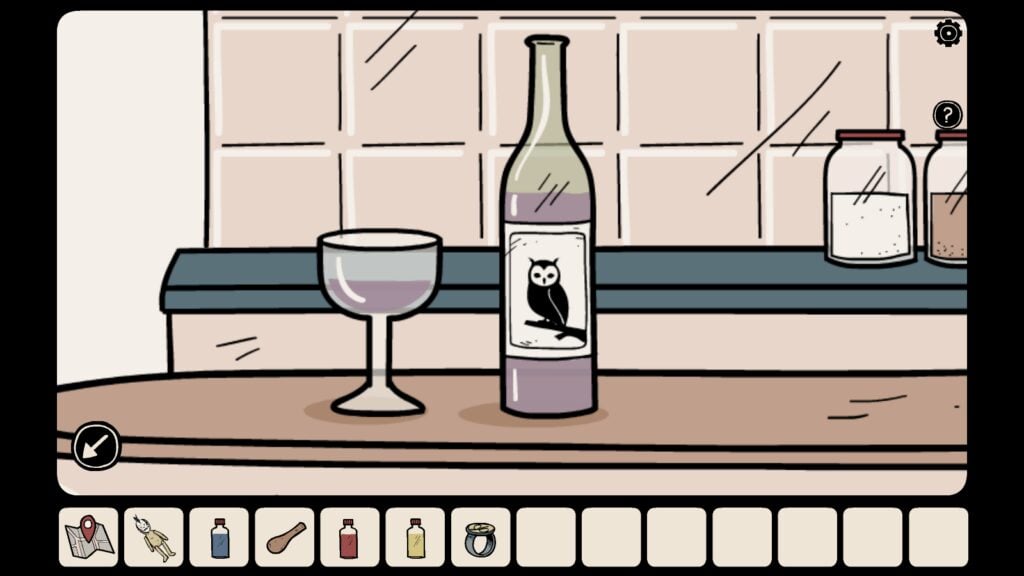
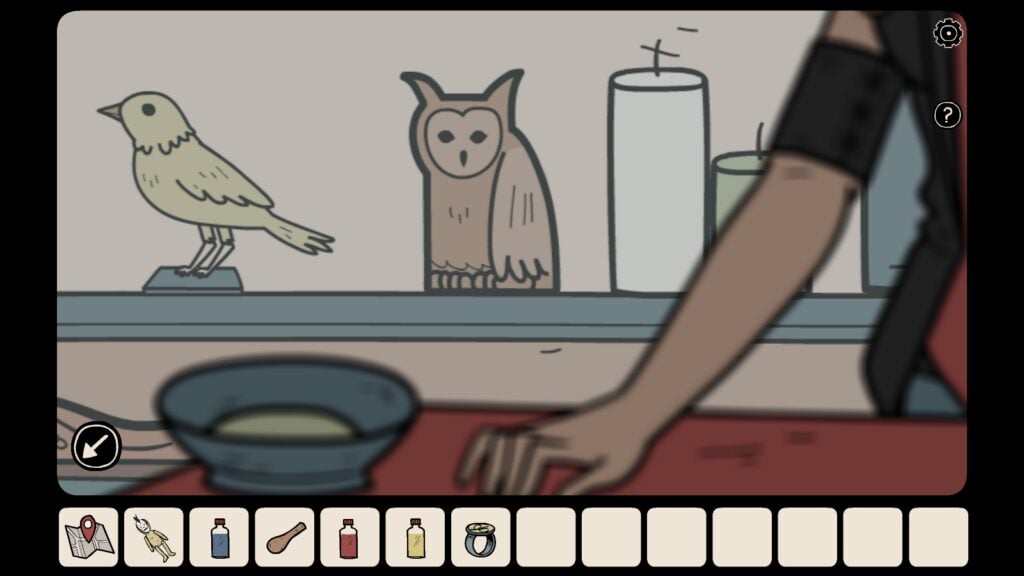
7. In Laia’s Store, pay attention to the decor pieces kept on shelves behind Laia. There’s a small wooden statue of an owl, just next to the bird, on the second shelf.
8. In the mental hospital, while talking to the hospital staff member/nurse, tap the book kept near her to discover an owl’s picture on the book’s cover.
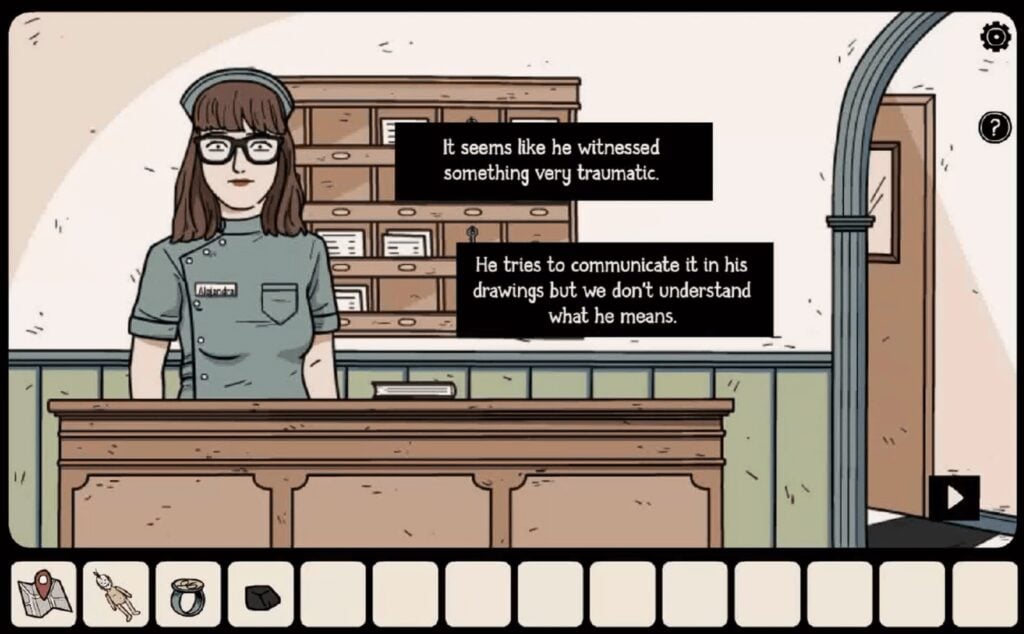
Talk to the nurse and then tap the book next to her
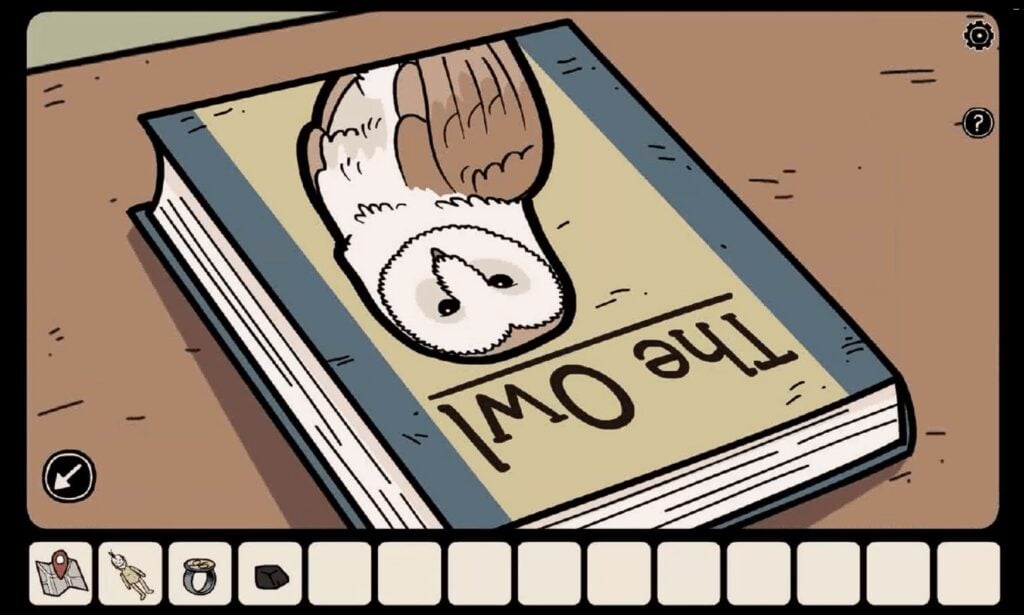
The owl on the cover of the book
9. In the mental hospital, in Lenny Auris’s ward. There’s a photo of an owl stuck underneath the white mattress/makeshift bed. Tap the photo.
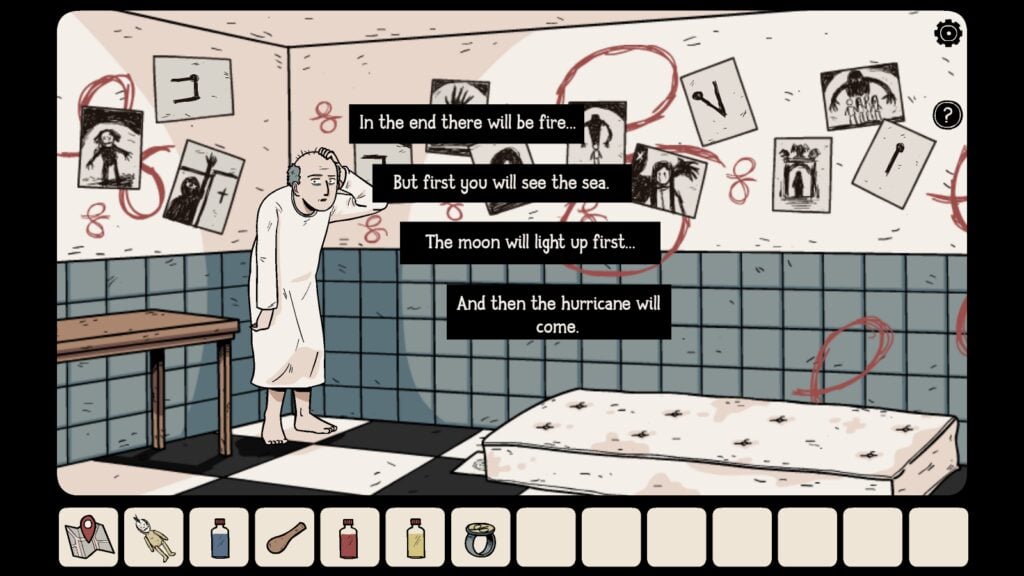
Asylum Ward
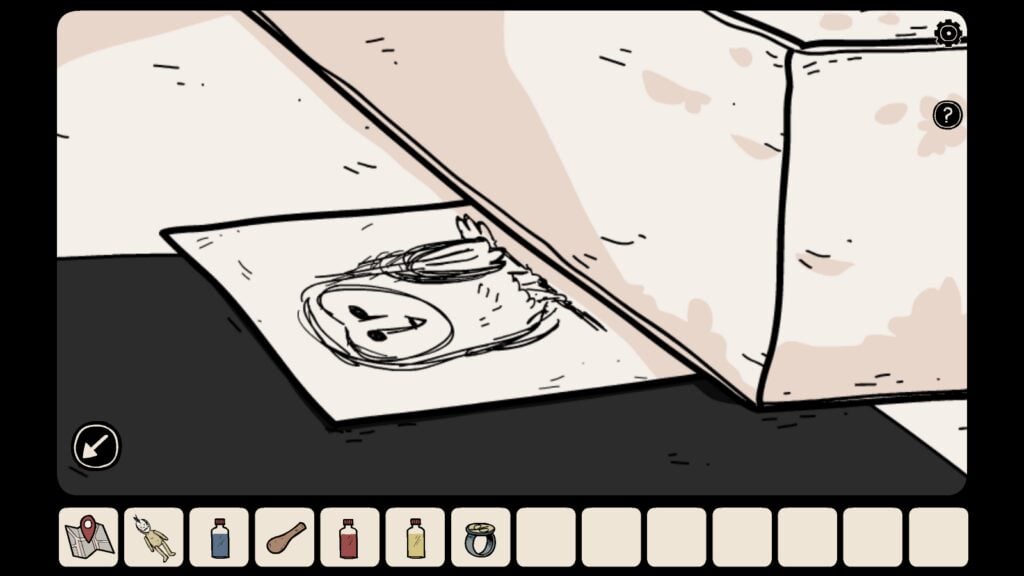
Owl underneath the mattress in the asylum ward


