If you are running Bluestacks Android emulator on an AMD-powered Windows 10 laptop that has dual graphics, i.e., integrated Vega 8 graphics and an RX 500X series (560X) dedicated GPU, then you must have noticed that “switchable graphics” option is missing in the latest Radeon Adrenaline 2020 software. Right-click on the screen and click on the Radeon software settings. You won’t find this option anywhere in the software GUI.
In AMD laptops with dual GPU, the switchable graphics setting allows users to assign a dedicated GPU to an application/game for optimal performance.
To increase gaming performance in Bluestacks Android emulator, you can switch from the integrated graphics (VEGA 8) to discrete GPU through this option. This will not only give an FPS boost, but also ensure lag-free performance and will allow you to play games at high settings.
For Nvidia-powered dual graphics laptops, switching to a dedicated GPU is very easy – on Bluestacks, click on the hamburger menu > settings > engine and check “Prefer dedicated computer graphics (Nvidia only)”. Thats it!
But for AMD laptops, you will have to open the Radeon settings and assign a discrete GPU by choosing “High Performance” in the system menu. Sadly, you won’t find the switchable graphics in the latest Radeon Adrenaline software edition.
No worries! Here’s a simple workaround to run Bluestacks on dedicated GPU. Follow these steps:
- Open Bluestacks. Click on the hamburger icon on the top-right corner of the screen. Click on “settings”.
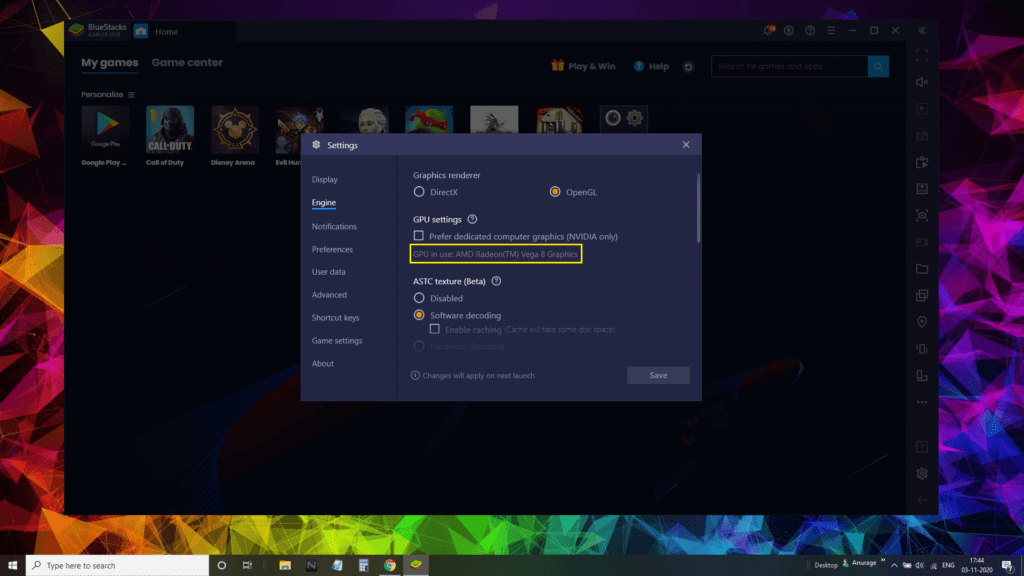
- Under “Engine”, find the current GPU in use under “GPU Settings”. Notice that the current GPU in use is AMD VEGA 8 graphics. This means that Bluestacks is currently running on integrated graphics and not on discrete GPU (RX 500X series). Close Bluestacks.

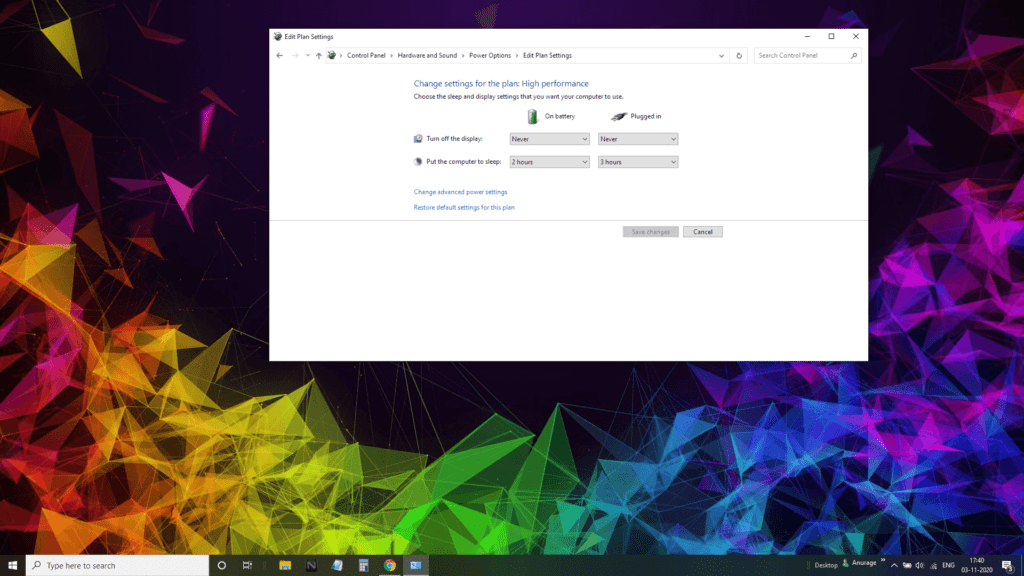
- Click on “Change advanced power settings”.

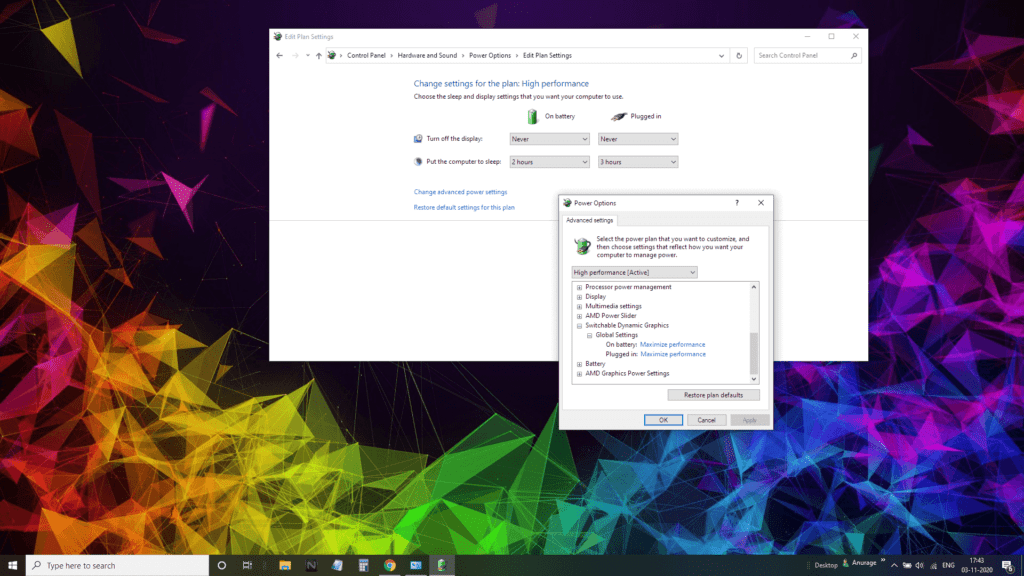
- A new window named “Power Options” will pop up on the screen. Scroll down until you find “Switchable Dynamic Graphics”. Click on the “+” sign beside it.
- Under “Plugged In” or “On battery” (depends on whether your laptop is running on battery or on AC power), change “optimize performance” to “maximize performance” *.

Choose “Maximize performance” under Switchable Dynamic Graphics
- Click on the “Apply” button and then click “OK”.
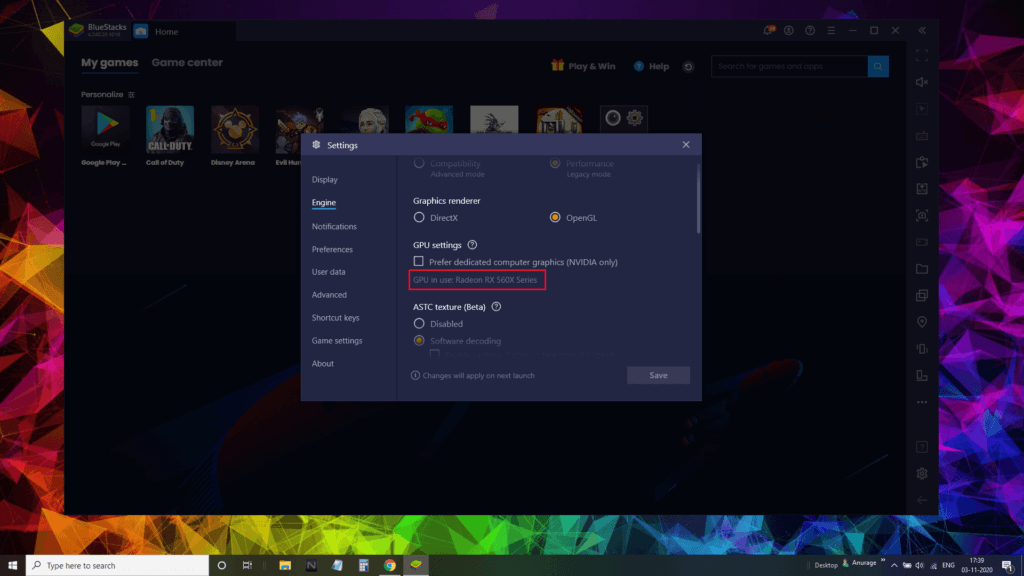
- Now open Bluestacks and again go to Settings > Engine. Under GPU settings, you will notice Radeon RX 560X series in GPU in use. You have successfully assigned your AMD laptop’s dedicated GPU to Bluestacks.

Check GPU in use again to see the changes. You will notice the name of your laptop’s dedicated GPU.
*Please note that the maximize performance option under “switchable dynamic graphics” in power options is a global setting and the discrete GPU will be in use for all applications, quite unlike the previous switchable graphics option on Radeon settings, where you can assign GPU to individual applications.


