Dark Dome’s Haunted Laia is a puzzle-adventure game. In this game, you must investigate a mysterious case of missing persons.
Dark Dome is known for its brilliant point-and-click room escape games, such as The Unwanted Experiment, The Girl in the Window, Ghost Case, and Nowhere House.
A new family has arrived in Hidden Town, but since the day they moved in, they have been harassed by strange presences in their own home until a few days Laia’s father and brother disappeared without a trace. You must help Laia solve the mystery and reveal the secrets behind her family’s disappearance.
Note: Some of the puzzles and their hints in the game are randomly generated.
- Must Read: Ghost Case: Full Walkthrough and Guide
Video Walkthrough
Our video walkthrough will help you find all answers to mind-bending puzzles and riddles. However, you may skip straight to our written content in case you need solutions to specific puzzles.
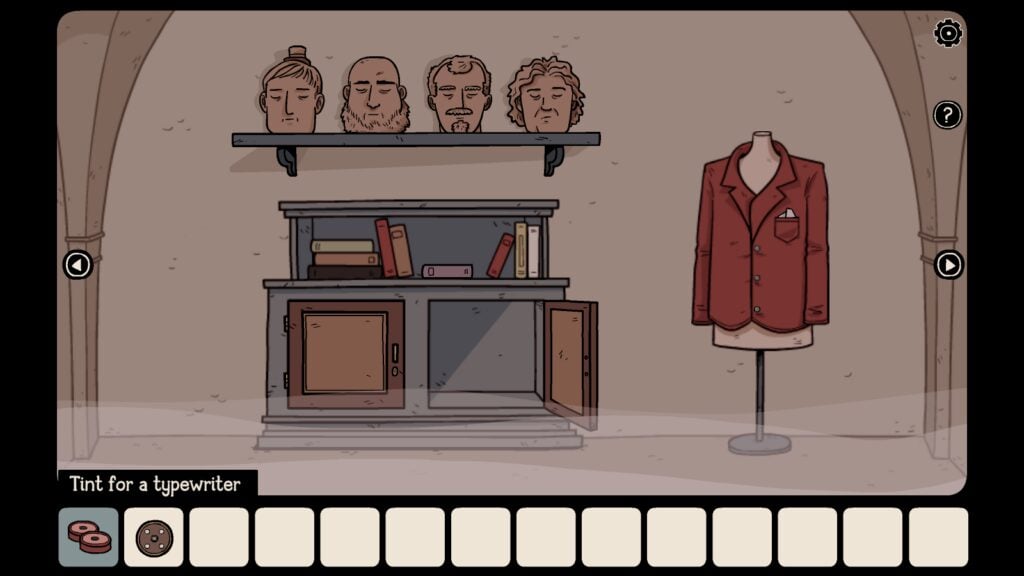
Using the arrow key on the right, move to the room where four head sculptures are kept on a shelf.
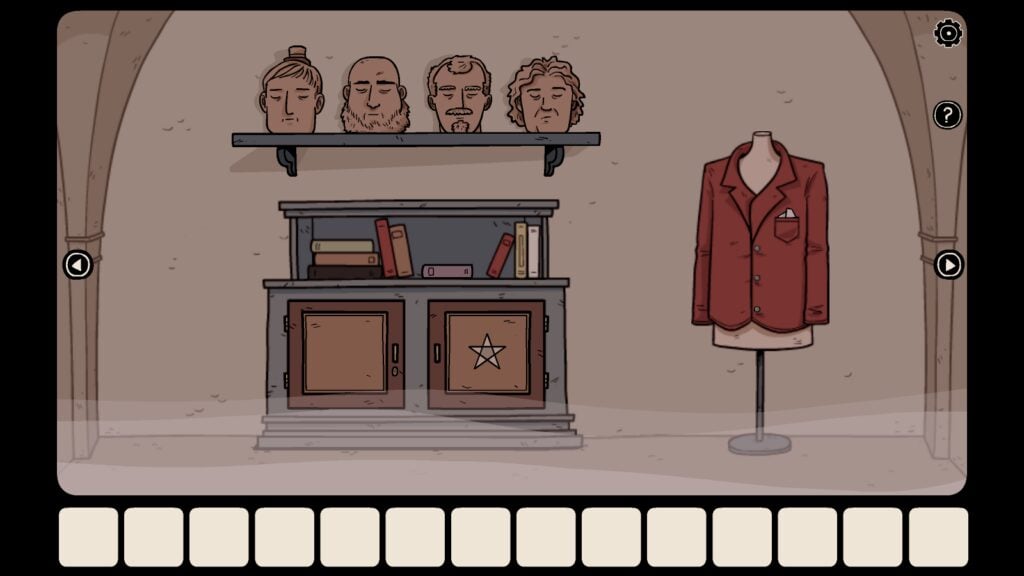
Unlock the cabinet with the pentagram symbol.
Tap the cabinet with a pentagram symbol. The cabinet is below the pile of books. You will find a pentagram with a symbol of the crescent moon on all five points.
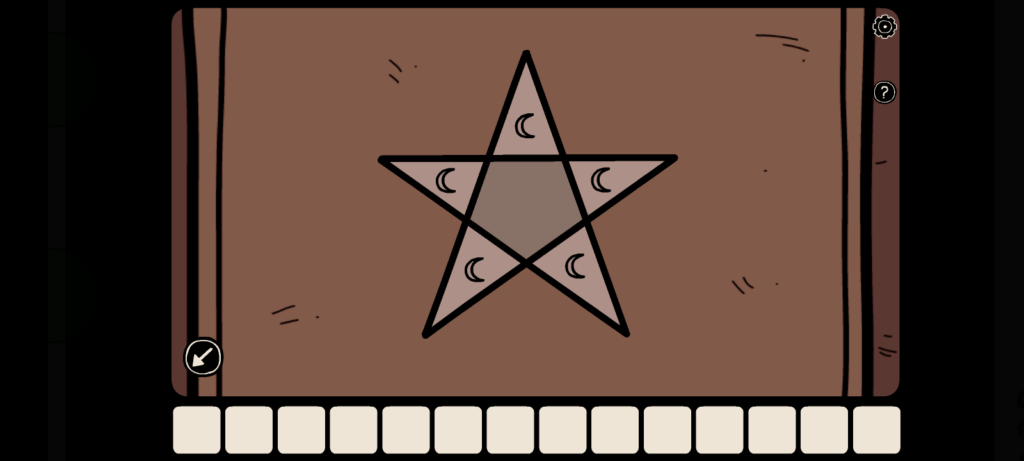
Pentagram with the same symbol on all five points.
You can tap on a point to change the symbols. There are 10 symbols on each point of the pentagram. – crescent, heart, eye, snail, sun, water (river), whirlwind, fire, frog, and wind. These symbols appear one by one when you tap the star points.
You will find similar-looking symbols in the form of pictures drawn on a painting in the typewriter room. Move to that room and tap the painting above the typewriter. Note down the position of all five symbols on the painting:
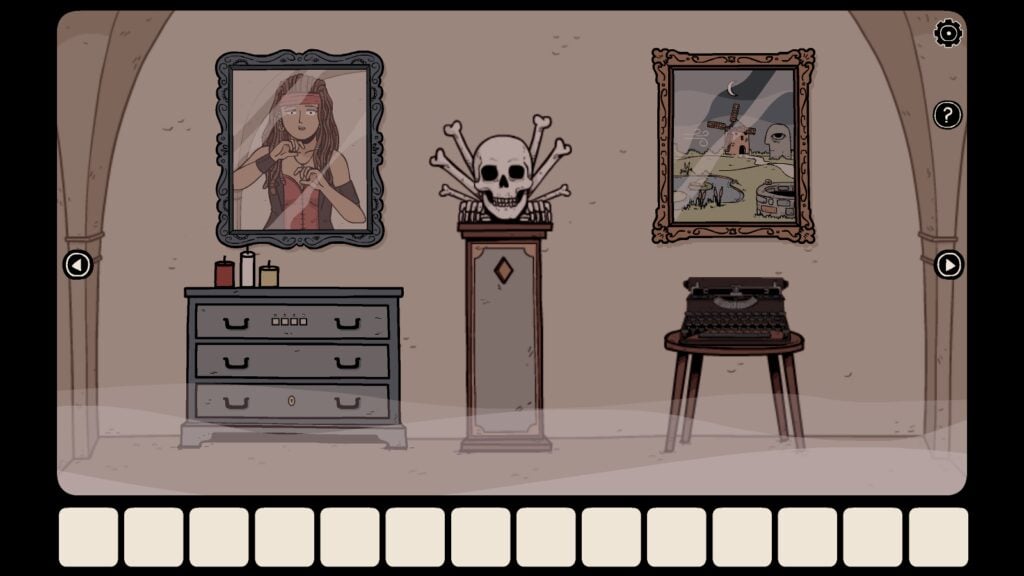
Typewriter room
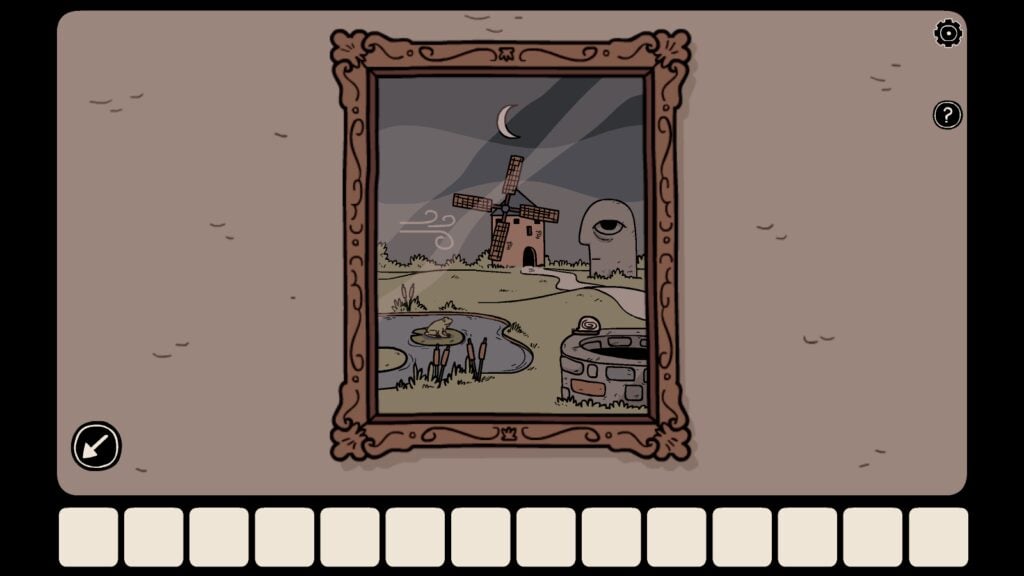
Painting on the typewriter room wall.
In our game, pictures displayed (crescent moon, one-eyed statue, snail, frog, and wind symbol) in a clockwise direction as shown in the screenshot below:
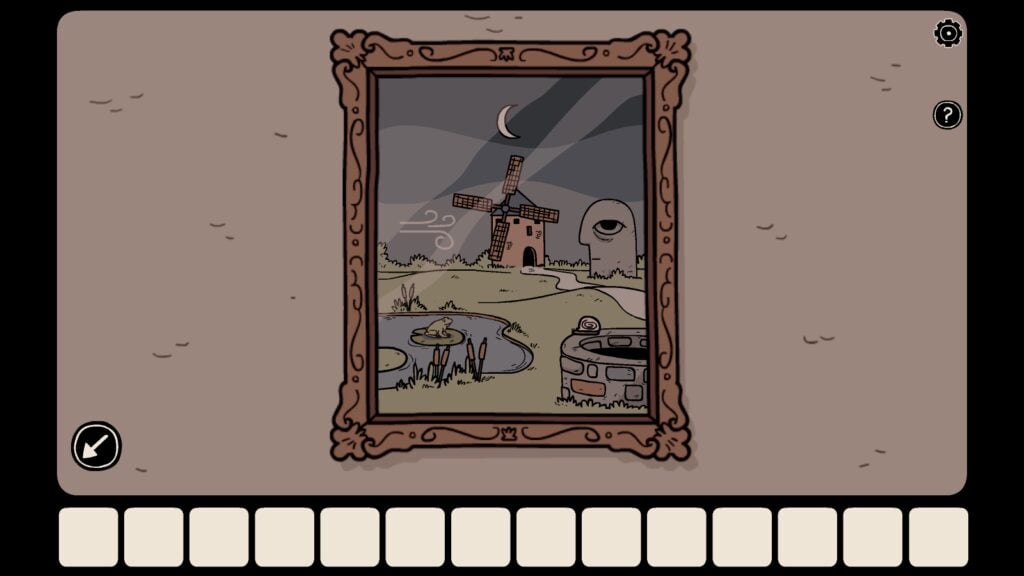
You will have to enter the symbols on the five-pointed star in the same order as shown in the painting. Go back to the head sculptures room and tap the pentagram cabinet twice, zoom in to enter the symbols in that order. Please note that the order of symbols in your painting will be different than ours since puzzles are randomly generated in a Dark Dome adventure game.
So the correct order of symbols on the pentagram/five-pointed star as per the painting on our game is:
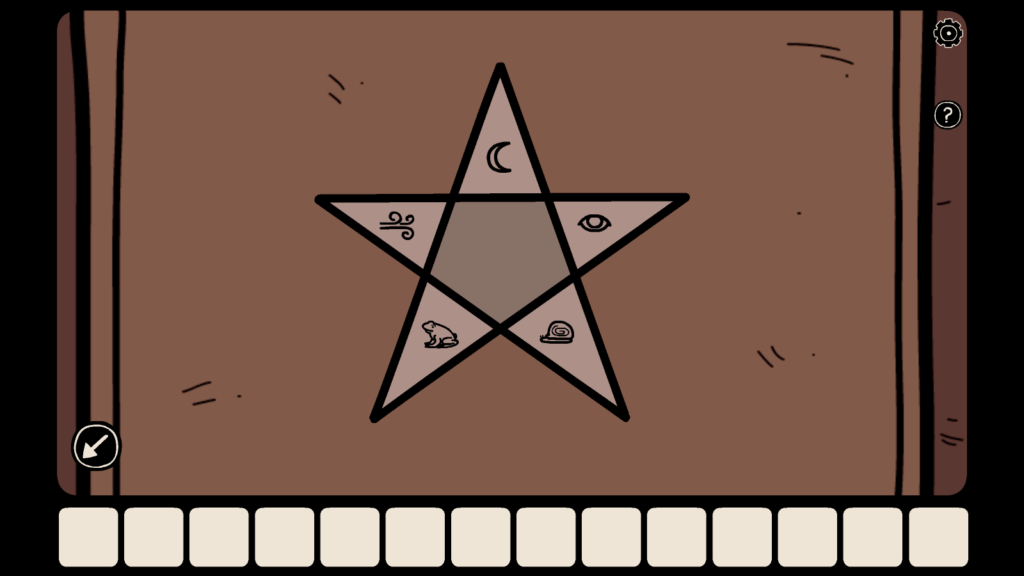
The position of the symbols in the painting is replicated on the five-point star in the head-bust room.
The cabinet opens with a click sound. Take the wheel and the blue key.
Go to the typewriter room. Use the blue key to unlock the bottommost drawer in the typewriter room. The chest of drawers can be found just below Laia’s painting. Open the unlocked drawer and take the tint for the typewriter.
Go back to the four-head sculptures room and tap the purple book on the bookshelf.
The girl holds the book in her hand. Tap the curved arrow near the book to open it. Tap the blank page to tear it off.
Head back to the typewriter room. Tap the typewriter and use the tint and blank page on it. First, use the tint and then the paper on the typewriter.
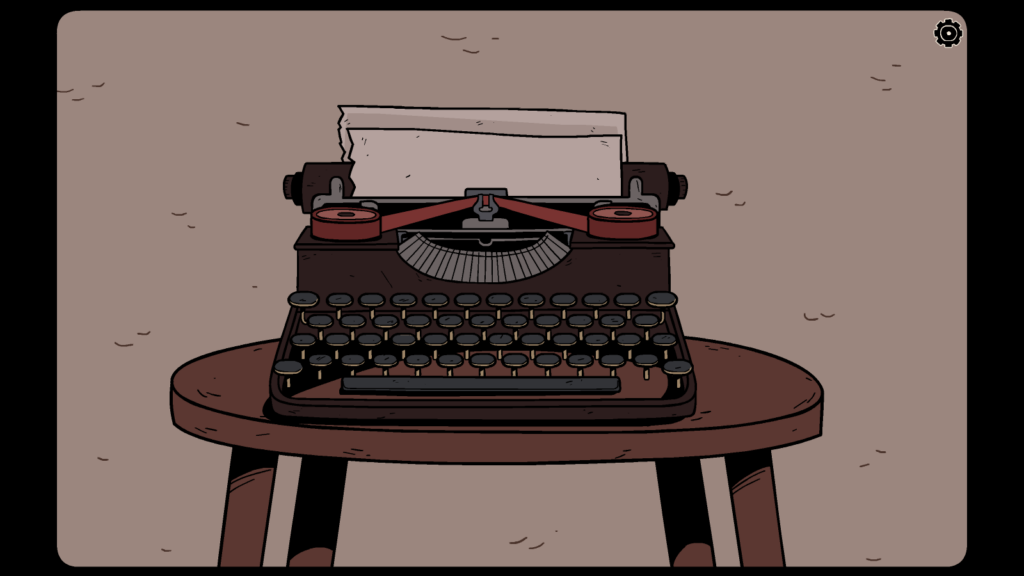
The typewriter starts typing out a cryptic message on its own:
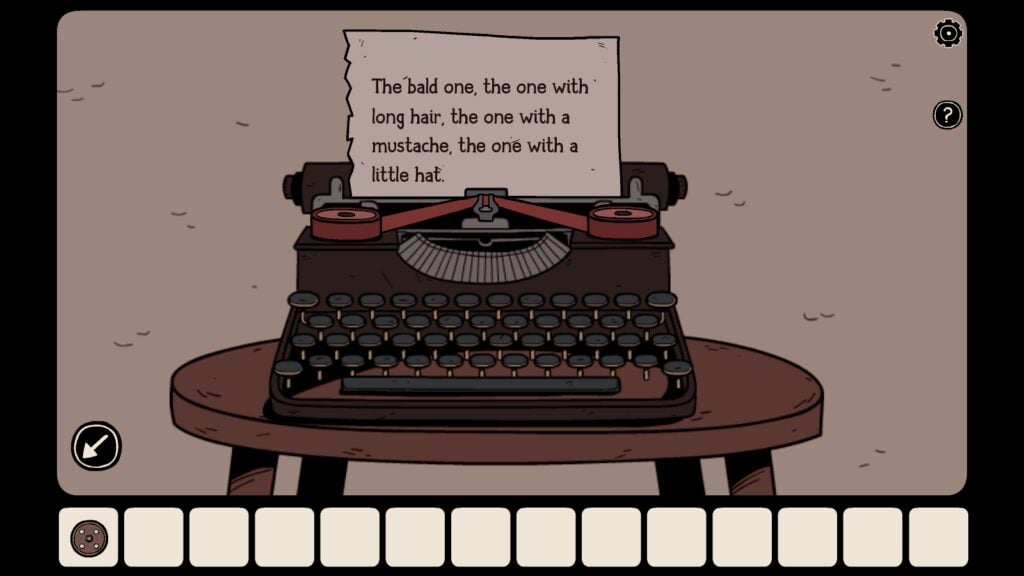
This text will help you discover a numerical code. Go to the four head bust room and follow the order of the cryptic clue:

1. The bald one: Tap the bald man’s head. Count the number of times the bald guy blinks – 6. You got the first digit of the code.
Do the same for the other three guys, but make sure you get the order right. The correct order of the head busts is displayed on the typewriter text.
2. The one with long hair – 2. He blinks twice.
3. The one with the mustache – 4
4. The one with a little hat – 3
In our game, we got this code – 6243. The order of the head sculptures on the typewriter may be randomly generated in your game.
The numerical code/combination will be used to open the purple box kept on the top shelf in the rusty chest room. Enter the code and open the purple box. Take the small red crank. There’s also a piece of paper in the box. Tap the paper to pick it up. The paper has three rows and each row has red, blue, and yellow X marks. The order of the colored “X” will be different from one game to another. The piece of paper serves as a clue to another puzzle. To know more about that puzzle, read on:
Now that you have the small crank and a wheel, move to the red door room. There’s a chair in that room. Tap the rope beneath the chair to pick it up.
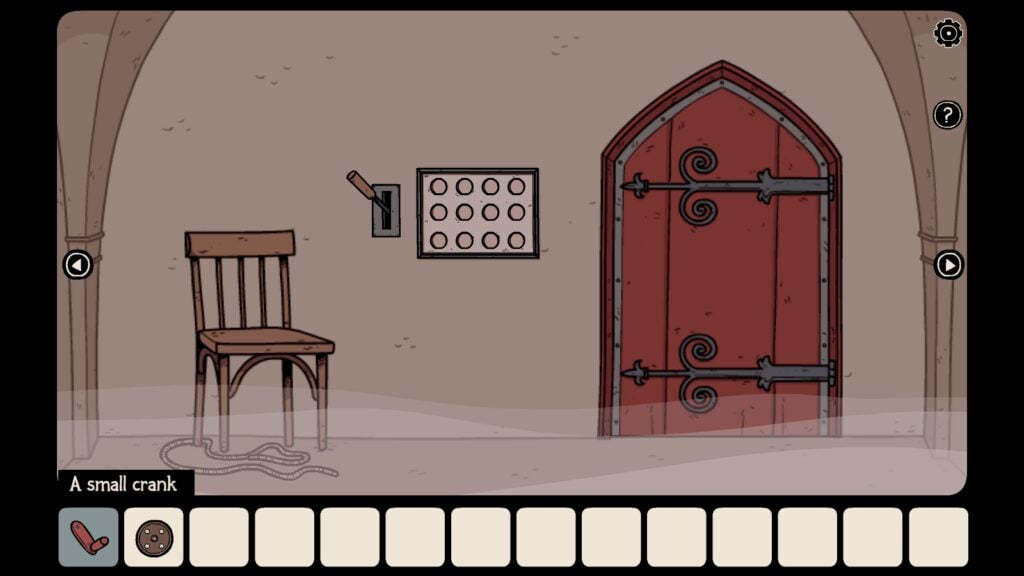
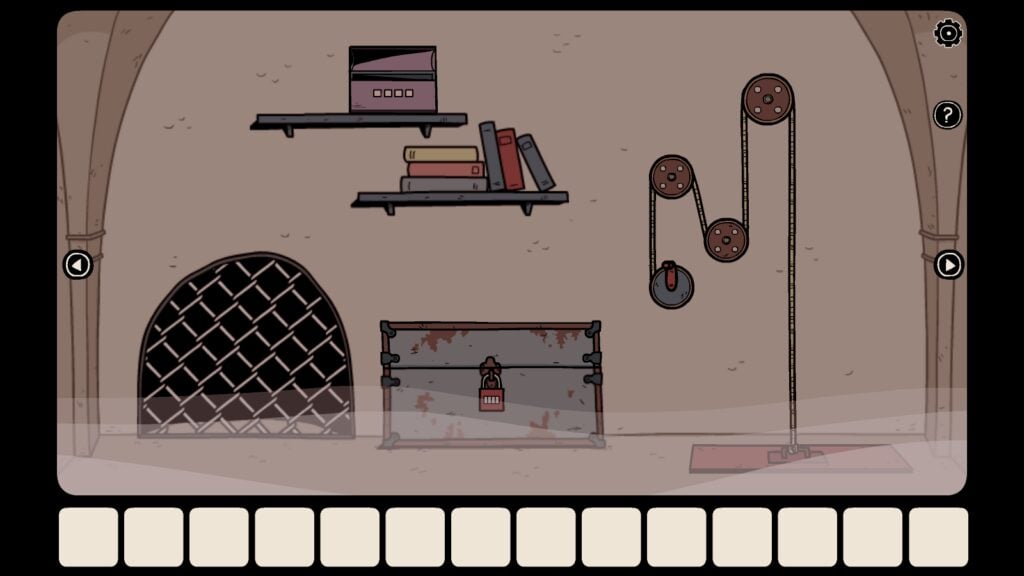
Move to the rusty crate room. There will be two WHEELS fixed on the wall. Install the third wheel on the screw in the middle, between the first and second wheels. Next, fix the crank on the blue disc and then use the rope to complete building the pulley. This is how the finished pulley mechanism will look like:
The Skull Puzzle
Tap the crank to set the pulley in motion. It will lift a heavy crate – it has a picture of a grid. Tap the grid to zoom in. The grid has skulls of three different colors – yellow, red, and blue – It’s actually a simple version of a Rubik’s cube-like puzzle but in 2D. Your objective is to arrange the skulls of the same color in each row. To get a clue on the order of the skulls and their color, tap the purple box in the same room. It’s the same box you opened with the help of the typewriter/head sculpture clue. Tap the piece of paper in the box and note down the order of colors in each row.
In our game, the order of colors, from top to bottom, is:
Top row: Blue
Middle row: Red
Third row: Yellow
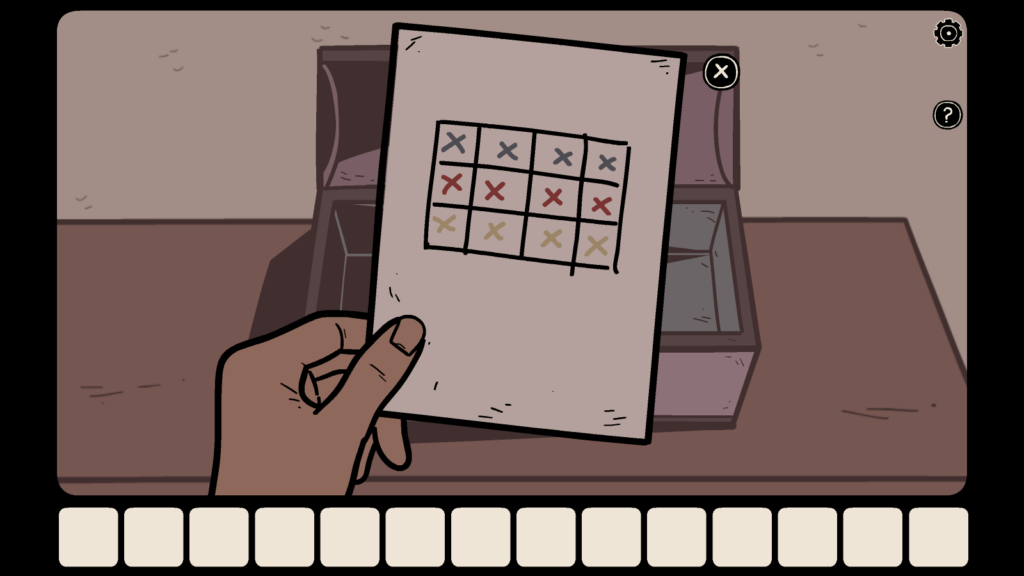
To solve Haunted Laia’s skull puzzle, arrange the colors of all skulls in the same order as shown on the piece of paper. The order of colors on the paper will be different in your game as it is randomly generated. It could be red on the top row, yellow in the middle, and blue at the bottom. They can be in any order, but if you have solved a Rubik’s cube, then the 2D version will be simpler to solve:
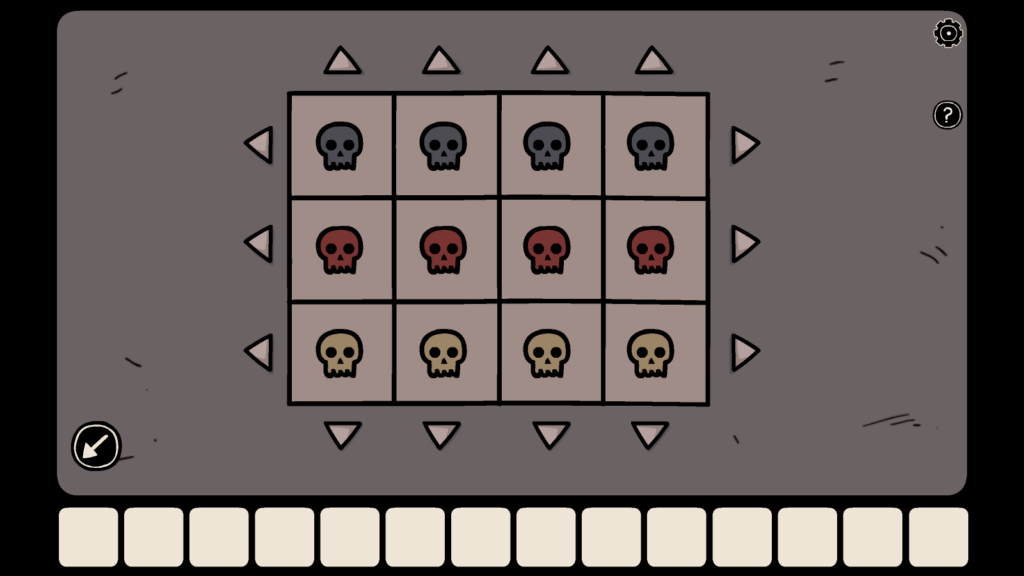
The chest opens, revealing a cutting plier. Take the plier and use it to cut the metal grill on the left.
As Laia uses the plier on the metal grill, she recalls her scary encounter with someone.
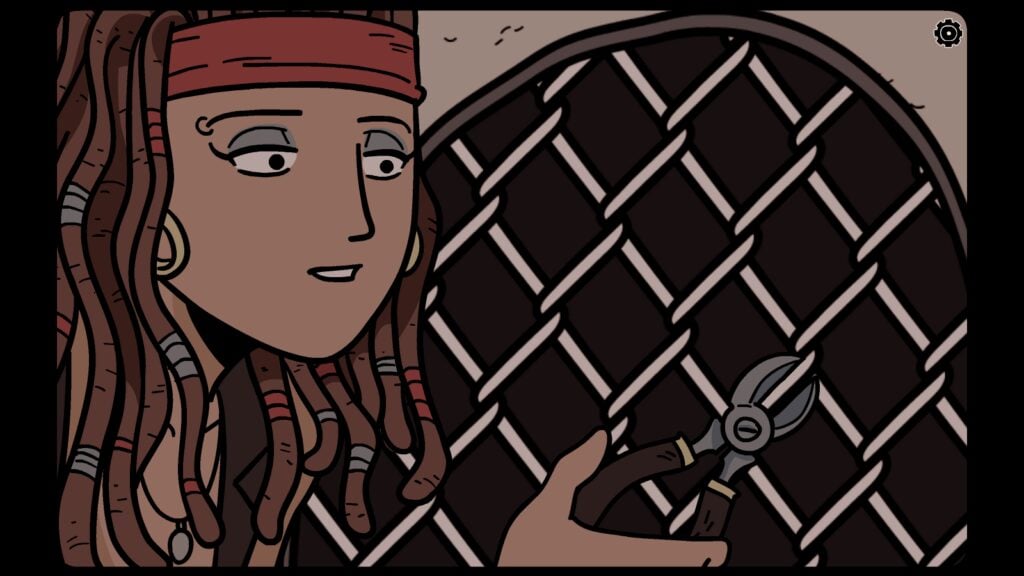
Flashback to 3 hours before and Laia is seen on a chair. Someone is interrogating her – Answer! Who are you? What are you doing here?
The frightened girl agrees to answer the mysterious man’s questions. She narrates an incident and the scene flashes back to a cave. Laia is examining a map as she enters the cave.
This is the entrance of the cave:
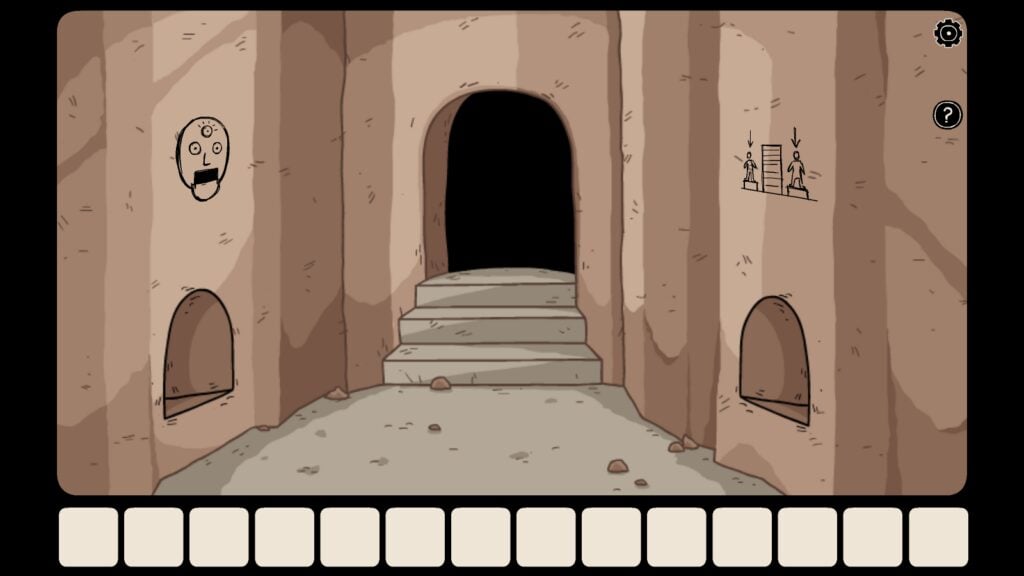
On the entrance, tap the window on the right to find the first iguana as shown in the screenshot below:
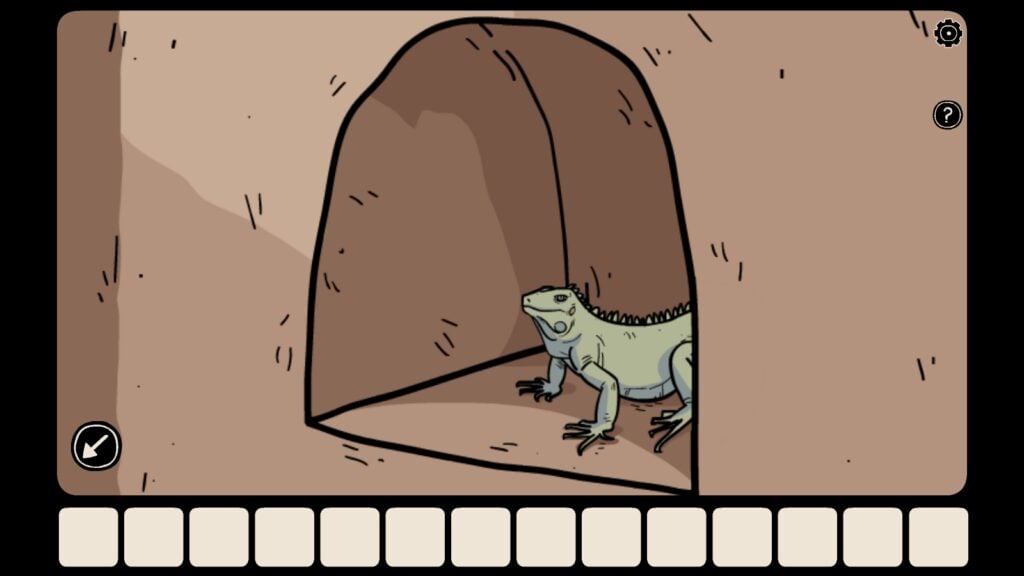
There are several interconnected chambers as you move further inside the cave. Tap the cave entrance to move in. Inside, you will find several chambers these chambers are in area 1. The list below will help you identify them when you follow our puzzles in his Haunted Laia guide:
Always tap the right arrow button to move to a new room. We have also provided screenshots below each room description:
Area 1
Room 1: The first chamber has a bookshelf on the left and a locked chest just below it:
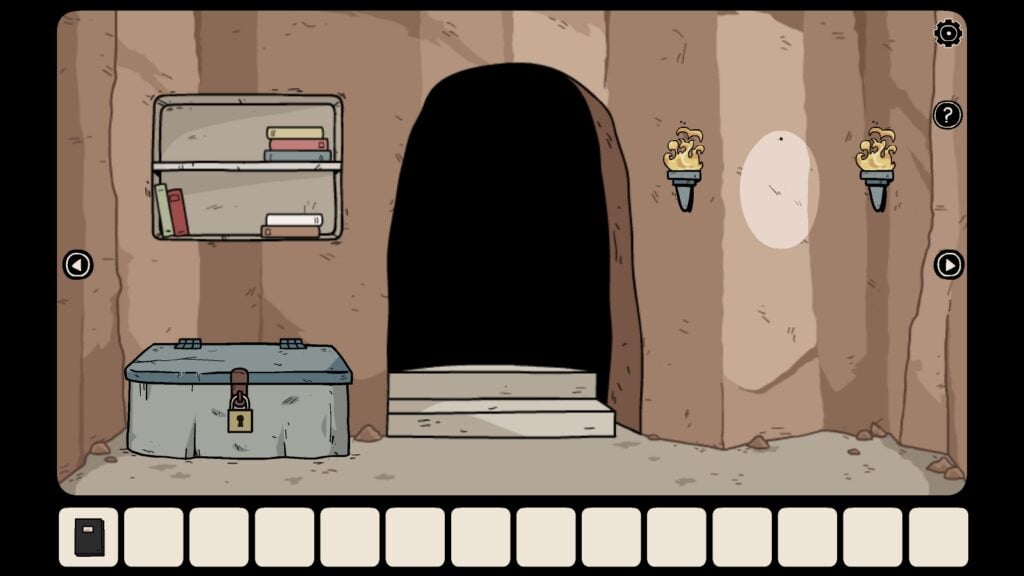
Room 2: The second chamber has a small canal blocked by a large rock:
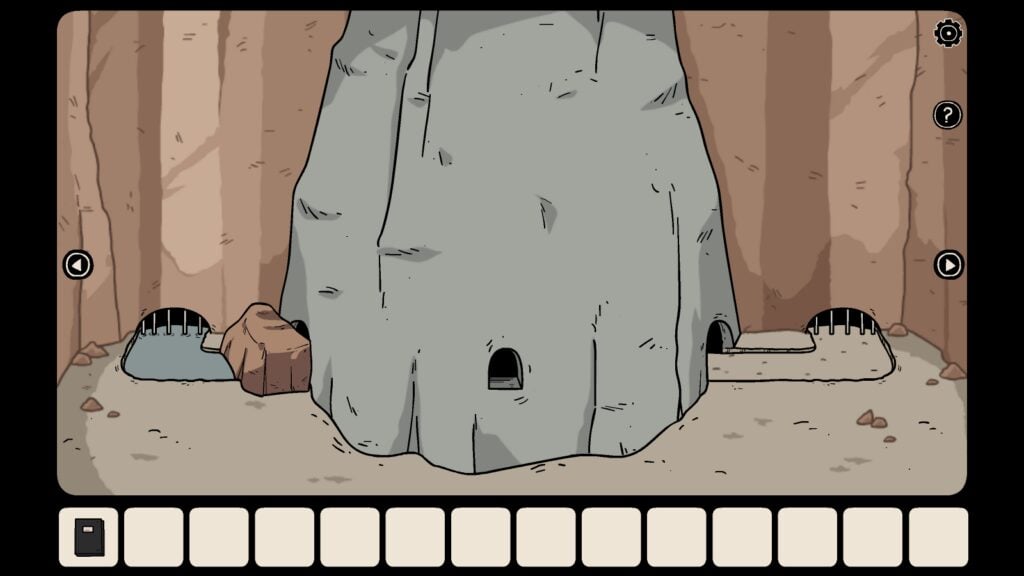
Room No. 3: The third room has an entrance that leads to another set of rooms through a hidden underground staircase. There’s also a puzzle on the left wall and a small red casket on the floor. More on this room later:
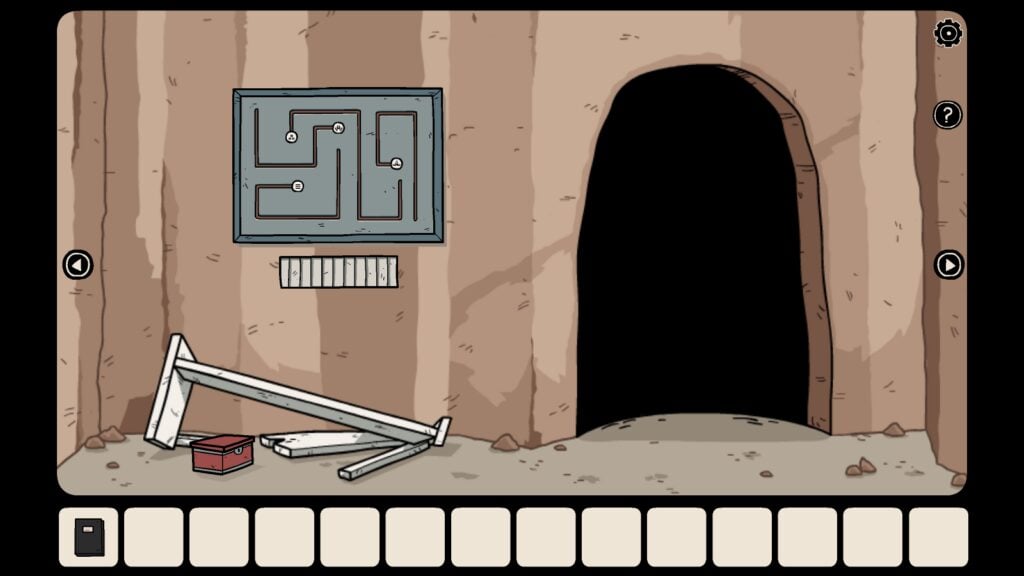
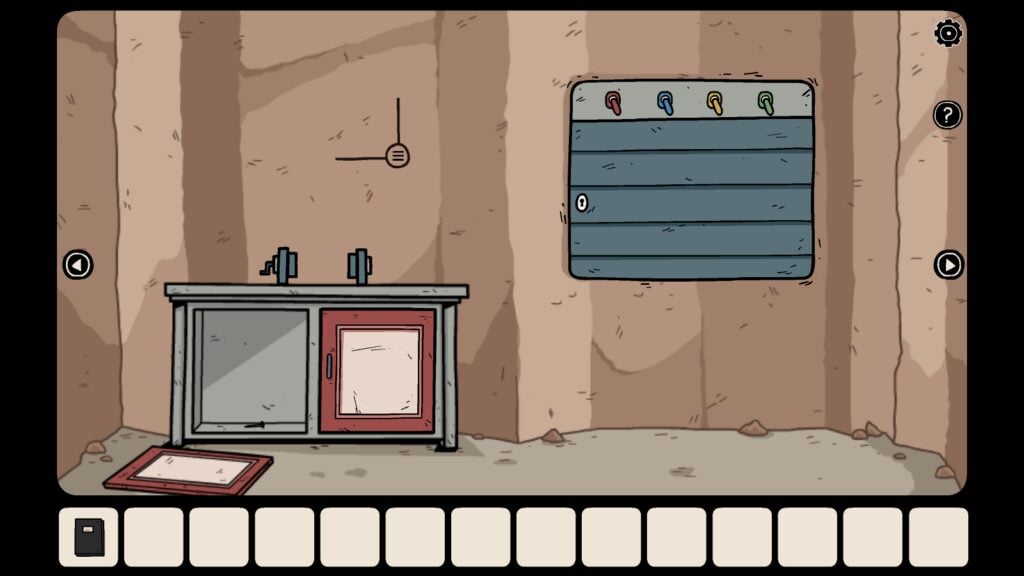
Room No. 4: The fourth room has a broken cabinet on the left and a blue panel with multicolor switches on top of it. The panel is locked and needs to be opened using a key.
How to Move from Area 1 to Area 2
You will have to move to and fro between Area 1 and Area 2 to solve multiple puzzles. Follow these steps when you move between these two areas:
1. Move to this room in area 1. It’s the third room. It has an entrance that leads to area 2 through a small entrance. Tap the entrance:
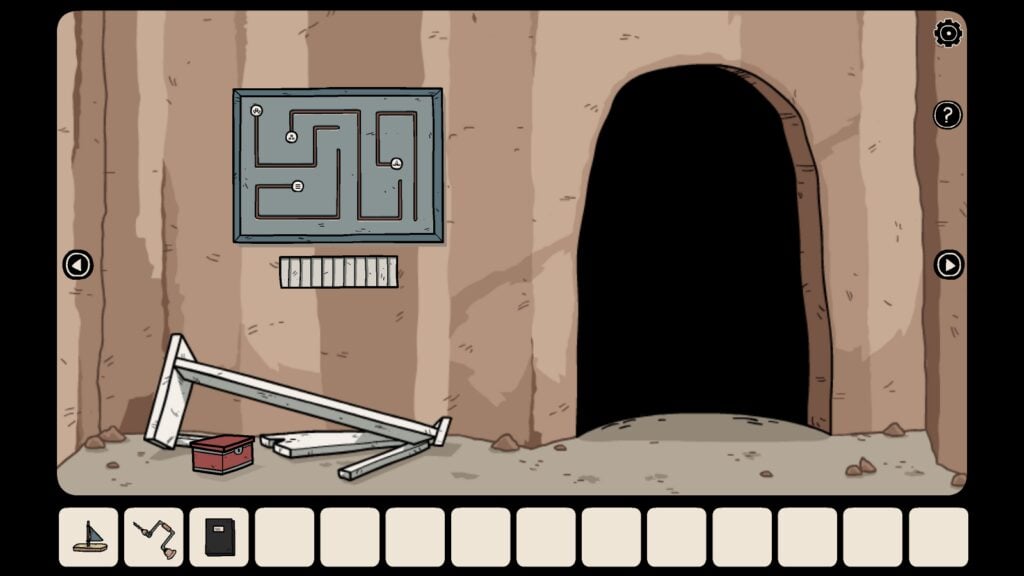
2. Tap the small entrance on the upper-left corner of the screen. Laia will descend the stairs to find a new group of rooms.
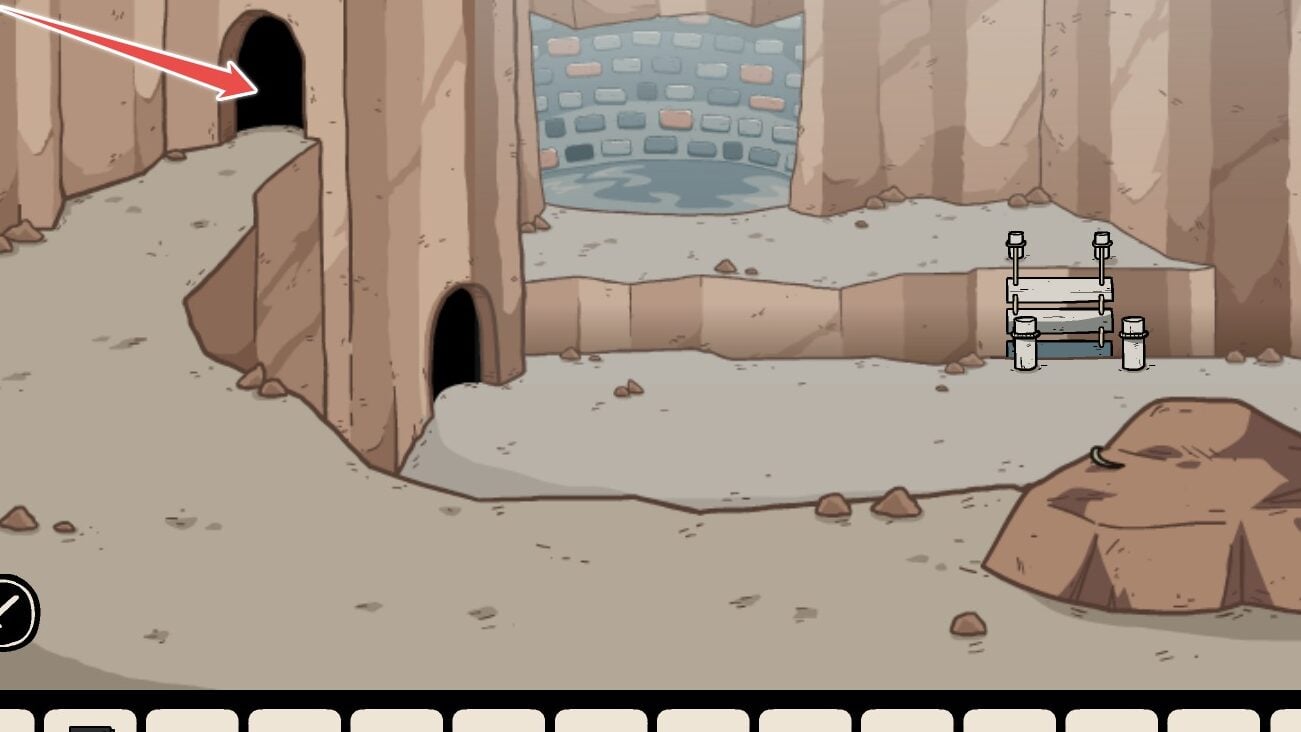
3. To move back to Area 1, Go to this room (see the below screenshot). You can see the staircase near the entrance:
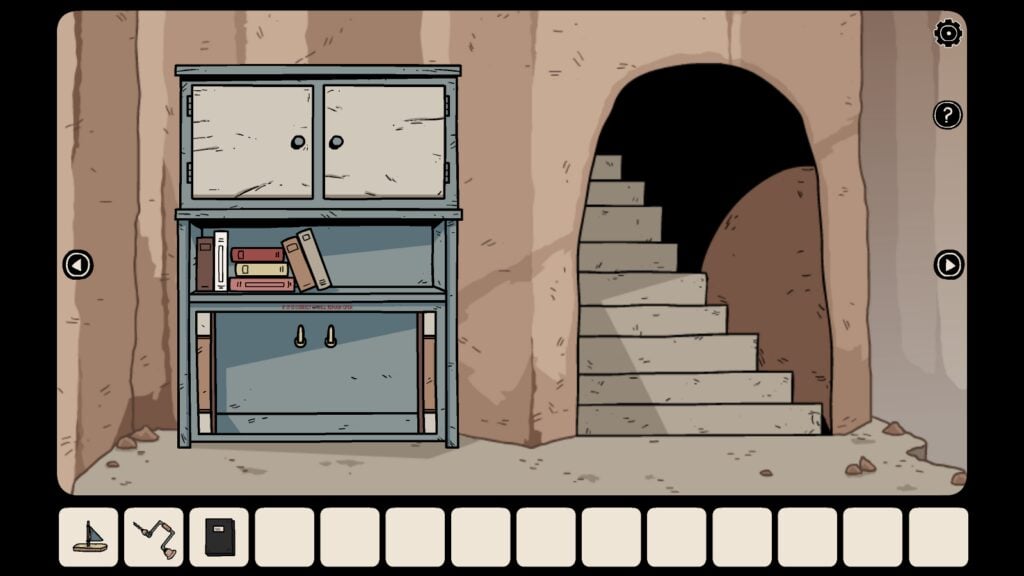
4. Tap the arrow on the lower-left corner of the screen to move back to rooms in area 1:
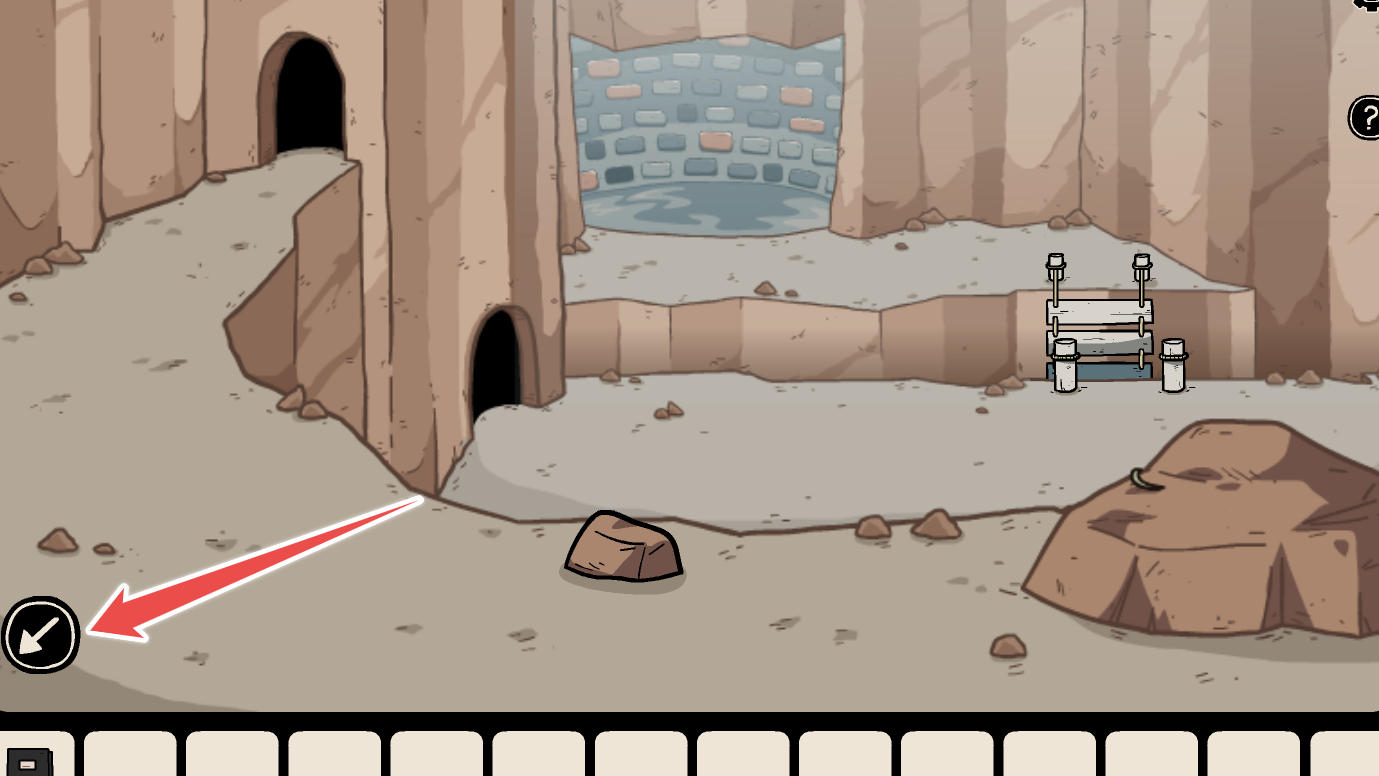
Here’s how to solve all puzzles in these rooms:
Take the black book from the bookshelf in Area 1: Room 1. Open the book and flip through the pages by tapping the curved arrow. There will be a few clues to solve puzzles. We will go through each clue later.
Move to Area 1: room 3. Tap the entrance > smaller entrance on the top left, and Laia descends the stairs. Now you are in Area 2.
Area 2
Room 1 – A white cabinet with a puzzle on the bottom of the cabinet:
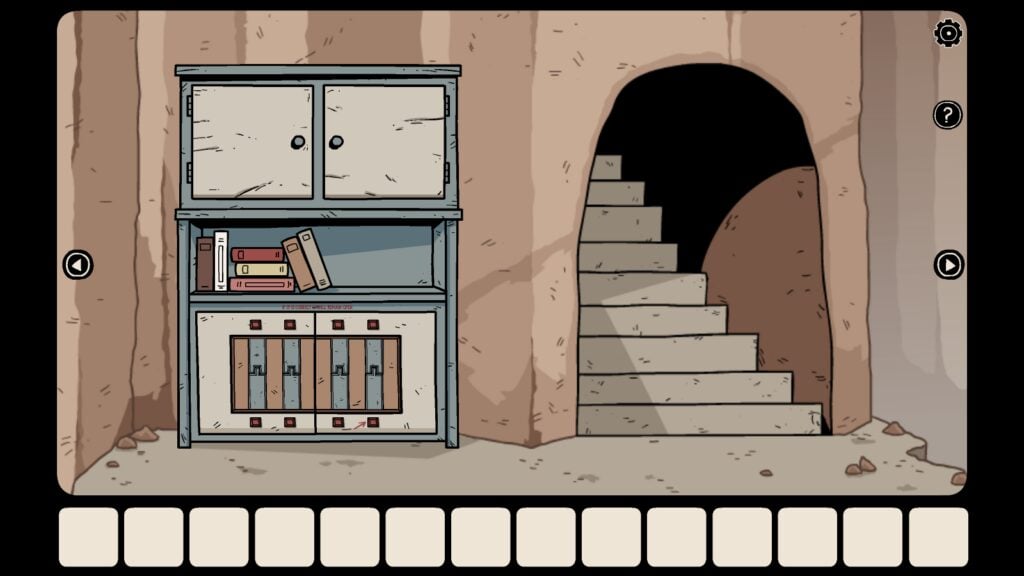
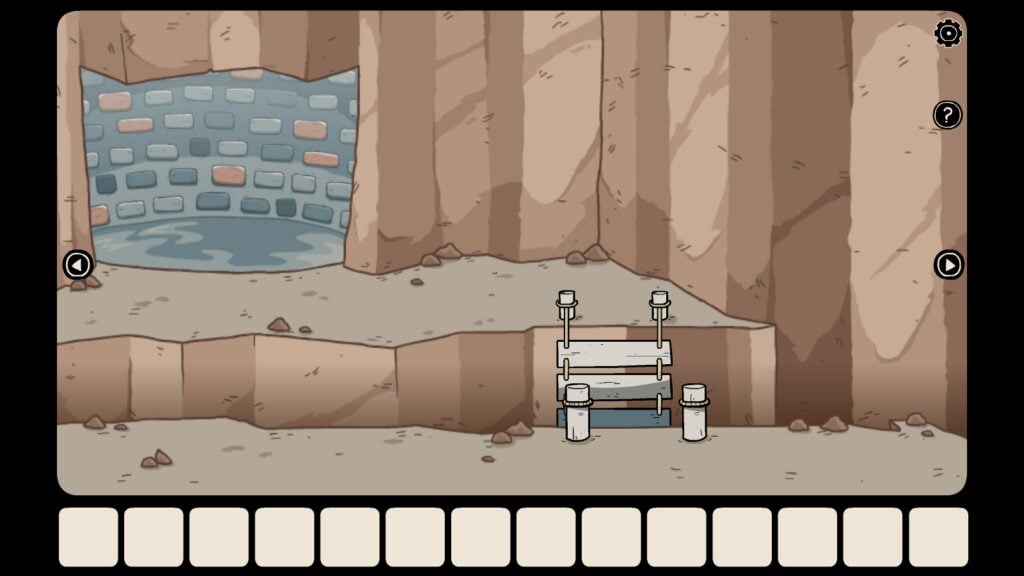
Room 2 – An open ground with a large crack on the ground, a detached bridge, and a water tank across the large crack. Laia has to cross the bridge to move to the water tank.
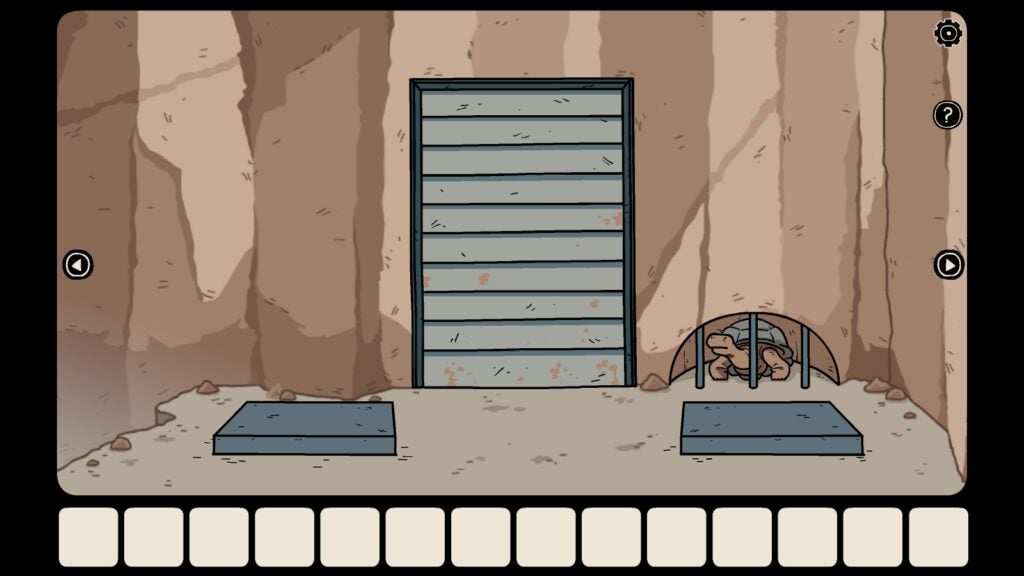
Room 3 – A shuttered door. There’s a tortoise behind iron bars on the right. Two raised stone platforms on the left and right sides.
Room 4 – A red door on the left. A stone face on the wall and a white chest below it.
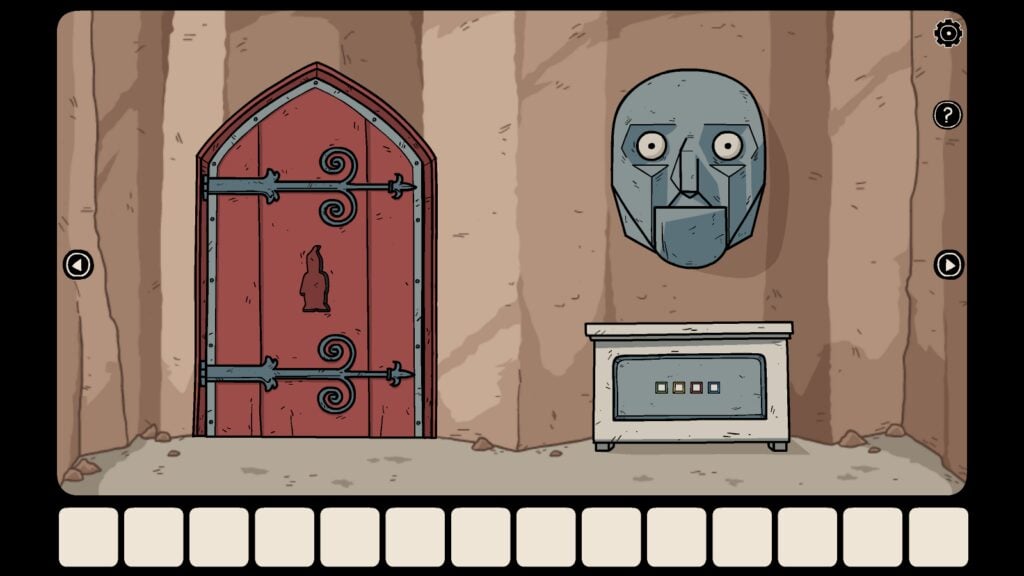
Let’s move back to Area 2: Room 1. There are two white doors at the top. Start by solving the puzzle door at the bottom of the bookshelf:
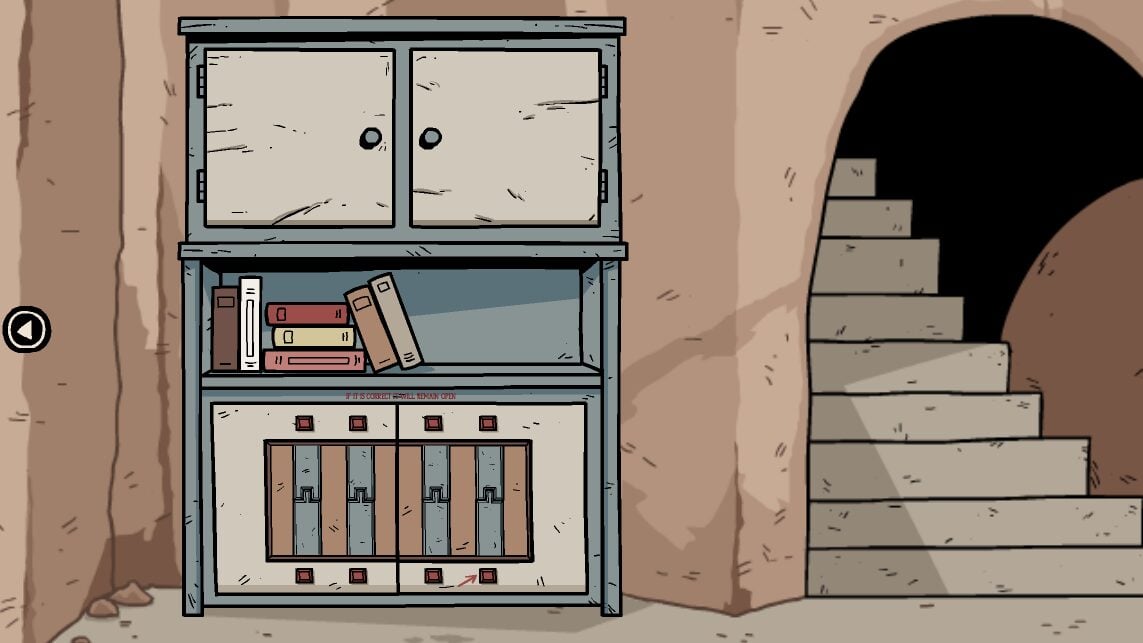
Tap the bottom puzzle to zoom in.
There’s a text on top of the puzzle – “If it is correct it will remain open”
You will have to keep all interlocked slabs open.
Start by pressing the button on the lower right. An arrow pointing to the button is the starter hint. Tap that button first and then press the correct order as shown in the screenshot below:
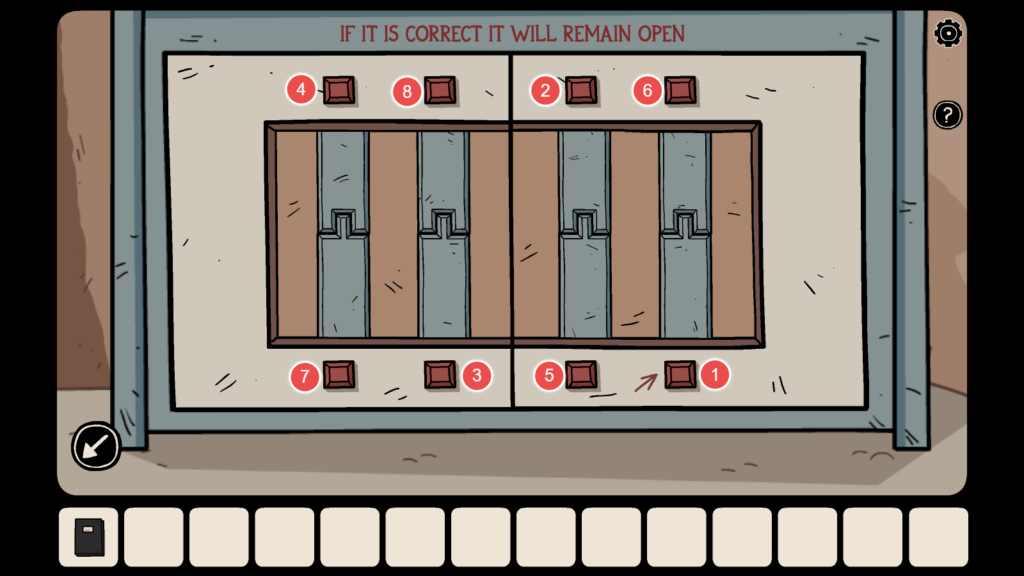
The correct order of buttons that should be pressed to keep all unlocking slabs open.
Take the drill and the fluorescent tube from the opened door.
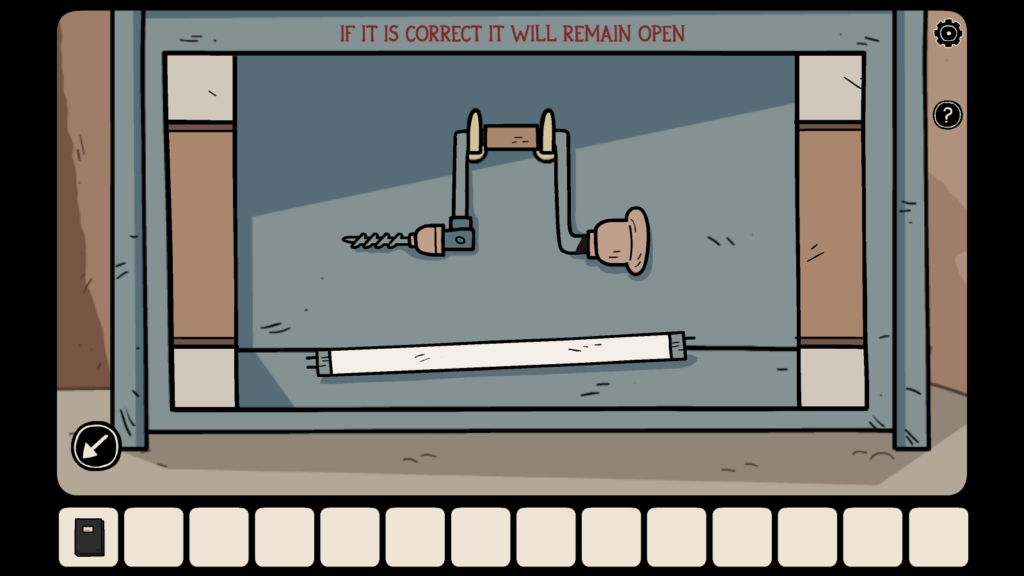
Tap the topmost portion of the bookcase. Open the double doors to see what’s inside:
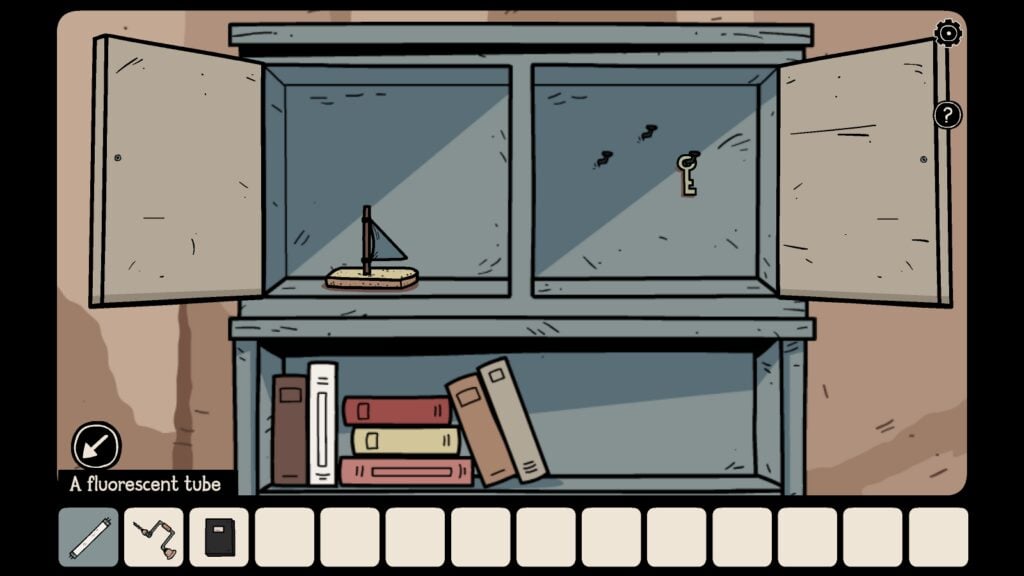
Take the toy boat and the green key.
Go upstairs and tap the arrow key on the lower-left corner of the screen to go back to Area 1:

Area 1
Room No. 4: Use the green key to unlock the panel with multicolored switches – Red, Blue, Yellow, and Green.
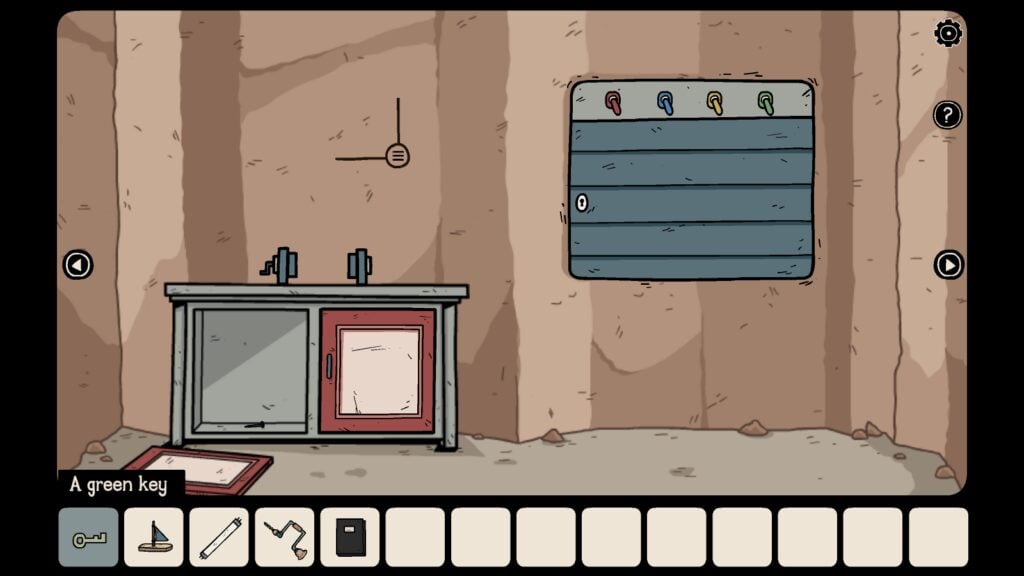
Install the fluorescent tube to the holder. Four unique lines on four square tiles appear as soon as you install the tube.
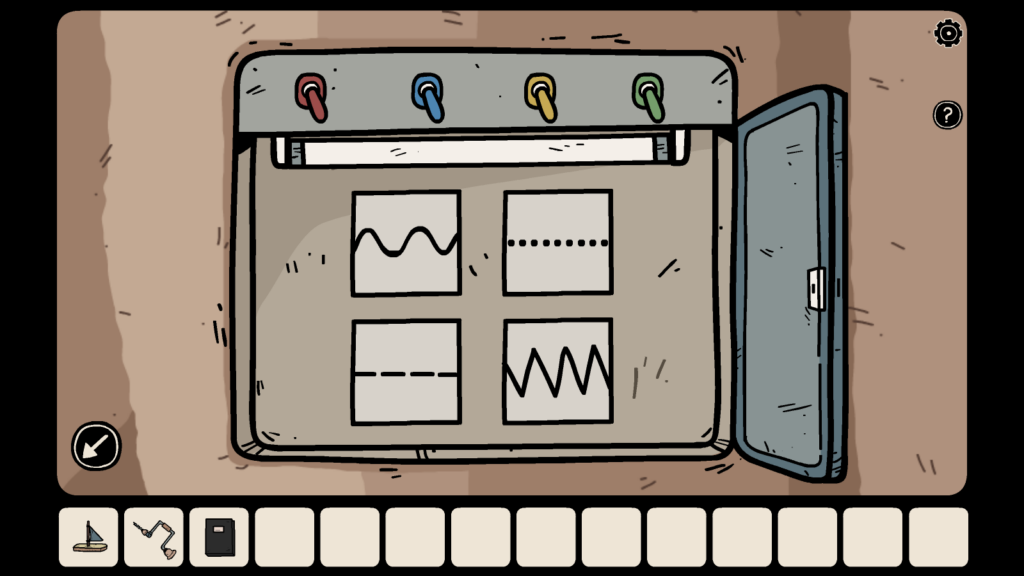
Open the black book from the inventory and press the curved arrow near the book to open it. The first page has the same patterns as the four blocks on the panel – wavy lines, dotted lines, zigzag lines, and dashes. Pay attention to their colors.
In our game the colors of each of these patterns are:
Wavy line – Blue
Dotted line – Red
Zigzag line – Yellow
Dashes – Green
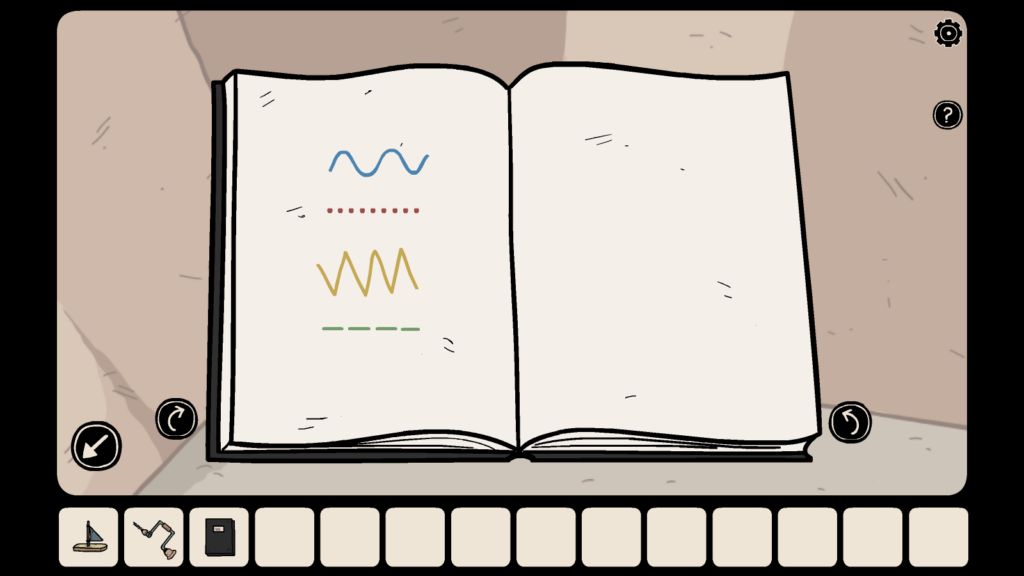
Note: The color of each line on the black book is randomly generated. They will be different in your game.
Go to Area 2: Room 4 (see screenshot below).

The fourth room is in area 2 with a red door on the left.
Tap the white chest under the human face sculpture. Tap the chest again to zoom in. You will see four square tiles. You can change symbols by tapping on a tile. Note the color of the border of each tile. In our game, they are (from left to right):
Green – Yellow – Red – Blue (see the screenshot below):
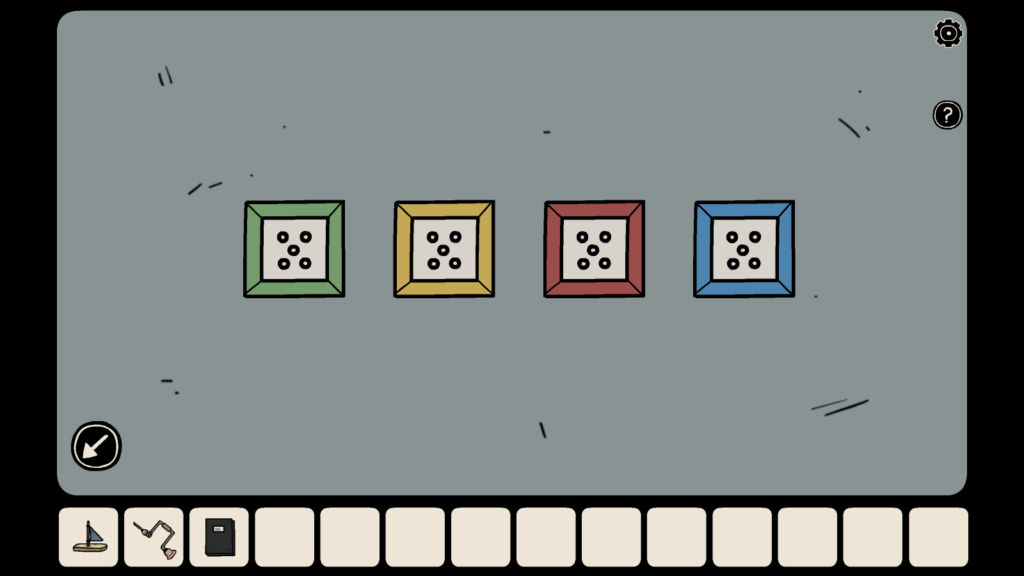
The border colors of each tile are green, yellow, red, and blue.
Make a mental note of these border colors of write them down on a piece of paper/notepad.
Open the black book again and note down the color of each line:

You will have to enter four correct symbols on each tile to open the chest. To do this, follow these steps
Go back to Area 1: Room 4. This is the same room where you installed the fluorescent tube on the blue panel.
1. To know which symbol to enter on the tile with the green border, we tapped the green switch and noted down the symbol that appears on the dashes: (Why dashes? We referred to the black book again. The color of the dashes is green in color in our black book, hence the symbol on dashes with the green light switched on is our first symbol).
The black book should be referred to only note down the color of each line so that you can find the symbols for each colored line when you tap the switches. But the actual hint is on the white chest – tiles with colored borders. The border colors on the tiles will help you know the correct order of the symbols, from left to right.

2. For the tile with the yellow border, we tapped the yellow switch and noted down the symbol appearing on the zigzag line:
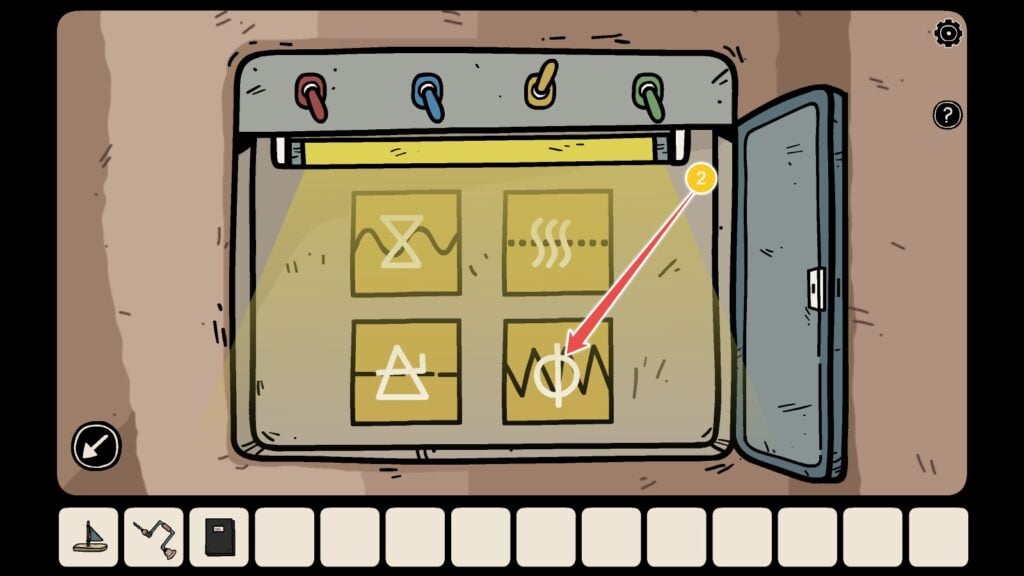
3. For the tile with the red border, we tapped the red switch and noted down the symbol on the dotted line since the color of the dotted line was red.
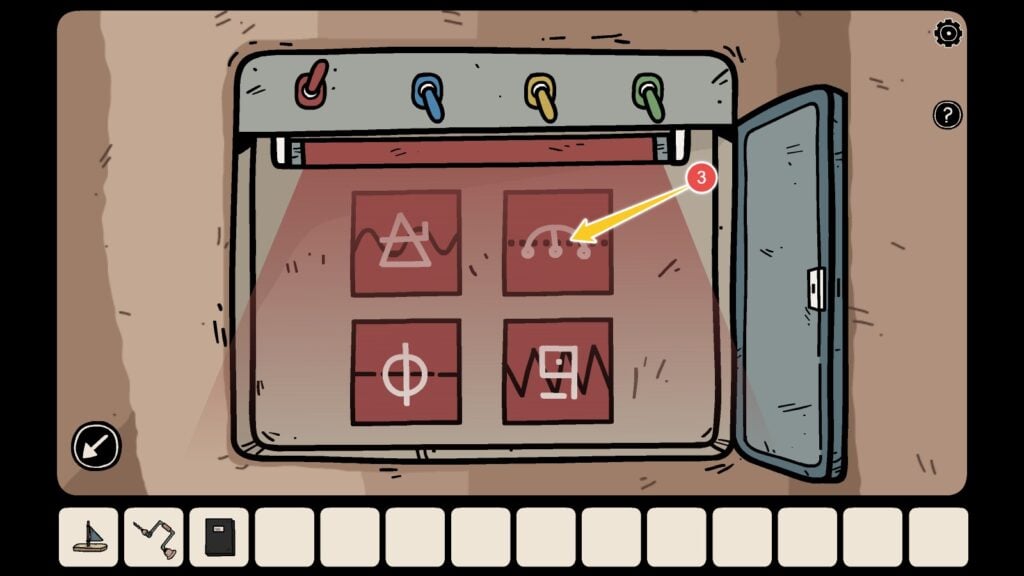
4. For the tile with the blue border, we switched the blue switch on and noted down the symbol on the wavy line:
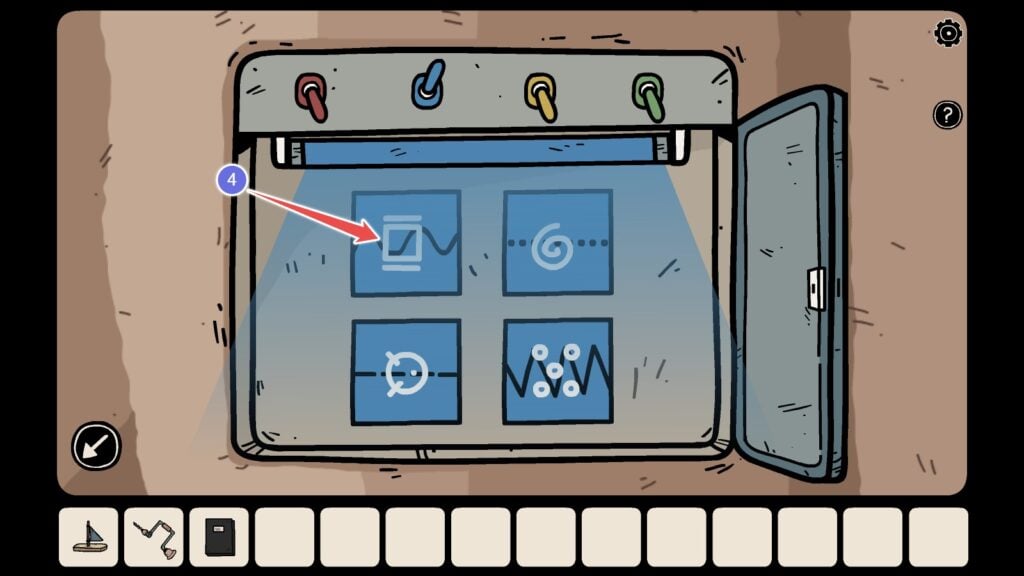
Once we found the correct combination/order of the symbols, we went back to Area 1: Room 4 – the red door room – and entered the symbols on each tile to complete the puzzle:

The chest opens, revealing a large purple candle, a black box with no opening mechanism, and a piece of paper that has a solution Haunted Laia’s token puzzle:

Take the stairs from the entrance located in Area 2: Bookshelf room and you will be in this room in Area 1.

There’s a puzzle on the left side of the entrance. Tap the blue panel to zoom in on the puzzle. There are lines engraved on the stone panel. There are also four tokens at the end of each line. Tapping a token will make it slide over an engraved line. Slide the tokens and put them in the right position by referring to the drawing on the piece of paper that you just got from the white chest:
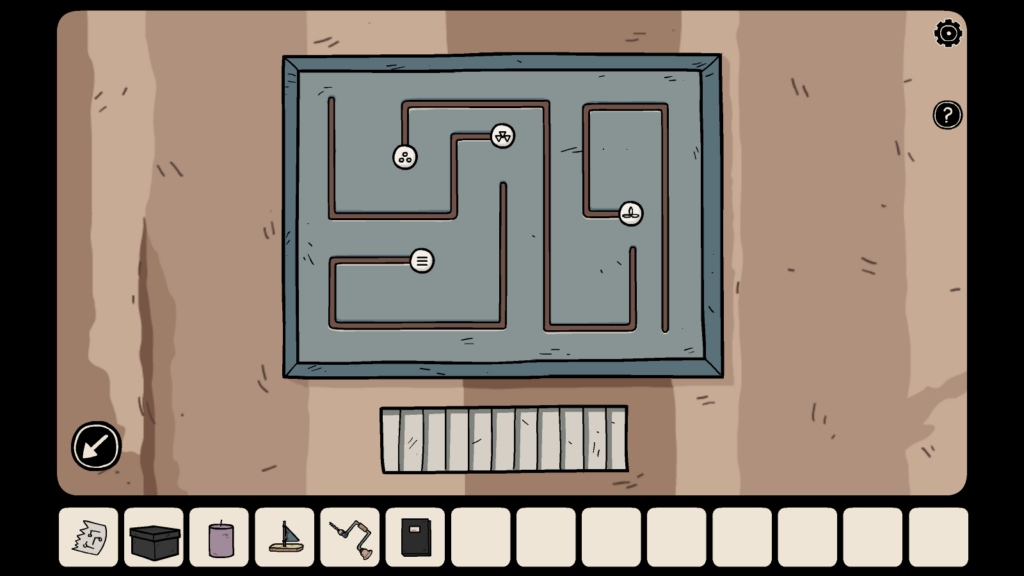
Token Puzzle

Correct position of the tokens on the piece of paper. Slide the tokens on the puzzle in the same position as the tokens on the paper.
Only three tokens and their position on the engraved lines are drawn on the paper. To find the fourth token, move to area 1: room 4, i.e. the room on the right side of the token puzzle room – The fourth room has that blue panel with multicolored switches. The fourth token’s position is drawn on the wall:

The fourth token and its position are drawn on the wall on the left side.
Replicate the positions of the token, which were found on the piece of paper and on the wall. In our game, it looked like the screenshot below. In your game, the position of the tokens on the piece of paper will be different.

The first three tokens' position are on the piece of paper

The fourth token's position is drawn on the wall
Notice that the small white panel slides open after solving the puzzle:

Take the metal file and the black marker pen.
You will now have these tools in your inventory:
1. A black marker pen
2. Metal file
3. A box with no opening mechanism
4. Large purple candle
5. A toy boat
6. A drill
7. The black book (for puzzle hints)
Go to Area 1: Room 4:
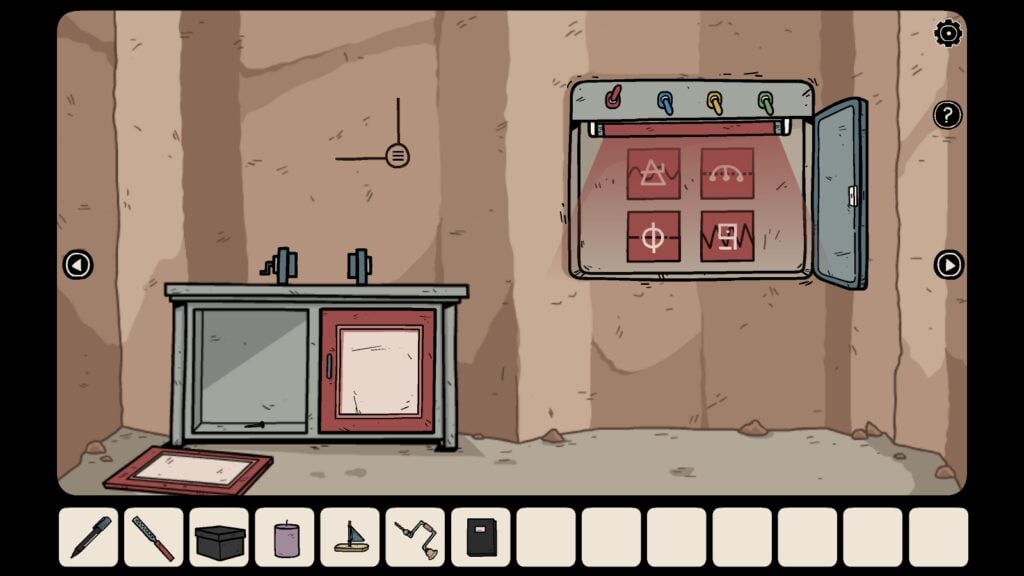
Tap the cabinet on the left. You will see two sections. One is closed and the other one is open as the door is already broken. Take the nail from the left section and open the right door to take the head of lettuce.

Now go back to Area 2 through the entrance located in Area 1: Room 3. In Area 2, go to room 3, where you will see a tortoise behind iron bars. Tap the tortoise to zoom in:

Area 2: Room 3
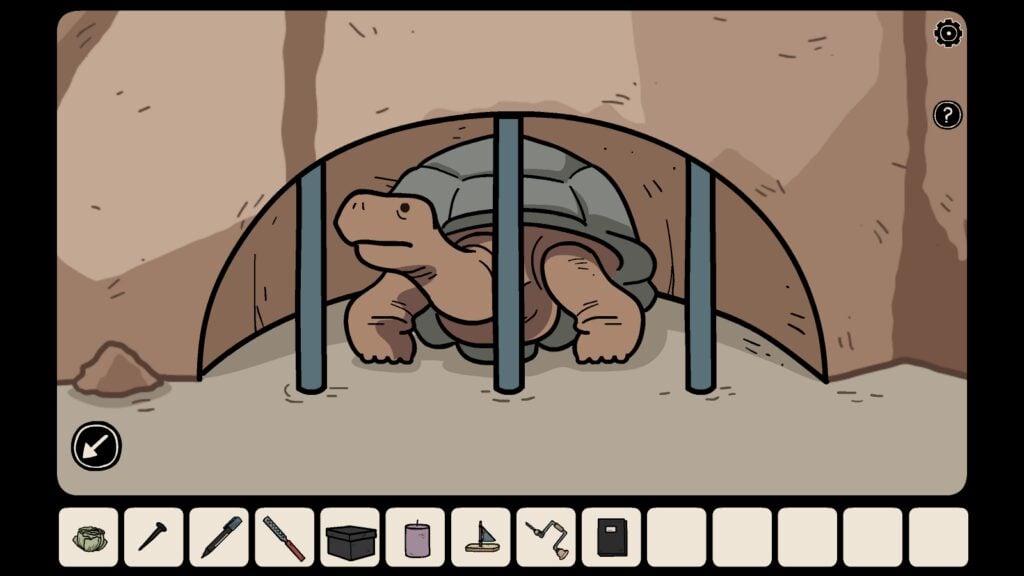
A Tortoise behind bars
Use the metal file from your inventory to cut one of the iron bars. Don’t forget to take the iron bar after sawing it off using the metal file.

Zoom out by tapping the arrow on the lower-left corner of the screen. Place the head of lettuce on the raised stone platform on the lower right. The tortoise moves to that platform and starts eating the lettuce. As the tortoise munches on the lettuce, the stone platform gets depressed. Noticed the hammer in the background? Take the hammer.

The hammer is revealed in the background as soon as the tortoise leaves his enclosure and moves to the raised stone platform

A hammer
Pick the large rock in this open area, which shows up on the screen when you move from area 1 to area 2:

Next, go back to Area 1: Room 2:
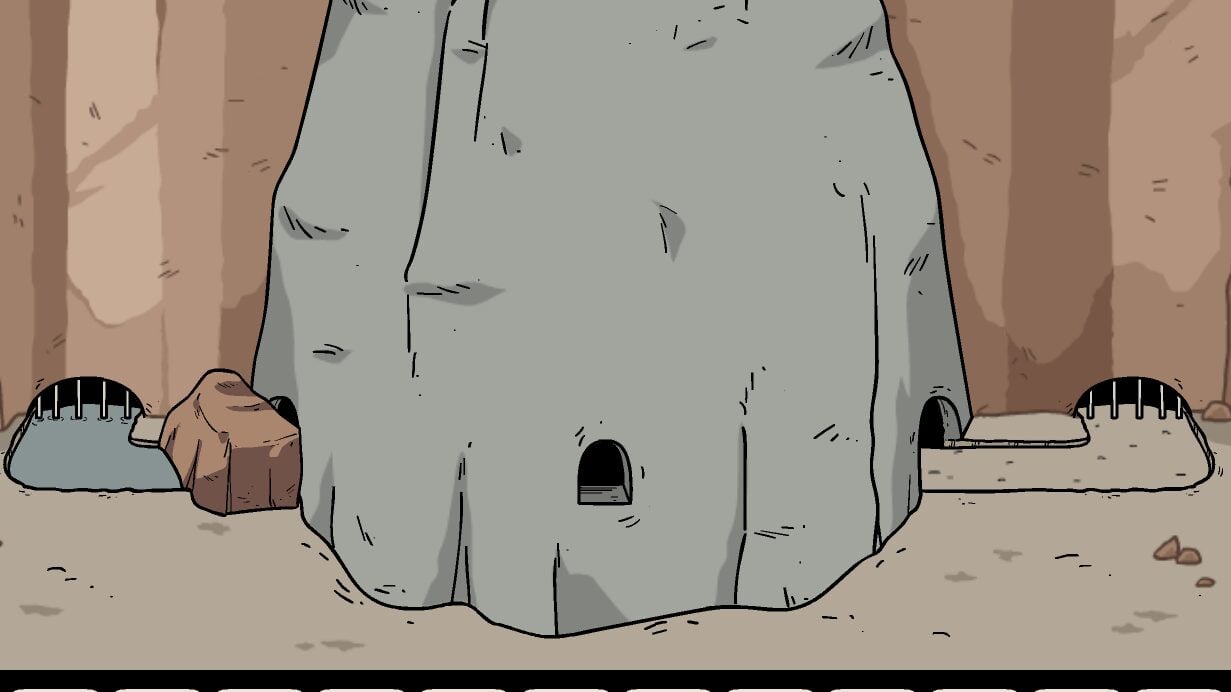
Place the rock on the ground as shown in the screenshot below:

Now place the iron bar in this way, so that you can tap to remove the larger rock that’s blocking the flow of water on the stream:
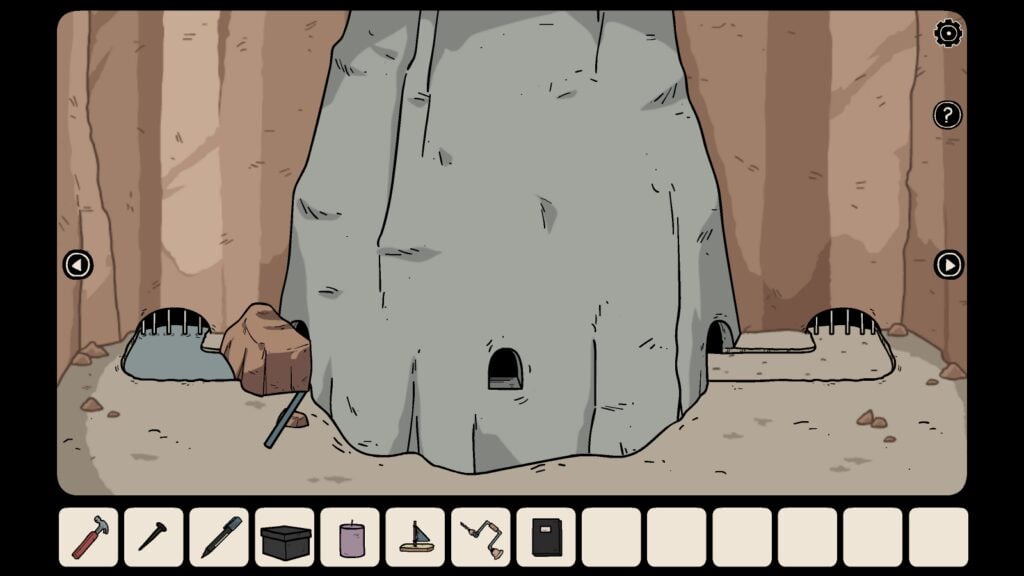
Tap the iron bar to remove the boulder. Water flows smoothly.
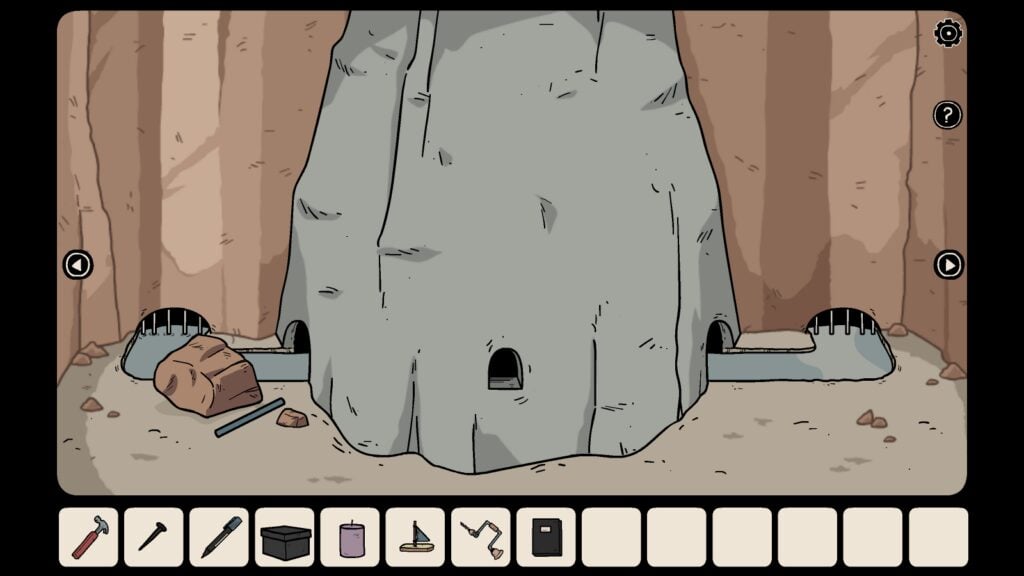
Remove the boulder to let the water flow.
Place the toy boat on the left side of the stream. The toy boat will move towards the right and on its way will take the key hanging from the cave. Once the boat stops, grab the yellow key.

Place the toy boat

The toy boat picks the key
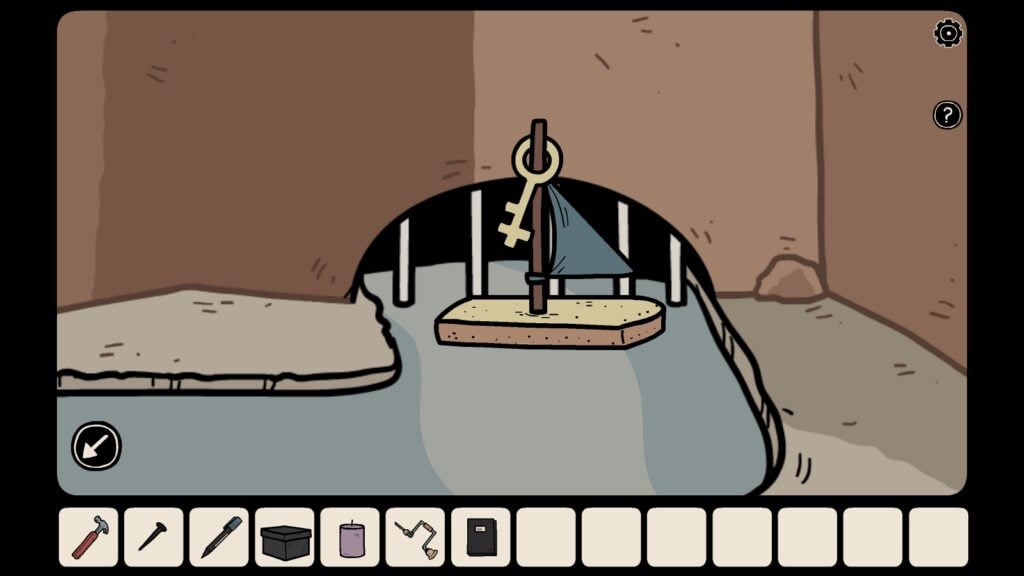
Take the yellow key once the boat stops
Go to area 1: Room 1 and use the yellow key to open the chest with a yellow lock.
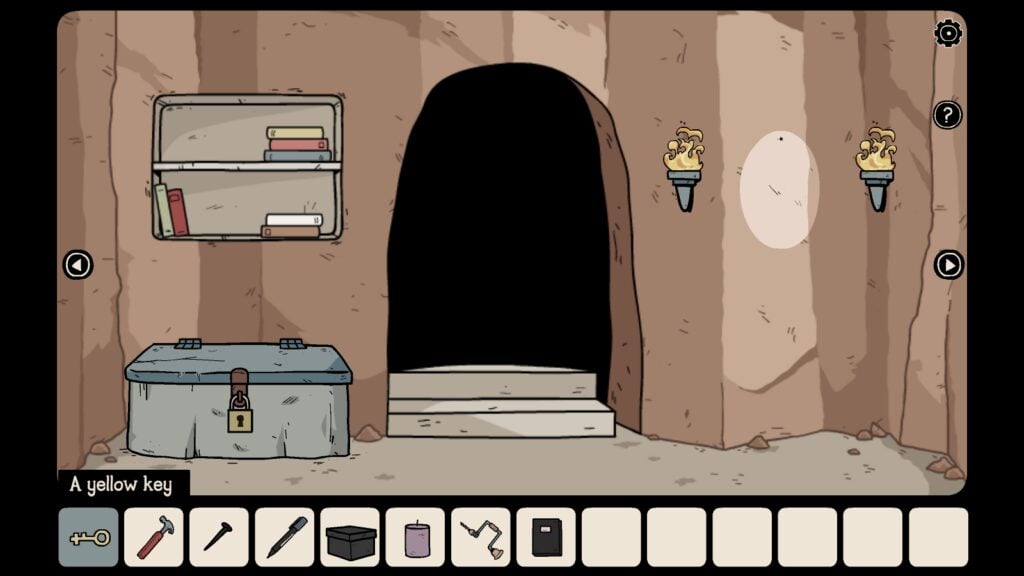
Use the yellow key to open the yellow lock
After opening the chest, tap to peek in to see what’s inside the chest. Take the mirror and the spoon.

In the same room, on the right side, there’s an oval placeholder to install the mirror. Tap the white oval placeholder to zoom in. Fix the nail in the small hole in the wall, use the hammer to secure it, and then hang the mirror. (We found the nail in area 1: Room 4 – It’s the same room with a blue panel with multicolored switches. )

Fix the nail
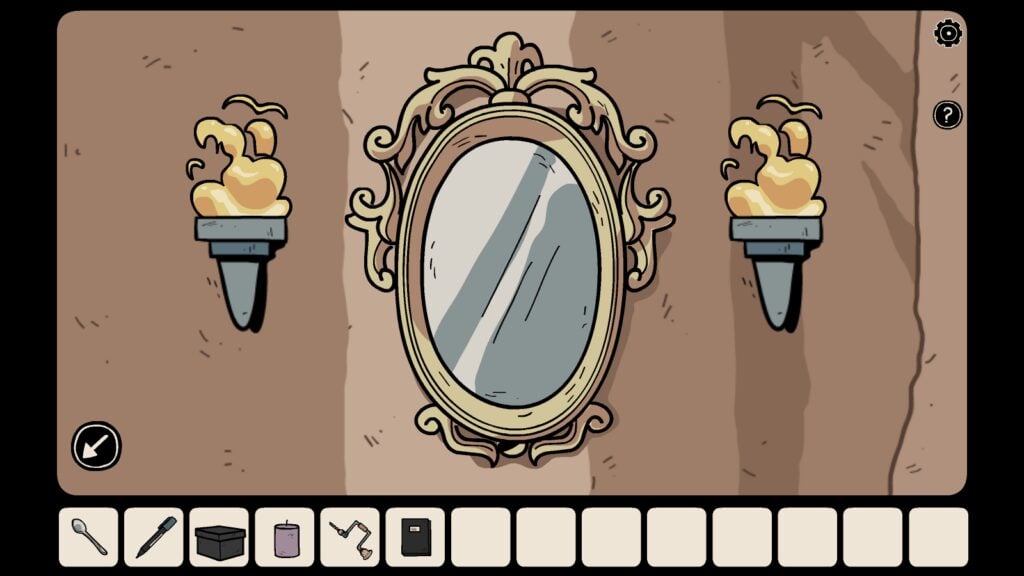
Hang the mirror
Next, tap the “box with no opening mechanism” and then tap the mirror. With the box in her hand, Laia will look into the mirror in the cutscene. Strangely, the reflection of the box is open.
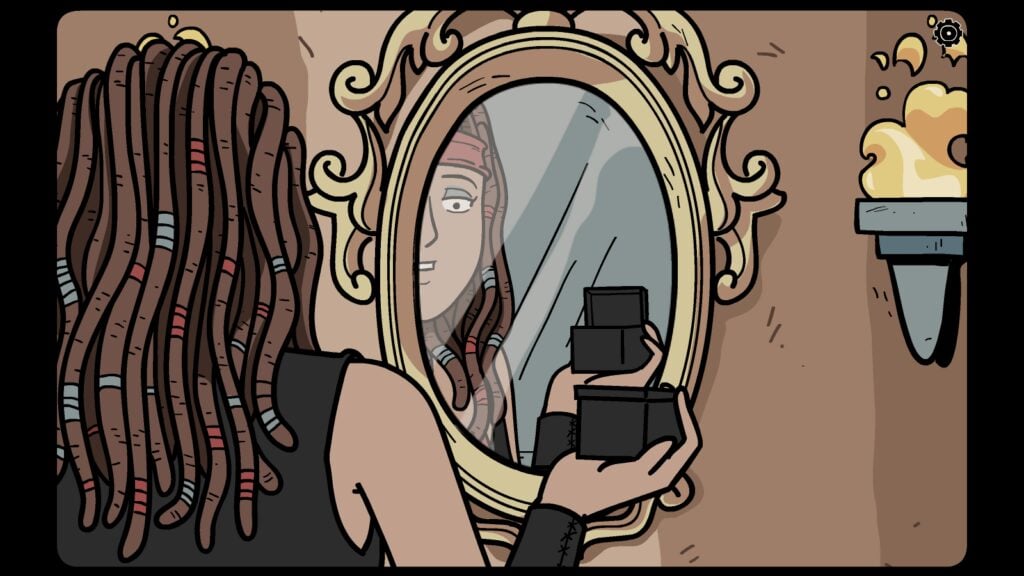
She will then pick the glass eye from the opened box reflected on the mirror.
Note: The hint for the mirror puzzle can be found on page 4 of the black book.
Go back to area 2 from the entrance in Area 1, Room 3. Move to room 4 in area 2. Tap the big stone face on the wall.

Area 2: Room 4 - Red Door Room

Stone Face
Use the drill to make a hole in the forehead of the stone face. Now put the glass eye on the hole. The face’s mechanical mouth opens, revealing a red key and a scissor:

Drill a hole

The mouth opens. Take the scissor and the red key
The position of the dots on each glass eye changes when you collect the scissor and the pink key. This is a hint for another puzzle, which we will explain later.
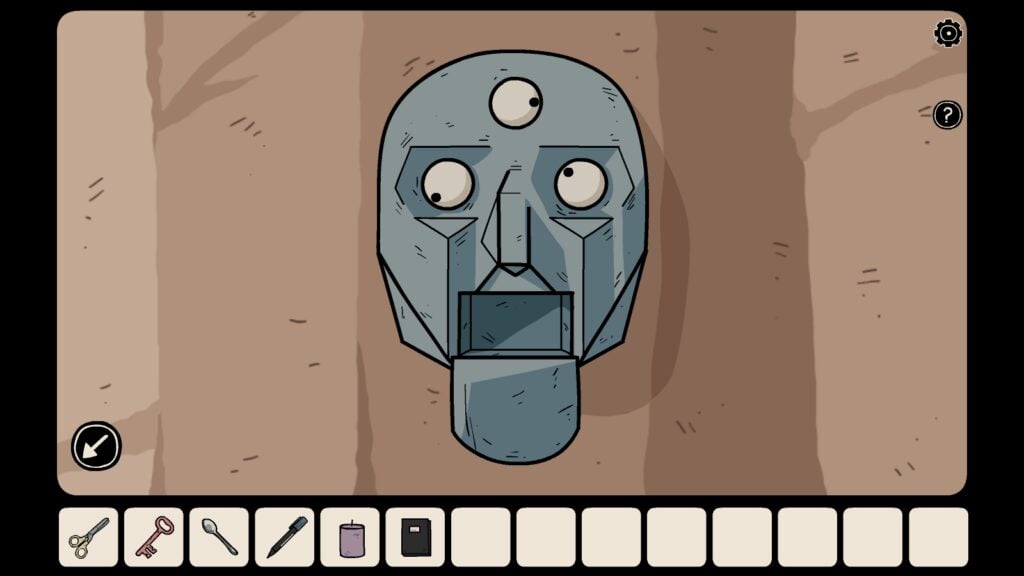
Pay attention to the dots on each glass eyeball. They change when you pick the scissor and pink key.
Go to Area 1: Room 4. This is the same room that has the multicolored switch/panel puzzle. On the left side is then bench vise on top of two cabinets. Tap the bench vise to zoom in.
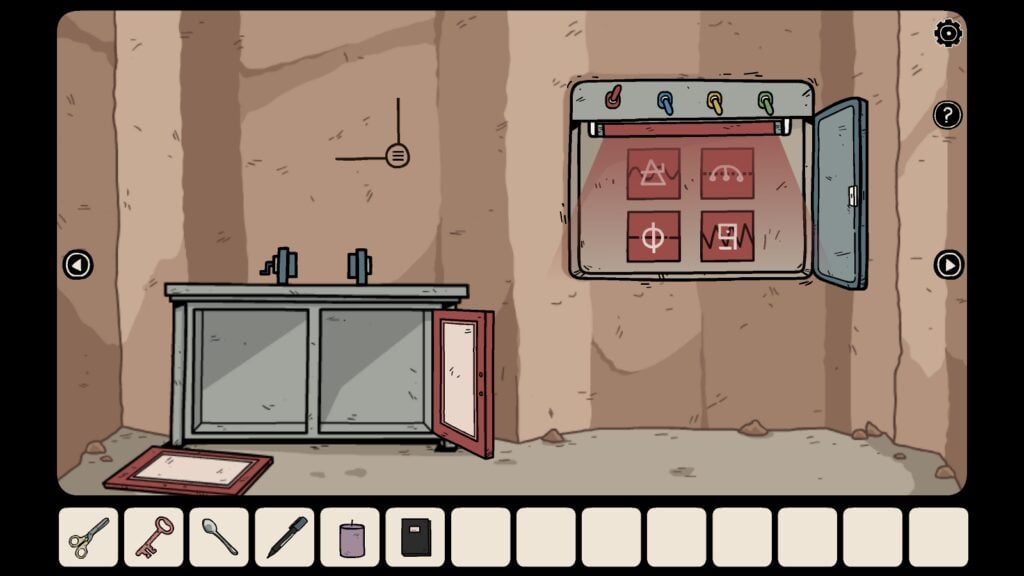
Tap the bench vise on the left to zoom in

Bench vise/clamp that can hold an object securely.
Tap the crank handle on the left to adjust the clamp, and then secure the large purple candle on the clamp.
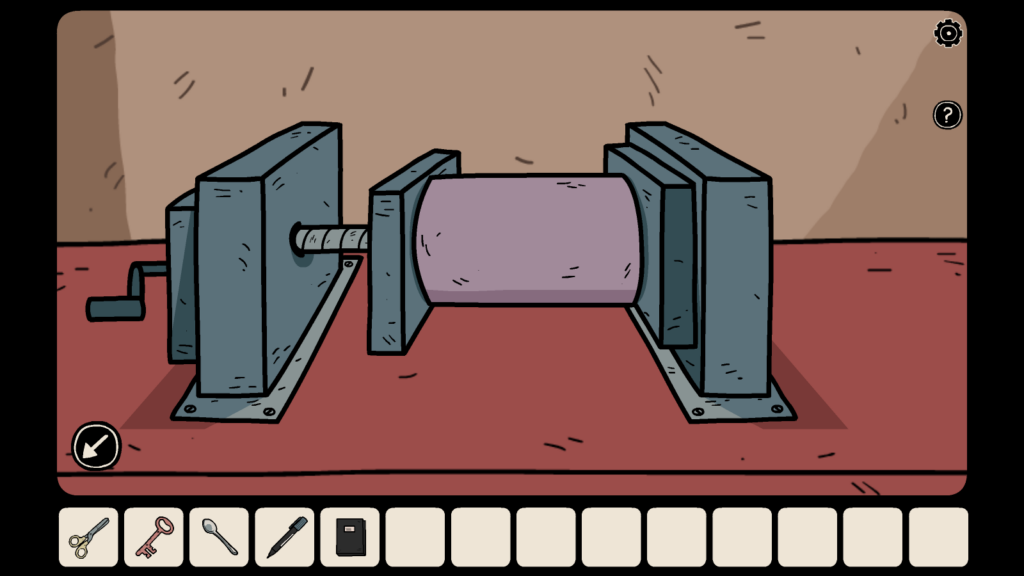
Secure the purple candle on the bench vise.
Open the black book and flip to the last page. There will be a picture of a key. Use a pair of scissors to cut out the picture of the key.

Use the pair of scissors to take a cutout

Key cutout
Next, tap the paper key on the inventory and then tap the purple candle to stick the paper key on it.
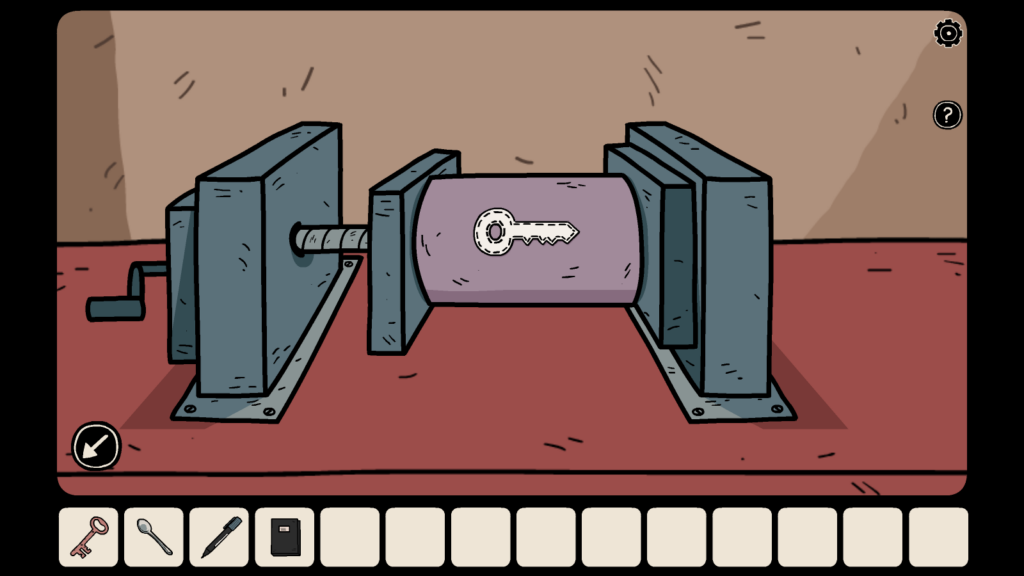
Use the black marker pen to trace along the line of the paper key. Tap the pen and then tap the candle to do this. Next, use the spoon to carve the shape of the key around the paper cutout and get the purple wax key. Two cutscenes will show Laia cutting and scooping out the key using the spoon.

Now that you have the purple key, go to Area 1: Room 3, and tap the red casket placed on the floor:
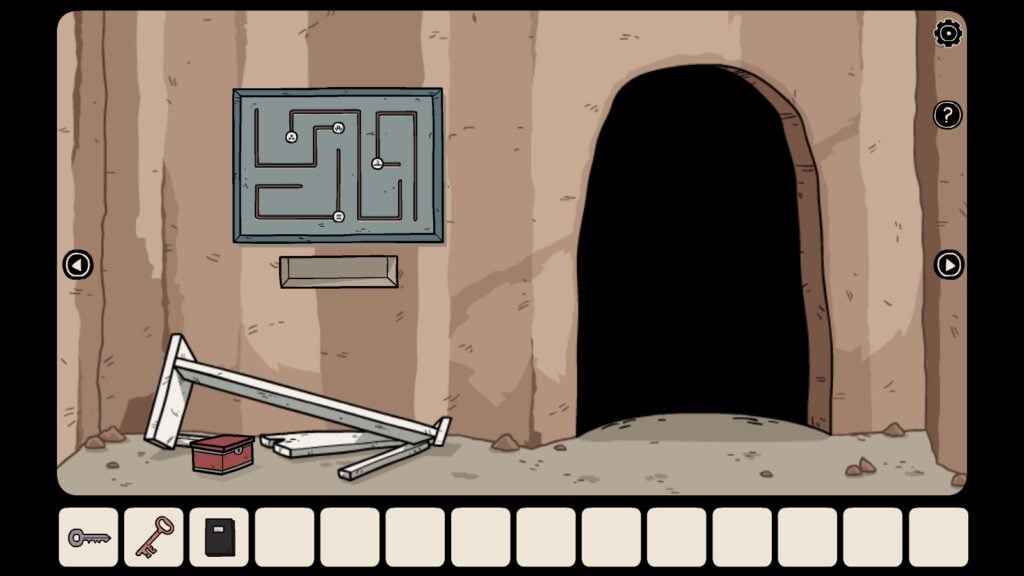
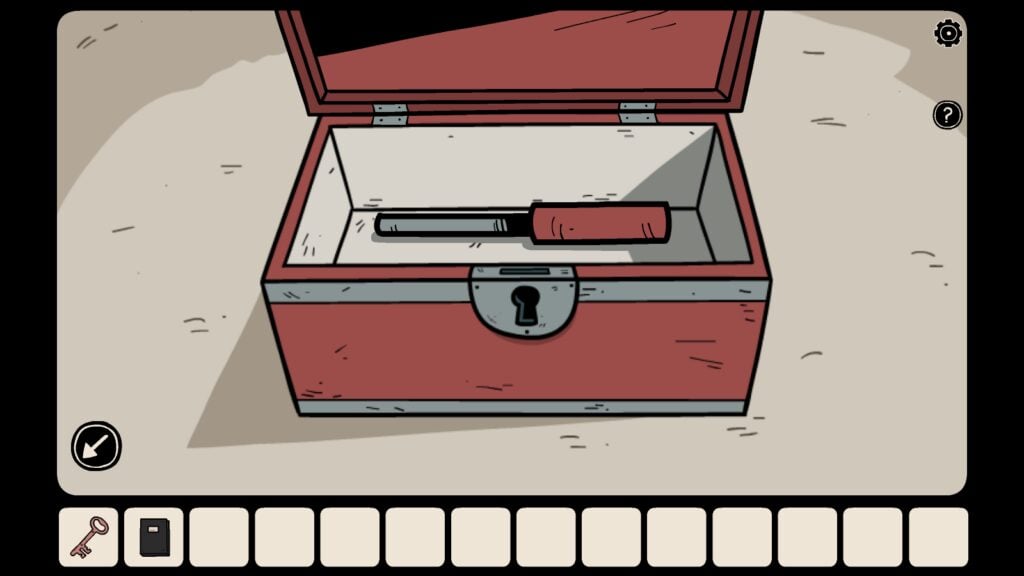
Use the purple key to open the casket and take the lever from the box. The lever will be used on a machine.
Go to Area 2: Room 3. Tap the stone block on the left side to push it down. The tortoise has already pushed down the block on the right. With both blocks pushed down, the door opens revealing a machine. Tap the machine to zoom in.

There are three knobs on the right and a tiny hole on the left. Fix the lever on the hole. Now pay attention to the dots on all three knobs on the right:
Go to the room with that stone face sculpture and make a note of the positions of three dots on those three glass eyes. Come back to the tortoise room and tap on each knob to move the dots in the same position as seen on the stone face’s glass eye. Then pull the lever.

Stone Face Eyes

Tap the dots to replicate the position of the eyes on the stone face
As soon as you solve the above puzzle, Laia will move to the open ground to see if the bridge is now attached. To her surprise, the machine worked and now she can cross the bridge and move toward the water tank.
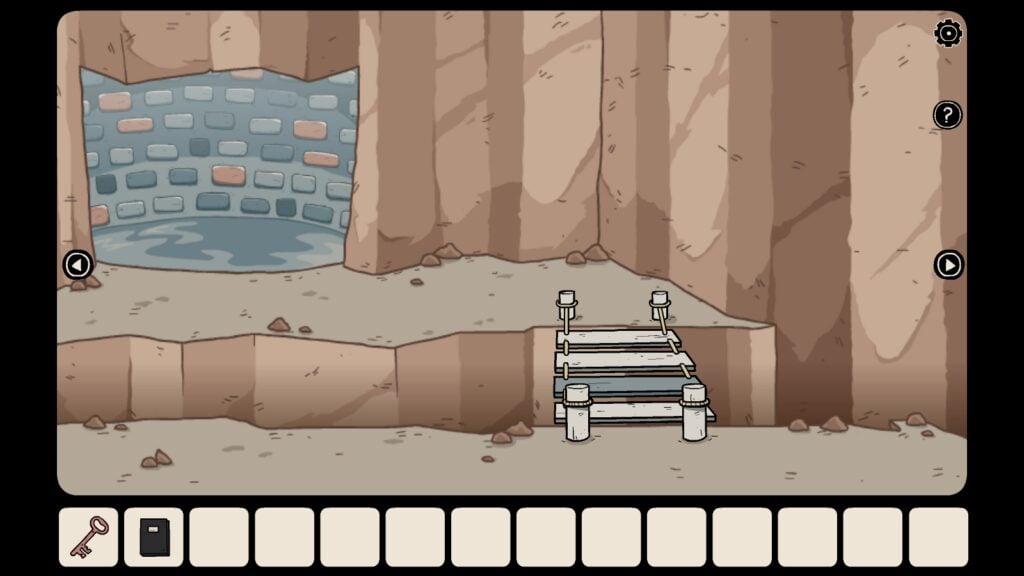
Tap the water tank and she will cross the bridge. As soon as Laia tries to touch the water, a voice warns her not to. It’s her father and brother. She finally finds them, but it’s too late. The “Shadows” brought them to the cave for a ritual, submerging them into this cursed water tank and now they are part of them. Any external light will turn them into strange creatures.
But Laia has other plans and she will help them. Flashback to 3 years ago and Laia is shown moving to a new house, with her father and brother. She spots a ghostly shadow that slithers behind a wardrobe. Laia pushes the wardrobe to find a hidden door behind it. She unlocks it to enter a secret room and wonders how this room wasn’t on the floor plans. The door behind her shuts close automatically. She is now trapped in these four parts of the room. Help her escape the secret room:
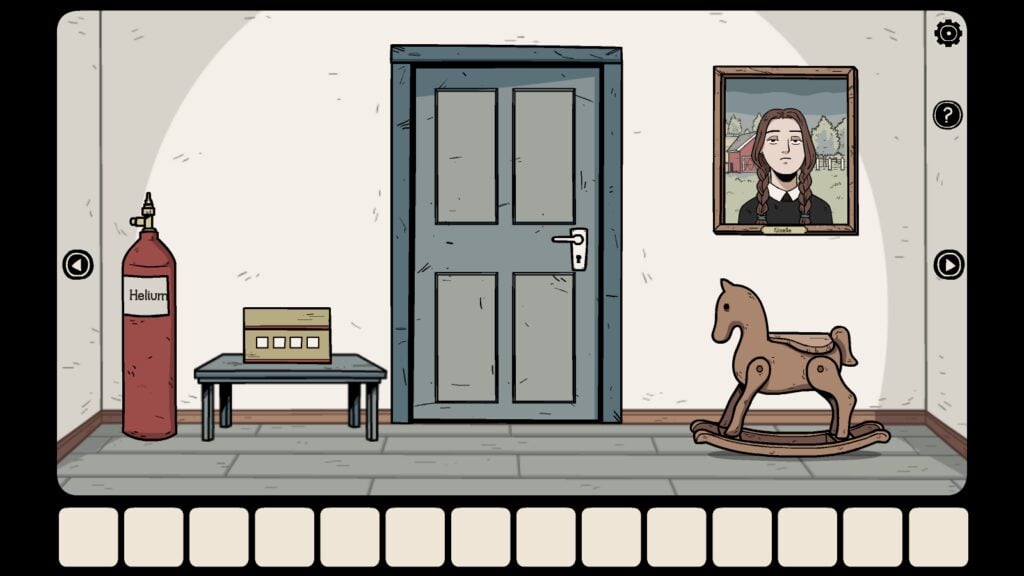
1. A portrait of a girl is on the right wall. A rocking horse below it.
2. There’s a desk on the left and a book placed on top of it. A tent-like object is on the right side of the screen. Tap the tent to find a cozy little couch inside the tent. There are six tarot cards and a blue box with six switches on the couch.

Tap the sheets to find a cozy bed
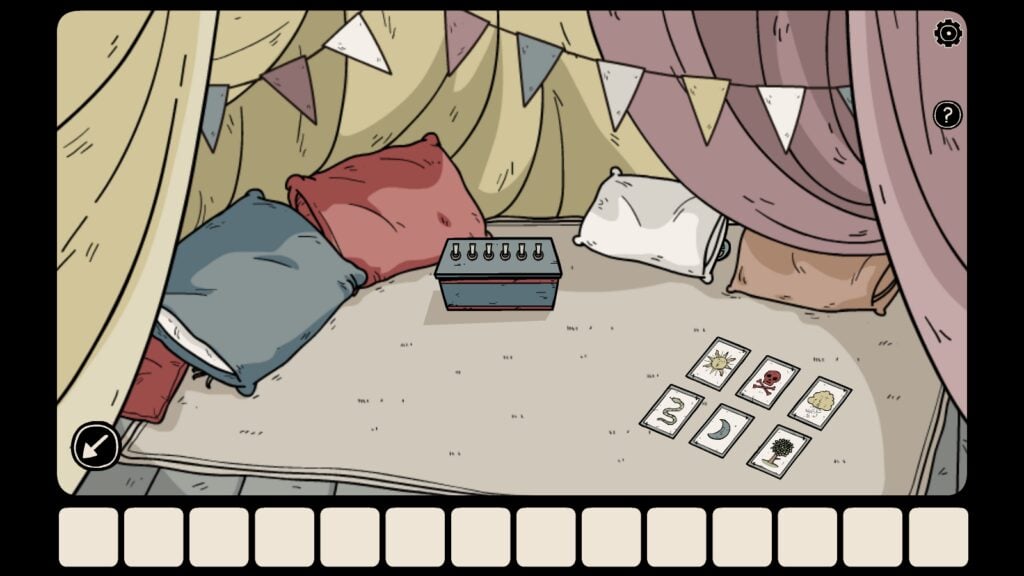
There are a few tarot cards and a blue box on the bed.
3. There’s a blue chest on the left and a two-drawer chest on the right. A small casket is on the top of the first drawer. Tap the upward-pointing arrow in the same room to view the ceiling.

5. A shuttered window on the left and a desk with two drawers on the right. There’s also a bookshelf in the top right corner of the room.

Tap the rocking horse to zoom in and tap it again to make it move. As the toy horse rocks forward and backward, four strange symbols on the wall are revealed. Make a mental note of those four symbols.
In our game, these four symbols were the skull, sun, cloud, and crescent:

Move to this room and tap the tent-like structure to peek inside the couch:

Tap the pink/yellow curtains to peek in

Inside, you will see six tarot cards and a blue box.
Tap the playing cards to zoom in:

Tap to flip only those cards with the same symbols shown on the wall, behind the rocking horse. In our game, we will flip the cards in the same order as displayed on the wall:
1. Skull card
2. Sun card
3. Cloud card
4. Crescent card
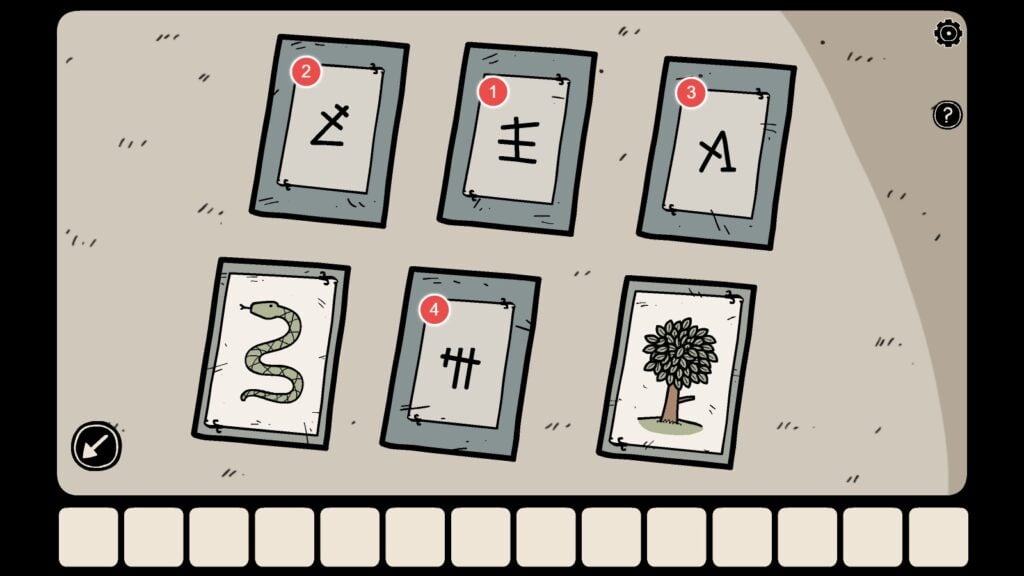
Keeping in mind the correct order of the symbols from 1-4 as seen on the wall behind the rocking horse, The symbols on the flipped-up cards will be entered in that order in this small box. This box is kept on a small desk, on the left side of the rocking horse room:

After opening the box, take the small crank handle and a ball of yarn from the box:

Tap the broken jack-in-the-box toy in the shuttered window room to zoom in. Fix the crank handle into the box, and tap to turn the crank. (You must tap three times to zoom in on the jack-in-the-box )

Jack in the box on top of the desk
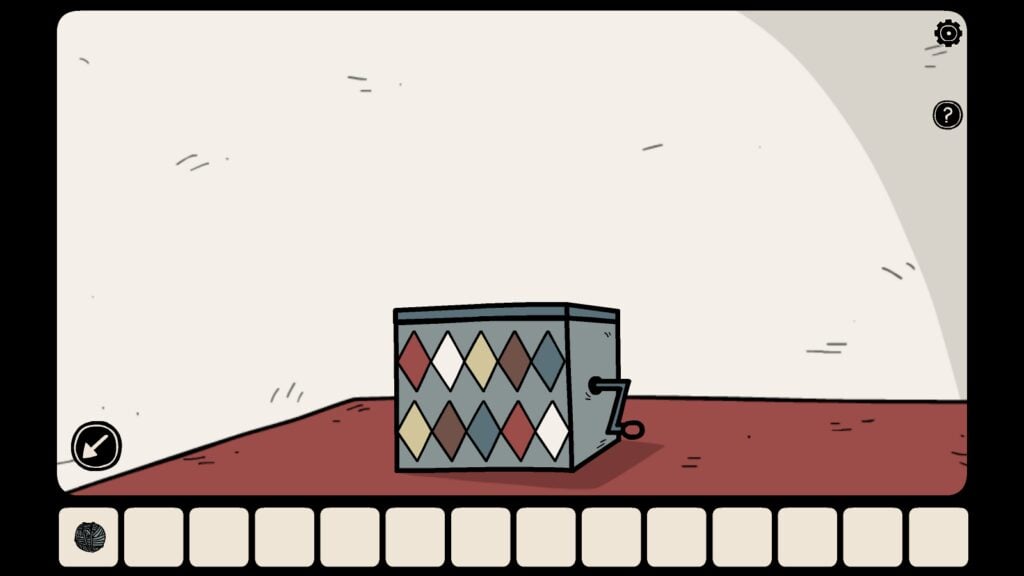
Install the crank in the box
The music plays and the lid pops open. Take the black key from the jester.

Use the black key to open the small red chest in this room. Pick the thinner and a deflated balloon from the box.

Use the black key to open the small red chest kept on the chest of drawers

Take the thinner and the deflated balloon from the red chest
In the same room, open the first drawer and take the small rag.

Your inventory is at the bottom of the screen. Tap the small rag and then the thinner bottle to moisten the rag with the paint thinner.
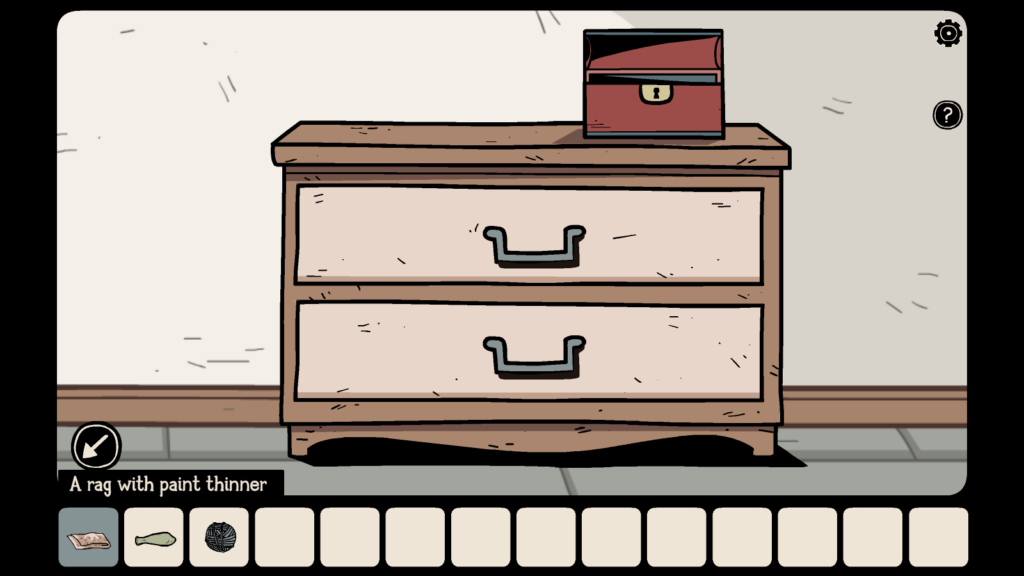
Combine the thinner with the rag to obtain a rag with paint thinner
Go to the rocking horse room, and tap the portrait of “Giselle” to zoom in. Use the rag with pain thinner on the painting to reveal a set of four symbols:
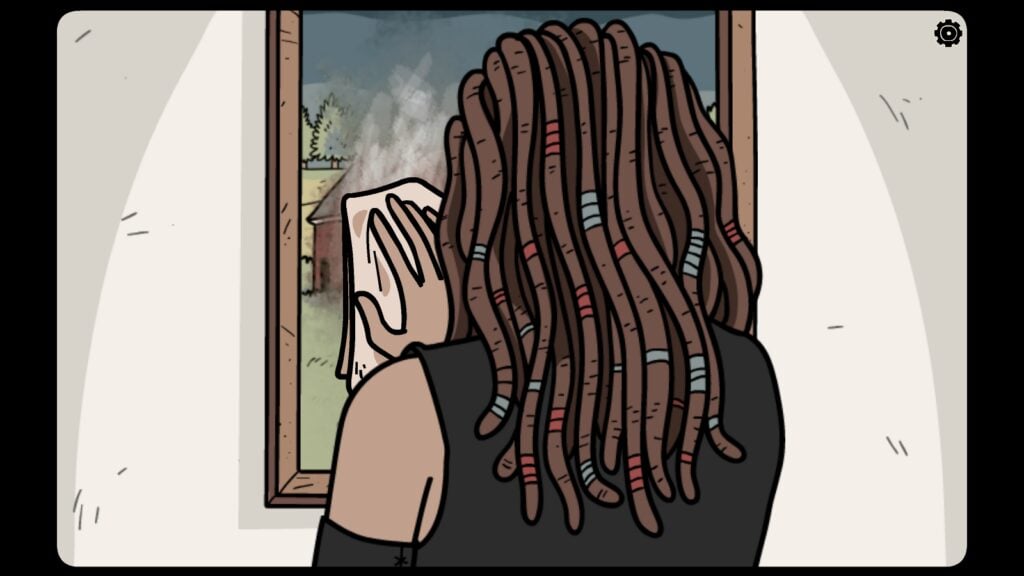
Use the rag with thinner on the portrait of Giselle

The smudged painting will reveal 4 symbols
Go to the shuttered window room. Tap the red padlock to zoom in and enter the symbols in the same order as displayed in the painting/portrait of Giselle: (Symbols will be randomly generated on the painting in each new game)
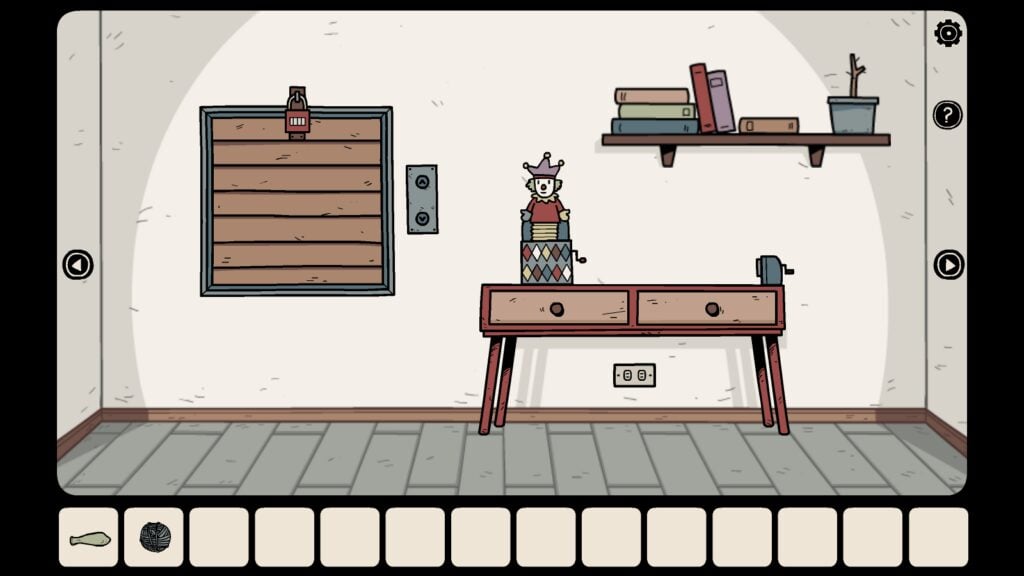
Tap the red padlock above the shuttered window
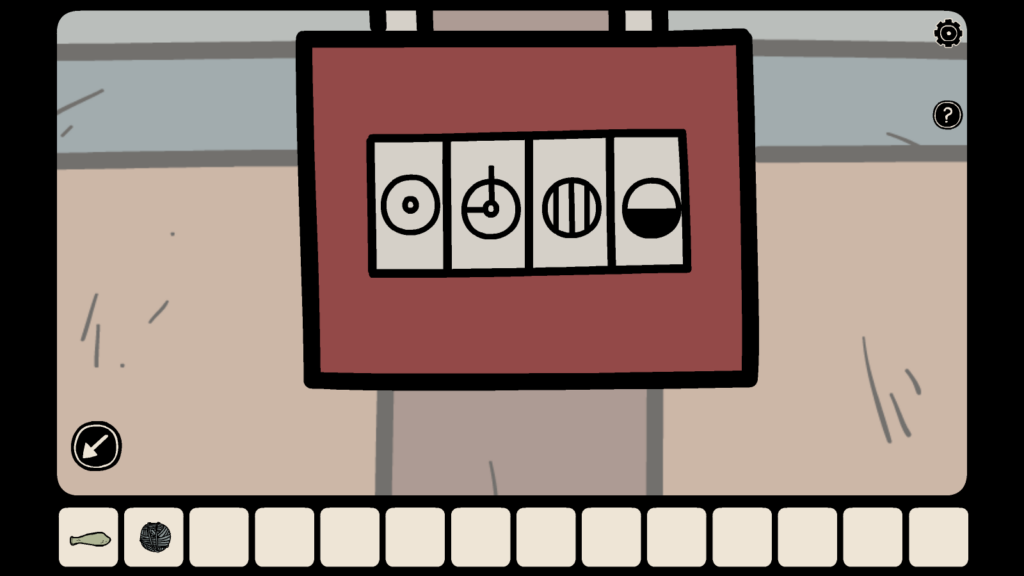
Enter the symbols by tapping on each tile to unlock the window.
Unlocking the shuttered window reveals a makeshift elevator. The elevator moves when you tap the up/down arrow buttons.
Tap the upward pointing arrow button twice. As the elevator moves up, you will see a small piece of paper pasted on the bottom of it. Tap to reveal.

You will find 6 arrows drawn on the paper. Make the mental note of them or copy all arrows on a notepad. The direction of the arrows on the paper will be randomly generated in each new game.
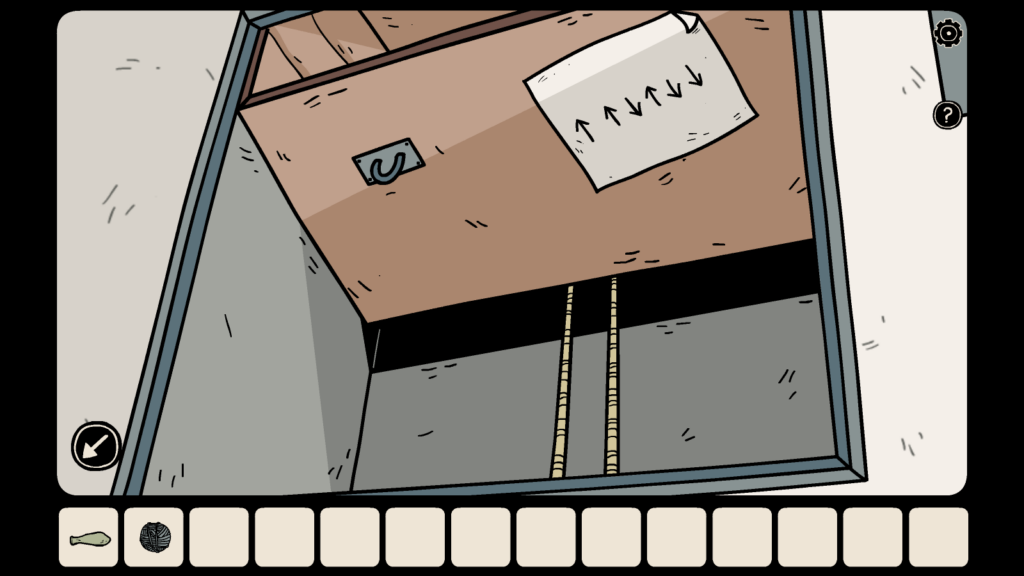
Go back to the room that has a blue desk on the left and a tent-like structure on the right. Tap the tent and then tap the blue box with switches.

Referring to the downward pointing arrows on the piece of paper on the elevator, flick only those switches downwards on the box to complete the puzzle. In our game, we had to flick the third, fifth, and sixth switches down, since the direction of the third, fifth, and sixth arrows on the paper are pointing downwards.


The box opens. Take the “Large Hook” and “The End of a Gripper”.

Go back to the elevator room. Tap the elevator and tap the piece of paper pasted on the elevator again. Now attach the large hook to the metal ring as shown in the screenshot below:

Next, tap the down arrow button twice to move the elevator to the bottom. And then tap the upward pointing arrow button twice to move the elevator up. A polaroid camera is hanging from the hook. Take the camera.
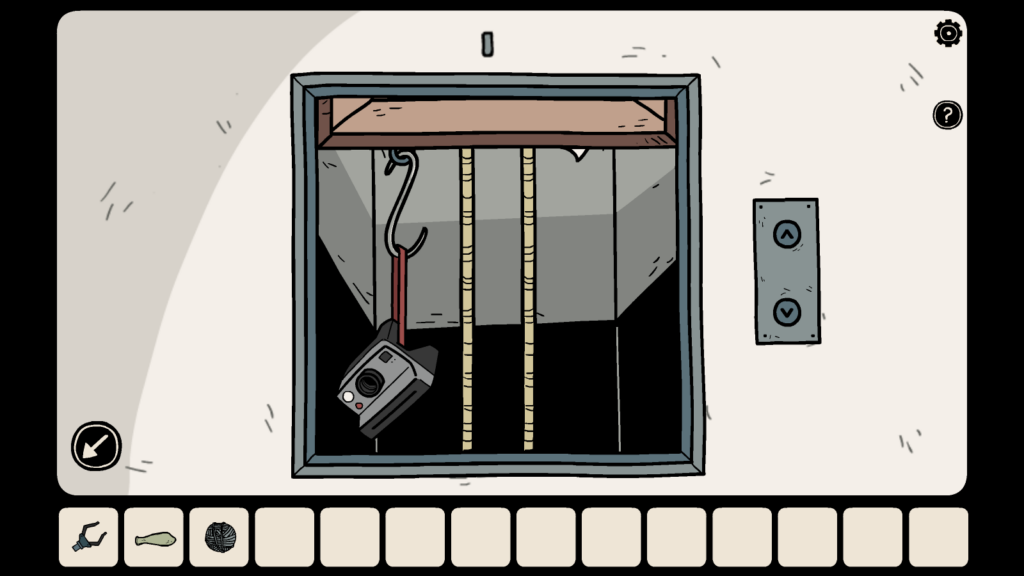
Using the polaroid camera, take in-game photos of all 4 parts of the room. Start with the room with the toy horse and finally take the fourth picture in the elevator room. Just move to a room, tap the polaroid camera, and then tap the red circle on the lower-right corner of the screen to take a pic. To move to the next room, you will have to first exit the display by tapping the “X” button on the upper-right corner of the screen.

Tap the small “X” to exit the display and then move to the next room to take a pic.
All four photos taken using the polaroid camera can be accessed from your inventory. Tap the group of four photos to view them.
There’s a ghostly apparition waving at you in each photo. Pay attention to its hands and count the fingers in each photo. Also, make sure you identify each room from a photo’s background.

To solve this puzzle, exit the photos view and head straight to the elevator room. This is the same room that has a jack-in-the-box kept on a wooden desk. Tap the purple book on the shelf at the top-right corner.
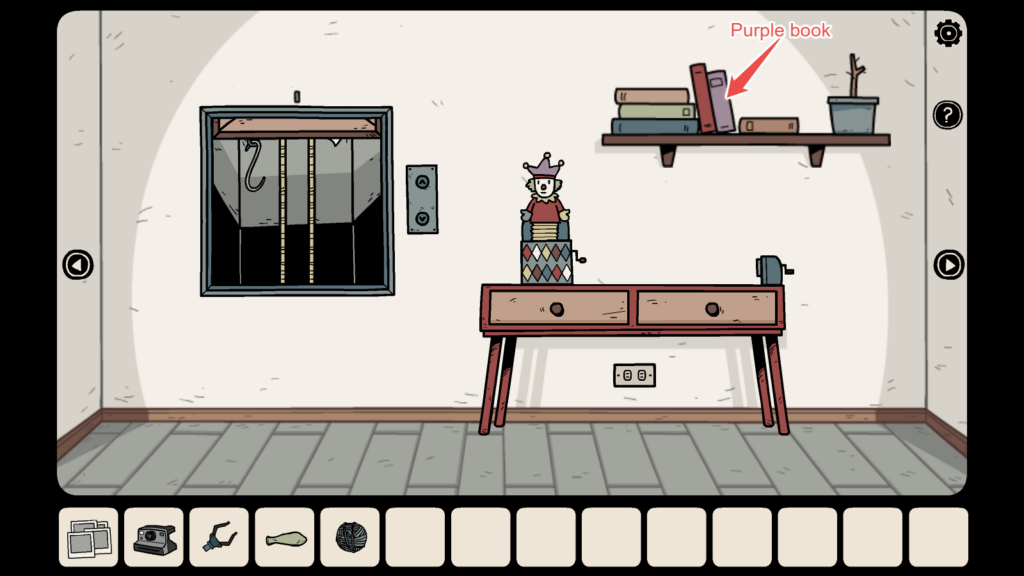
There’s a small piece of paper sticking out of the purple book. Tap it to know the hint for unlocking the blue chest with a red padlock. This hint is connected to the four photos.

The symbols on the piece of paper are actually pictorial representations of the objects you will find in all four rooms: Duck, Horse, Window, and Plant.

Symbols are objects found in each of the four rooms.
In our game, the first symbol drawn on the piece of paper is that of a toy duck. This particular object is found in the tent room. Tap the 4-photo set from the inventory. We count the number of fingers of the ghost in the tent room pic and note them down – it’s 8. Pay attention to each pic’s background and then move to that room to identify that room from its background.

The next symbol is the flower pot. It’s in the elevator room, and it’s kept on top of the bookshelf in the upper-right corner of the screen. We view the four photos again and count the ghost’s fingers in the elevator room picture – 7.

The next symbol on the paper is the toy horse. The toy horse can be found in the room that has a blue door. We tap the photos and this time pay attention to the ghost on the blue door photo. Pay attention to his finger – 1.
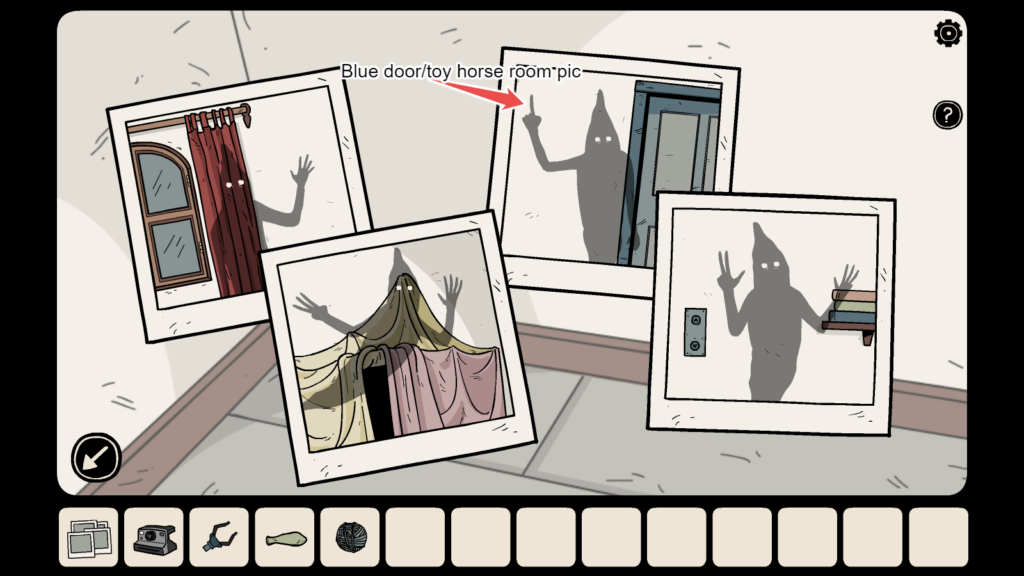
The fourth symbol on the paper is that of a window. View the photos again and count the fingers of the ghost near the window/red curtains – 5

With the help of the symbol/hints on the piece of paper and the four ghost photos, we found five digits:
8715
Note: The ghostly fingers pointing upwards in each of the four photos are randomly generated. The order of symbols on the piece of paper may also be randomly generated in each game, so the four-digit code to unlock the blue chest in your game will be different than ours. Make sure you follow the above steps to get your own combination code and don’t forget to identify the room by its background on each photo before counting the fingers.
Now move to the blue chest room. Tap the chest to view the red padlock.

We enter the digits – 8 7 1 5 on the red padlock to unlock the chest. The padlock has roman numerals.

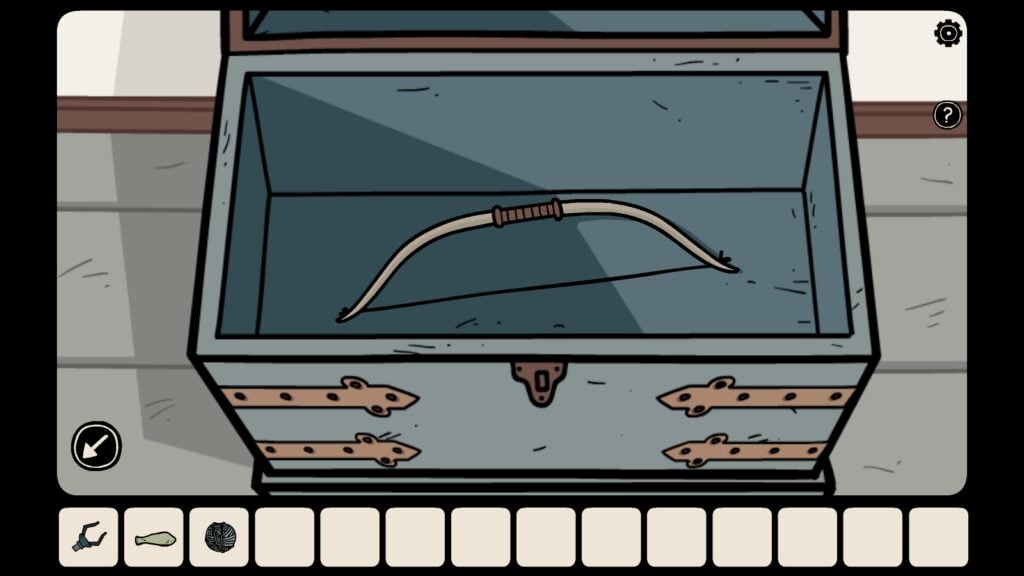
The padlock unlocks with a click. Tap the chest again to open it and tap it again to see what’s inside the chest. Take the bow:
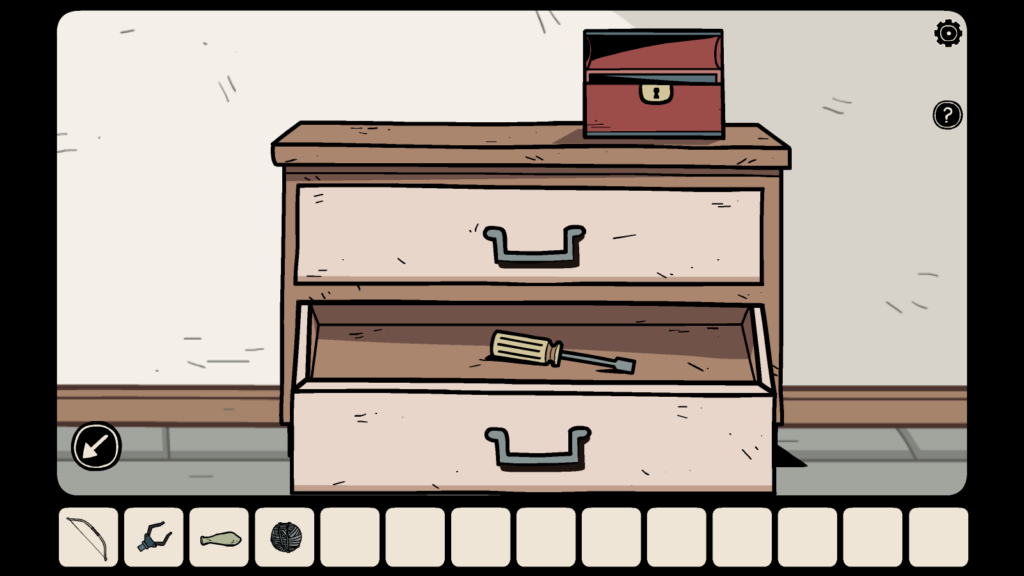
In the same blue chest room, tap the drawers on the right and then tap the bottom drawer to open it. Take the screwdriver:
Go to the tent/blue table room and tap the shelf just above the blue table. Pick the “incomplete extension clamp” from the shelf.

Tap the shelf above the blue table
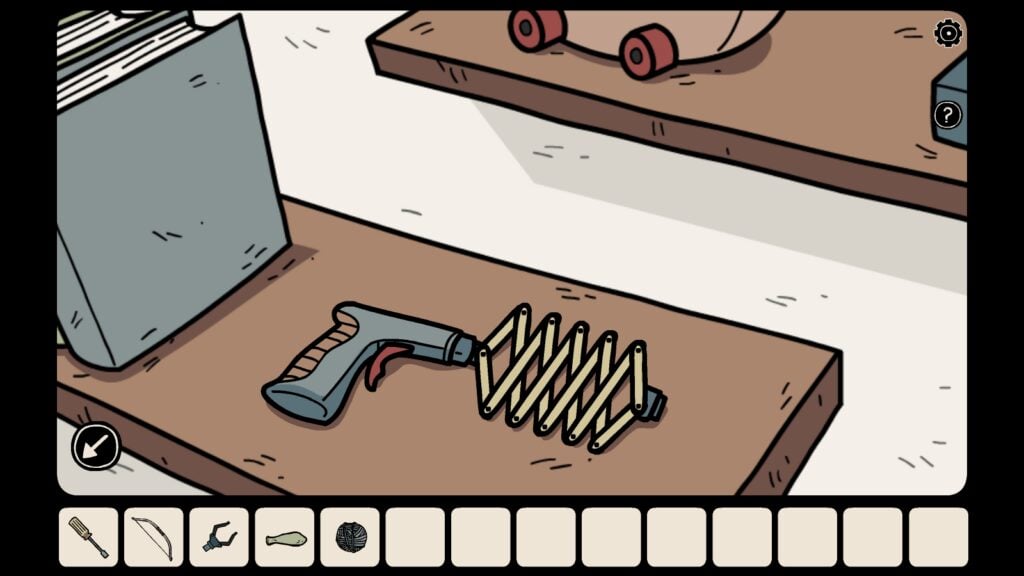
Pick the extension clamp
Go to the elevator room. It’s the same room that has the jack-in-the-box kept on top of the red desk. There’s an electrical outlet, underneath the red table. Tap the outlet and then use the screwdriver to unscrew it.

Tap the outlet under the red desk

Use the screwdriver to unscrew the outlet
After unscrewing, tap the board again to remove it from the wall. There’s a pencil in the hole. You won’t be able to reach it if you tap it.
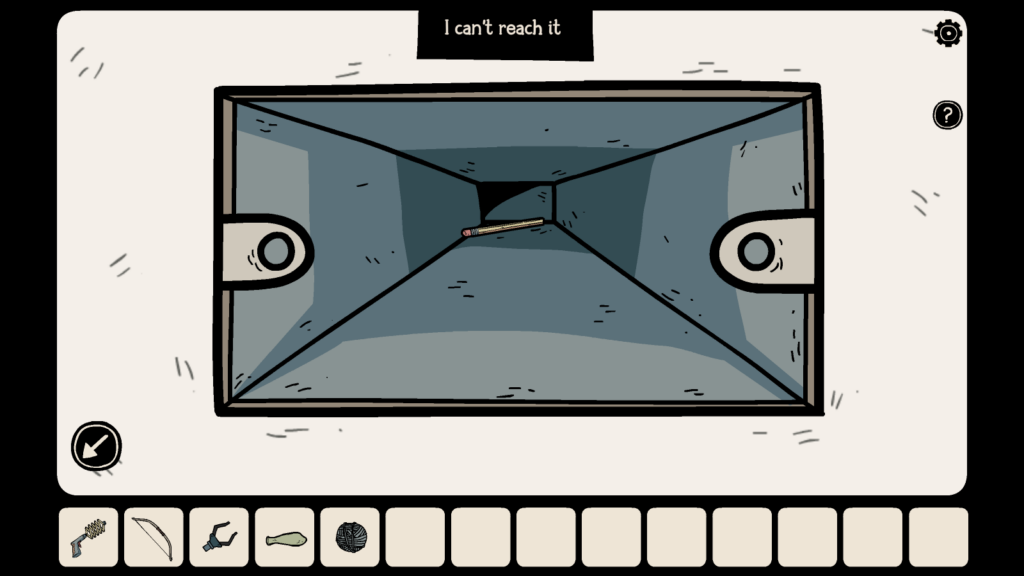
To pick the pencil, combine the “incomplete extension clamp” with the end of a gripper in your inventory. Just tap these two objects to create a new object – An extension clamp.

After combining those two objects, tap the extension clamp and then tap the pencil in the hole to grab it using the clamp. Laia will use the clamp to take the unsharpened pencil.
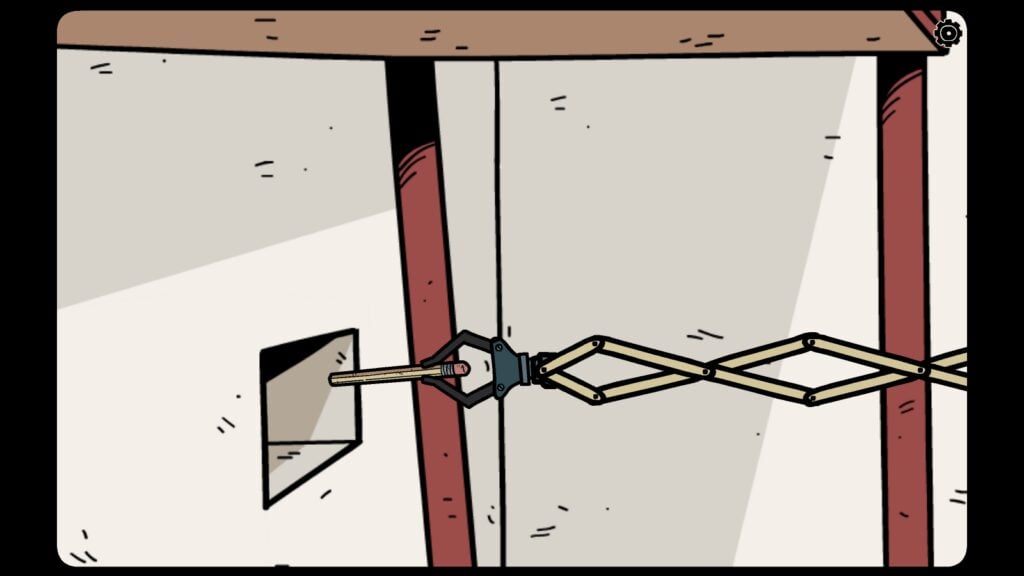
Laia picks the unsharpened pencil using the new extension clamp.
Go to the elevator/jack-in-the-box room and tap the pencil sharpener placed on the red desk, near the jack-in-the-box. You will have to tap twice to zoom in on the sharpener.

The sharpener is on the right side of the red desk.
Put the unsharpened pencil in the sharpener and tap the handle at the back to sharpen the pencil. Tap the pencil again to store it in your inventory.

The sharpened pencil will be used as an arrow, and we already have the bow. Let’s find out what’s the actual use of the sharpened pencil and the bow:
Go to the tent/blue table room and tap the tent. Take the valve that is partially hidden under the pillow:

Move to the rocking horse room and install the valve on the red helium cylinder. Next, put the green deflated balloon in the nozzle and tap the valve to pump the helium into the balloon. Take the inflated balloon from the cylinder.

Combine the inflated balloon with the ball of yarn:

You will get a balloon with a string attached.
Move to the jack-in-the-box/elevator room again and tap the red desk > right drawer. Take the clip. Now tap the clip in your inventory and select “Bend Clip”. Combine the bent clip with the balloon to make a “balloon with a hook and string attached”

Take the clip

Bend Clip

Combine
Go to the blue chest room and tap the upward-pointing arrow to view the ceiling.

There’s a red key trapped in the ceiling on a wooden plank.
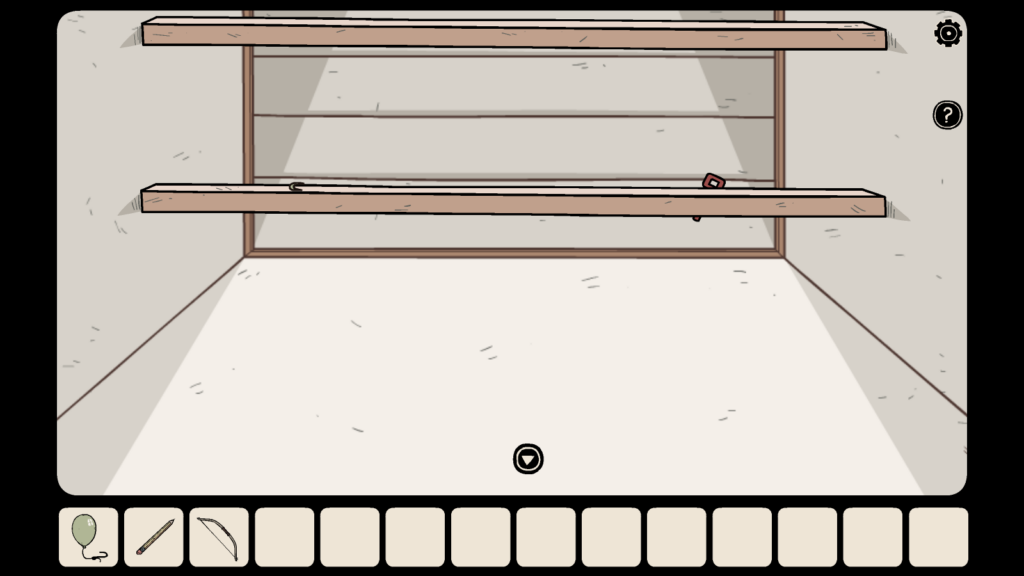
Tap the balloon with a hook and string attached to your inventory and then tap the ceiling. The helium-filled balloon will float high up to the ceiling, picking up the red key on its way to the ceiling.

Now combine the sharpened pencil with the bow to make a makeshift bow and arrow and shoot the balloon. Just tap the ballon and Laia will shoot. The red key will then fall on her palm.
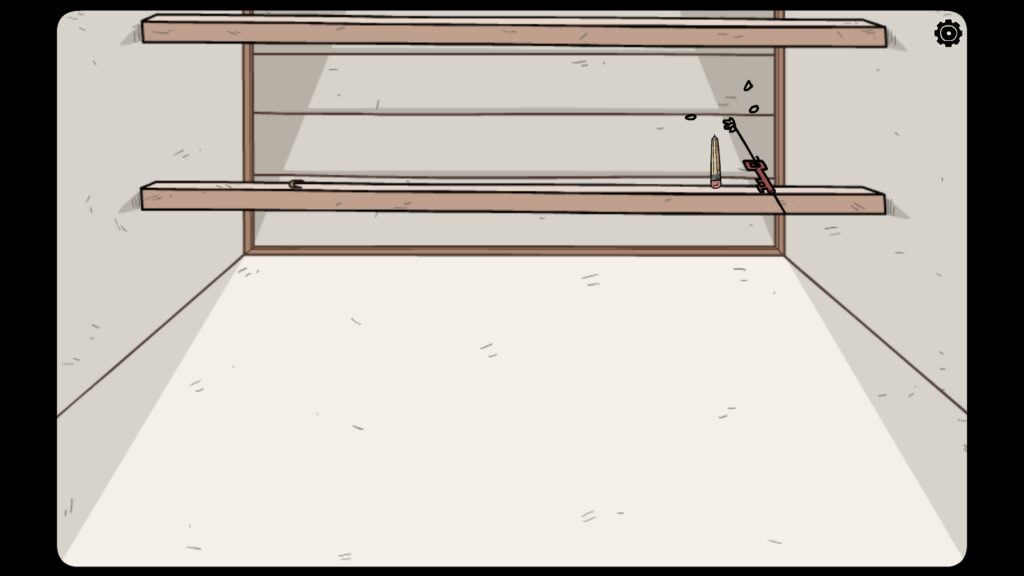
Move to the rocking horse room and use the red key to unlock the blue door. Tap the door again to open the door. You have successfully escaped the hidden room. Tap the entrance to exit.

After escaping the hidden room, you will return to the present moment. Laia has found her father and brother, but they are cursed with the spell of the shadows. Laia remembers reading the big red book in the tent room. The book talked about “magical seeds” and that one can be freed from the curse if one eats them.
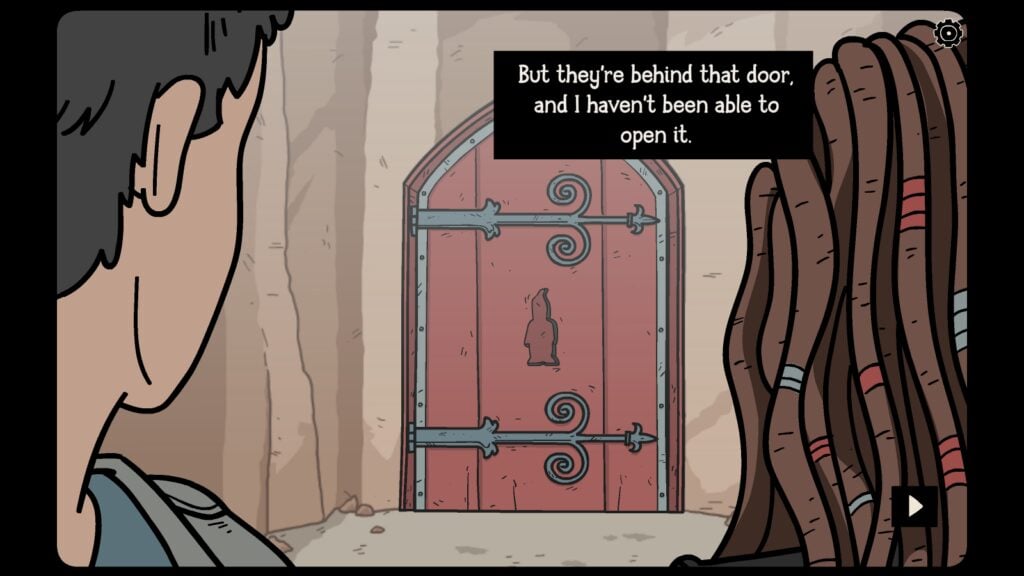
Laia takes a look at the locked red door. (you saw this red door in the previous puzzles). The seeds are behind that door and she has to open it to get access to them.
Suddenly, they see a bucket fastened with a rope descend the bottom of the well. There’s a strange blue idol in the wooden bucket.

Seeing the idol in the bucket, her father tells Laia to hand over the pink key. You found the pink key from the gaping mouth of the stone face sculpture. Tap the pink key and then tap his palm to give it to him.

Holding the key, Laia’s father and brother step back into the water, emerge as shadows from the water, take the idol from the bucket, and put the pink key in the bucket.

The bucket descends.
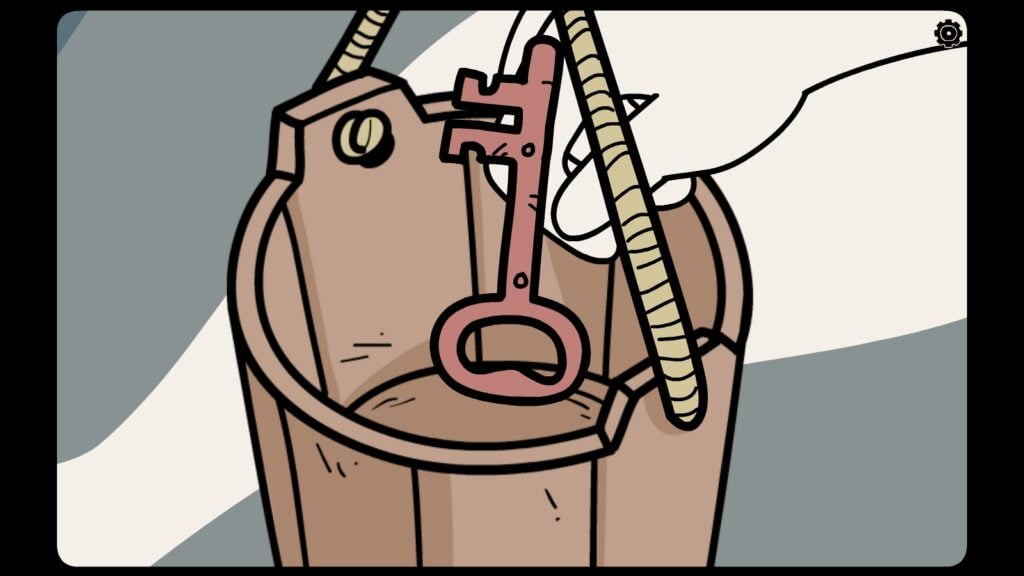
Laia’s father puts the pink key in the bucket
Her father gives her the idol to open the locked red door. Tap the idol to collect it. The idol will act as a key to open it.

Go to the Red Door room, tap the strange idol in your inventory at the bottom of the screen, tap the red door, and then tap the empty slot to put the idol in it. The door unlocks. Tap to enter.

As she enters the room, the witch hits her and traps her inside a painting. Laia remembers all this and you are back to the very first puzzle scene. Recall that scene where she was about to cut the metal grill with the pliers.
Tap the plier and then tap the metal grill to cut through the mesh. You can now enter the underground chambers through this entrance as soon as Laia breaks open the metal grill:
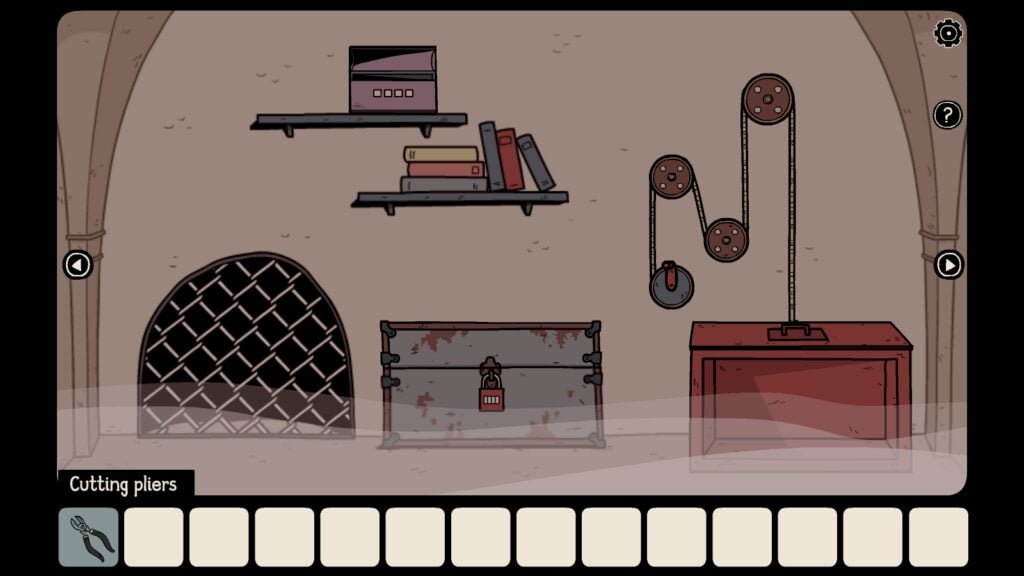
You will be in this room. This will be the first underground chamber. Tapping the broken grill exit will allow you to move to the upper chambers.

Go to the sarcophagus room and pick the small white pebble. Next, go to the light post room and pick another white stone.

Sacrophagus room
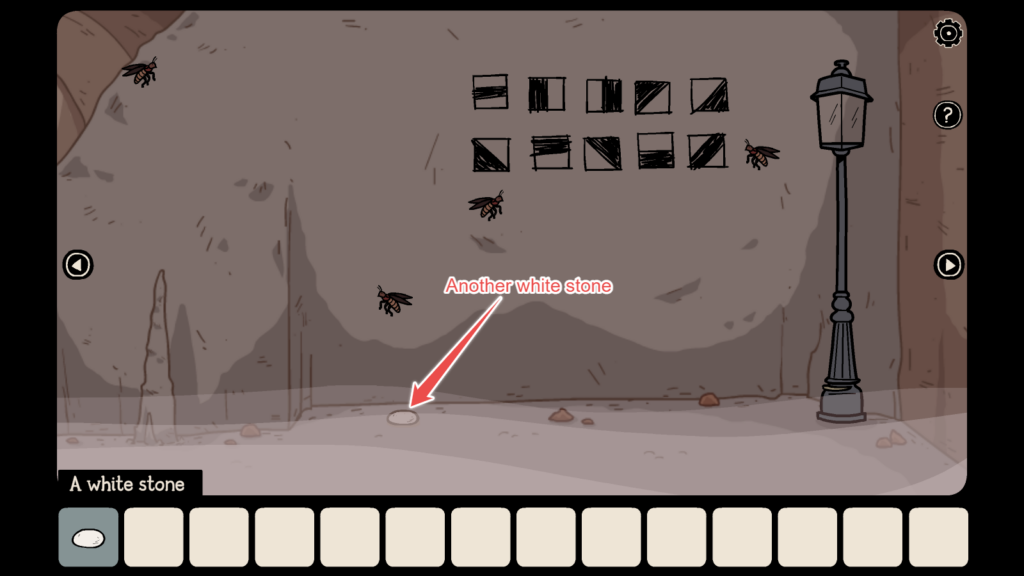
Light post room
In the sarcophagus room, tap the shuttered wooden panel on the wall, above the sarcophagus:
The panel opens, revealing a grid on the left and 8 wood blocks of different shapes and sizes on the right.

You will have to drag the blocks onto the grid and put them in the right place. All blocks should fit in the grid. Haunted Laia’s wood block puzzle is somewhat like Tetris, but the blocks can’t be rotated and the player must put all the blocks in the right place to complete the puzzle:
Here’s the solution to the wood block puzzle:
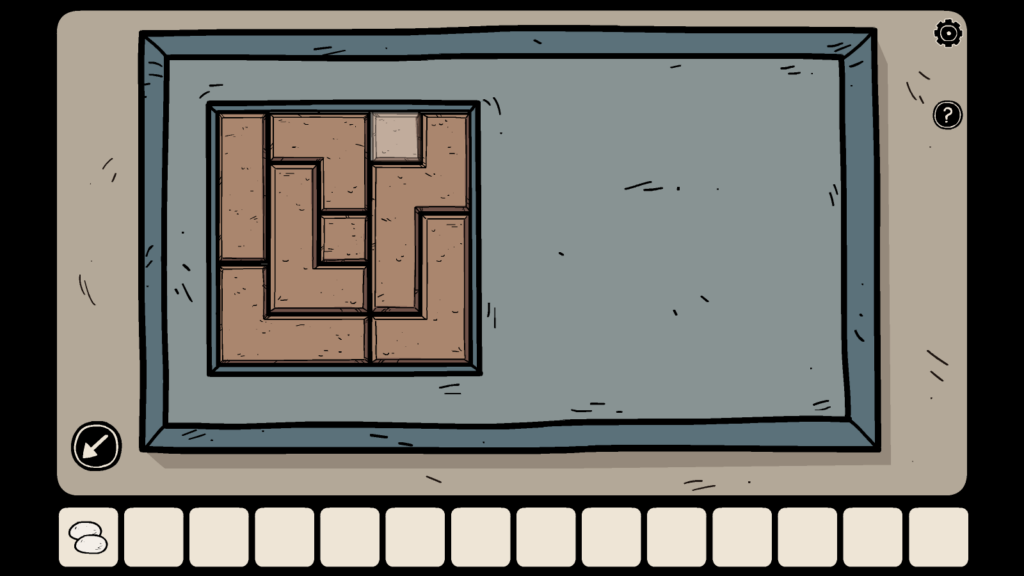
Soon after solving the puzzle, the stone coffin’s cover slides open and a creepy skeleton hand appears. Take the white key from the hand.

Go back to the first room. Tap the metal grill hole to exit the underground chambers and move to the upper rooms. This entrance will act as a entry/exit for the underground chambers and the upper rooms:

Once you are in the upper rooms, move to the four head sculptures room and use the white key to unlock the left cabinet door, next to the pentagram door in this room:
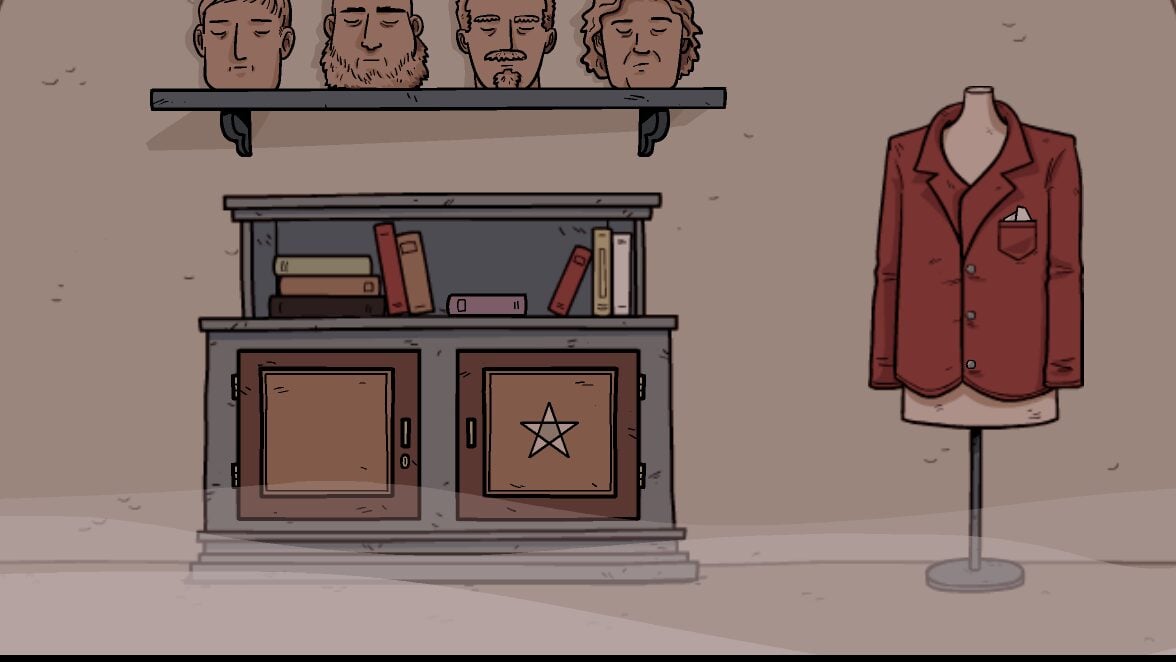
Use the white key to unlock the left cabinet door, next to the pentagram door
Take the bottle of cleaning alcohol, a photo of a scarecrow, and a piece of paper – a puzzle hint that has four circles and a strange symbol drawn on one of the circles. The piece of paper will be used to solve the final puzzle – the door exit puzzle.

Go back to this room and enter the underground chambers through the broken grill entrance as shown in the screenshot below:
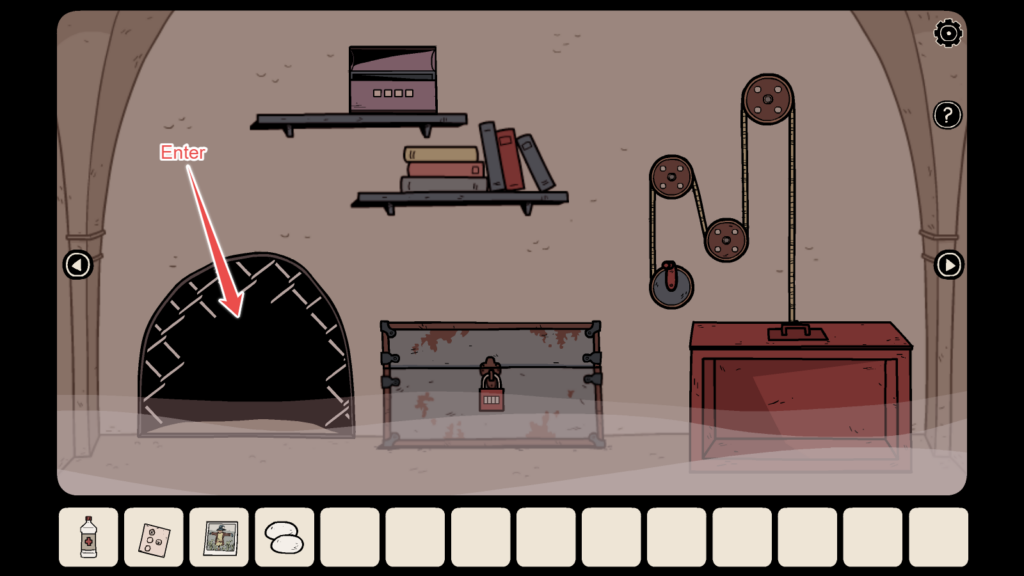
Go to the room that has a caged skeleton. Tap the bird’s nest. Now tap the photo of the scarecrow and tap the bird to scare her away. The bird will fly away, abandoning her nest.

Skeleton in cage room

Bird's Nest
Tap the empty nest to collect it.
Go to the light pole room and tap the light pole. Use:
1) Bird’s Nest
2) A bottle of cleaning alcohol and finally
3) two white stones to light up the lantern part of the light pole.
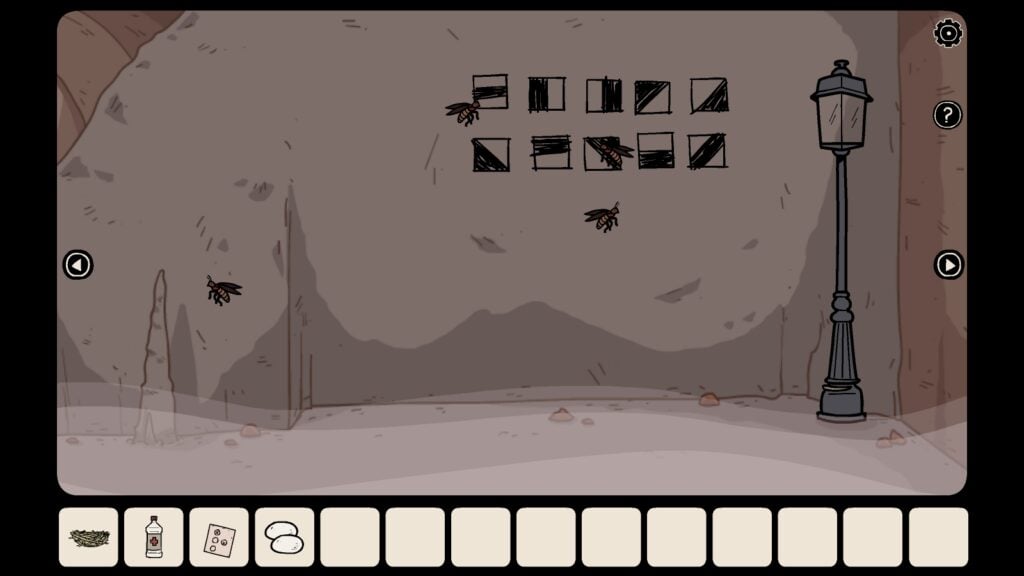
Light Pole Room

Light up the lantern
Once the lamp post is lit up, four fireflies will be attracted to the light. As they hover near the light post, all four fireflies will glow in four – green, red, blue, and yellow.

Fireflies attracted to the light glow
The bright colorful fireflies will then move to four different patterned square tiles drawn on the wall, hinting at a solution to solve a particular puzzle. In our game, the fireflies moved to these tiles, but their positions won’t be the same in your game. It will be randomized:

Make a mental note of only those patterned tiles where the red, green, blue, and yellow fireflies are hovering over. In our game, the green firefly is above the first tile in the first row, the red one is above the fourth tile (first row), the blue firefly is hovering above the second tile in the second row and the yellow firefly is above the fifth tile (second row).
Go back to the upper rooms through the underground room exit and move to the typewriter room. Tap the blue chest of drawers > first drawer. It’s on the left side, just below Laia’s portrait.

Tap the first drawer underneath Laia’s painting
Refer to the glowing fireflies hint on the wall (see screenshot below) and enter the tile correct combination while paying attention to the colored dots above each pattern on the drawer. The green, red, blue, and yellow dots correspond to the colored fireflies hovering over certain patterns on the wall. Get the same patterns on the drawer by tapping on each tile on the drawer to open it. (Note: The firefly puzzle hint may be randomly generated)

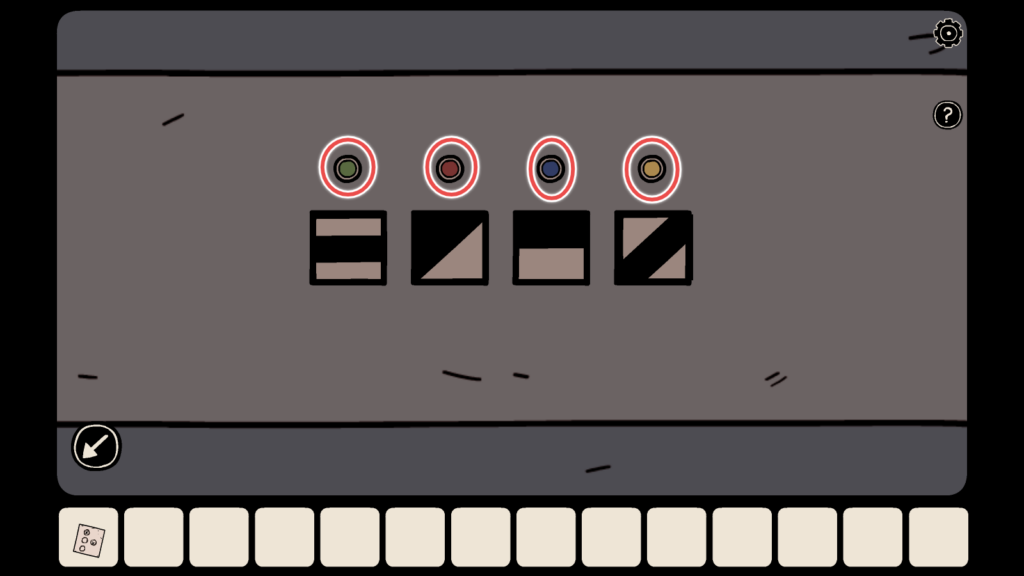
After unlocking with the correct combination, tap to open the top drawer, and take the token with a strange symbol and a piece of paper that provides an important hint to a puzzle in the first underground chamber:

Go back to the underground chambers through the broken metal grill entrance in the upper room. In the first underground chamber, tap the red mechanical weighing scale to zoom in:

Go to the first chamber and tap the scale

Mechanical weighing scale and stones of various sizes
Four stones of different sizes and weights are kept next to the mechanical weighing scale. There are strange symbols etched on those four stones. We will now begin solving the Weight Puzzle:
Tap to view this piece of paper. We found it in the top drawer in the typewriter room: (Refer to the firefly puzzle to know how to get this piece of paper)

You will find the same symbols on the piece of paper. With the help of this paper and the symbols on it, place the stones having similar-looking symbols in the same order as per the instructions on the paper, and note down their weight measures. In the second line, the paper instructs to add the weight measurements of the two symbols, and in the fourth line, subtract the measurements of the two symbols.
For example: In our game, the first symbol on the piece of paper was this:

In the weighing scale puzzle, we placed a stone with the same symbol on the tray and measure its weight:

Put the stone with the symbol (as shown on the paper) and note down its weight
Now in the second line on the paper, it instructs to add the weights of two symbols:

All we had to do is place the two stones with the same two symbols one at a time on the tray, note down their weight measurements, and add them. In the third line, we just had to pay attention to the symbol, place the stone with the same symbol on the weighing scale tray and note down its weight. In the fourth line, we subtracted the weight of the first line symbol from the second line symbol to get a number.
This way, we got four numbers: 8 5 2 5 – This will be used as a combination code to unlock the rusty blue chest in the upper chambers.

Go to the upper chambers and move to this room:

Tap the red padlock on the rusty blue chest and enter the combination code – 8525:

Numbers on each section of the padlock are denoted by lines vertical and horizontal lines. That’s the number 8 in the first section, 5 in the second, 2 in the third, and 5 in the fourth.
The rusty chest opens, revealing another piece of paper with strange symbols and a small pickaxe. By now you will have two pieces of paper with strange symbols – we got the first one from the cabinet next to the pentagram symbol cabinet in the four heads room.

Take the pickaxe and second piece of paper similar to the first one.
Go back to the underground chambers and move to the caged skeleton room. Tap the skeleton to zoom in. It’s holding a piece of paper that has a grid, a drawing of a lamp post, and a red “X” mark in column 3, row 4. (The position of the “X” mark on the paper may change in your game).

Caged Skeleton Room

Grid with an X Mark
The note with the “X” mark hints at a possible treasure location within the walls in the lamppost room. Go to that room, tap the pickaxe in your inventory, and then take the help of the note with an X mark on the grid to know the exact location on the wall. Keep tapping the wall until a part of it cracks, revealing a small red diamond. Tap to pick the diamond.

Go upstairs, through the broken grill exit, to the upper chambers, and move to the typewriter room. In the middle of the room, there’s a skull kept on a tall pillar.
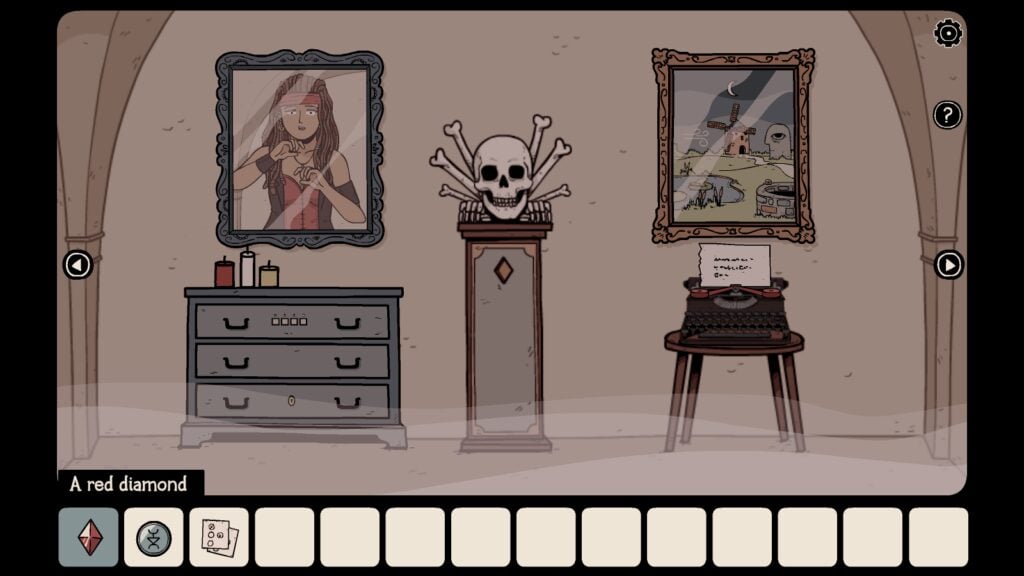
Tap the pillar and then place the red diamond on the empty diamond-shaped slot in the pillar.

A cut scene will show the eyes of the skull glowing red and the iron fence behind the caged skeleton going down, giving Laia access to the magical seeds growing on a branch of a tree. Exit the cut scene.

Go downstairs, to the caged skeleton room again, and tap the branch behind the cage. Tap the branch twice to pluck the three seeds. Exit the cut scene.

In the same area, tap the small rock, and pick the token behind it.
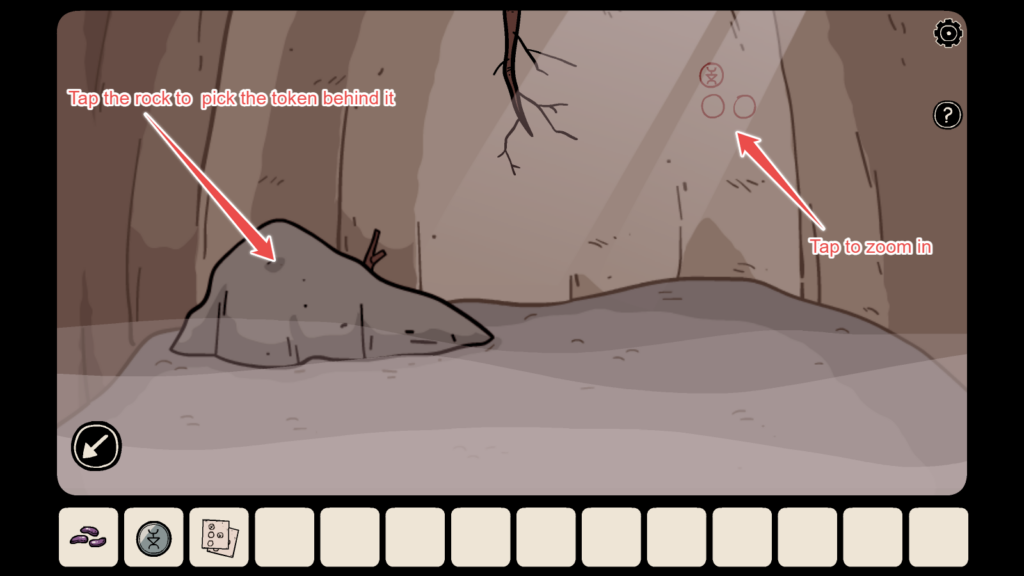
Tap the rock to pick the token behind the rock and don’t forget to tap the red circles drawn on the cave walls to get the hint.
Also, tap the tiny red circles on the cave walls to find a hint to solve Haunted Laia’s final door exit puzzle, aka the token puzzle. Take a screenshot of the red circles on the wall. You will see a symbol drawn inside of one of these circles (randomly generated in every new game)
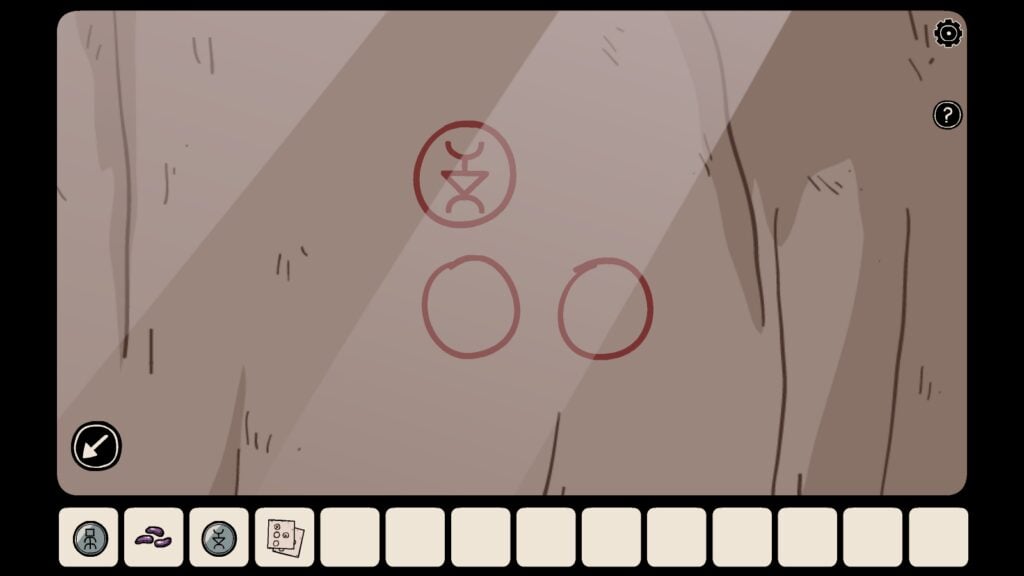
By now you will have two tokens, the first one was found in the top drawer in the upper rooms > typewriter room and the second one was behind the rock, in the caged skeleton room.
You will have to find two more tokens to solve the door puzzle. Go to the sarcophagus room and tap the skeleton’s arm sticking out of the stone coffin. Tap his cuff button to collect the third token:

Go to the stone coffin room and tap the skeleton’s hand to collect the token from its cuff.
Go to the caged skeleton room and tap all three pots. You will find the fourth token on one of the pots:

The fourth token was found in the third pot, the extreme right one, in our game:

Now that you have all four tokens, pay attention to their symbols – Each token has a unique symbol.
The next step is to get the hints. We already have two pieces of paper with similar-looking symbols drawn on certain circles:

The first note was found in the room with four busts/faces, in the left cabinet, next to the cabinet door with the pentagram puzzle in the upper rooms. The second note with the symbols and circles was found inside the blue rusty chest in the upper rooms. See the screenshots below:
The solutions for puzzles to find both notes are explained in detail in this Haunted Laia walkthrough. Read the wooden block puzzle and weighing scale puzzle section in this guide to know how to open the cabinet and the rusty chest.

First Note Found in the Cabinet Next to the to Pentagram Puzzle

Second note found in the blue chest
The third hint is scribbled on the walls of the caged skeleton room:
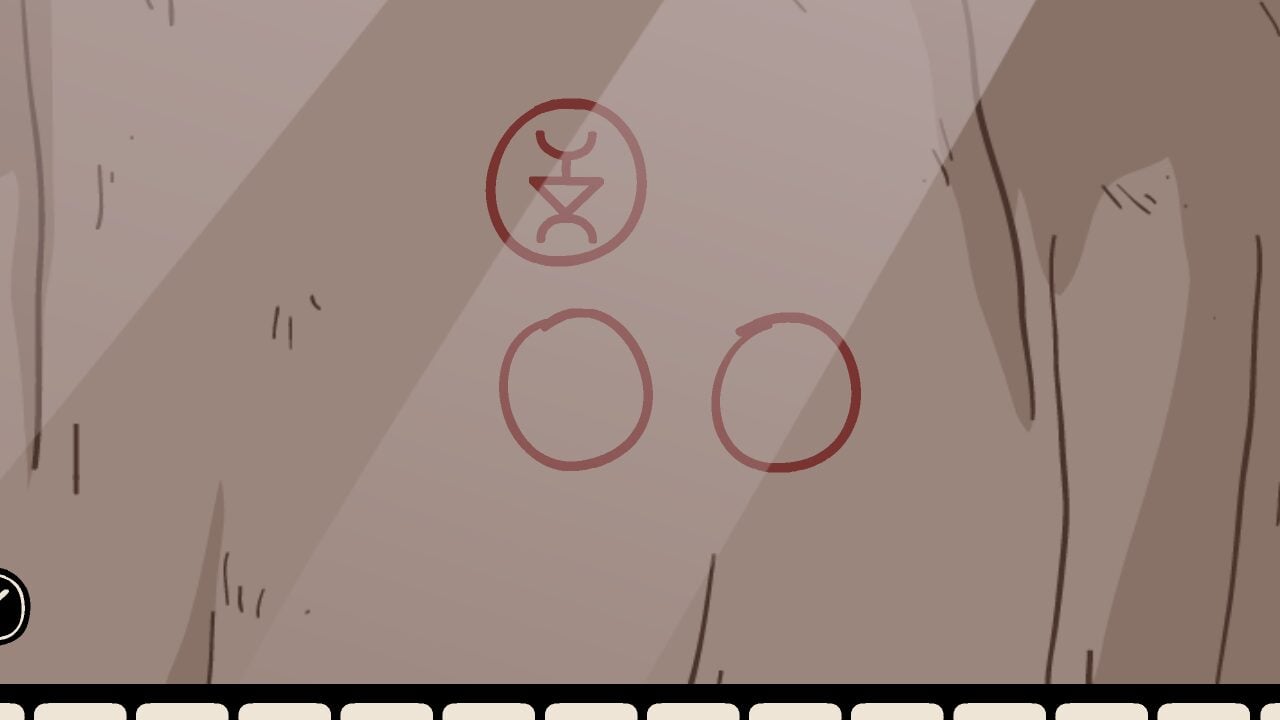
The drawing on the wall
Now there’s a fourth hint, another piece of paper, which can be found in the upper rooms > four head room. Tap the red coat and then tap its pocket to collect the fourth hint:
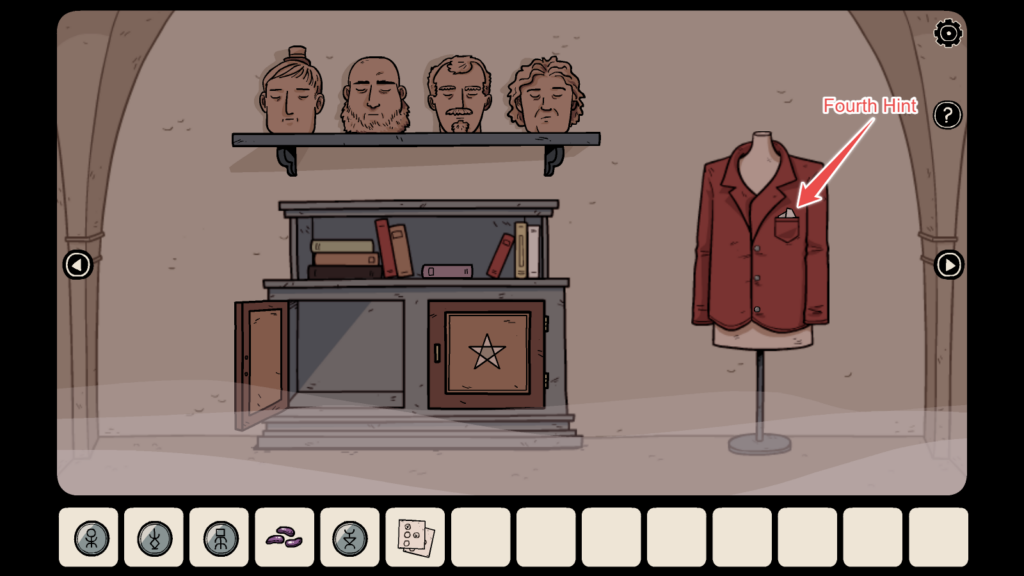
Now you will have three notes in your inventory. Tap to view them. Keep all four hints with you. Take screenshots of the 3 notes and the one on the wall:


Head straight to the red door room. It is located in the upper rooms:
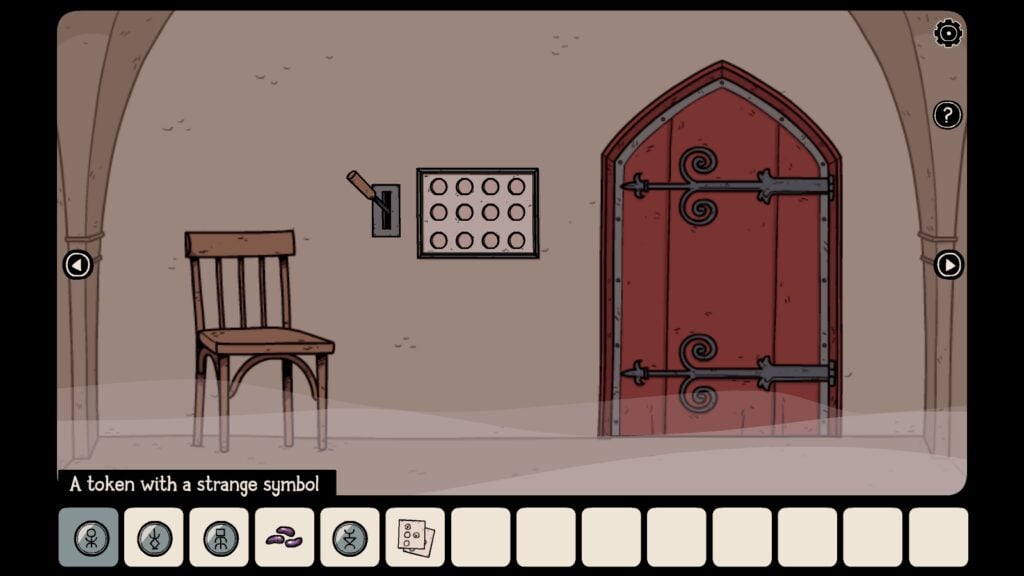
You will have to open the door by solving the puzzle on its left. There are 12 slots on the puzzle. Tap to zoom in:

You will have to place the four tokens in the correct slots, and for that, you must refer to the three notes and the drawing on the wall. Just tap a token and then tap an empty circular slot to place it, but make sure you know the right position of the tokens from the notes and the wall drawing. In our game, we had to place the tokens in their right slots as shown in the screenshot below:


The token symbols’ placement on the notes and on the wall will be different in each new game. Yes, this will be another randomly generated puzzle.
After solving the door puzzle, tap the level to open the door. tap the door to exit:

In the cut scene, Laia could see her father and brother, but she still can’t go out as she is trapped in another dimension. She has the three seeds now. As she tries to eat one seed to escape the dark dimension, an evil shadow grabs her leg. Laia falls down flinging the seeds up in the air accidentally. She lunges forward and manages to catch two seeds, but unfortunately, the third seed falls on the ground and breaks. At her family’s request, she throws the seeds at them. Her father and brother eat the seeds to cure themselves of the curse. Darkness engulfs her, but her father enters the dark dimension and rescues her from the clutches of the evil witch. Wait! The story does not end here and this is probably the bad ending – Laia is still trapped in the dark dimension, and the rescued girl is the witch.
There’s no good ending, but Haunted Laia has a secret ending that unlocks if you buy the premium version of the game.


