Honkai: Star Rail is an RPG character collector game developed by miHoYo, the same people behind Genshin Impact and Honkai: Impact. Here, players experience an adventure across the cosmos as they visit distant planets in an attempt to save each of them from calamities caused by “Stellarons”.

Photo: Honkai: Star Rail Twitter
Along our journey on the Astral Express, we’ll meet memorable and colorful playable characters who each have their own parts to play in our story. Each of these characters can be tailored to a degree via Light Cones and Relics.
Light Cones can be thought of as Weapons in Genshin Impact. Each Light Cone comes with its own special mechanics like increasing a stat or making characters more likely to be targeted.
Relics, on the other hand, can be a lot more complicated since they come in varying rarities, sets, and have different methods of acquisition.
This article aims to guide you through the many nuances that come with Relics in Honkai: Star Rail. Read on to learn exactly what relics are, how to get them, and who to equip them to!
What Are Relics
Relics are Honkai: Star Rail’s version of armor or equipment found in other games. These relics are essentially divided into two sub-sets; Cavern Relics and Planar Ornaments.
Relics
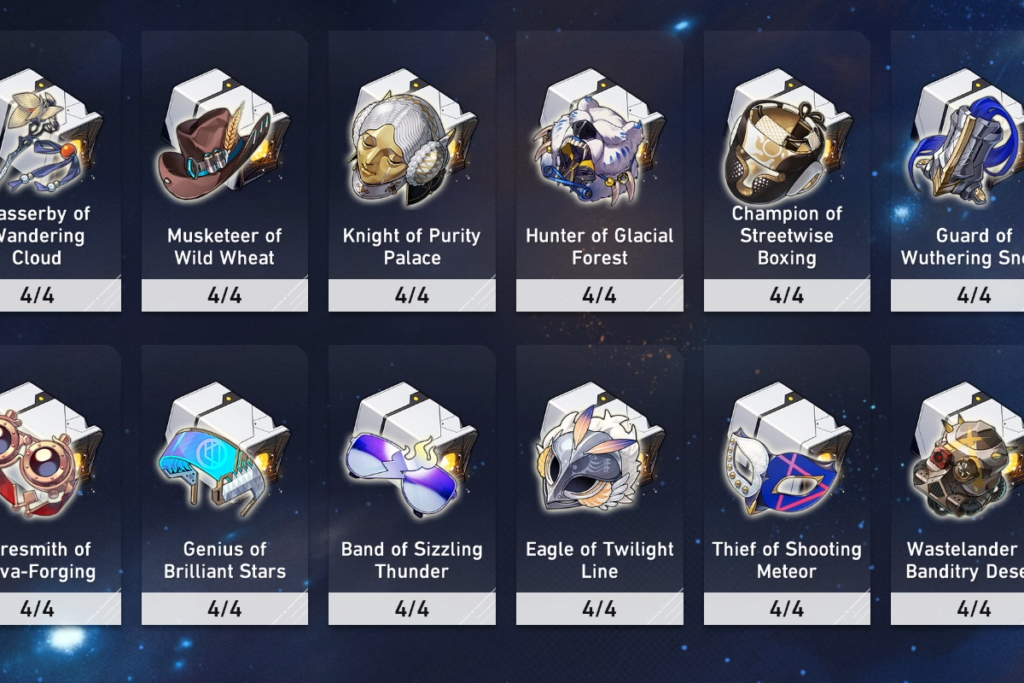
Photo: miHoYo
Relics are the base form of these items that you will get access to as soon as you hit Trailblaze Level 14. These Relics come in three different rarities and are equipped in either the Head, Gloves, Boots, and Body slots!
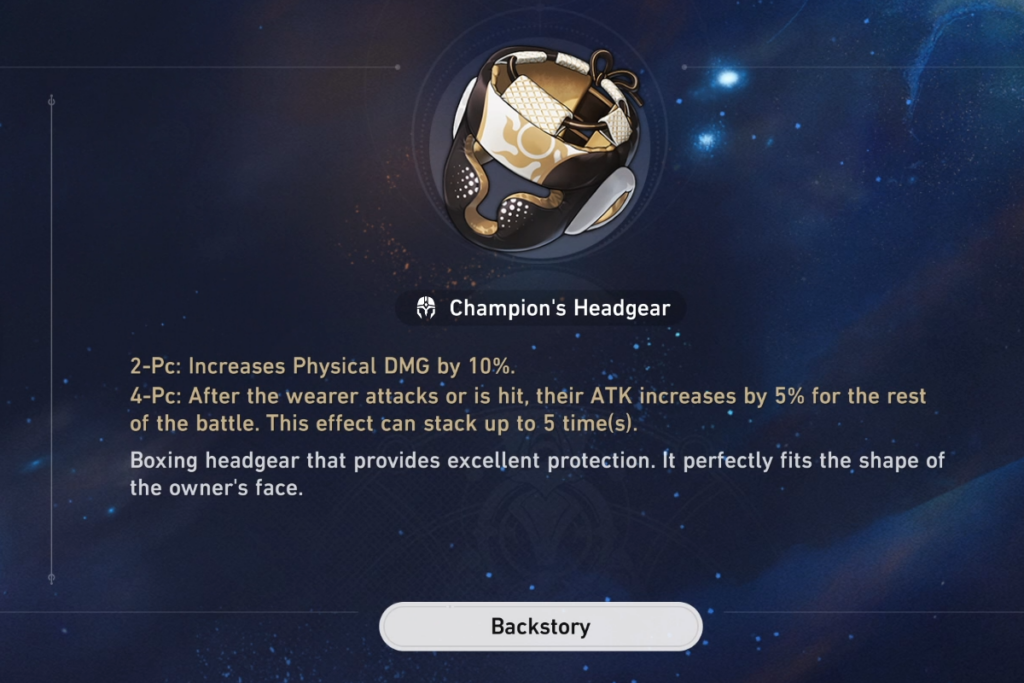
Photo: miHoYo
Relic Sets and Best Characters
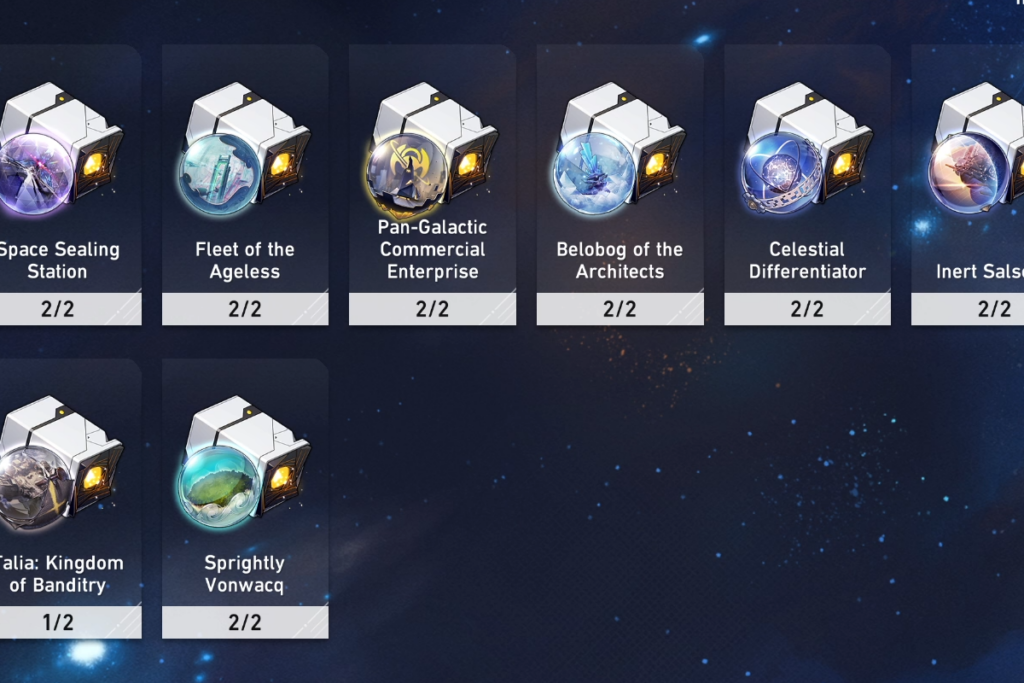
Photo: miHoYo
Planar Ornaments are relics equipped in two other slots that you unlock after completing the quest “No Time For Me, My Friend”, which is subsequently unlocked once you hit Trailblaze Level 24. These Planar Ornaments are either a Rope or an Orb!
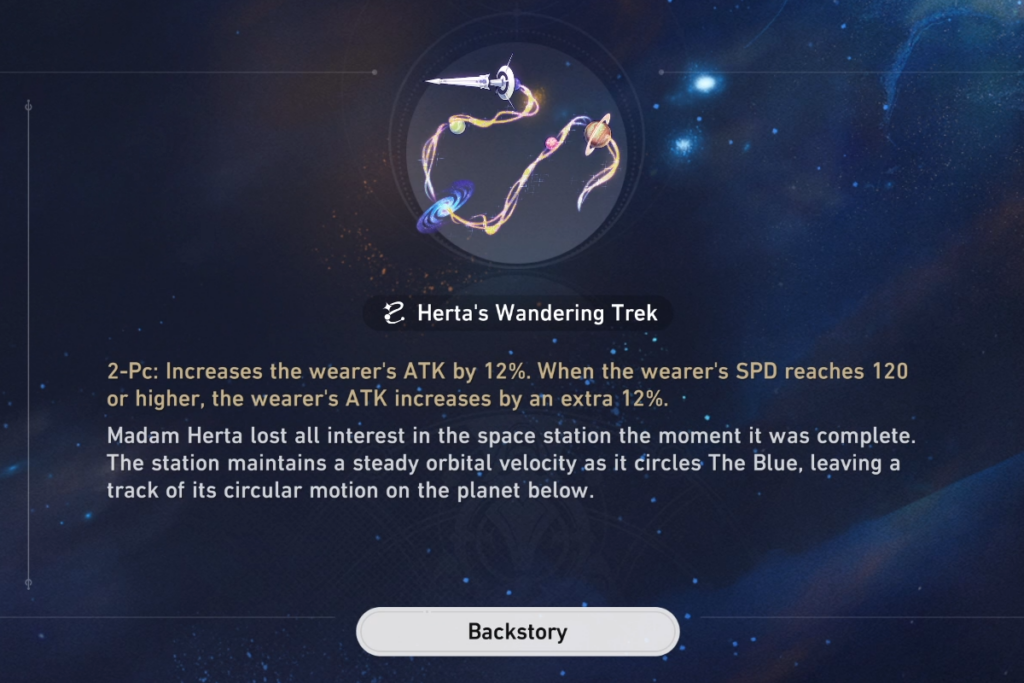
Photo: miHoYo
Planar Ornament Sets
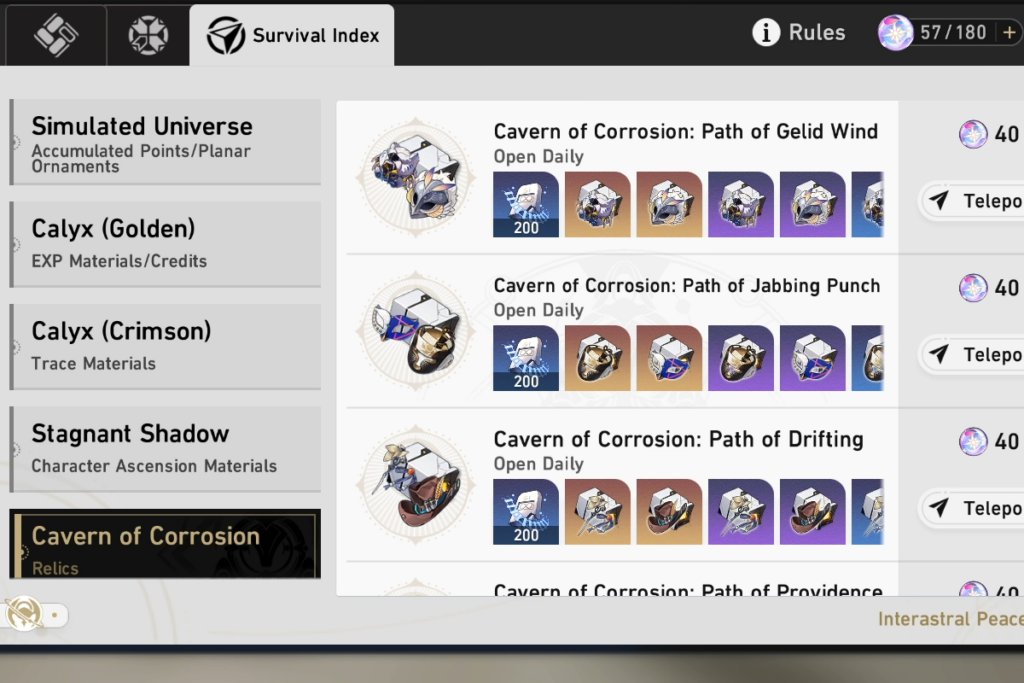
Photo: miHoYo
Relics are prevalently farmed within the Caverns of Corrosion Calyxes. Each attempt at a Calyx will cost you 40 units of Trailblaze Power/Energy.
Below we’ve included a table that displays all the Caverns of Corrosion currently available in the game as well as their Relic Set rewards and their locations!
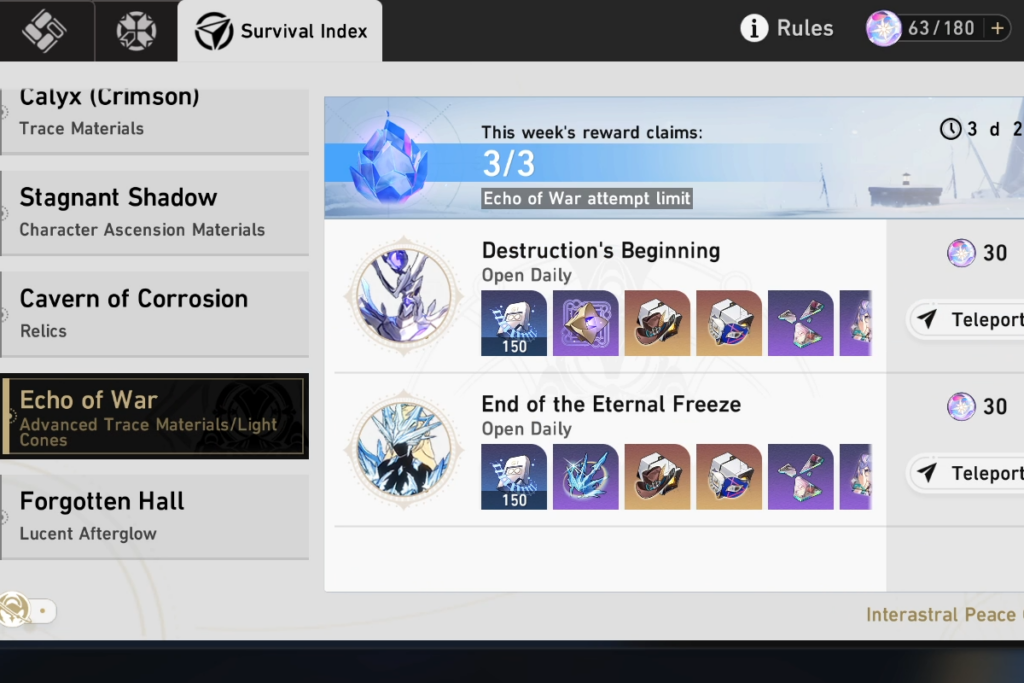
Photo: miHoYo
Relics can also be randomly rewarded by clearing either of the two weekly world bosses within the Echoes of War.
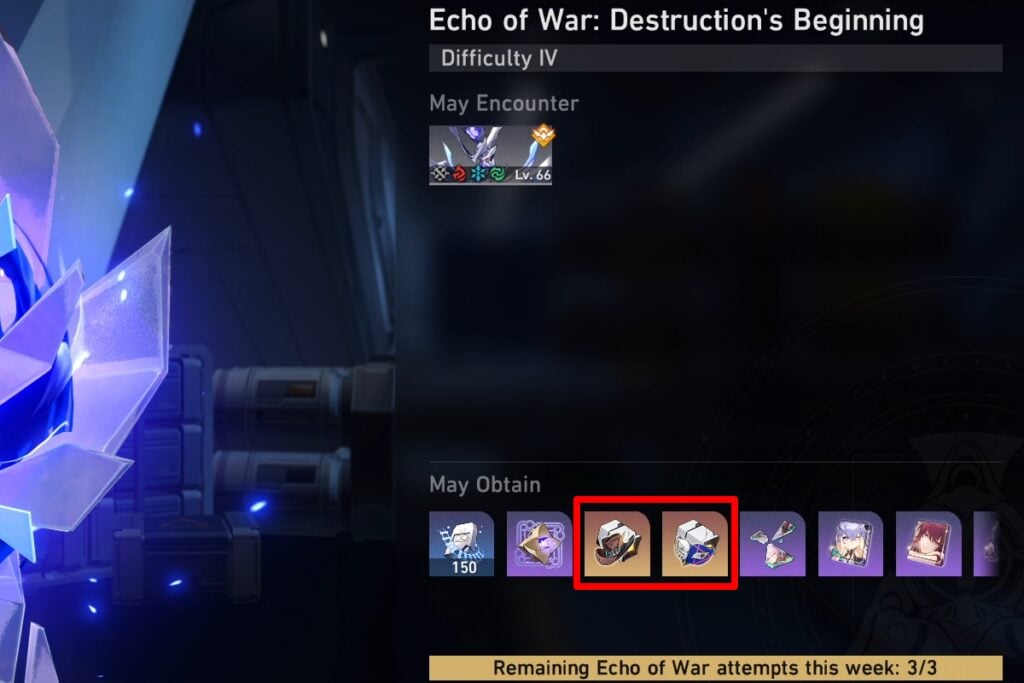
Photo: miHoYo
Currently, there are only two different stages in the Echoes of War and both stages are revisits of Bosses previously defeated in the story.
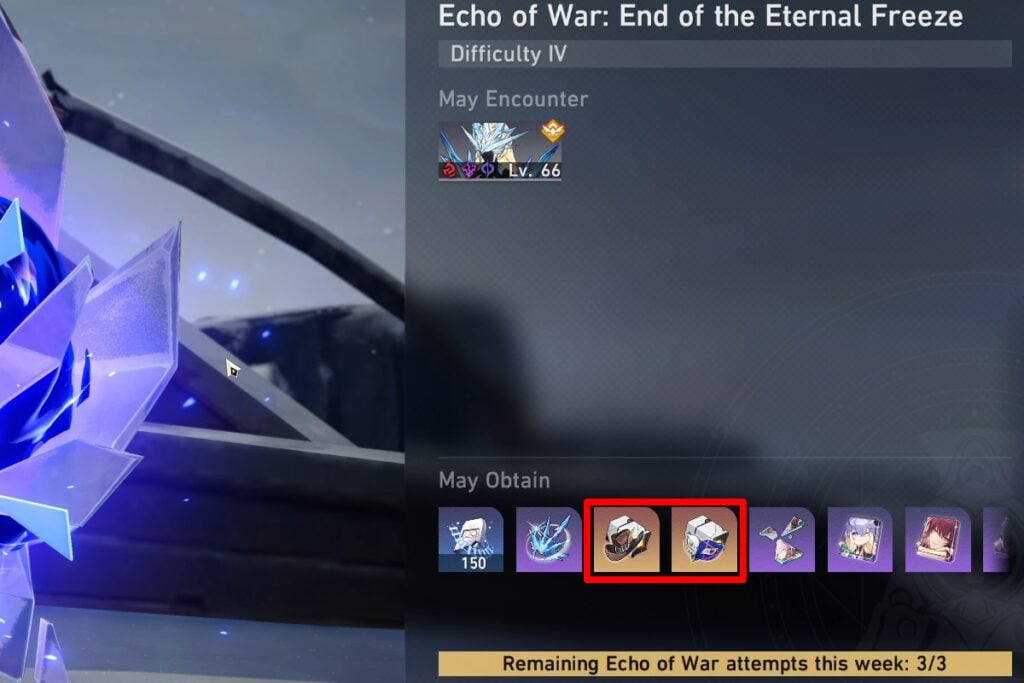
Photo: miHoYo
Obtain Relics From Operation Briefing
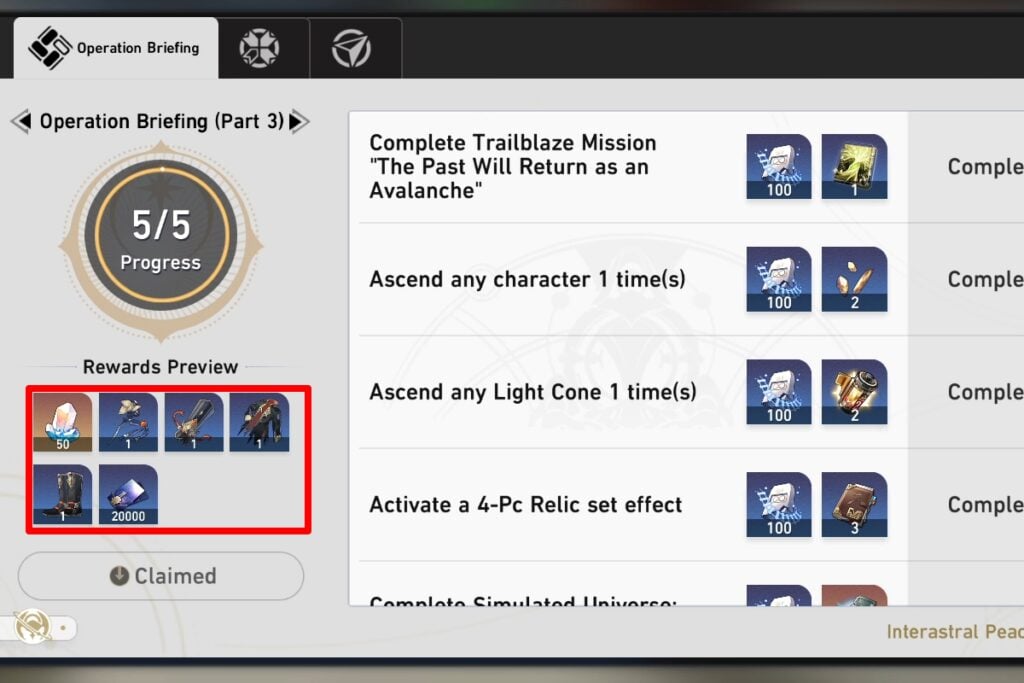
Photo: miHoYo
The Operation Briefing is Honkai: Star Rail’s version of tutorial missions. Each “level” of the Operation Briefing contains a set of objectives that players must accomplish before it rewards them.
These rewards vary from Stellar Jades to Exp and Gold materials, with some challenges awarding a full set of Relics!
If you’re only starting out in the game, focus on clearing the objectives within the Operation Briefing since these challenges don’t necessarily require you to use Trailblaze Power to complete them!
Pompom Awards Relics
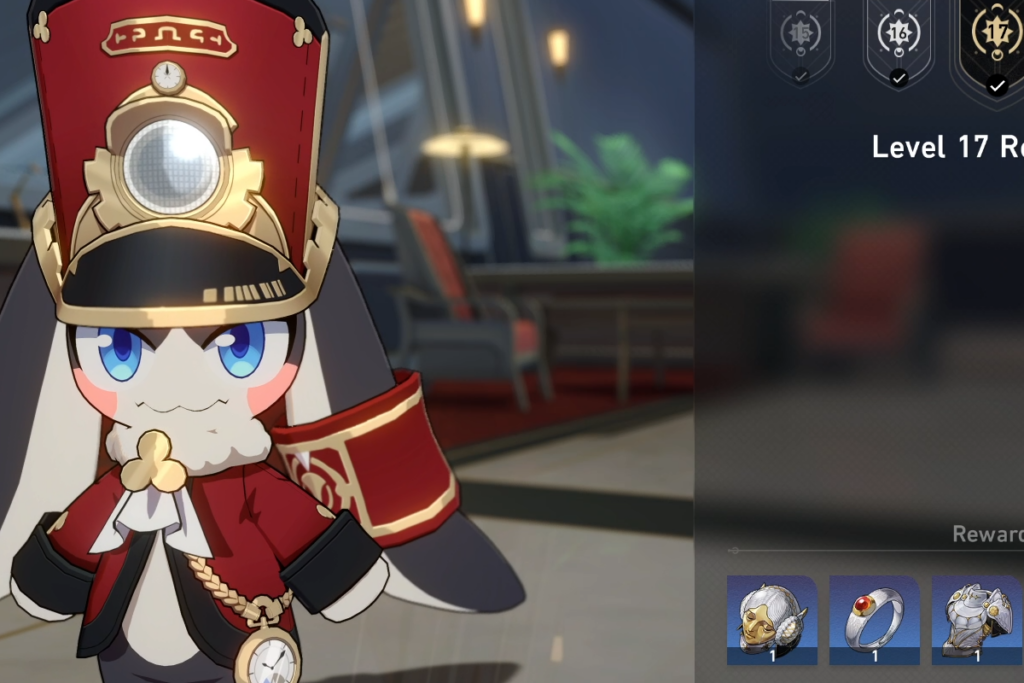
Photo: miHoYo
Shortly after boarding the Star Rail for the first time, Pompom will call you over and reward you for every Trailblaze Level you’ve managed to reach.
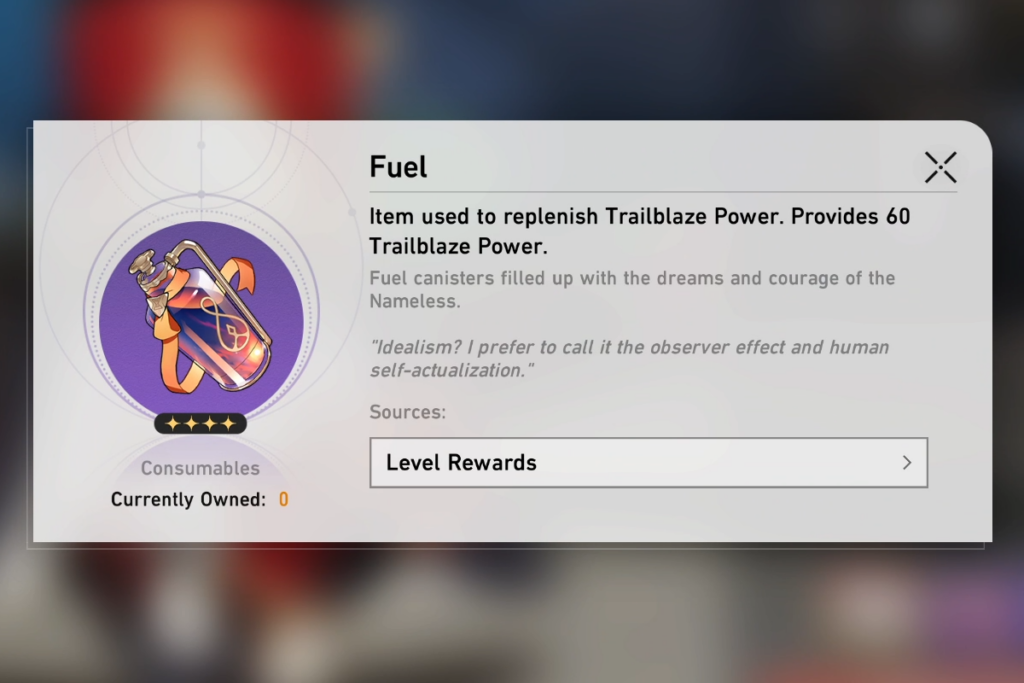
Photo: miHoYo
Arguably, the most sought-after Level Reward that Pompom has to offer is the consumable known as Fuel.
However, if you’re starved for Relics, Pompom rewards Relics at the following Trailblaze Levels:
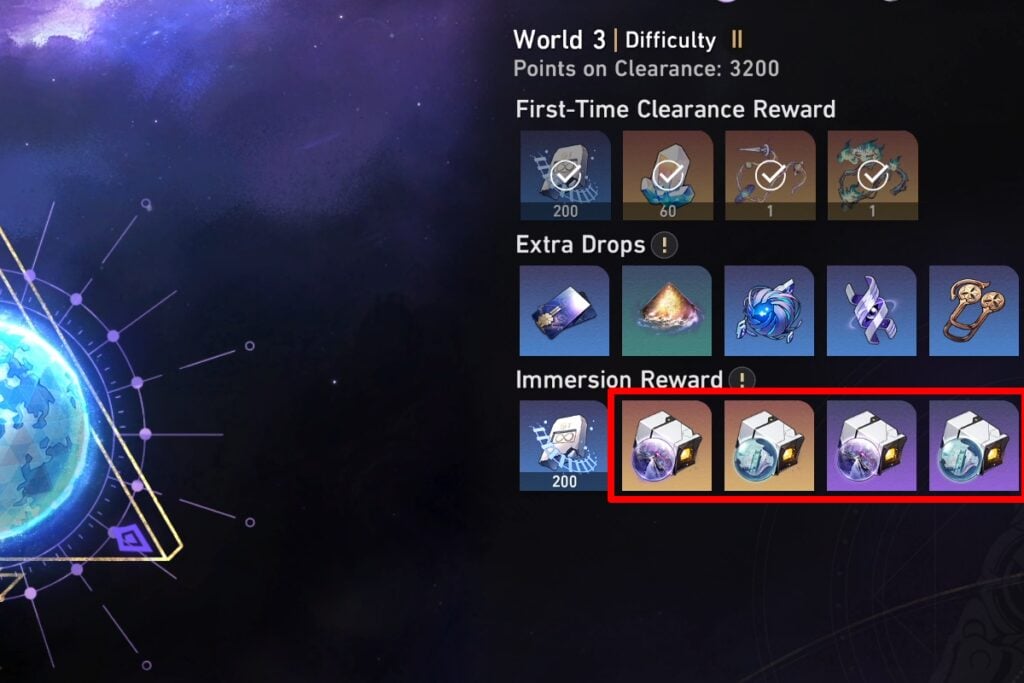
Photo: miHoYo
Unlike regular Relics, Planar Ornaments can only be obtained from the Simulated Universe. This game mode is unlocked early on as part of the story.
Once you hit Trailblaze Level 25, you will be eligible to attempt the harder worlds within the Simulated Universe, with subsequent difficulties unlocking at higher Equilibrium levels!
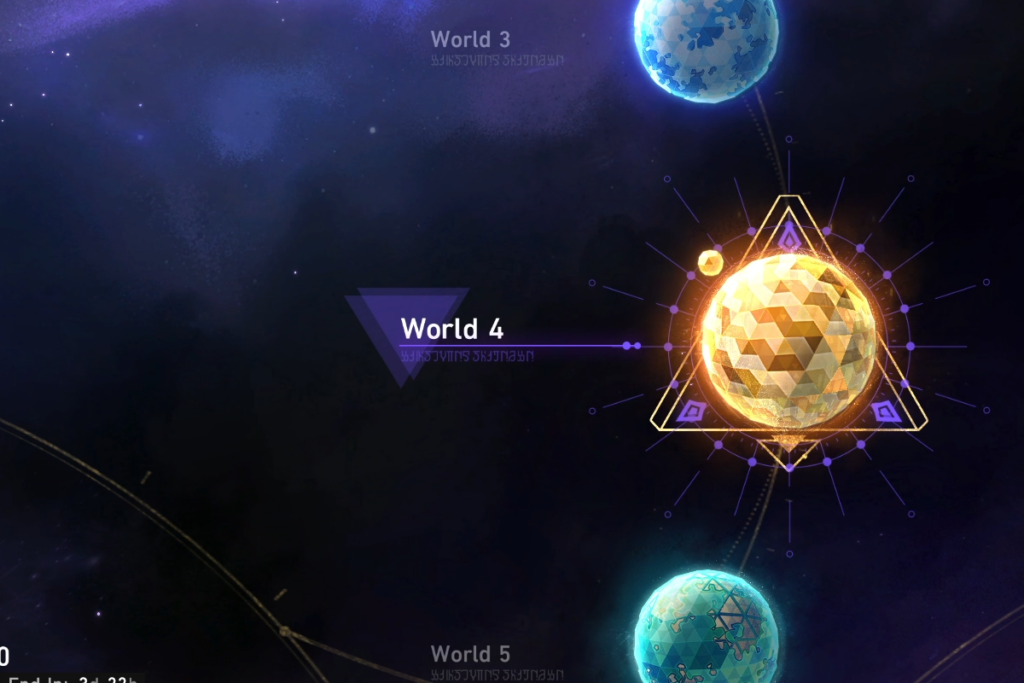
Photo: miHoYo
Below we’ve created a table of all the currently available Worlds within the Simulated Universe game mode in which you can farm Planar Ornaments.
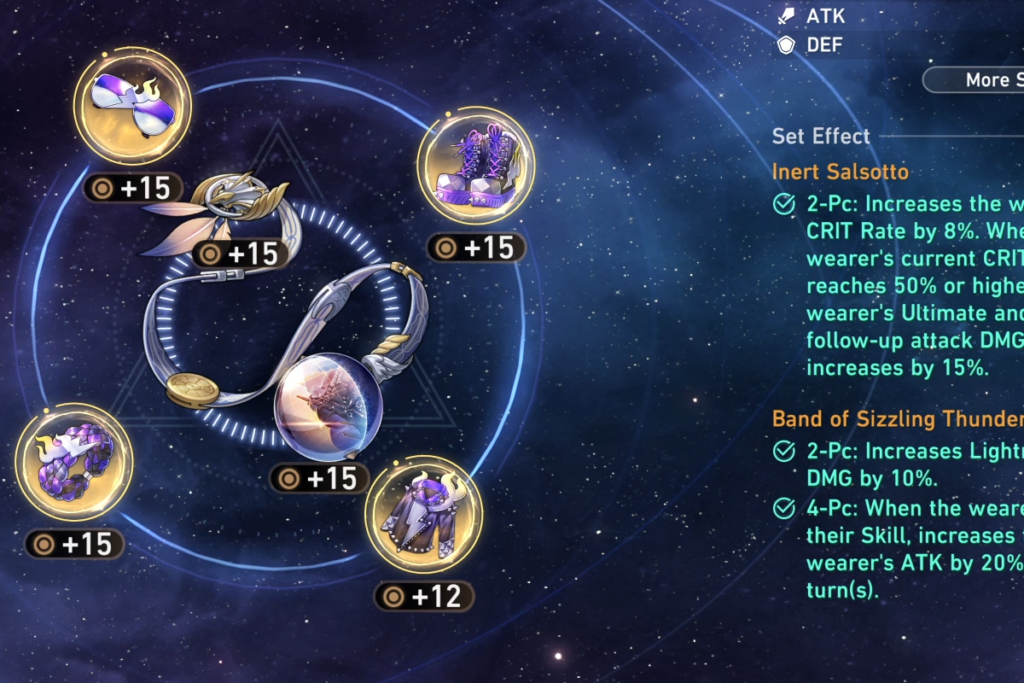
Photo: miHoYo
Like in Genshin: Impact, Relics in Honkai: Star Rail comes in varying star ratings ranging from 2-Stars all the way up to 5-Stars. When you’re starting out feel free to equip any of the free relic sets you naturally receive from progressing the game.
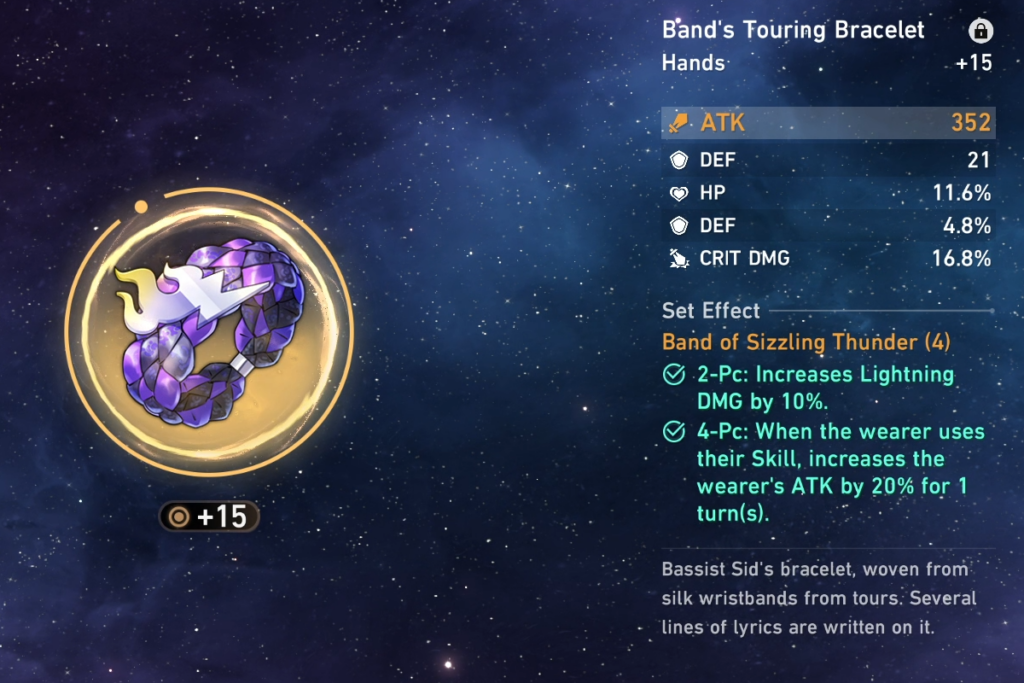
Photo: miHoYo
Once you’ve reached a high enough Equilibrium level, you will want to focus solely on upgrading 5-Star Relics, as these will provide the highest stat boosts to your characters.
How to Determine If A Relic Is Worth Upgrading
Step 1: Choose Your Main Stat
Each Relic can have an associated Main Stat that depends on the slot it fits into. Some Relics like Head and Gloves can only roll HP or ATK while others can roll a variety of different stat boosts.
Take the following Boots. They belong to the same Relic set but have different Main Stats.
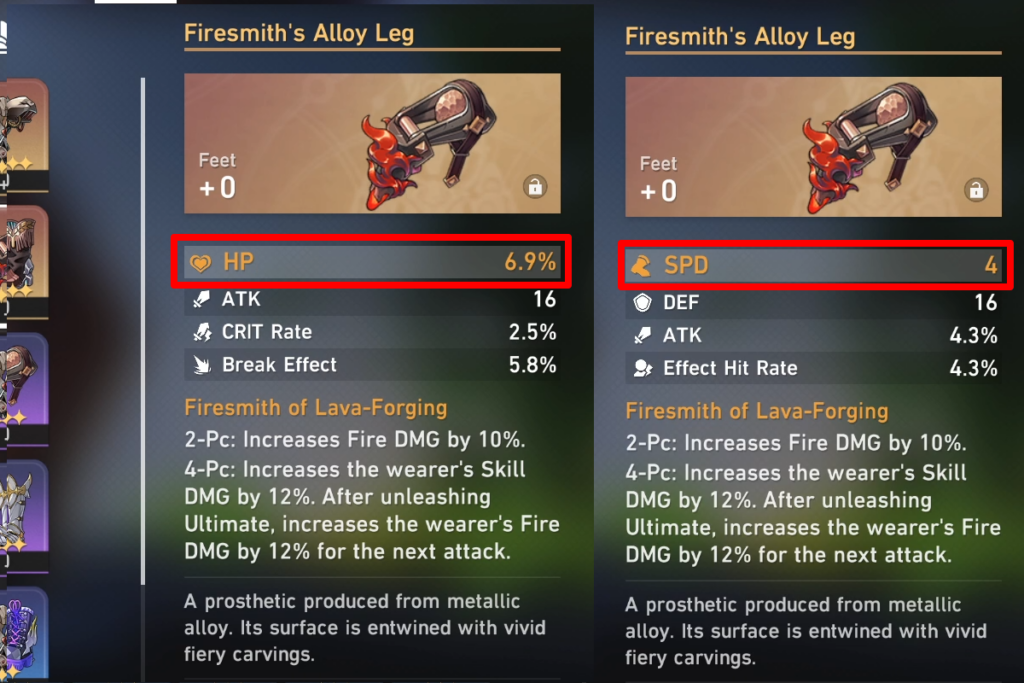
Photo: miHoYo
You will want to choose which Relics you want to equip by first looking at the main stat that they rolled with before upgrading it further. Below we’ve included a table showing all the possible main stat rolls for each Relic.
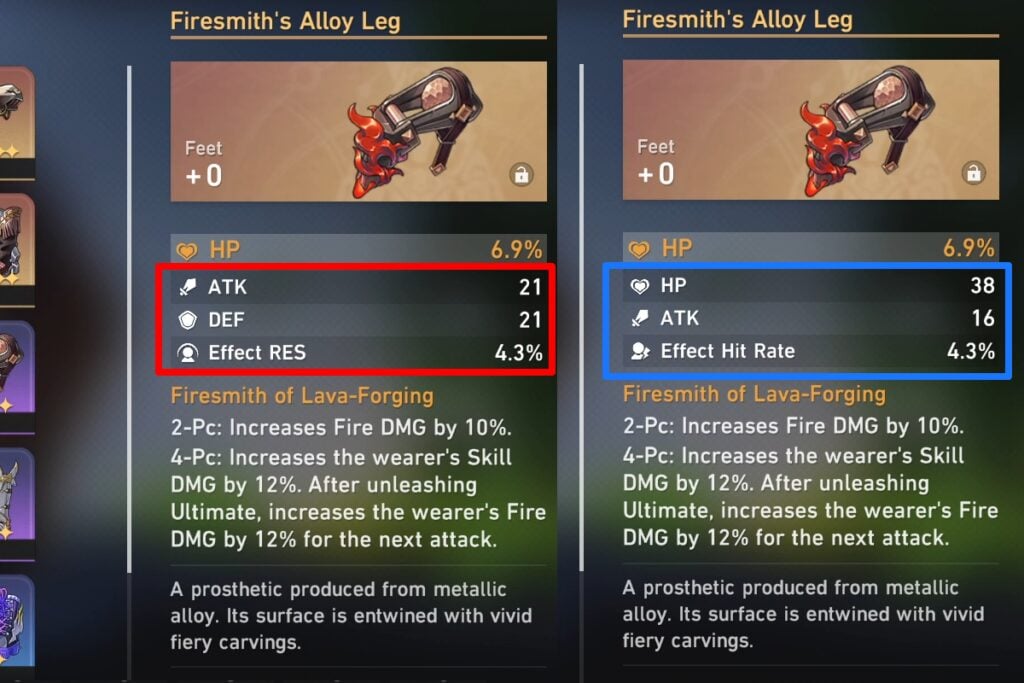
Photo: miHoYo
Your Sub-Stats are the secondary stats that roll randomly whenever you acquire Relics. Pieces from the same set that have the same main stat can have different sets of sub-stats.
For DPS characters like Seele, you’ll want to prioritize subs like Critical and Attack. Healers like Bailu and Natasha will want subs like HP, while Preservation characters like Gepard and March will want Defensive subs.
Step 3: Upgrade Your Chosen Relic
Once you’ve chosen a specific relic to enhance, upgrade it slowly instead of rushing it towards max level in order to save as many resources as possible when trying to roll for the perfect relic.
Relics can have a maximum of four different subs with each one having a random chance of being boosted at specific relic level thresholds.
Namely, once you upgrade your relic to levels three, six, nine, twelve, and fifteen. If you obtain your relic with only three subs, you will obtain your 4th sub once you hit relic level 3. This can easily be identified by checking if the “New” icon is present when upgrading your relics.
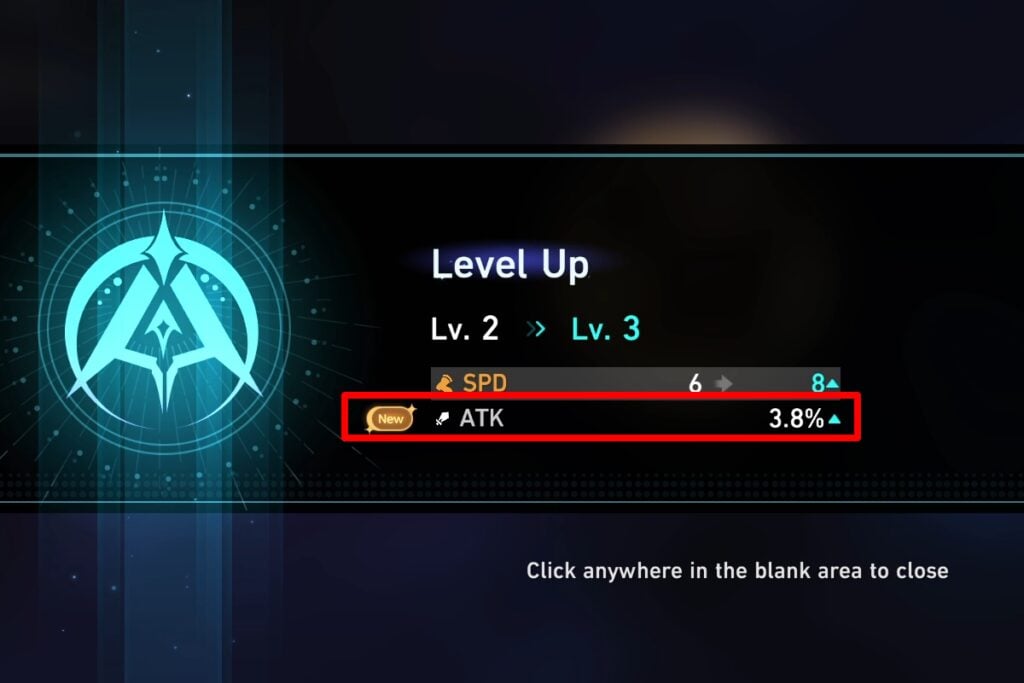
Photo: miHoYo
If you upgrading a relic that already has 4 subs, each of the thresholds will upgrade an existing sub instead of adding a new one.
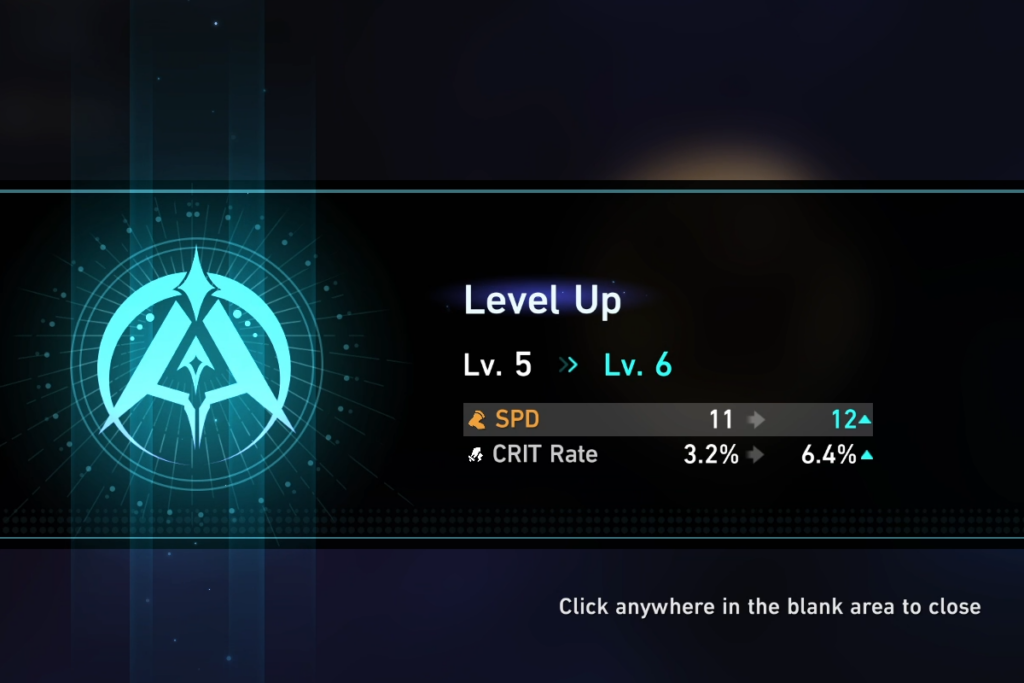
Photo: miHoYo
You will want to first check if the desired sub-stat was enhanced at relic level 3, from which you can decide if you want to continue upgrading the specific relic or not.
If you enhanced the sub-stat you wanted, then keep upgrading til relic level 6 to see if the next enhancement is still a sub-stat that you desire.
If you dislike the sub-stat that was enhanced, you can decide if you want to keep upgrading the same relic, or try again once you have a different relic to upgrade.


